How to Make ISO Installs for Windows 10 Builds
You will find out in this article how exactly you can make an ISO install files for your new Windows 10 Technical Preview version and it will only take you a few minutes of your time. So go right ahead and read the tutorial below for a detailed explanation.
You will also need to have a removable USB stick or a CD/DVD in order to properly copy the downloaded ISO file to it thus making it ready for the Windows 10 Technical Preview build you want to install. Also, you will need to carefully download the correct ISO file for Windows 10 Technical Preview depending on the country you are from because it comes in different languages as well as for a version for Windows (x64) and a Windows (x86).
How to create ISO install in Windows 10 Technical Preview?
- Left click or tap on the link posted below.
- Click here to sign up for the Windows insider program
- Go to the bottom of the page and left click or tap on the “Get Started” button or “Sign In” if you are already registered.
- Left click or tap on the link posted below to download the latest Windows 10 Technical Preview ISO file.
- Click here to download Windows 10 ISO
- Scroll down on the page above and look for the language and type of Windows operating system you need.
- Left click or tap on the Language you want the operating system to be.
- Left click or tap on the “Download” button afterward.
- Left click or tap on the “Save File” feature you get on the pop-up message.
- Save it to your Windows operating system.
- Insert a boot USB stick or a CD/DVD in the device.
Note: It needs to be a boot CD, DVD or USB stick so basically be sure not to have any important data on it. - Now we will need to right click or hold tap on the USB partition in Windows.
- Left click or tap on the “Format” button you get from the menu that appears and follow the instructions on the screen to do a quick format on the USB stick.
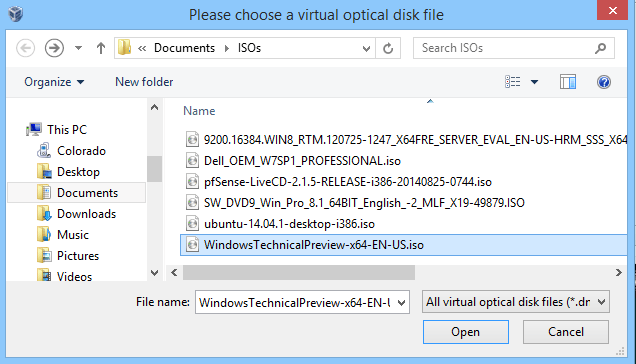
- Now copy the Windows 10 Technical Preview ISO file on to the USB stick.
- Double click to open the “Setup.exe” file within the ISO extension.
- Follow the instructions on the screen to finish the process and get your USB stick up and running with the new build of Windows 10 Technical Preview.
- Now that you made a free ISO install for Windows 10 Technical Preview latest build you can go ahead and install it on any operating system you wish.
Windows 10 ISO installs useful tips
If you have a specific Windows 10 build, and you are not sure how to make it ISO, we have a great guide which will help you to create an ISO file out of any Windows 10 build. IN case you already started installing Windows 10 from an ISO file but you encounter issues, here’s an article that will help you install any Windows 10 build from an ISO file.
If you want to download and install Windows 10 from official sources, you can find out how to do it here.
Was it hard? I am confident that you can finish the ISO install in just a few minutes if you carefully followed the instructions above in the correct order but if you need further help with this subject write us below in the comments section of the page and I will be more than happy to help you.
READ ALSO: How to install Windows 10 April Update from an ISO file
Read our disclosure page to find out how can you help Windows Report sustain the editorial team. Read more


Improve this guide


User forum
0 messages