3 Ways to Fix Minecraft Realms Internal Server Error
Deleting the UUID folder might work in your case too
5 min. read
Updated on
Read our disclosure page to find out how can you help Windows Report sustain the editorial team Read more
Key notes
- Minecraft is played by millions on a daily basis, and it lets the user create their own server or connect to already created ones.
- Several people have been facing the Minecraft realm internal server error that does not let them join a server.
- In this guide, we will give you some of the best solutions that have helped users fix the problem at their end. For example, remove MODS and Plugins.
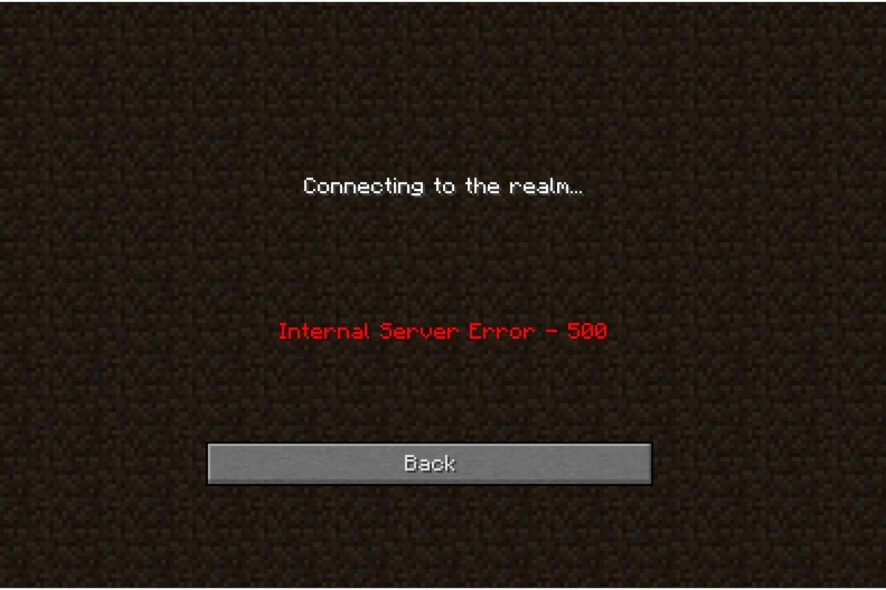
Are you getting Minecraft Realms internal server error messages and looking for solutions?
If so, then you are in the right place. Because in this guide, we will give you 3 ways via which you will be able to get rid of the frustrating Minecraft Realms internal server error.
Minecraft allows its players to either create their own realms or create their own servers, via which they can organize their own multiplayer servers. This would let them play with other players across the globe. Furthermore, you can also join servers that are official or managed by others.
When this error pops up, you will be shown an error message Connecting to the realm…Internal Server Error – 500. This error has been troubling users for quite some time, and you are not the only one getting this error.
Users who want to play Minecraft in different realms have reported facing this error. There could be multiple reasons behind this error, which we will discuss in this guide, along with the 3 effective solutions that will help you fix it. Let us get right into it.
Why do I keep getting internal server error in Minecraft?
You will come across the Minecraft realms internal server error when you are trying to log into a realm or a private server.
There will be multiple private servers that are liked by many gamers, but it is not perfect or contains errors.
After thorough research, we have deduced a list of the common reasons behind this issue, which you can find below:
- Due to poor internet connection
- Due to Minecraft server outages
- You are running an old version of Minecraft
- The MOD that you have installed for Minecraft is either corrupt or conflicting with the game
- The installation might be corrupt
- There is an issue with the temporary data
- Some additional plugins are causing the problem
Now that you know what the most common reasons that would trigger the Minecraft realm internal server error are, let us take a look at the solutions that will help you fix it.
Quick Tip:
Try opening Minecraft from a browser. There’s probably a no better option than Opera GX because it’s built with gaming in mind. It’s light, responsive, and fast, capable to support uninterrupted gaming.
What’s more is that Opera GX lets you select how much RAM and CPU each tab is using, for even better performance. Plus, you can follow the latest gaming news and download games from the GX Corner.

Opera GX
Access Minecraft from this browser to avoid error messages and focus on lag-free gaming!How do I fix Minecraft realms internal server error?
1. Delete the UUID folder
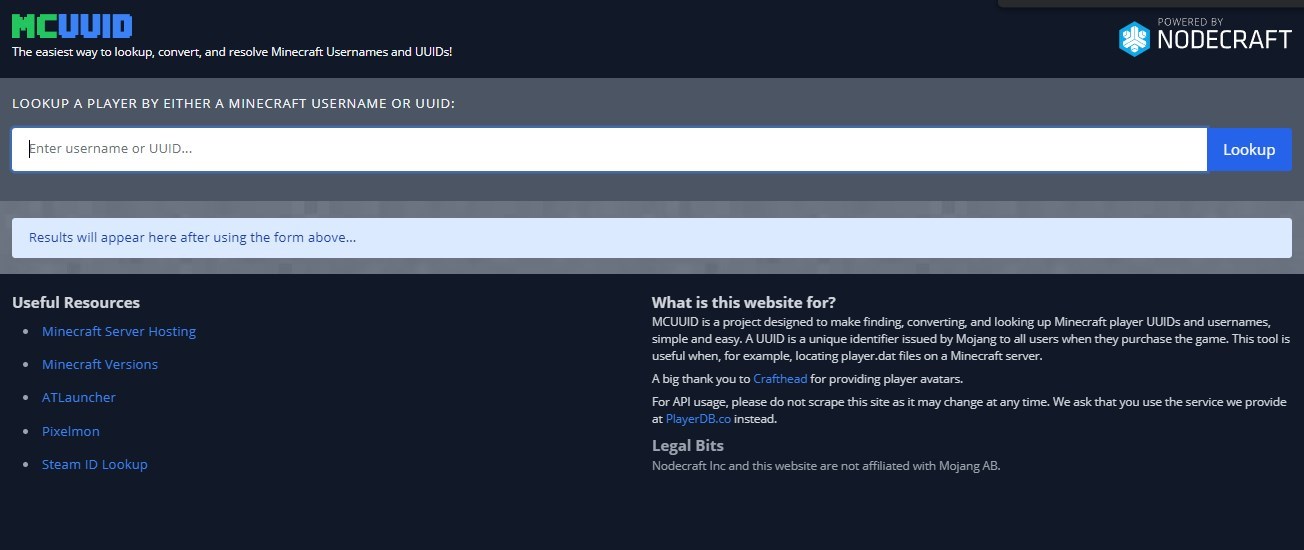
- Head over to this website.
- Enter the details asked to get your UUID.
- Log into the server.
- Go to your server files and open the world folder.
- Open the players folder.
- Here you need to delete the person’s user name and UUID for who you are getting the error message.
- Restart your PC.
- Try connecting to the server and check if this fixes the issue or not.
This solution is pretty effective and has been reportedly able to fix the problem for many users for whom Minecraft was working fine and all of a sudden started showing Minecraft realm internal server error.
Deleting the UUID folder could also help in the situation where only a specific user wasn’t able to connect to the server, while others did with no issues.
2. Remove MODS and Plugins
If you are not enjoying the normal gameplay, you can install MODs and plugins to make the game interesting and fun.
Moreover, MODs also give the user more control over how they look and add new features. However, some MODs can interfere with game play and cause errors such as Minecraft realm internal server error.
Additionally, Minecraft gives the user the ability to install plugins to change the gameplay or modify the feature list. You can install Plugins very simply by dragging and dropping.
However, if you have installed an incompatible MOD or plugin, then you will come across multiple errors. In such a scenario, you can simply disable all MODs and plugins, restart the game, and check if this fixes the problem or not.
3. Update or Reinstall Minecraft
Update Minecraft Realm
- Launch the Minecraft app.
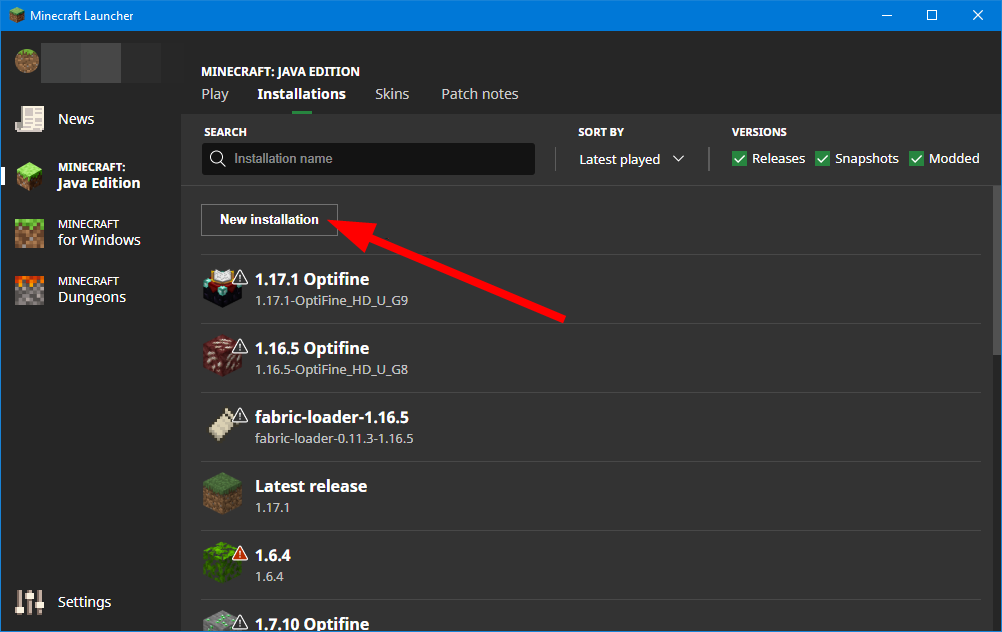
- Navigate to the installation tab and click on New Installation.
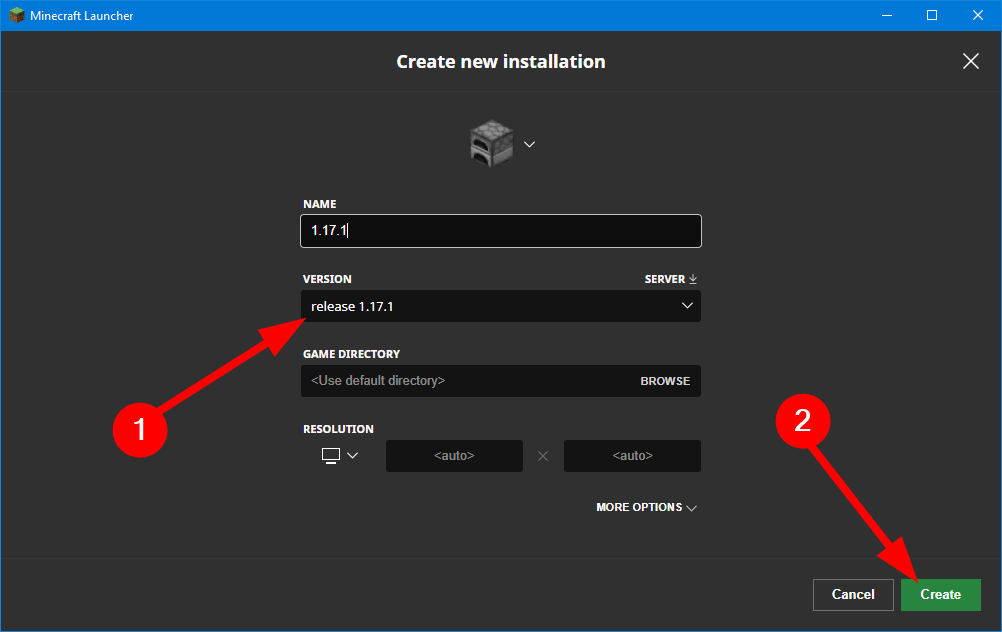
- Under Version, select Latest Release.
- Click on the Create button to create the installation.
- This will download the latest version of the game.
Reinstall
- Open the Start menu.
- Search for Control Panel and open it.
- Click on Programs and Features.
- Select Minecraft and hit the Uninstall button at the top.
- Visit the official Minecraft website.
- Input your credentials and download the game.
- Follow the on-screen instructions to install the game.
How do I give Minecraft more RAM?
Default launcher
- Open Minecraft default launcher.
- Click on the Installations tab.
- Click on the 3-dot icon on the right to the Minecraft version and select Edit.
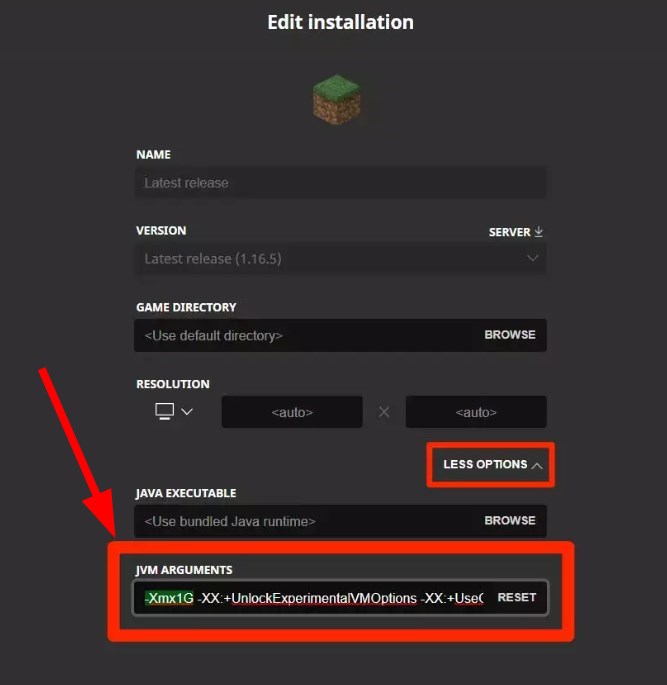
- Select More options.
- From the drop-down locate JVM ARGUMENTS. Here you will see Xmx1G -XX:+UnlockExperimentalVMOptions.
- In the Xmx2G, the 2 stands for the amount of RAM allocated to the Minecraft launcher.
- Change it to your desired amount.
- Tap Save to confirm your changes.
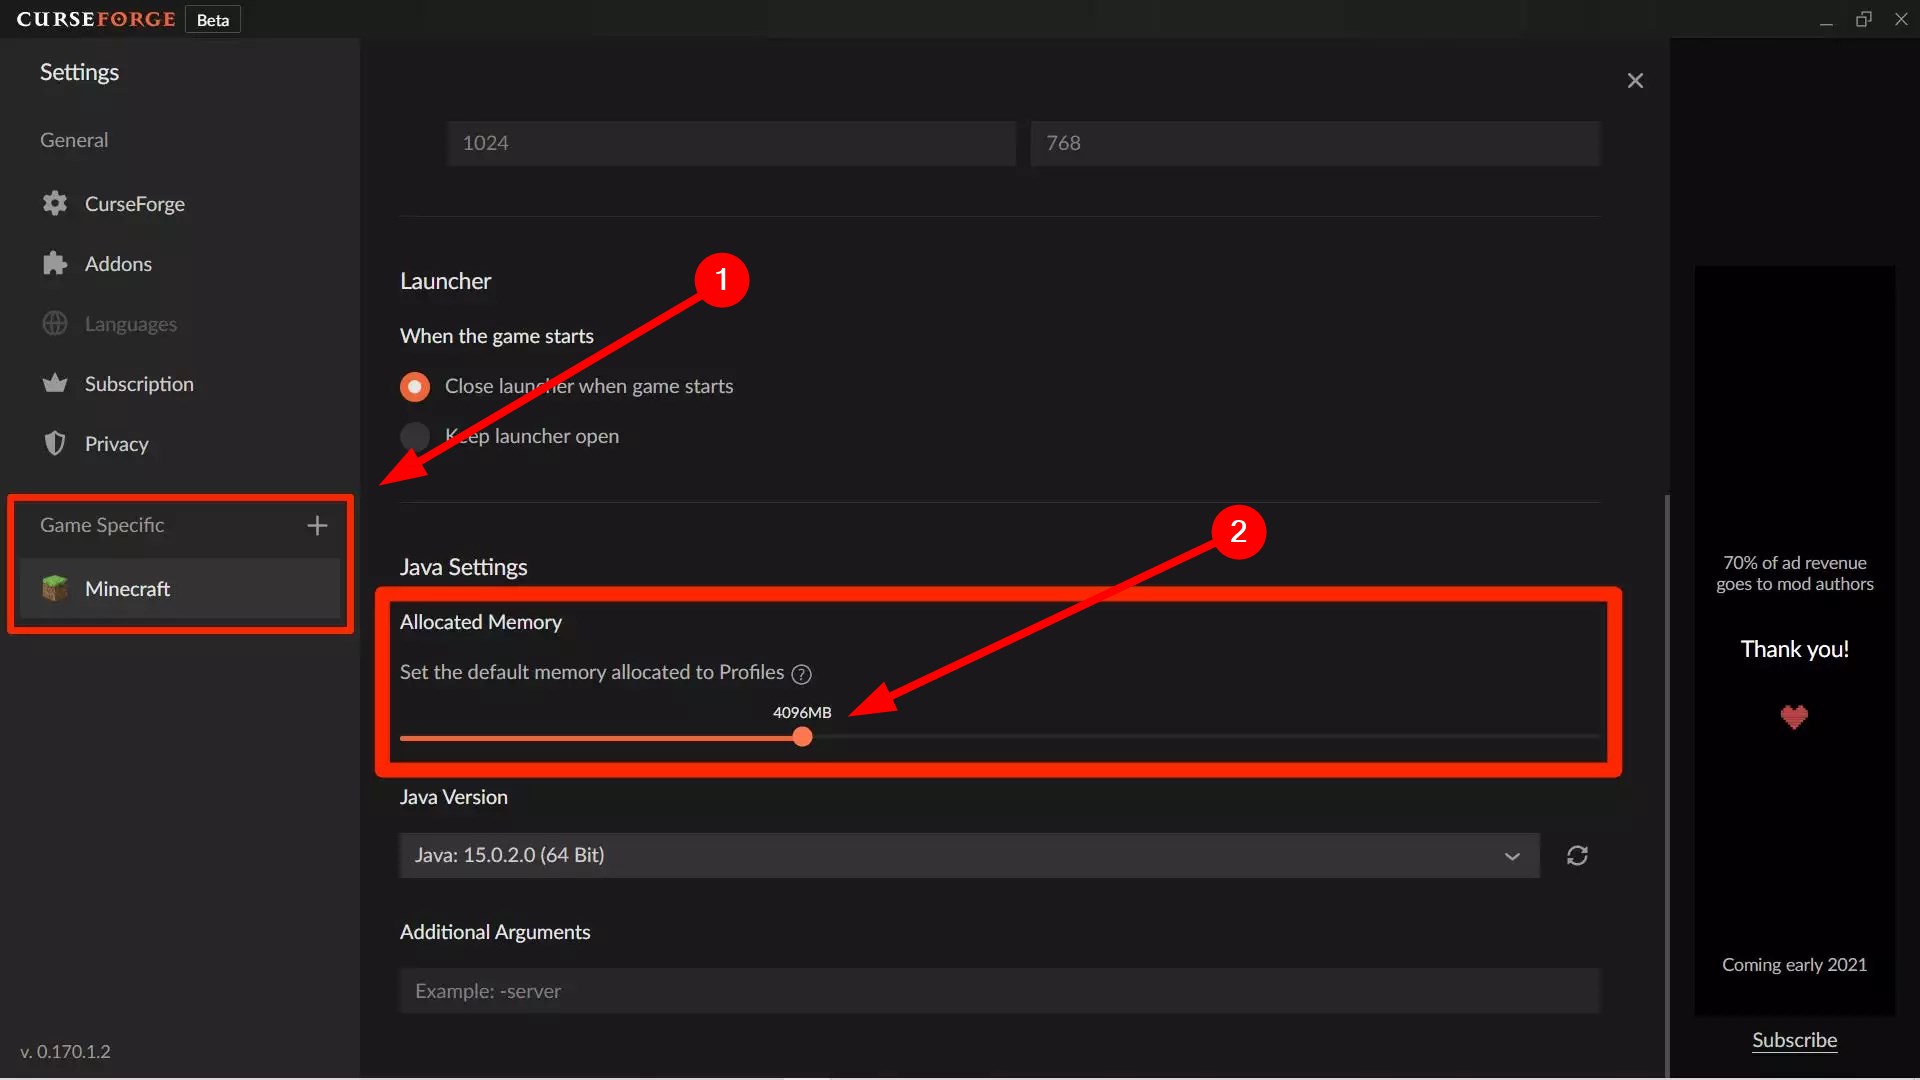
CurseForge Minecraft launcher
- Launch the app.
- Click on Settings in the lower left corner of your screen.
- Under the Game Specific section, select Minecraft.
- Scroll down, under Java Settings, you will see Allocate Memory with a slider.
- Drag the slider and allocate as much memory as you want to Minecraft.
- Changes will be saved automatically.
Minecraft lets you launch the game from different launchers. We have discussed teh steps for the default launcher and the CurseForge launcher to give you an idea of how you can allocate RAM to the game.
Let us know in the comments section, if this guide helped you fix the Minecraft realms internal server error or not.

