How To Fix The WHEA Uncorrectable Error Risk Of Rain 2
![]() 4 min. read
4 min. read
![]() Updated on
Updated on
Share this article

Improve this guide
Read our disclosure page to find out how can you help Windows Report sustain the editorial team Read more
Key notes
- Running into a WHEA Uncorrectable Error is no joke and many users don't really know what to do.
- There is a troubleshooting process and a solution for such an issue and you came to the right place.
- Our article will guide you through the required steps, so you can go back to playing Risk of Rain 2.

Tell us if you find this scenario familiar. You’re sitting at your desk, minding your own business, and enjoying some quality Risk of Rain 2 gameplay when, all of a sudden, the game crashes with a blue screen.
No warning, no prior symptoms, just a blue screen of death crash and a message that says WHEA Uncorrectable Error.
Now, the first thing you need to do is not punch your PC. Secondly, you need to understand why this problem has happened in the first place.
The WHEA Uncorrectable Error is displayed by the system during blue screen crashes and is usually related to hardware failure.
A failing hard drive, defective memory, improperly seated CPU, and a variety of other hardware issues can all result in a WHEA uncorrectable error, so it’s not the game causing it.
Even though this sounds pretty serious, there are things you can do to actually fix it. And, in this article, we’re going to show how to do just that.
Risk of Rain 2 players also pointed out dealing with black screens after launching the game, so you might want to look into that as well.
How do I fix the Risk of Rain 2 WHEA uncorrectable error?
1. Check integrity and stability of installed hardware components
Now, this happening should also be a warning sign to you, meaning that you might want to check some of the hardware parts on your rig.
Thus, be sure to physically inspect your computer hardware because you may have a physical defect or failure in one of your hardware components.
Check whether your cooling system is hooked up and functional, your RAM is securely seated in place, components like your CPU haven’t come loose, and everything is securely connected.
If everything appears to be in place and working accordingly, we can move on to the next steps of the troubleshooting process.
2. Update Windows to the latest version
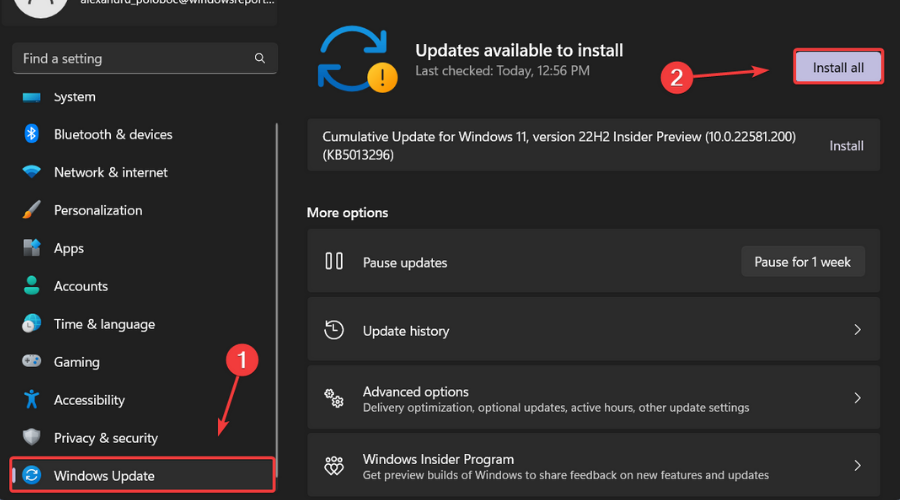
- Press Windows + I to access Settings.
- Select the Windows updates tab and click Install all.

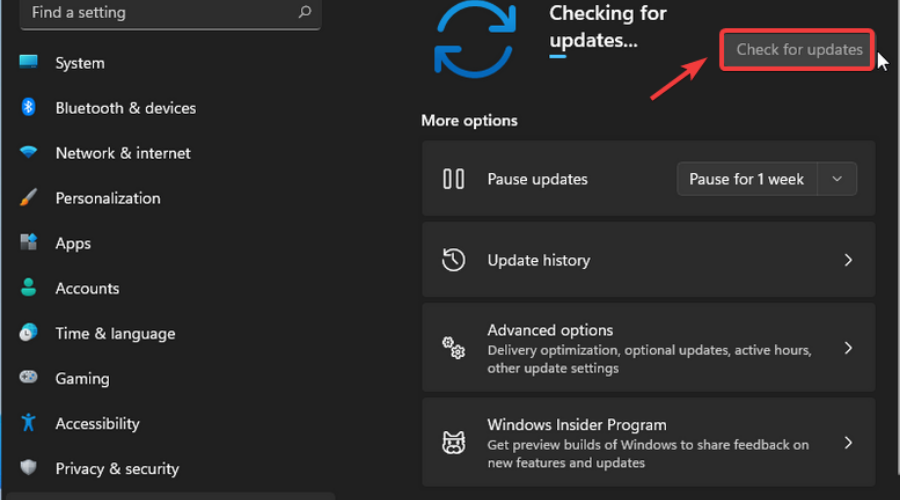
- If no updates are queued for installation, press the Check for updates button.
3. Update your drivers
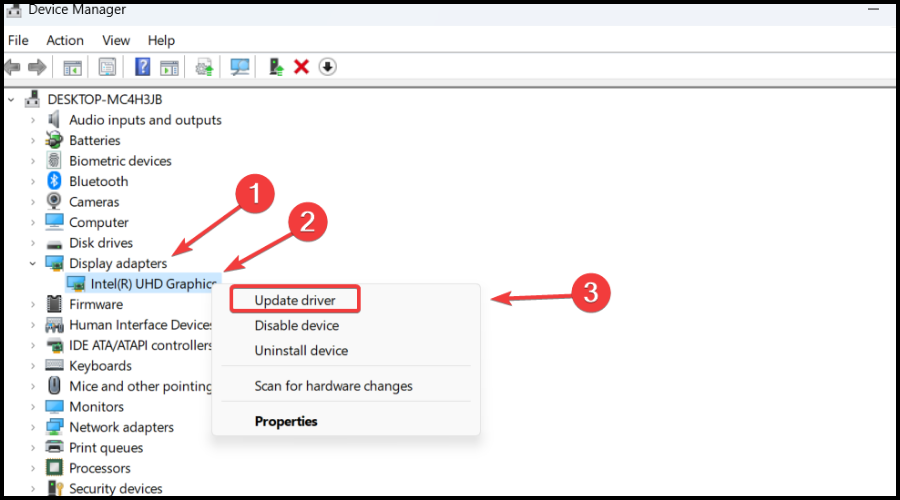
- Press the Windows key, search for Device Manager and click on Open.
- Expand Display Adapters, right-click on your GPU and select Update driver.
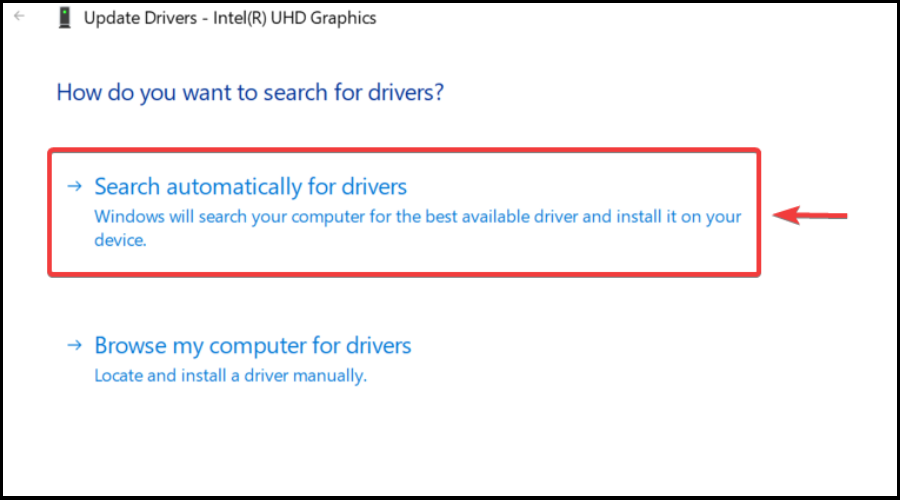
- Select Search automatically for drivers.

Be sure to do this for all of the installed drivers, not just for graphics one as we showed you above.
Would you like to also enjoy quality gaming without being worried about any crashes, lags, or freezes by keeping all drivers up to date and error-free easily.
Manual checks can sometimes be hard to perform, that’s why we recommend using an automated assistant that will scan for fresh driver versions daily.
In case you’re a beginner, you don’t have to worry! Outbyte Driver Updater is smart, simple, engaging and its user interface was built to make your life easier.
4. Disable overclocking in BIOS or UEFI
- Restart your PC.
- Press F2 or F12 (depending on your PC) to enter BIOS.
- In the BIOS (or UEFI) menu, go to the Advanced tab.
- Go to Performance.
- Look for an option that specifies overclocking or something similar.
- If it is enabled, which should be the case if your CPU is overclocking, then disable it.
- Save the settings and press YES to any confirmation dialogue box.
- Exit the BIOS menu and restart your computer system.
That’s pretty much what you’re looking at if you want to fix this error yourself. The process itself isn’t too hard and it won’t take up too much of your time.
Has this guide proven to be helpful in solving your issue? Be sure to let us know in the dedicated comments section below.