Rtwlane6.sys: How to Fix This Blue Screen Error
The reason could be an outdated driver
![]() 5 min. read
5 min. read
![]() Updated on
Updated on
Share this article

Improve this guide
Read our disclosure page to find out how can you help Windows Report sustain the editorial team Read more
Key notes
- The blue screen error could have occurred due to malware infection, outdated drivers, or third-party software interference.
- This guide will cover all the expert-tested methods to fix the issue.
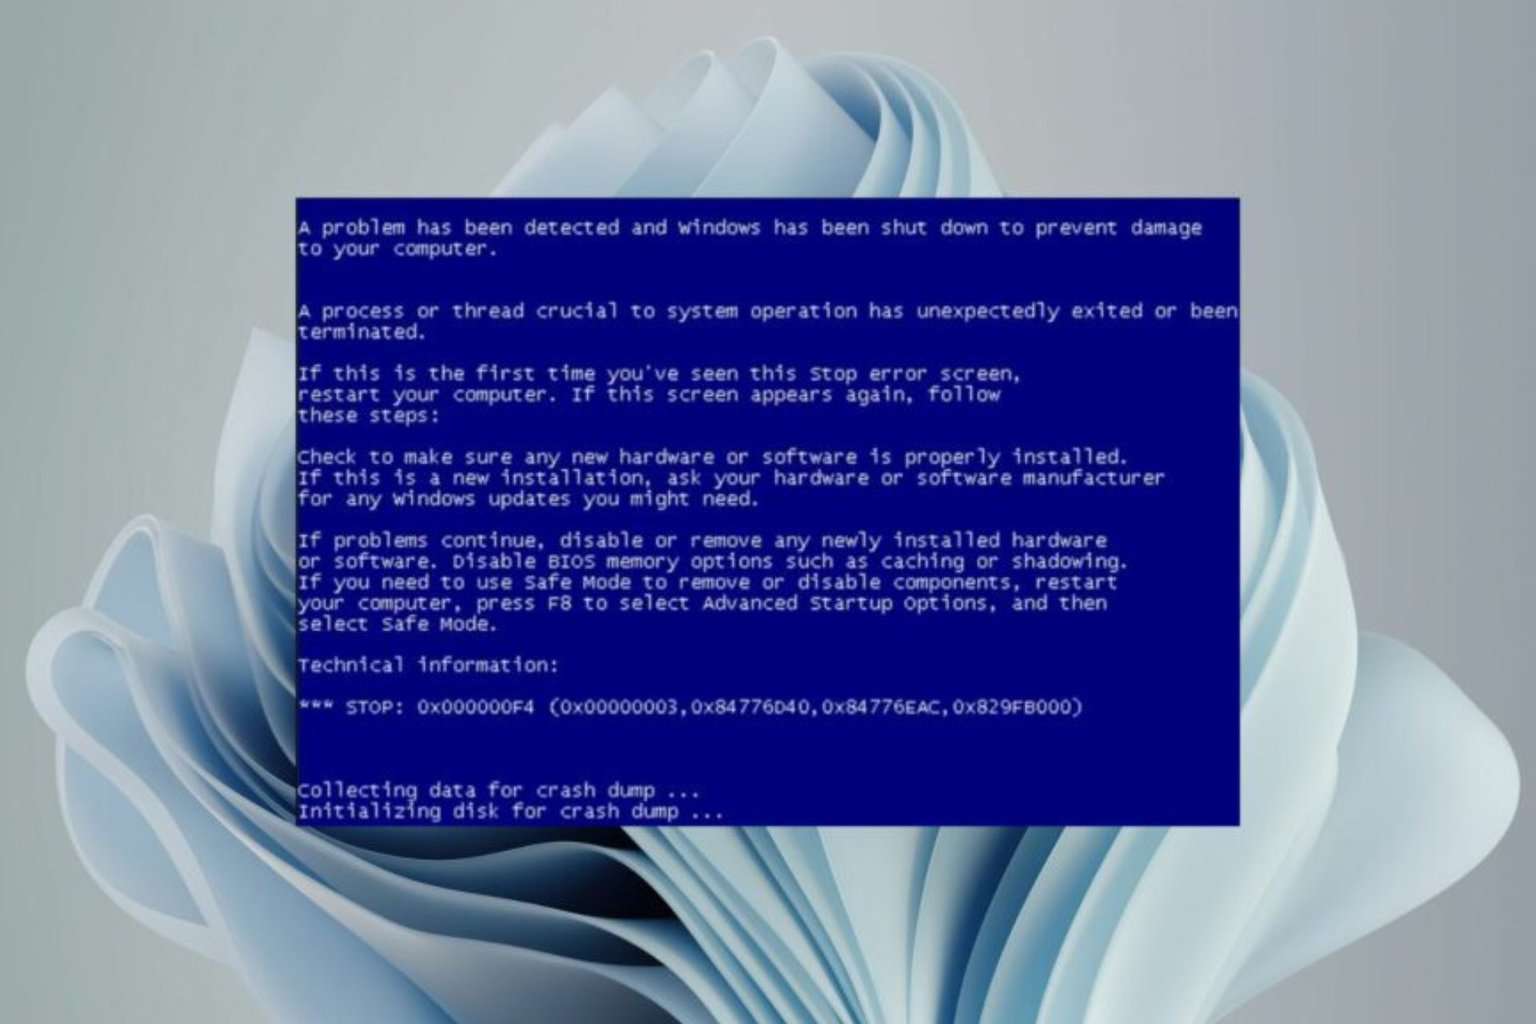
The rtwlane6.sys blue screen error is one of the common BSOD errors on Windows OS. This error is associated with the Realtek wireless driver, which is responsible for managing wireless network connections on a computer.
When the driver encounters a problem, it can cause the system to crash, hence the BSOD error.
This guide will discuss some available methods to troubleshoot and resolve the issue right after examining the causes.
What causes the rtwlane6.sys blue screen error?
This blue screen of death error occurs due to various reasons; some of the common ones are:
- Outdated drivers – If the wireless Lan device driver is corrupted or outdated, it can cause this BSOD error. You need to update the device drivers to fix it.
- Third-party software interference – If there is a conflict between different drivers or software, you might face this error. To fix the problem, you might have to uninstall third-party software.
- Hardware issues – If the hardware component of your computer is damaged, especially the wireless LAN card, you might face this issue.
- Malware infection – If your computer is infected with malware or viruses, then you might get a lot of errors, including a BSOD error. You need to run a malware scan to find and remove virus from the computer.
What can I do to fix the rtwlane6.sys blue screen error?
Before moving to the troubleshooting steps, make sure you go through these preliminary checks:
- Restart your computer.
- Scan your computer for malware infection.
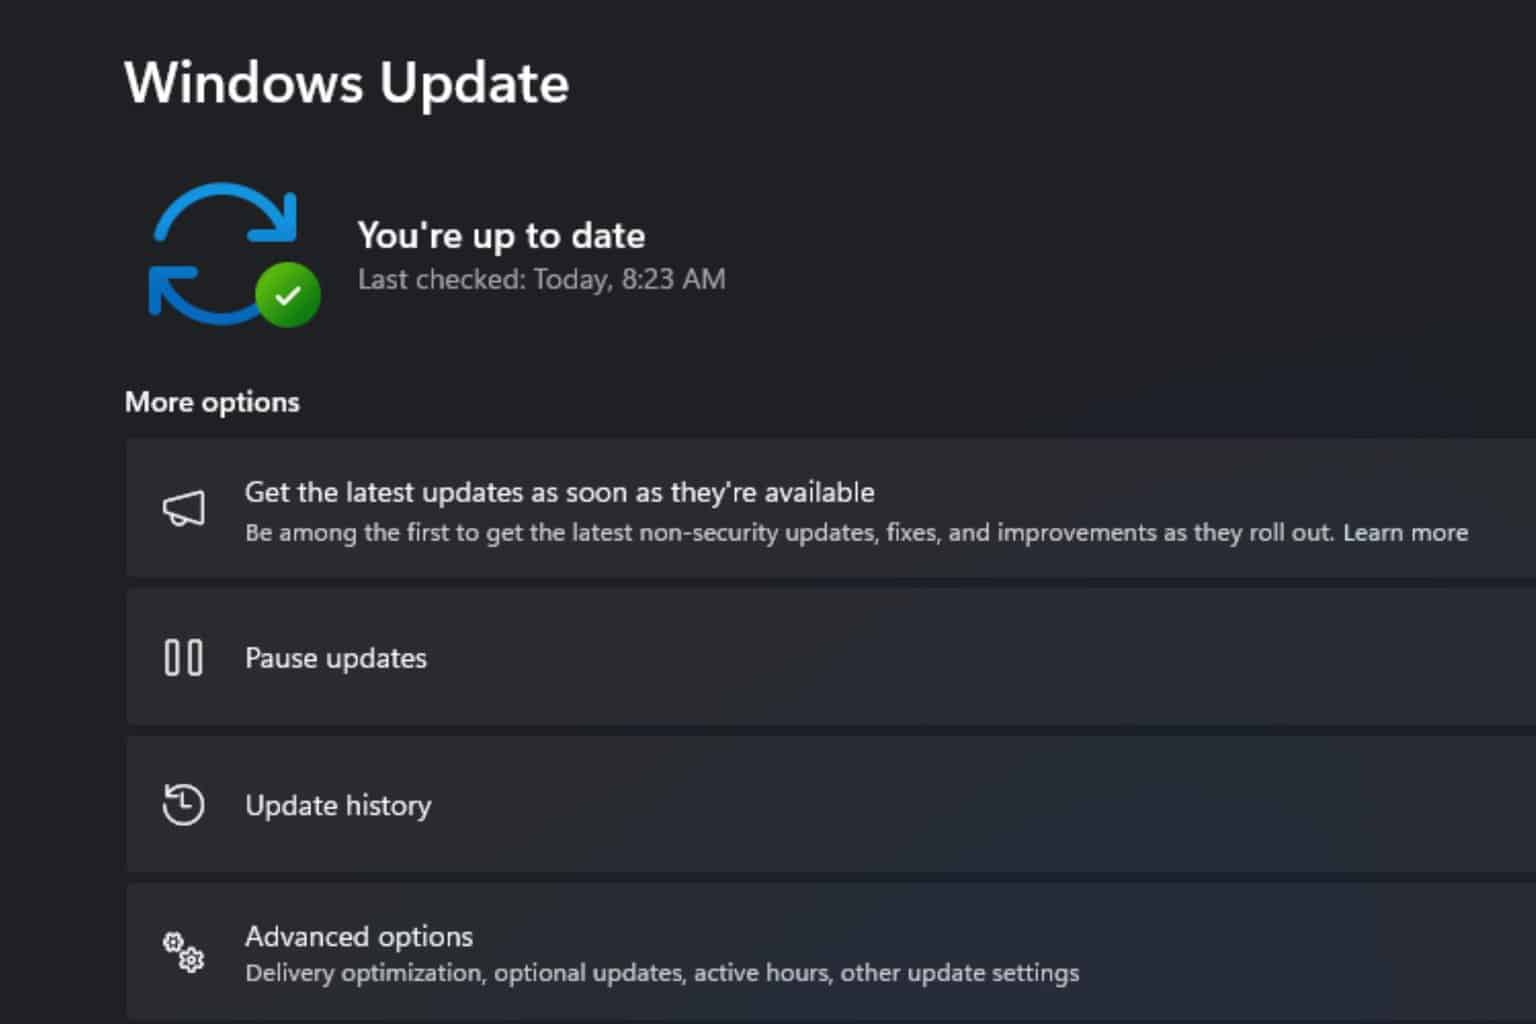
1. Update/Reinstall the device drivers
1.1 Update drivers
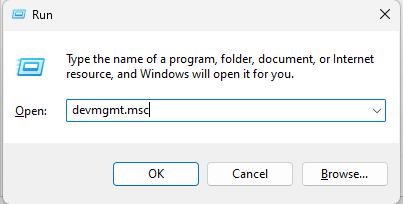
- Press Windows + R to open the Run console.

- Type devmgmt.msc and press Enter to open Device Manager.
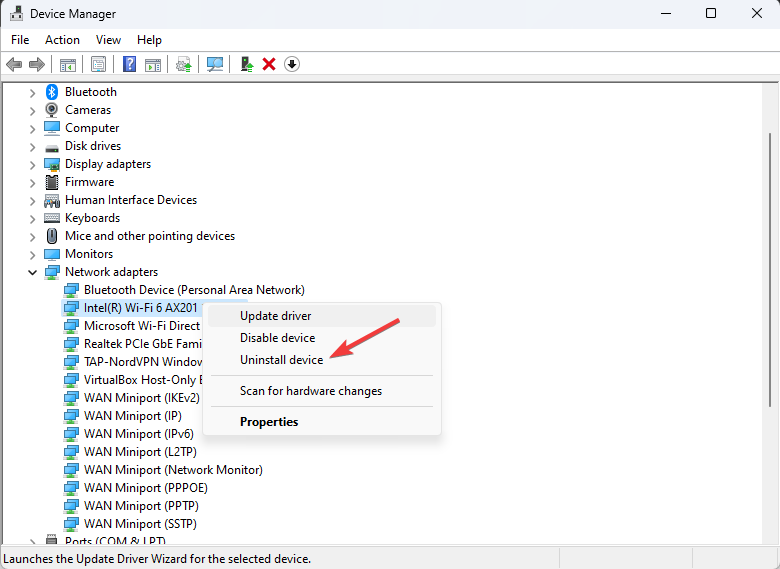
- Go to the Network adapters and select the Wireless LAN driver.

- Right-click on it and select the Update driver.
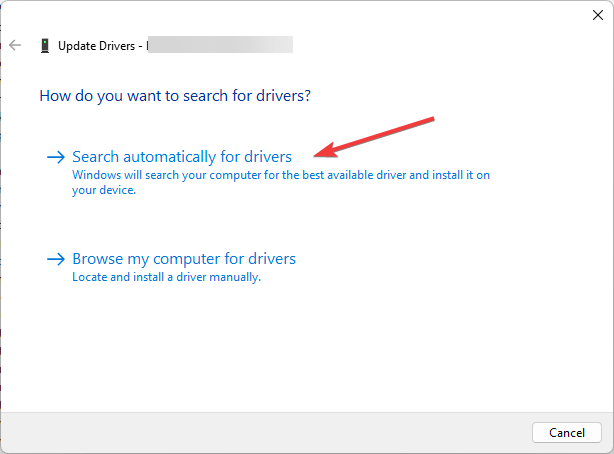
- Click Search automatically for drivers.

- Follow the onscreen instructions to complete the process. Restart your computer.

If you’re looking to ease this procedure even more, you can use an automatic program to detect all outdated or faulty drivers and update them with the newest options from its database.
1.2 Reinstall drivers
- If updating the drivers didn’t help, then go to Device Manager.
- Expand the Network adapter, right-click the Wireless LAN card, and select Uninstall driver.

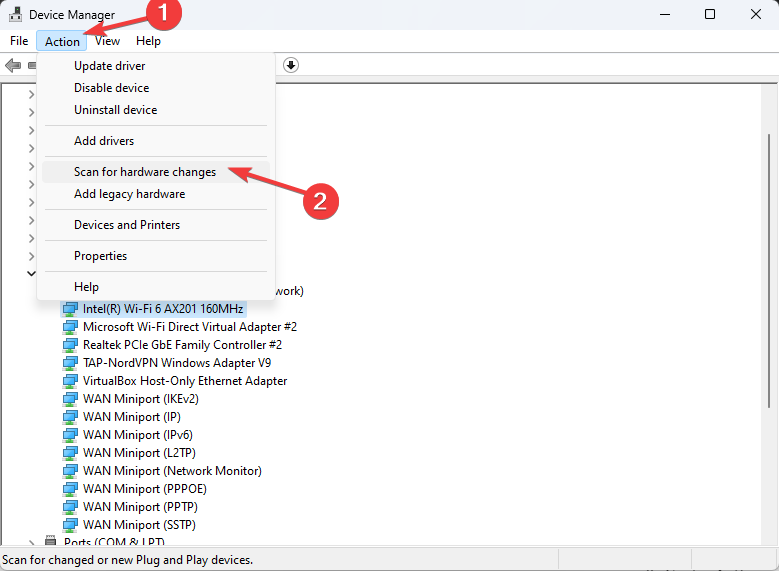
- Go to Action and click Scan hardware for changes.

- Follow the onscreen instructions to complete the process.
2. Run a memory diagnostic tool
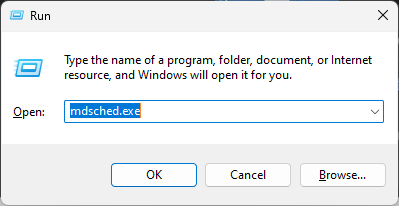
- Press the Windows + R to open the Run command.

- Type mdsched.exe and press Enter to open the Windows Memory Diagnostic tool.
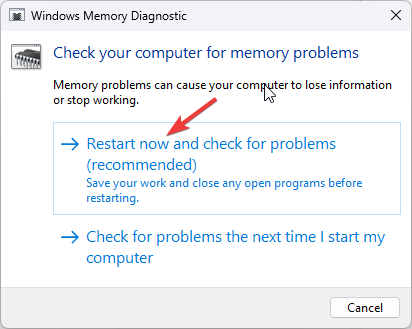
- Click Restart now and check for problems.

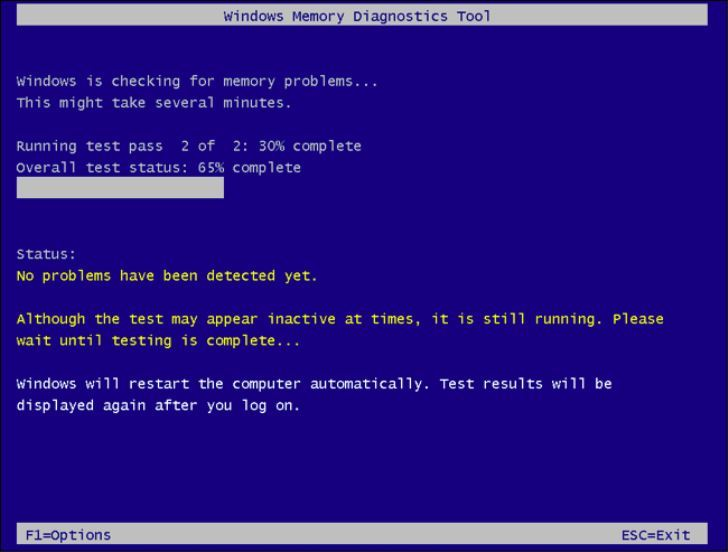
- The diagnostic tool will run, and your computer will restart.

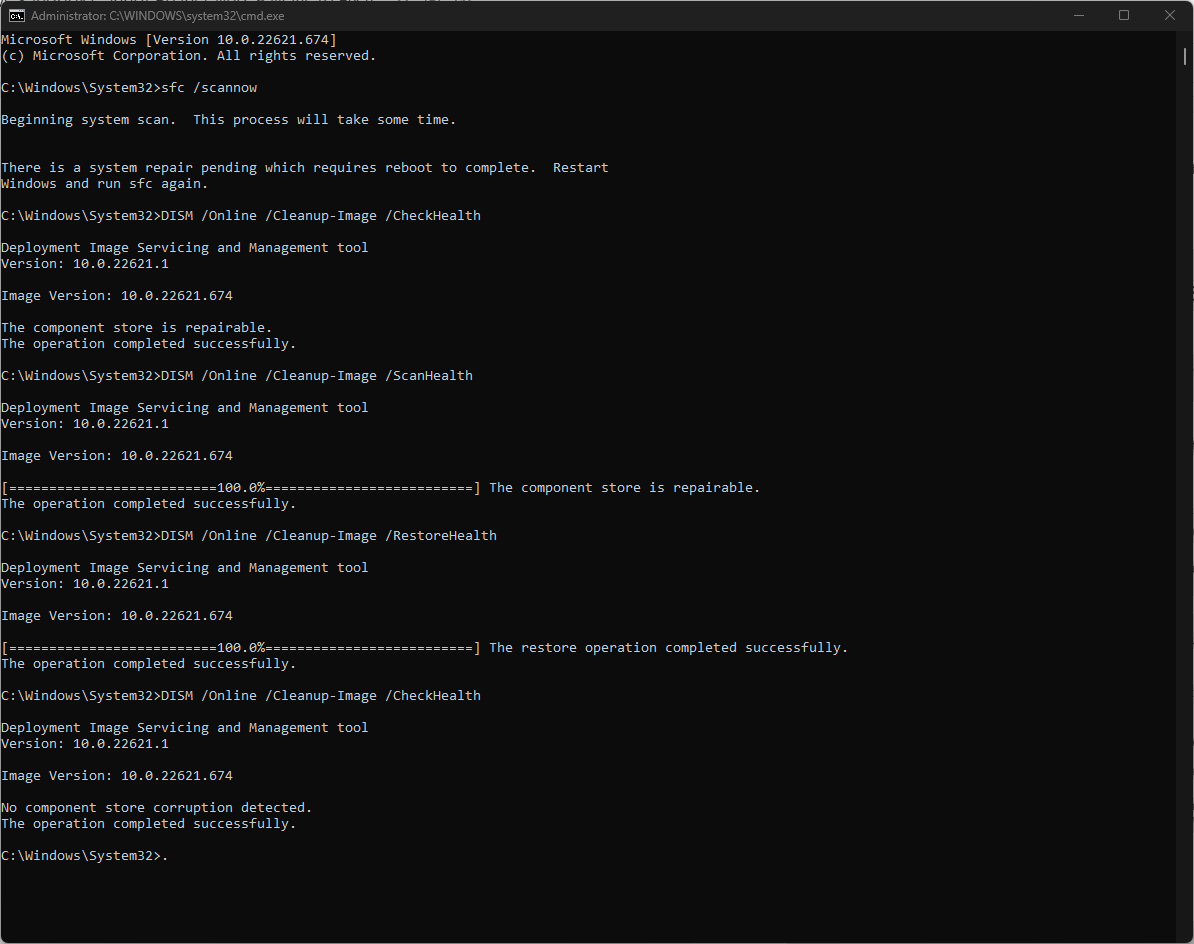
3. Use the Command Prompt
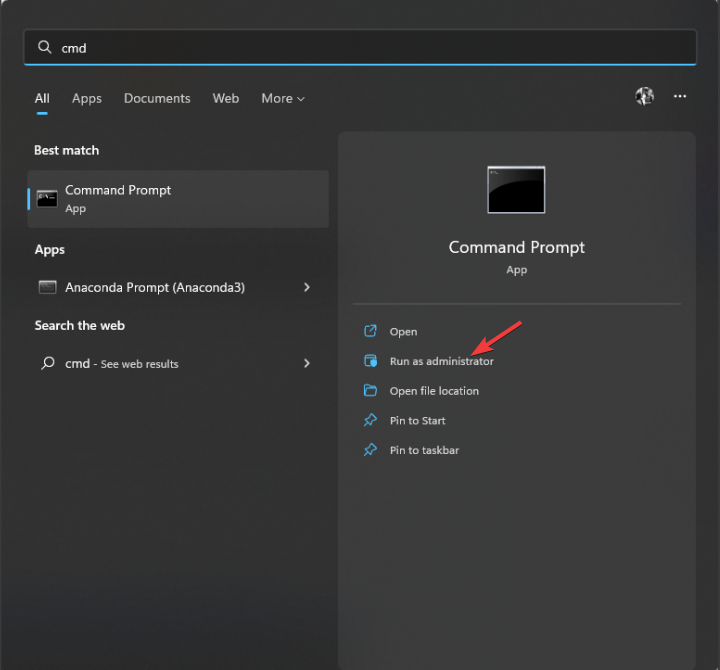
- Press the Windows key, type CMD, and click Run as administrator.

- Type the following command to repair system files and press Enter:
sfc /scannow - Copy and paste the following command one by one and press Enter after every command:
DISM /Online /Cleanup-Image /CheckHealthDISM /Online /Cleanup-Image /ScanHealthDISM /Online /Cleanup-Image /RestoreHealth
- Restart your computer.
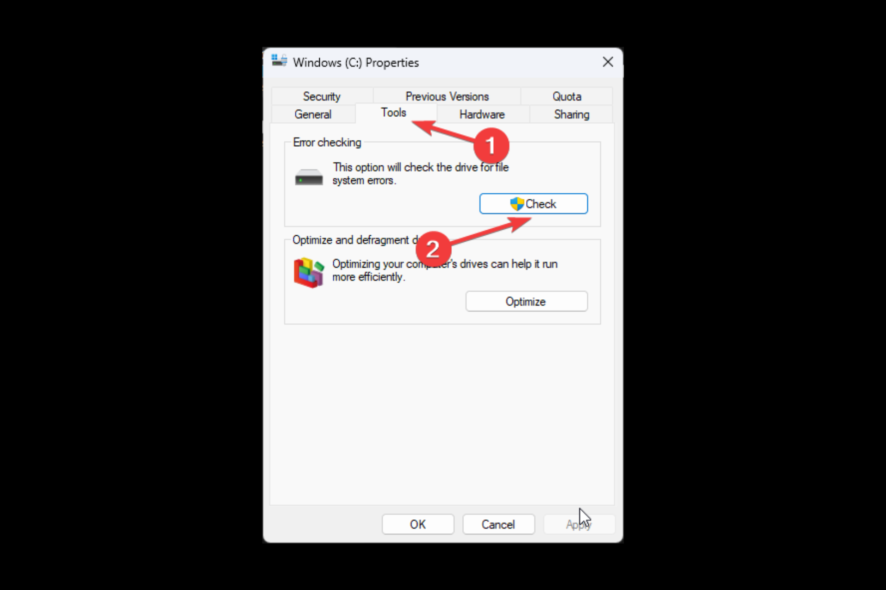
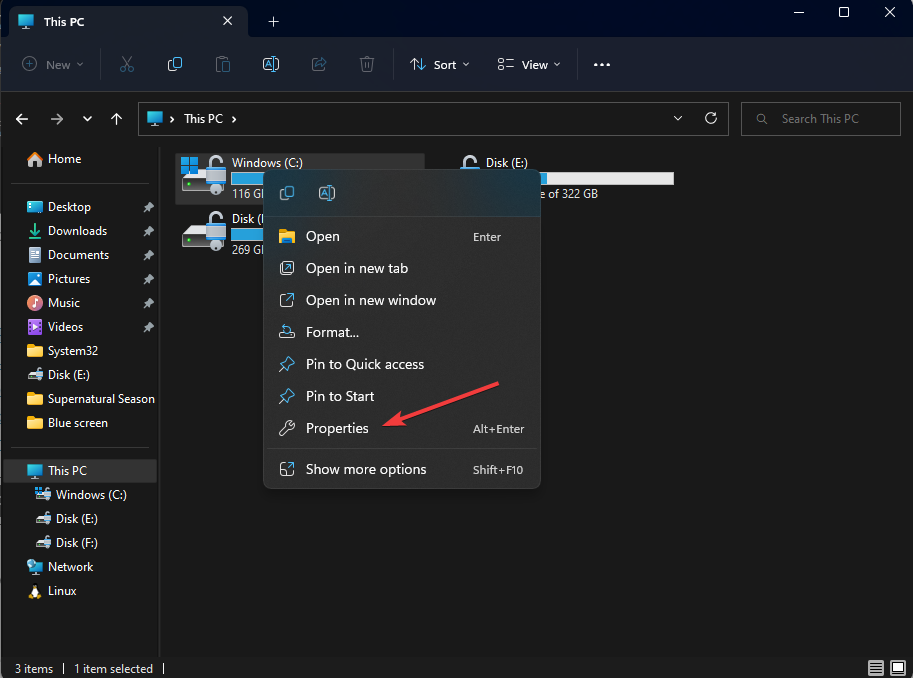
4. Run Error checking on the disk
- Press Windows + E to open Windows Explorer.
- Go to This PC, select and right-click the drive, and choose Properties.

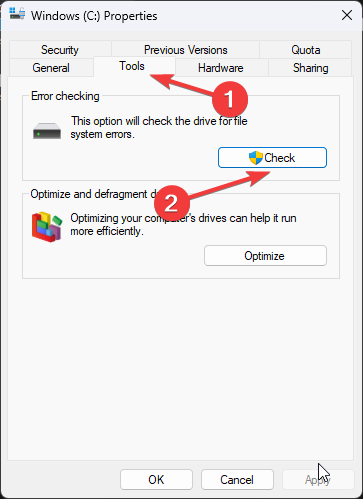
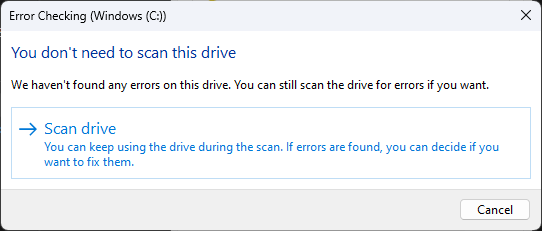
- On the Tools tab, under Error checking, click Check.

- Click Scan drive.

- Follow the onscreen instructions to complete the process.
5. Restore your system to the previous version
- Press the Windows key, type Control panel, and click Open.

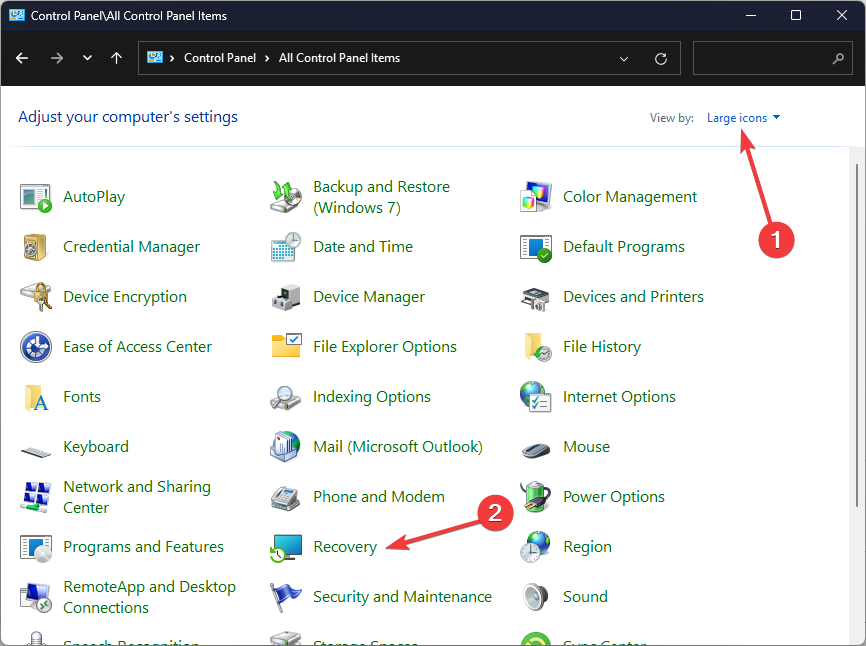
- Select View as Large icons and click Recovery.

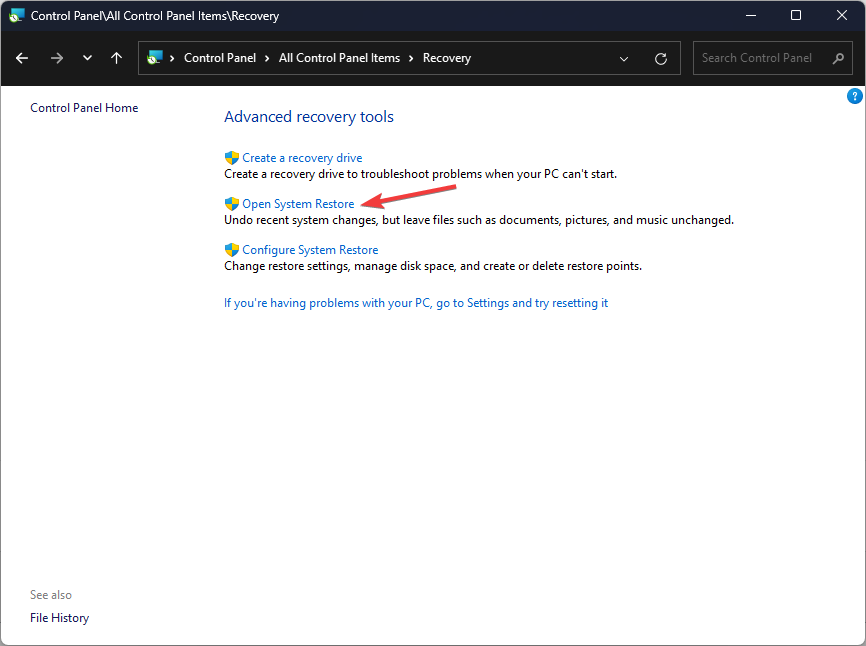
- Click Open System Restore.
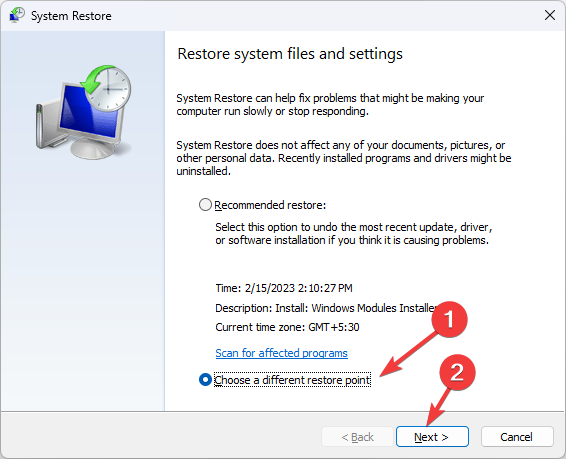
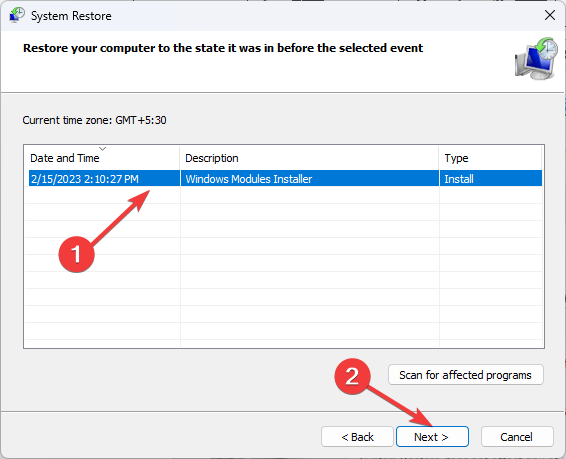
- Select Choose a different restore point in the System Restore window and click Next.

- Select the restore point and click Next.
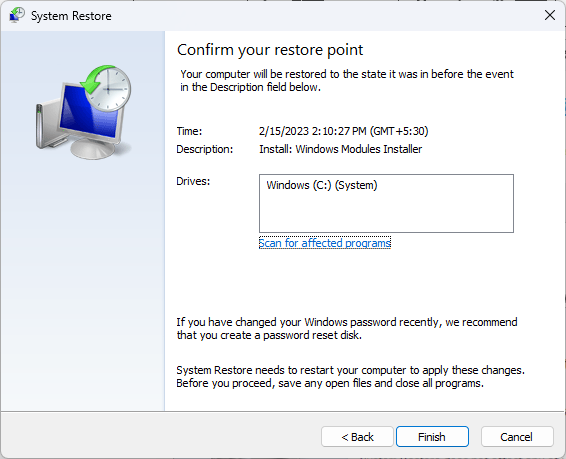
- Click Finish to let your system restore to its previous version.
6. Create a user account profile
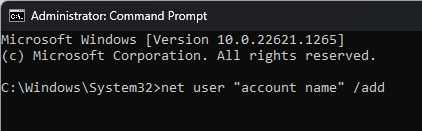
- Open Command Prompt with admin rights using the steps in method 3.

- Type the following commands one by one and press Enter:
net user "account name" /addnet localgroup administrators "account name" /add - Close the Command Prompt and log out the current user.
- Now select the newly created user account and log in.
7. Perform the in-place upgrade
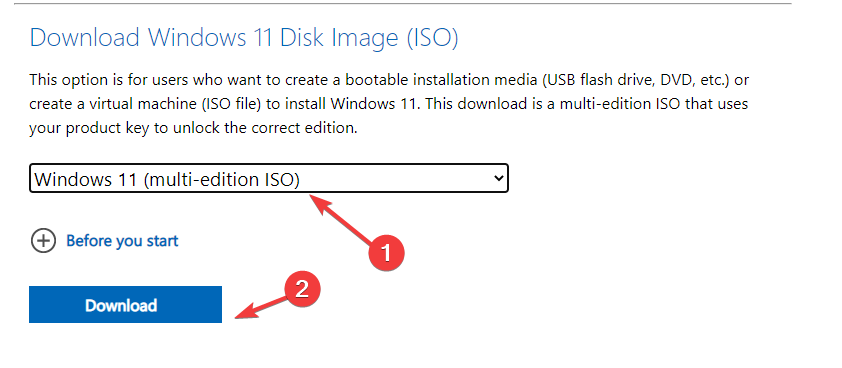
- Go to Windows 11 download page. Download Windows 11 ISO and select Windows 11 (multi-edition ISO).

- Select the product language option, choose English or your preferred language, and click Confirm.

- Click Download.
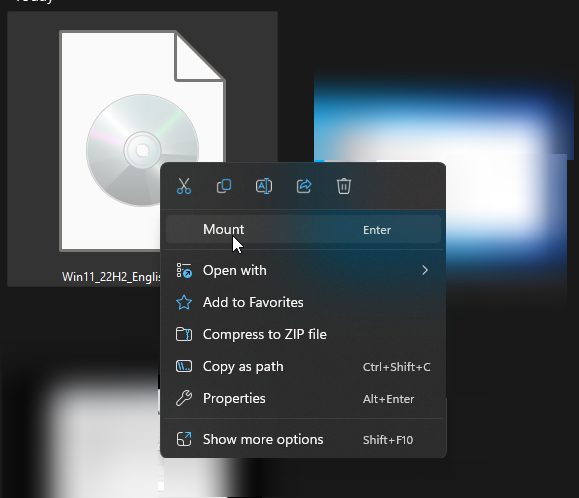
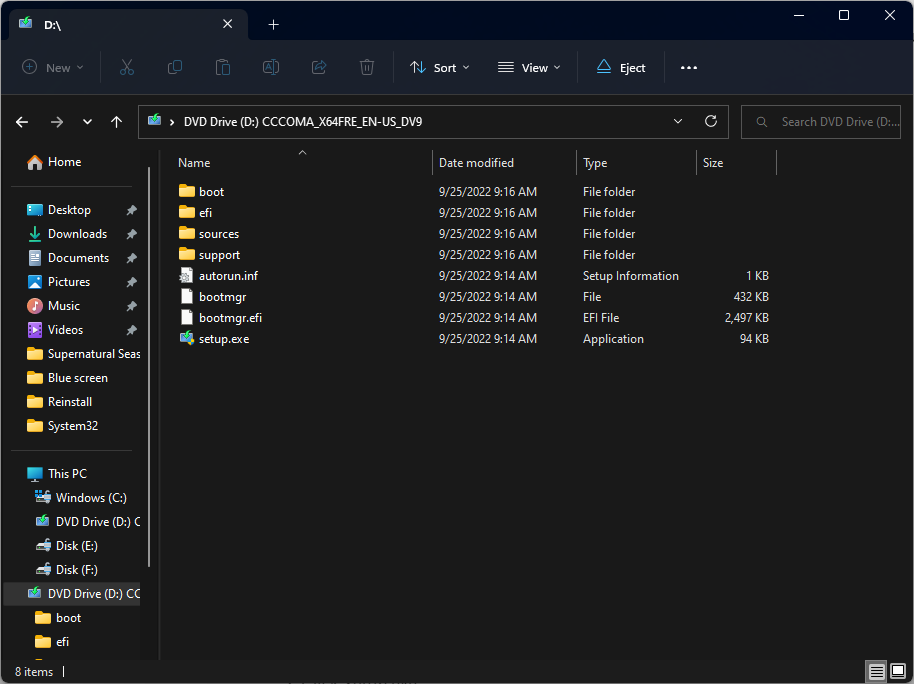
- Select and right-click the downloaded file, and click Mount.

- Click Setup.exe.

- Click Yes on UAC if prompted.
- On Install Windows 11 dialog box, click Next.
- On the next page, click Next.
- Wait for the program to check for available space. On the Ready to install page, select Keep personal files and apps.
- Click Install and follow the onscreen instructions to complete the process. Your computer will restart a few times, eventually leading you to the lock screen.

So, these are the methods to follow to fix the rtwlane6.sys blue screen error. Try them and let us know what worked in the comments section below.