How to undo registry changes in Windows 10

Sometimes you can encounter problems after changing a specific are from the registers, even if it is about a key or the entire hive and you do not know how to solve this problem.
Windows 10 has a useful feature which allows you to create backups at a specific moment to which you can return in any moment. In other words, you can restore your computer to the settings of a certain time in the past. This is useful because you can set your configuration to a form that did not exist those errors without the need to revert to the default factory settings and in that case, you will have to reinstall all your programs and drivers. So, sometimes, you have to create this backup to have more safety for your system.
Method 1 – Restore your registry using registry back-up
How to create a registry back-up in Windows 10
- Type regedit in the Windows search bar and select it from the list of results.

- This will open the Registry Editor dialog box. It is the place where you can modify, delete, change and back-up all the registers.
- Now is your decision what you want to save. You can back-up the entire registry, or you can back-up only a part, if you know where you will be working. We recommend you to back-up the whole registry because in this way you are sure that everything works in this state and you will not have to create every time a copy for each edited register.
- To back-up the whole registry right-click on the Computer section from the left table of the Registry Editor interface.
- Select the Export feature. This will create a .reg file where you have all the registry from that moment.
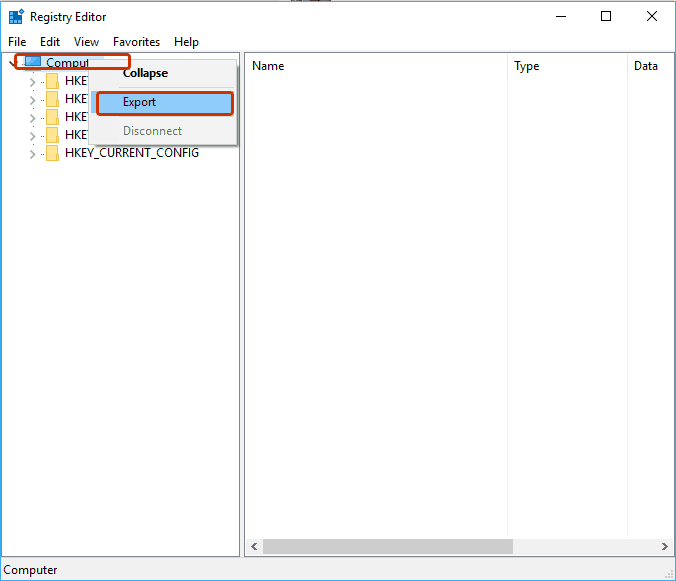
- Save the file in a known location (like Desktop or Documents) to be sure you can find it easily.
- Check the place where you saved the registry. If the file is there, we can continue to the next stage, otherwise read more carefully the steps from above and try again.
How to restore your Windows registry
- Locate the back-up file of your registry. If you have problems of finding it, check in the Documents folder (the folder where is saved automatically) for a .reg. The icon looks similar with a blue broken Rubik’s cube.
- Double-click on the .reg file to open it. Depending on the configuration of your operating system, you may receive a dialog-box where you have to allow the application to make changes to your computer. Click on the Yes button in this case to start the restore process.
- You will receive an attention dialog-box where you are informed that the following actions may cause your components to not work properly. If this file is created by yourself, then it will be safe to run the process, otherwise make sure that the source of the file is safe.
- Click on the Yes.
- Assuming that your back-up file was imported correctly, you will receive a notification where you are informed that the file was successfully added to your registry.
- Click on the OK button of that dialog-box. Now you can delete the back-up file if you consider that you will not need it in the future.
- Restart your system to complete the configuration.
Alternative method to restore the Windows registry
- Open Registry Editor.
- Click on the File button from the upper panel of the interface. Select the Import… option.
- Find and select the .reg back-up file and the click on the OK.
- You will receive a notification where you are informed that this action may cause problems to your system. If the file is from a safe source you can continue, otherwise we recommend you to use the system restore point method (the next topic of the article).
- Click on the Yes button.
- You should receive a dialog-box where you are informed that your file was imported successfully. If not, try to repeat this process logged as an Administrator.
- Restart the system to complete the restoring process.
Method 2 – Restore your registry using the system restore point
How to create a system restore point in Windows 10
This is a simple process which if is done regularly, it can avoid a lot of headaches. Here is how you do that.
- Search Create system restore point in the Windows search bar and select it from the lists of results.

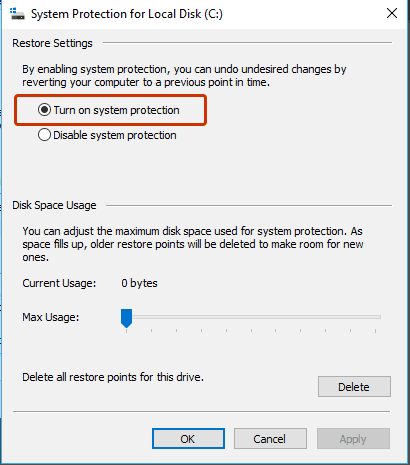
- To create a system restore point you have to turn on the Protection feature for the disks. You can do that by selecting each disk / Configure / Turn on system protection.
- After you activated the protection click on the .. button and type a description on the restore point to know what was the condition of your computer at that time.
- Click on the Create button to finish the configuration.
How to restore your computer
- Search Create system restore point in the Windows search bar and select it from the lists of results.

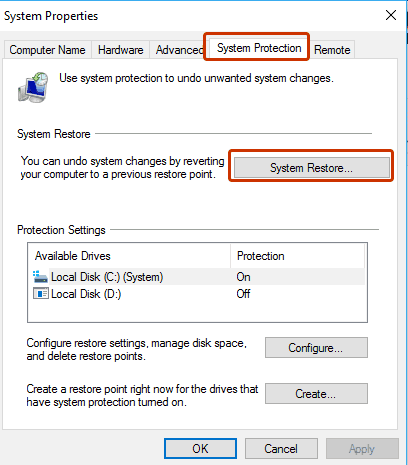
- Open the System Protection.
- Click on the System Restore… .
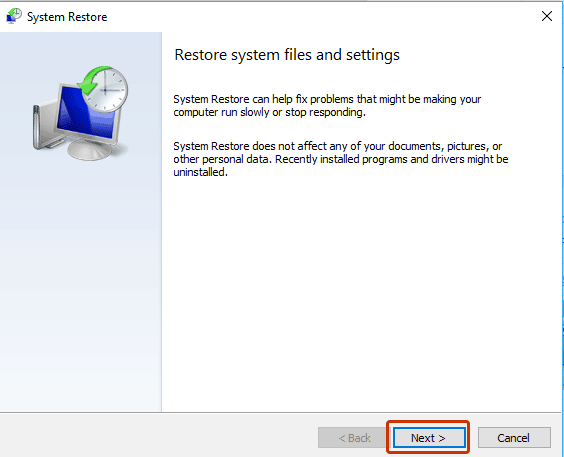
- This will open a dialog box where you are informed that this feature may solve many of the system problems, but also will uninstall the installed programs from that point until now. Click on the Next button.
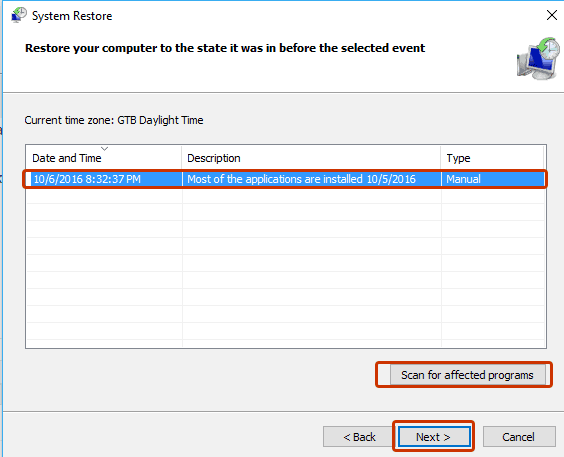
- Select from the restore points list select the point where you want to restore your computer. You can also Scan for affected programs to find more information about possible issues. After you finish this procedure click on the Next button.
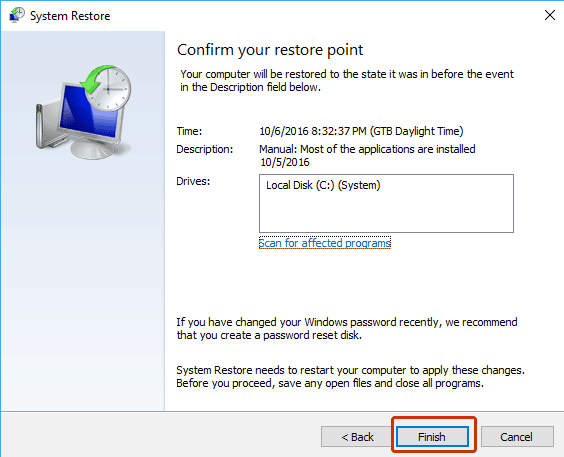
- Make sure you save all your work on a external device and click on the Finish button to start the system restoring process. Your computer will reboot and after that it will have the settings from that point.
Read our disclosure page to find out how can you help Windows Report sustain the editorial team. Read more


Improve this guide


User forum
0 messages