3 Ways to Remove the Evaluation Copy Watermark in Windows 11
Remove the System requirements not met watermark in a jiffy
3 min. read
Updated on
Read our disclosure page to find out how can you help Windows Report sustain the editorial team. Read more
Key notes
- Microsoft applies watermarks on computers that force installed Windows 11.
- Universal watermark disabler is a great tool that help remove the watermark.
- We also go over a few other solutions which you can use to remove the watermark.
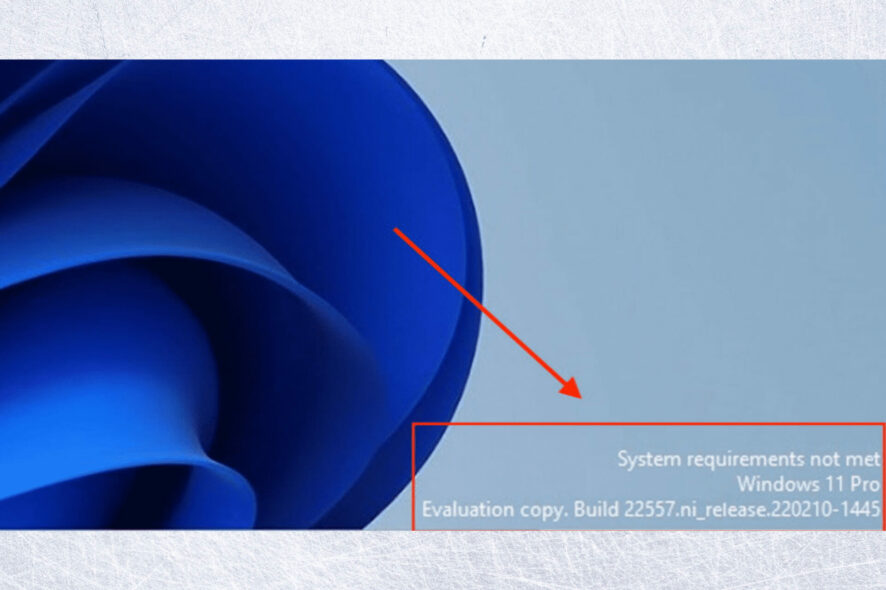
Are you having trouble with the annoying watermark on the bottom right side of your Windows 11 screen? And you don’t know how to remove it? The Universal Watermark Disabler tool comes to your rescue.
The Universal Watermark Disabler for Windows 11 is a tool that can assist in removing the annoying watermark on the bottom-right side of the Windows screen that is interfering with your wallpaper and overall experience.
Without any further ado, let’s get started.
How do I remove the watermark from Windows 11?
1. Remove the watermark using Universal Watermark Disabler
- Download the Universal Watermark Remover.
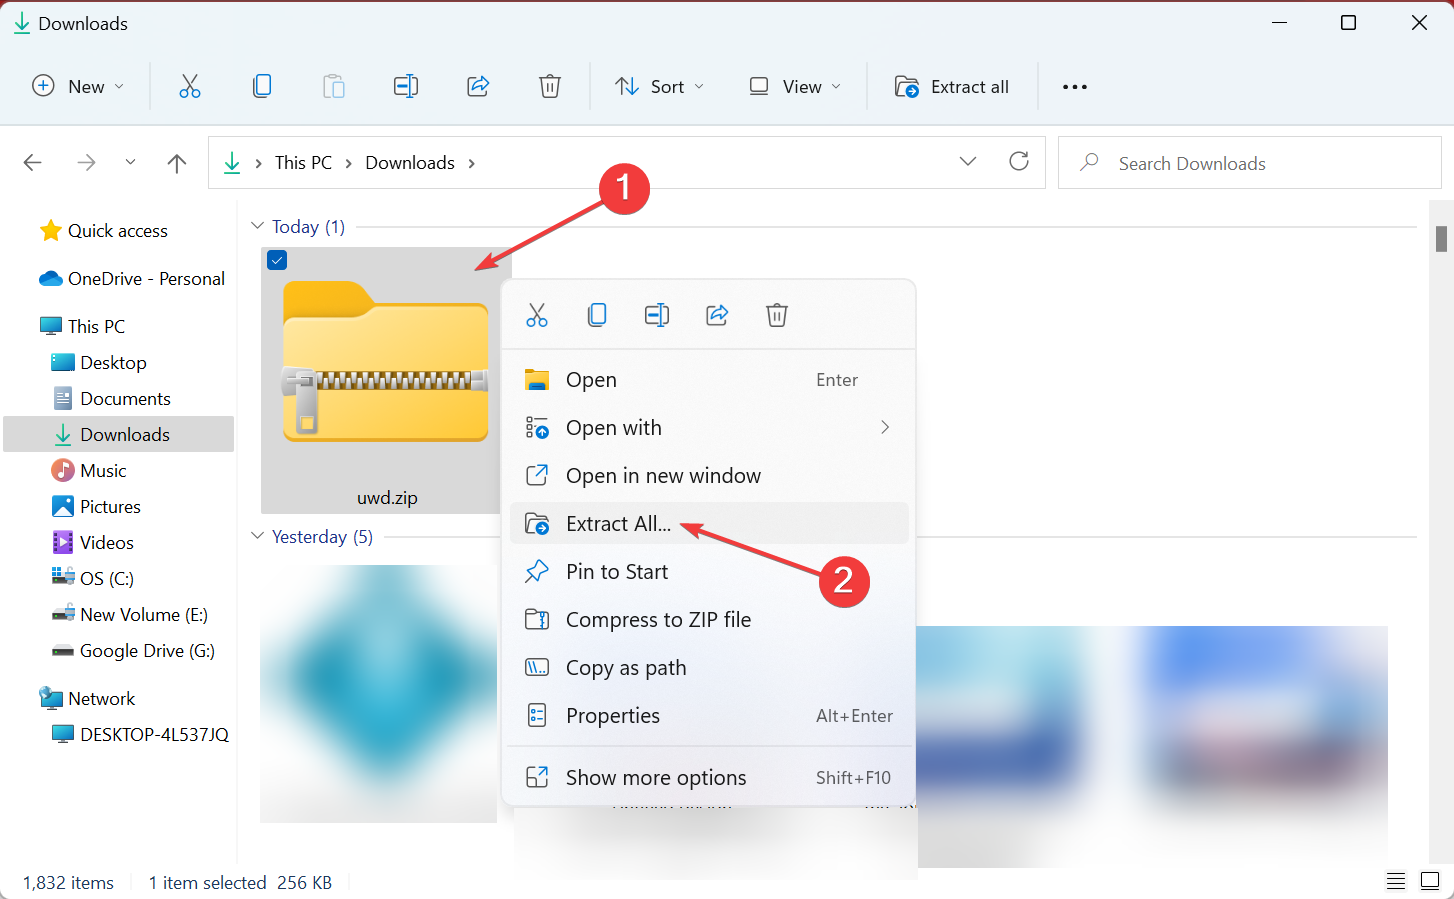
- After it’s downloaded, right-click on the folder and select Extract all.
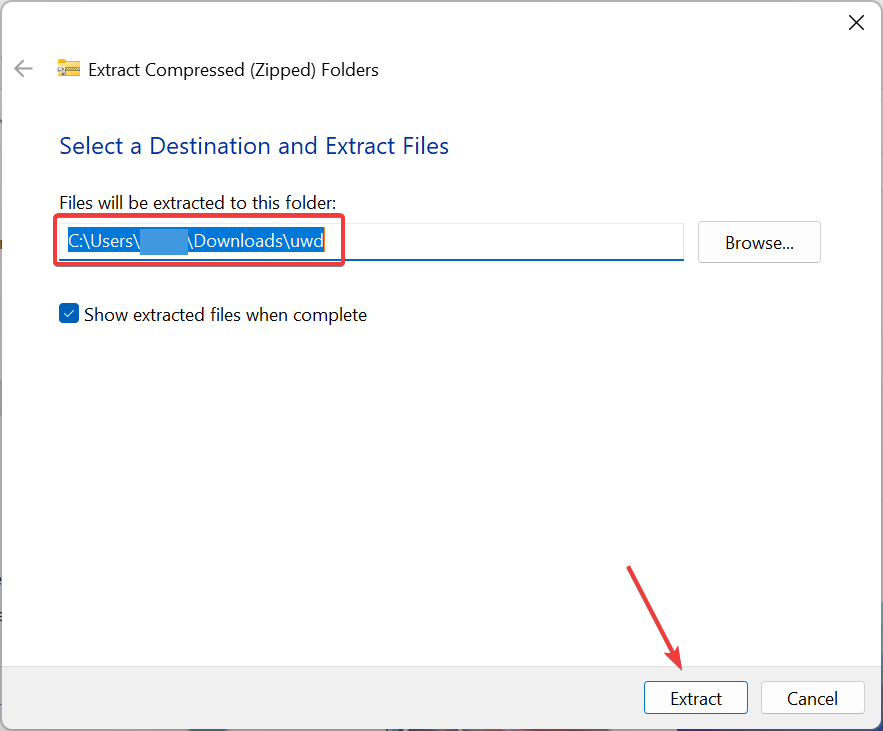
- Choose the desired location, and click on Extract.
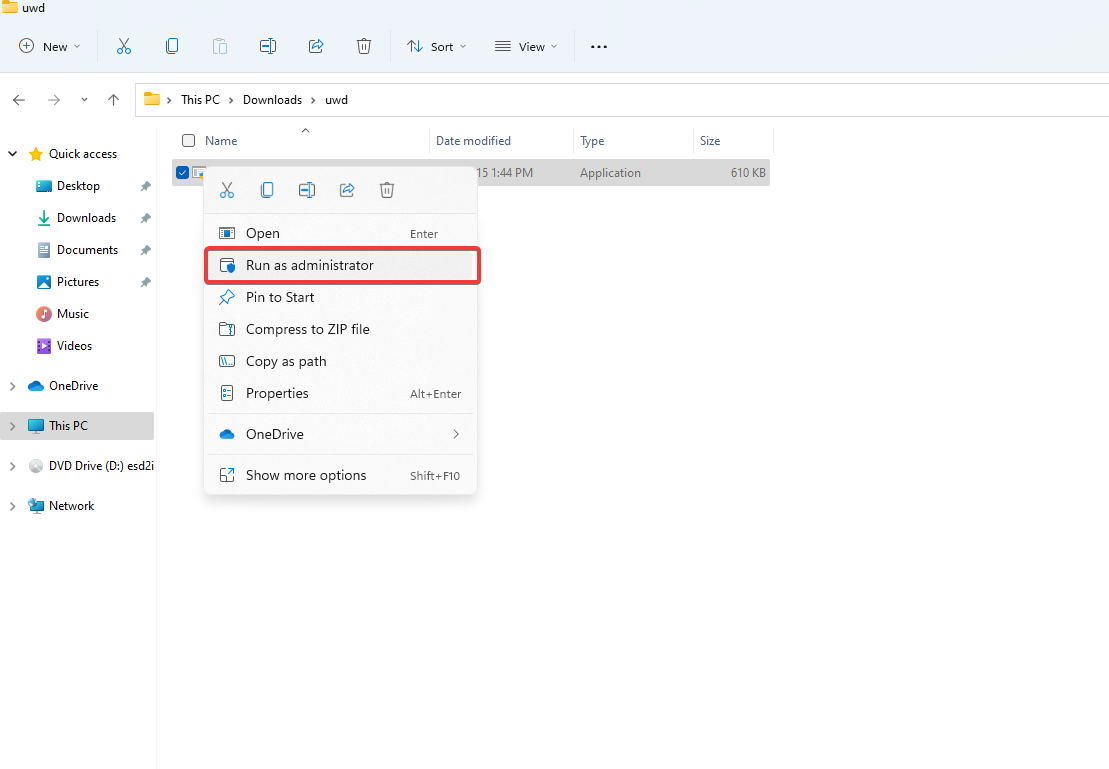
- Open the extracted folder, then right-click on the UWD.exe file and choose Run as administrator.
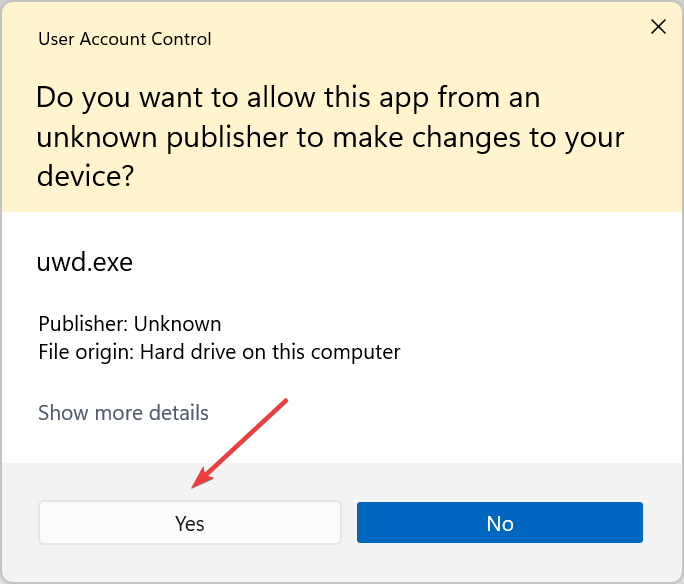
- In the UAC dialog box, click on Yes.
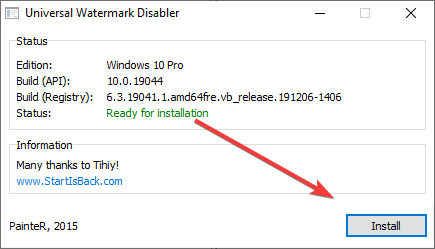
- The Universal Watermark Disabler will launch. Click on Install to continue with the installation process.
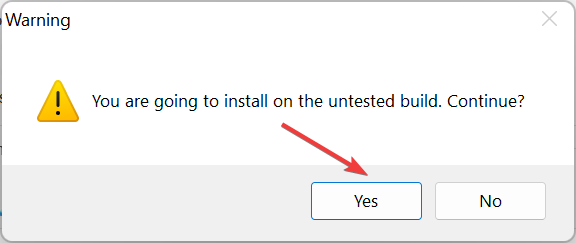
- Click Yes in the confirmation prompt.
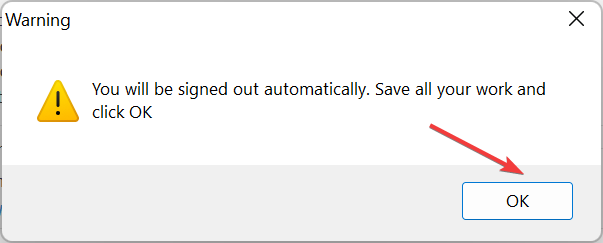
- After the software is installed, click OK to sign out of the user account.
- When you sign back in, the Activate Windows watermark will be removed.
The simplest way to remove the Evaluation Copy watermark in Windows 11 is to use the Universal Watermark Disabler, a third-party freeware application that removes all kinds of watermarks.
But before you begin, we would request that you create a backup of all the data as you will be replacing the system files basebrd.dll.mui and shell32.dll.mui, and the process can sometimes cause instability.
Also, keep in mind that replacing system files regularly can cause your PC to break, so don’t make it a habit.
2. Remove watermark using the registry editor
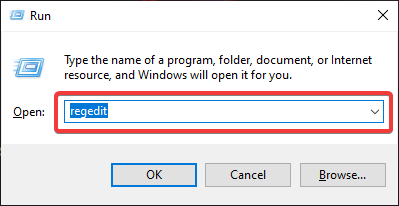
- Press Windows + R to open Run, type regedit, and hit Enter.
- Click Yes in the UAC prompt.
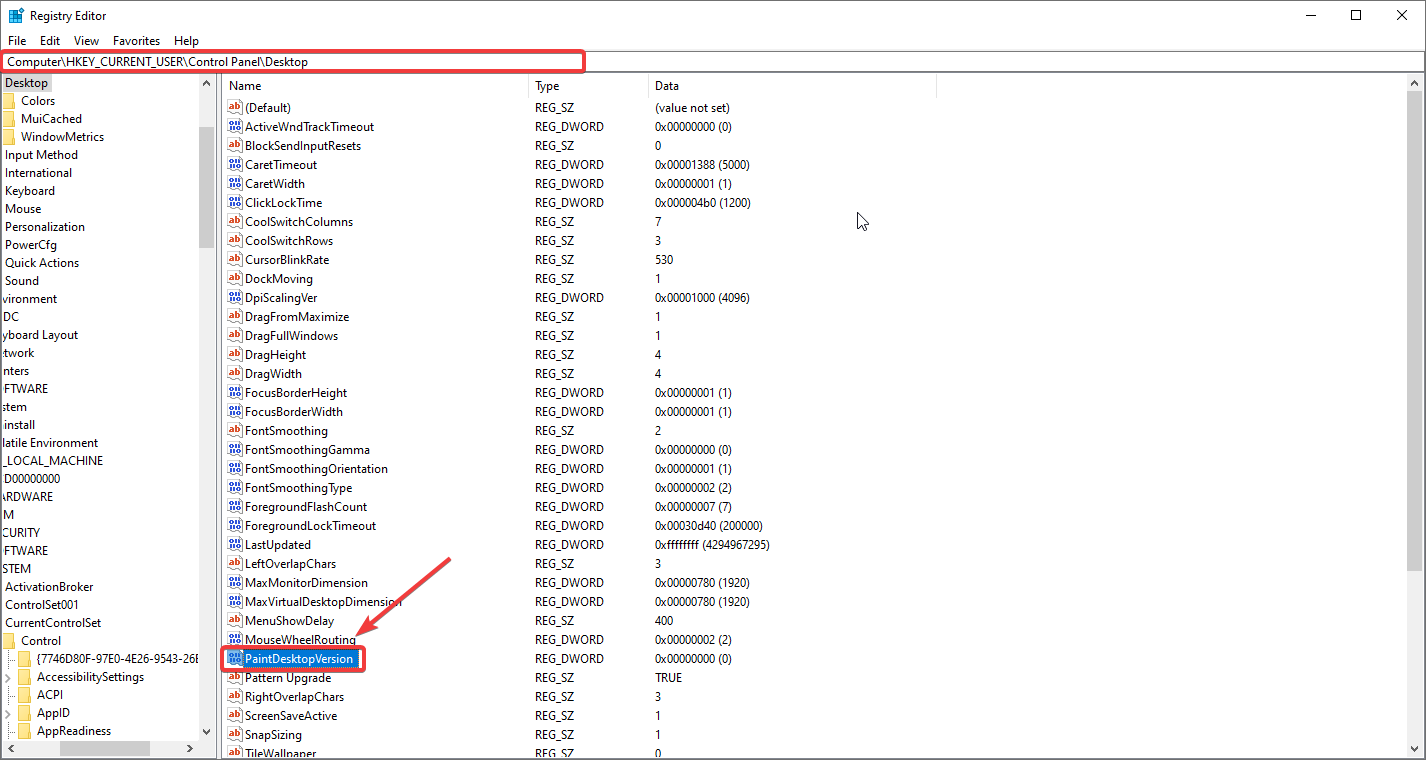
- In the address bar, paste the following path and hit Enter:
Computer\HKEY_CURRENT_USER\Control Panel\Desktop - Locate and double-click on PaintDesktopVersion from the entries on the right.
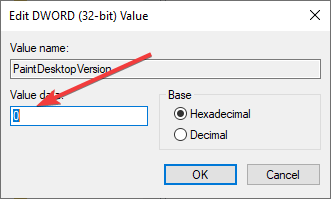
- Change the Value data to 0 and click on OK.
In case you don’t prefer using a third-party app like Universal Watermark Disabler in Windows 11, modifying the Registry will help. But make sure not to change any values other than what’s listed here.
3. Remove the watermark using Ease Of Access Settings
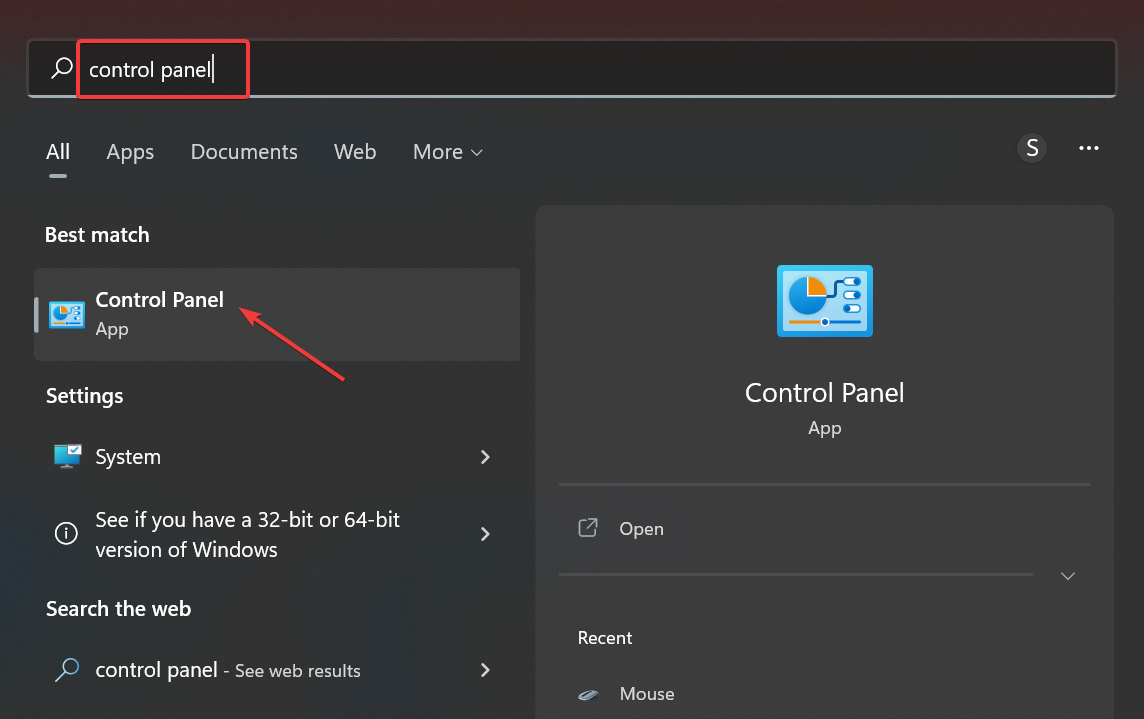
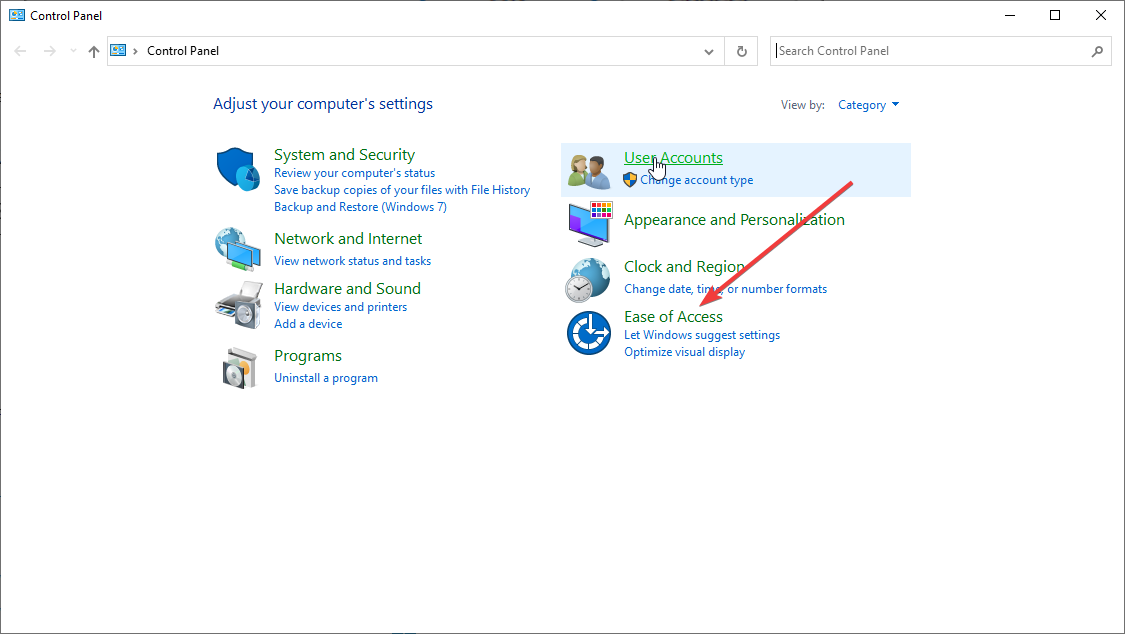
- Press Windows + S to open the Search menu, enter Control Panel in the text field, and click on the relevant search result.
- Click on Ease of Access here.
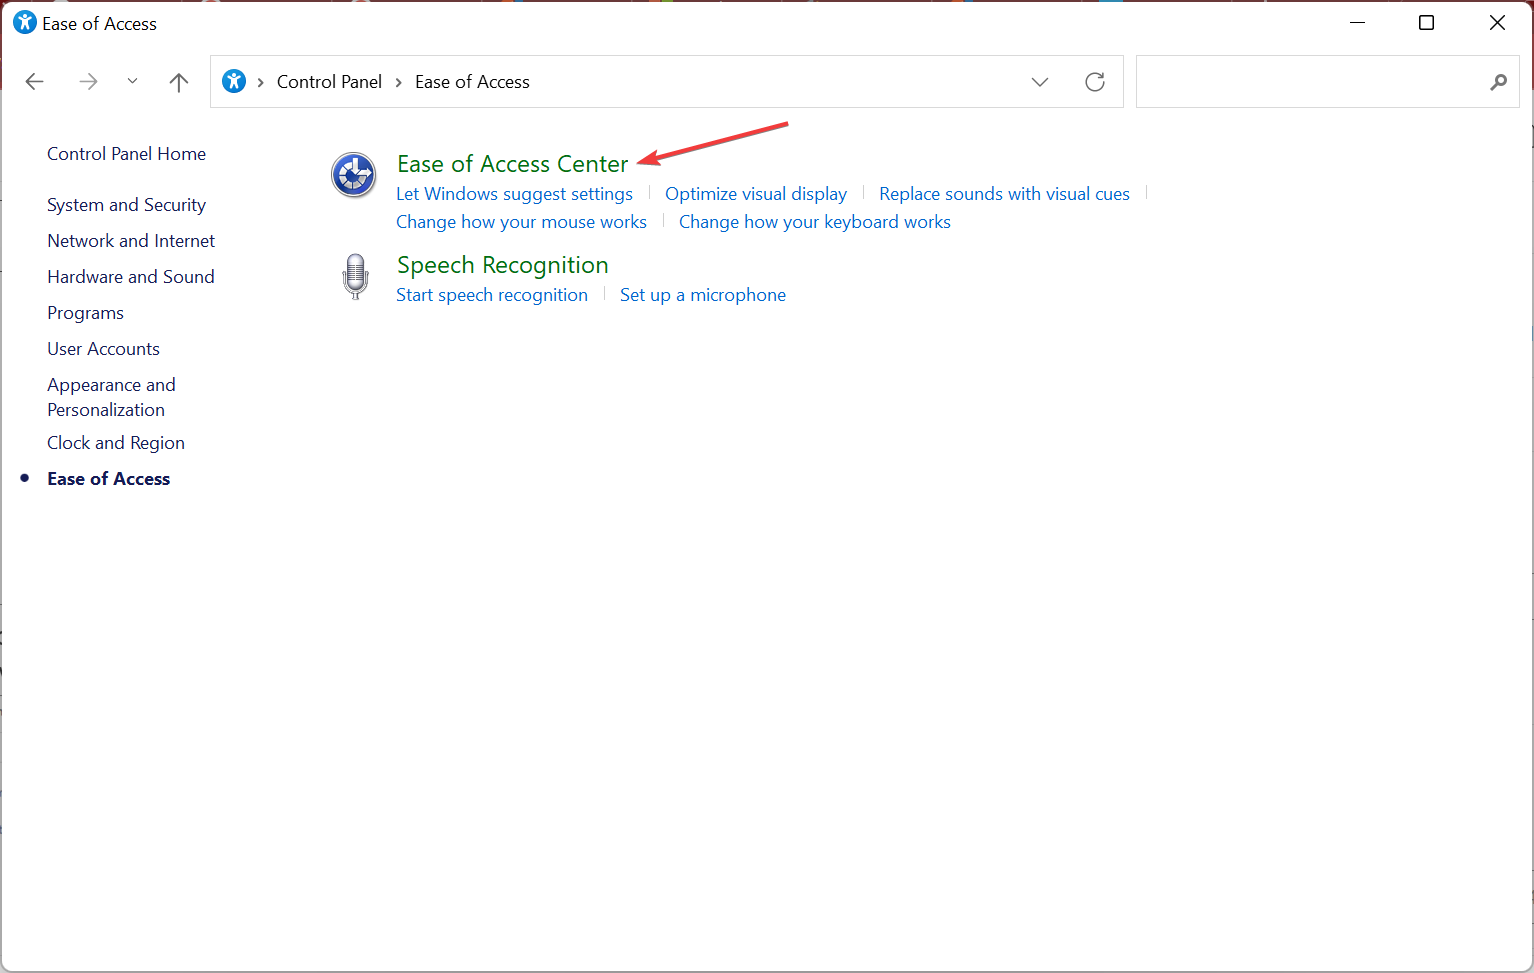
- Click Ease of Access Center.
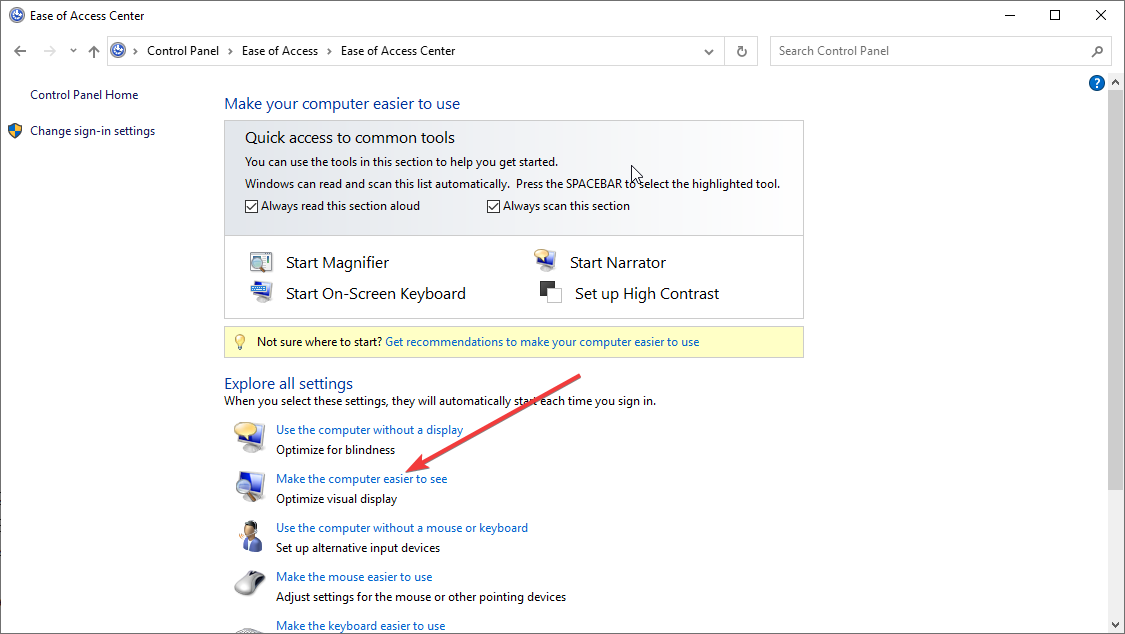
- Select the Make the computer easier to see option.
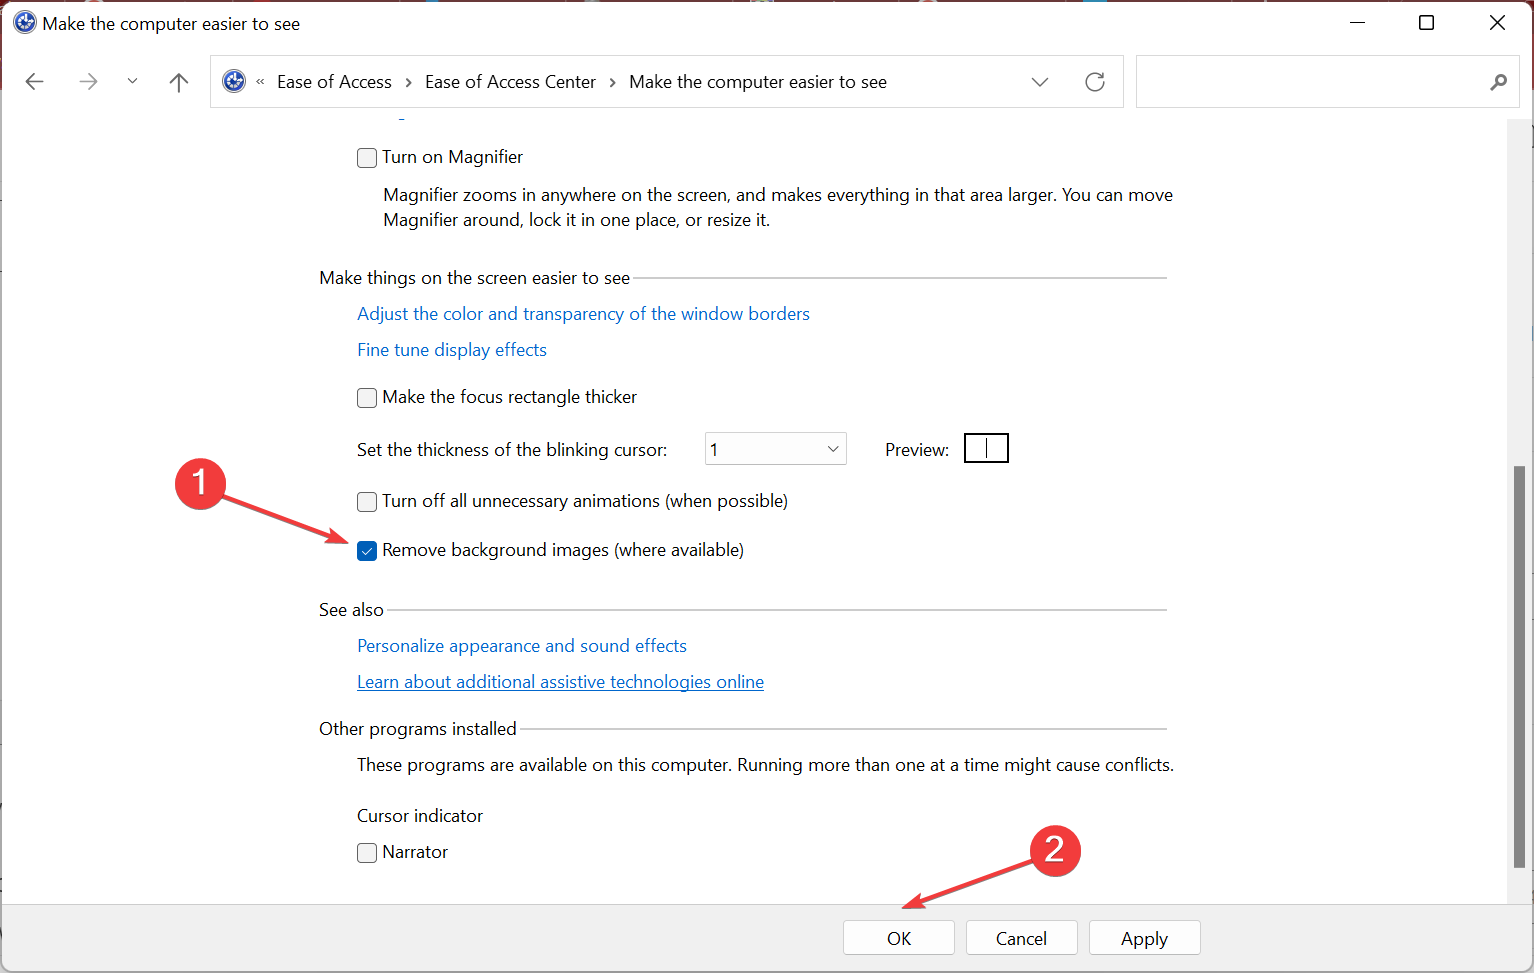
- Tick the checkbox for Remove background images (where applicable), and click on OK to save the changes.
After this step, you shouldn’t find the watermark on your desktop, and the entire desktop will turn black.
That’s all! You now know all the ways to remove watermarks in Windows 11, along with using the Universal Watermark Disabler tool.
Also, find out how to remove watermarks in Microsoft Word. If you know of any other methods or have a query, do drop a comment below.





User forum
0 messages