How to Configure & Change your Wacom Tablet Pen Settings
Key notes
- Wacom tablet pen setup is a simple, rule-based task requiring strict adherence for smooth functionality.
- If you are a new Wacom tab, the pen configuration might not be essential since it will be in the default mode.
- Use the Mode function in the table properties to switch between the pen and mouse mode.
If you are an artist or a graphic designer, you should know how to use Wacom tablet pen settings. It ensures productivity and efficient results in your graphic design work.
Nevertheless, you can configure your Wacom tablet to ensure it works just as expected.
So, to achieve your goals with the Wacom tablet, understanding how to configure the Wacom pen is necessary.
To achieve your goals with the Wacom tablet, understanding how to configure the pen is necessary. This article will guide you through the best Wacom pen settings and configurations.
Quick Tip:
Before going any further to set up your tablet pen for the Wacom device, you should make sure all the necessary drivers are up to date.
To do that, simply utilize driver updating software that can automatically update all your drivers to ensure maximized performance before starting to configure the tablet pen settings.
This way, you’re covered from unexpected errors occurring on your tablet when you try to configure the pen settings.
How do I connect my Wacom tablet pen?
There are no special steps you need to follow to connect your pen to a Wacom tablet. First, connect the tablet to your computer via a USB cord. A blue light will show, indicating that it is on.
However, bring the pen closer to the tablet, and you will see your mouse pointer on the screen.
Moreover, you don’t have to connect a Wacom tablet pen to your tablet. It works with magnetic force, so it doesn’t need to be powered.
How do I use Wacom pen mode?
- Go to Wacom tablet properties.
- In the tool list, select your pen.
- Select the mapping tab to prompt the Mode option
- In Mode, select pen.
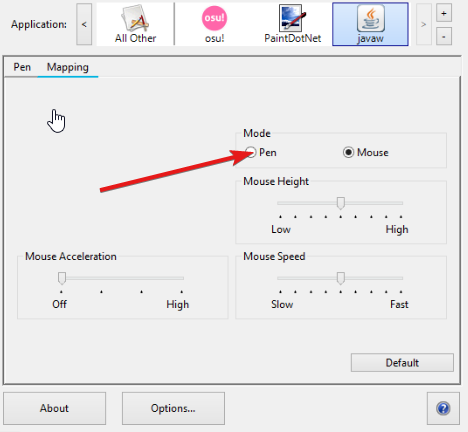
Pen mode means that the pen controls the cursor on your screen. The cursor will appear on your screen depending on where you place the pen on your tablet.
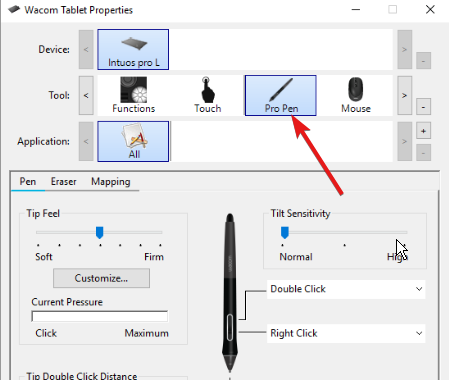
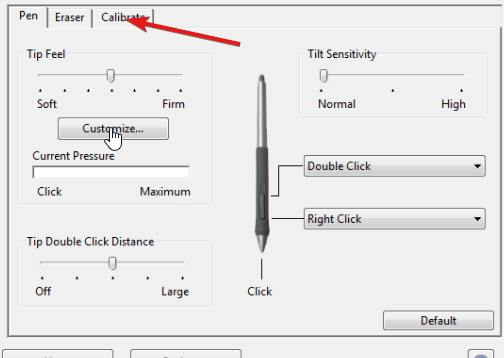
How do I change my Wacom pen settings?
- Open Wacom tablet properties.
- In properties, select your pen from the Tool row.

- Click on the Pen tab.
- From the drop-down of functions beside your pen, click on the one you want to adjust.
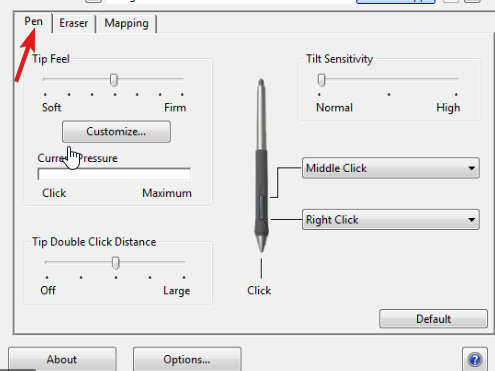
You can access Wacom pen settings by going through Properties. Under the properties tab, you can adjust the settings to suit your needs.
How do I calibrate my Wacom pen?
- Open Wacom Tablet Properties.
- Select your pen from the device list. (If you have multiple pens on your device, select the one you work with from the list.)

- Click on the Calibrate tab.
- Select the calibrate option to activate calibration on your display screen.
- Hold the pen in the normal position while working with it and touch the pen in the center of the crosshairs in the top right corner.
- Do the same to the crosshairs of the remaining corners.
- Test the alignment and click OK to accept the calibration.
You can recalibrate your Wacom pen anytime, so the settings are adjustable.
Please refer to the link above if you want to know about the Wacom pen settings for Windows 10/11.
There are things to learn when it comes to maximizing the productivity of your Wacom pen. So, to know more about Wacom tablets and pens, visit our page.
Read our disclosure page to find out how can you help Windows Report sustain the editorial team. Read more


Improve this guide


User forum
0 messages