Wdfilter.sys Blue Screen Error: How to Fix it
Updating Windows and Defender definitions can help
5 min. read
Updated on
Read our disclosure page to find out how can you help Windows Report sustain the editorial team. Read more
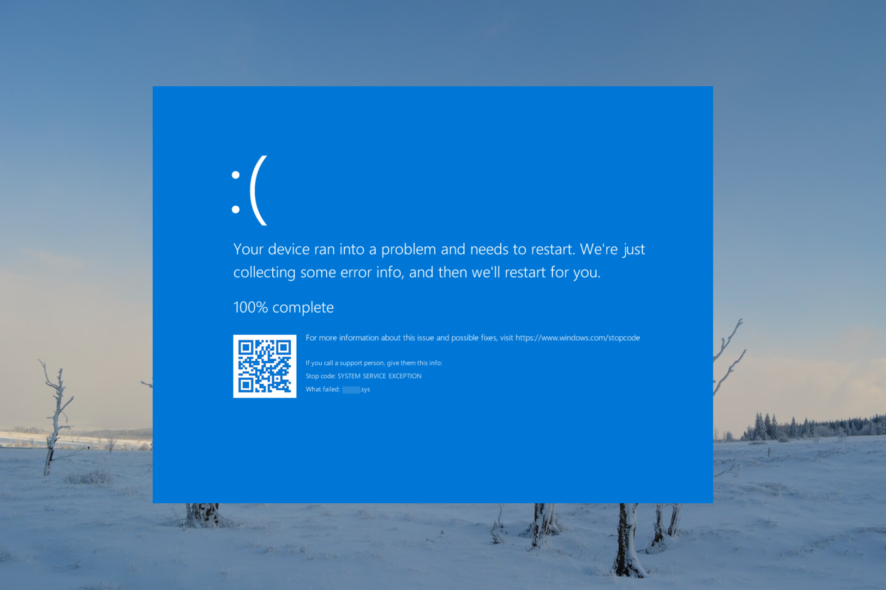
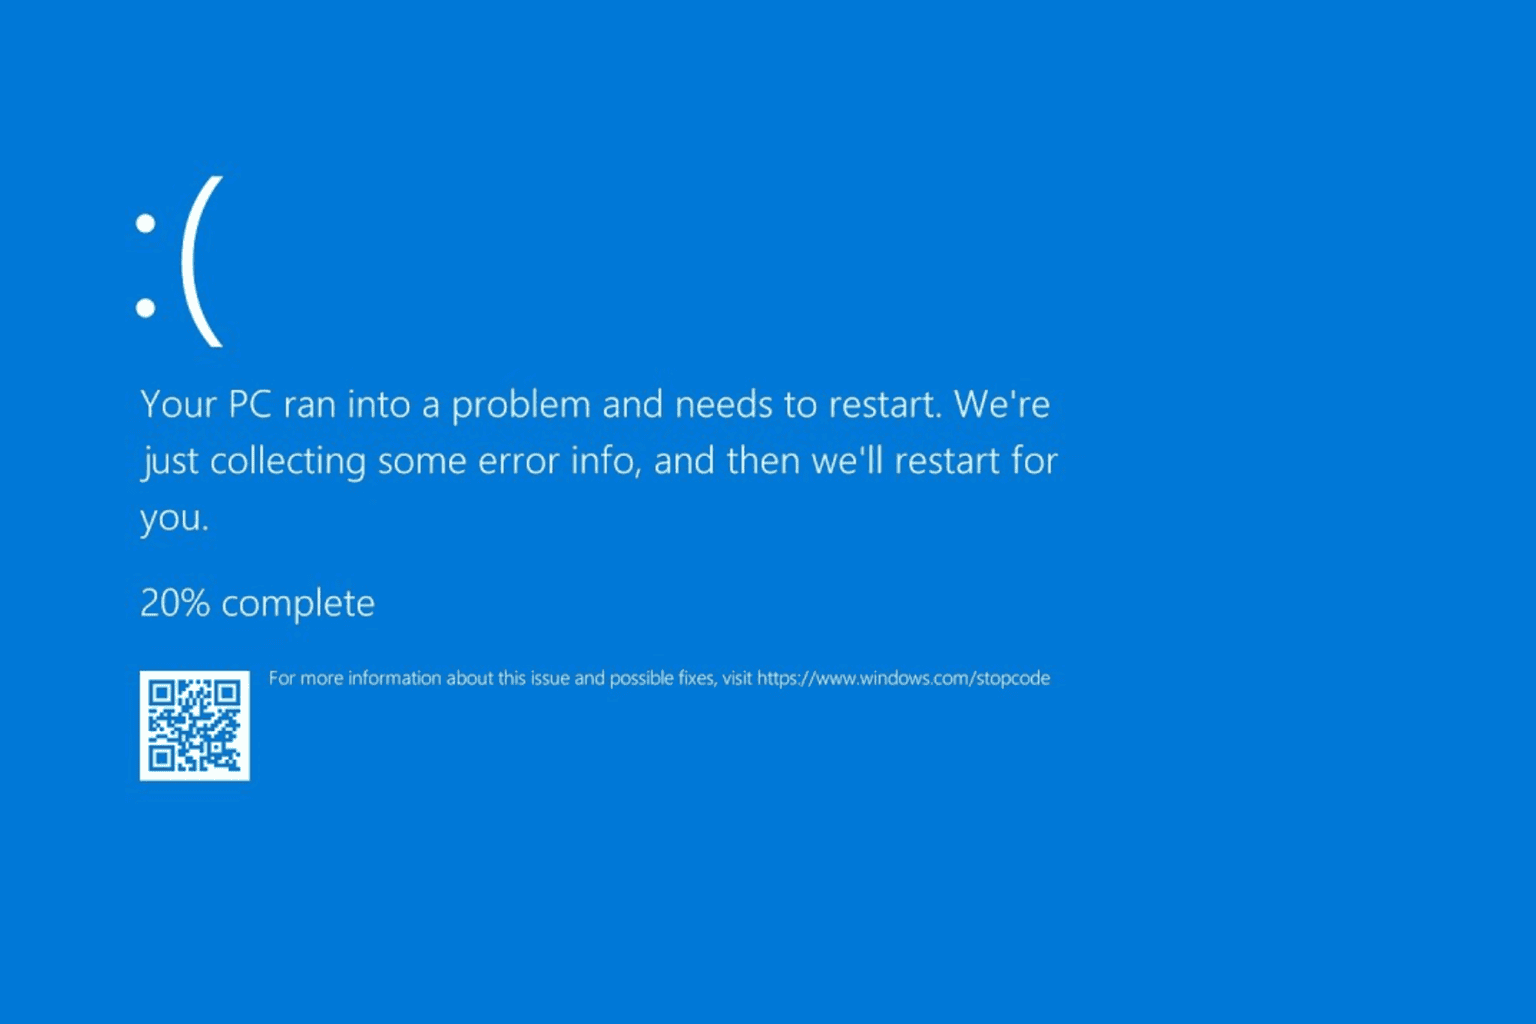
Many reported wdfilter.sys blue screen error on their PC, and in today’s guide we’re going to show you a few methods that can fix it, so let’s get started.
How do I fix wdfilter.sys blue screen error?
1. Update the Windows Defender definitions and Windows
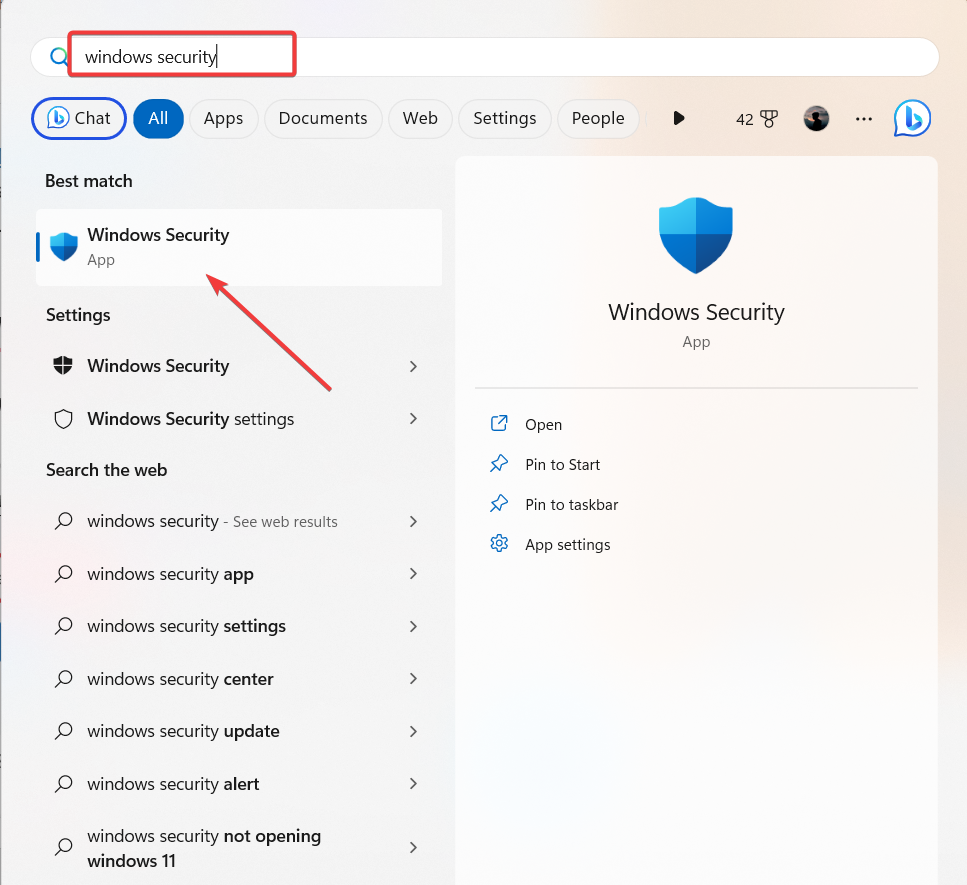
- Press the Windows button to open Windows Search, type Windows Defender, and select the Windows Security or Windows Defender app from the result.
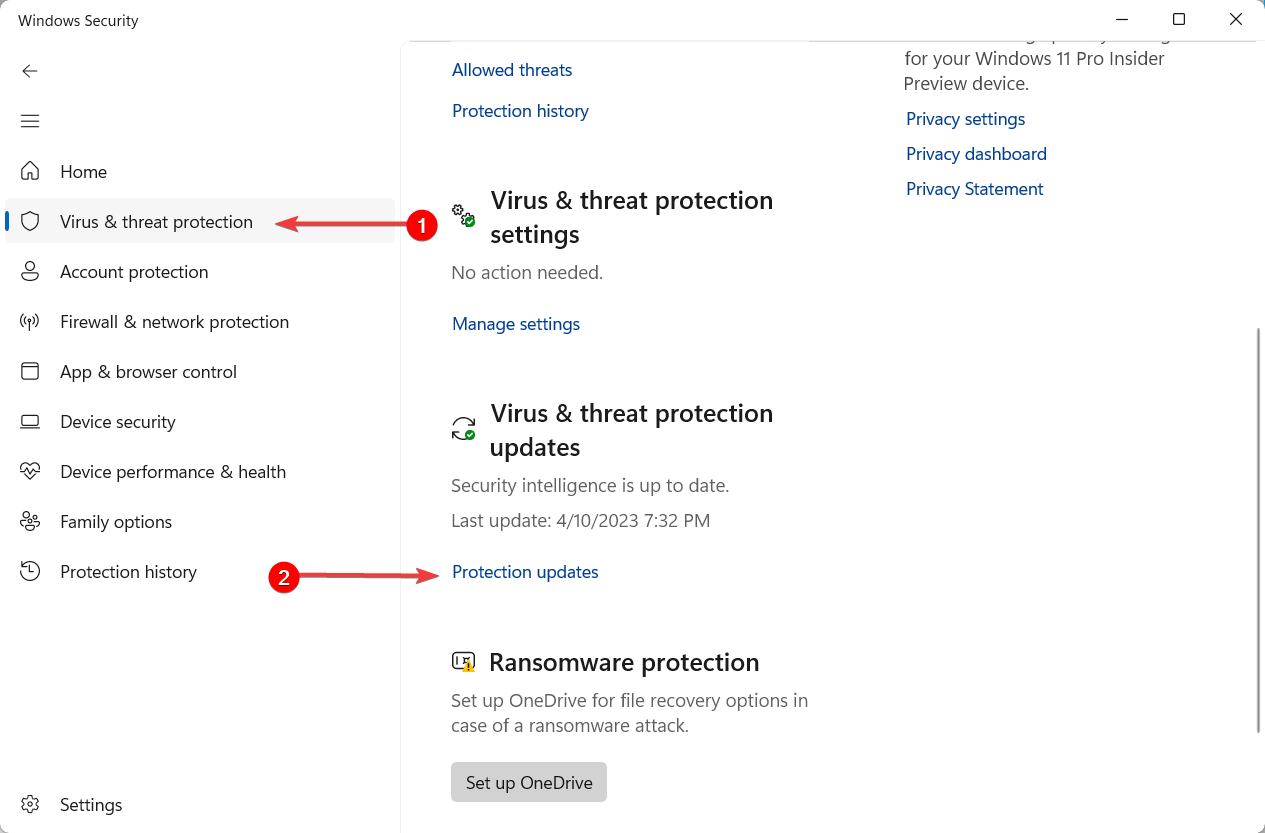
- In the Windows Defender app, navigate to the Virus & threat protection tab, and select the Protection updates option.
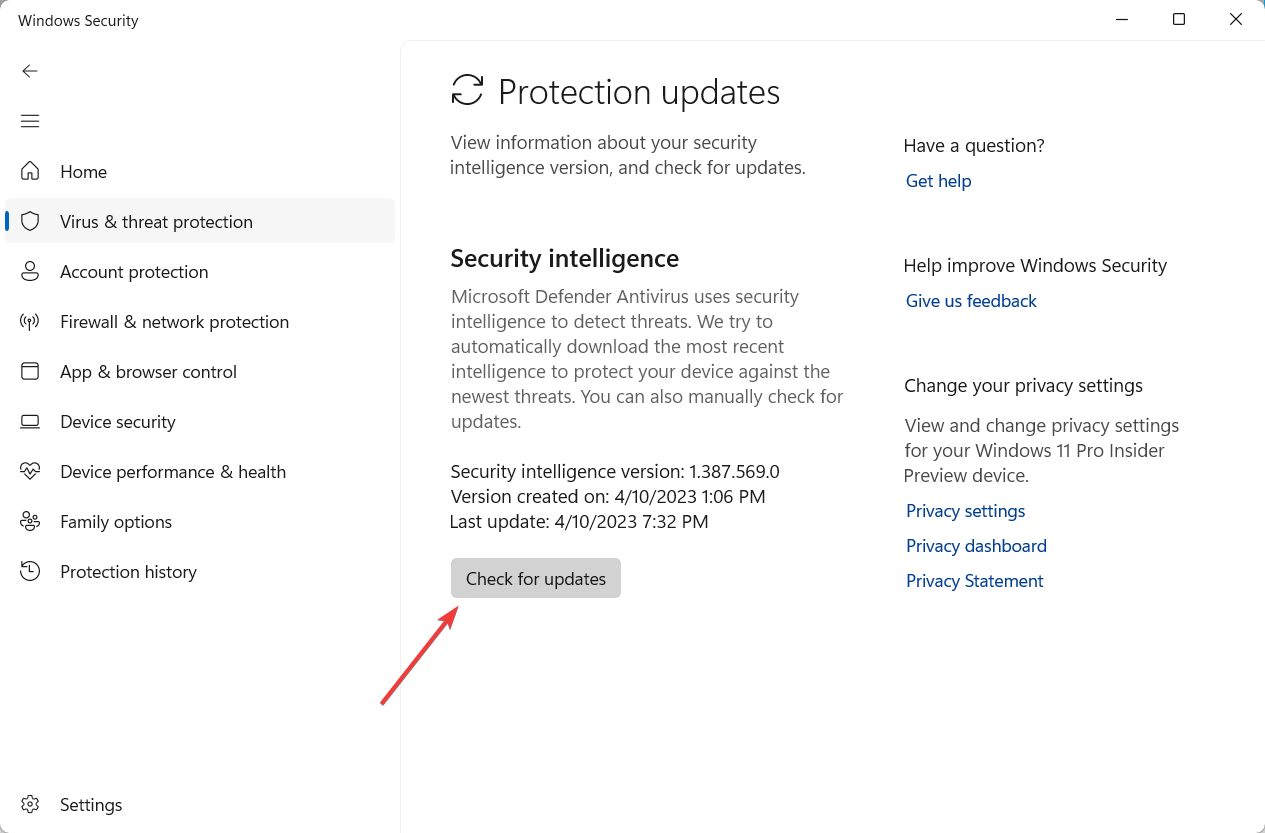
- On the following screen, click the Check for updates button to update the virus definition.
- Windows Defender will download and install any available security definitions.
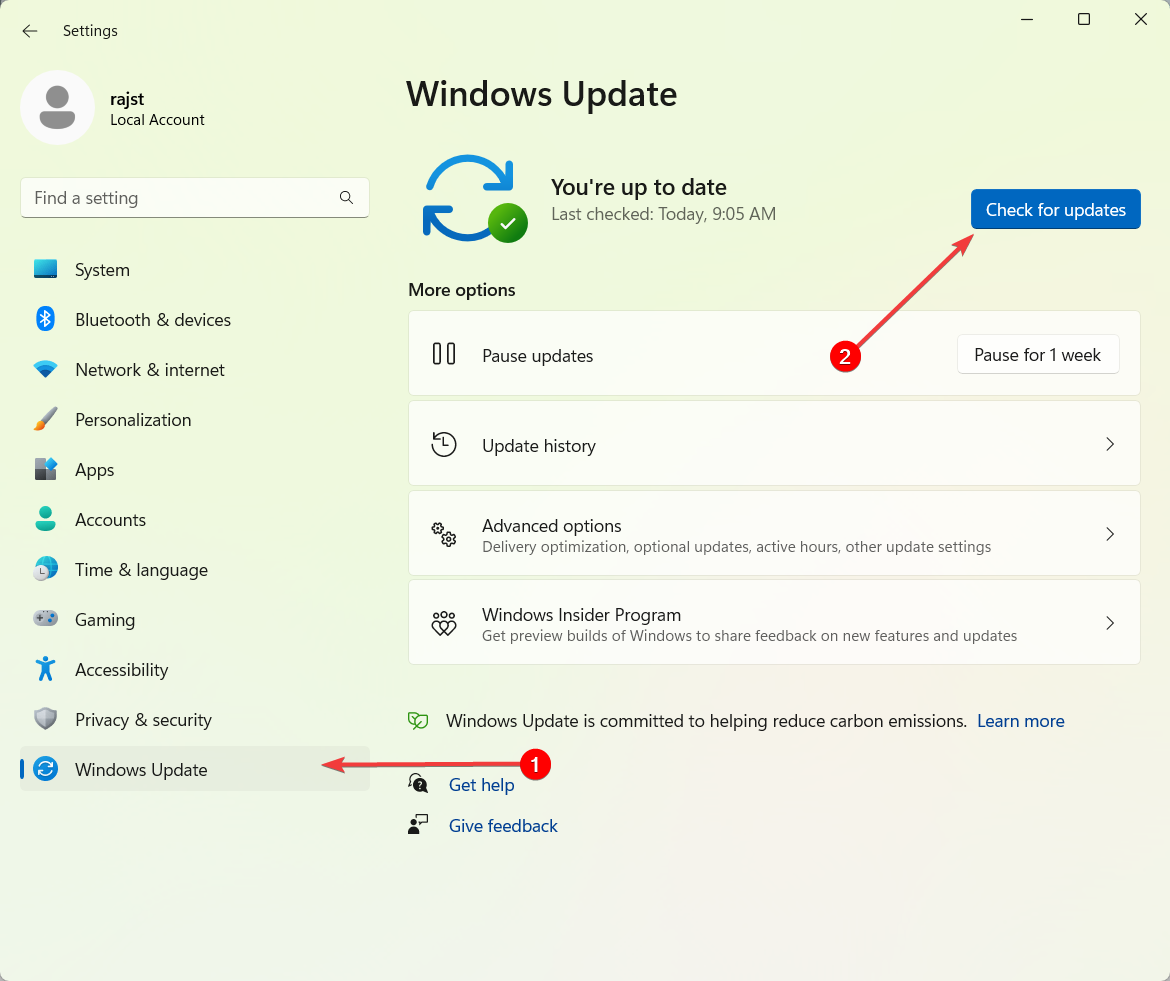
- Now, press Windows + I to open Windows Settings.
- In the Windows Settings, go to the Windows Update tab and click on Check for Updates.
- After the updates are installed, restart your PC, and scan your computer for malware with the Windows Defender.
2. Run SFC and DISM scans
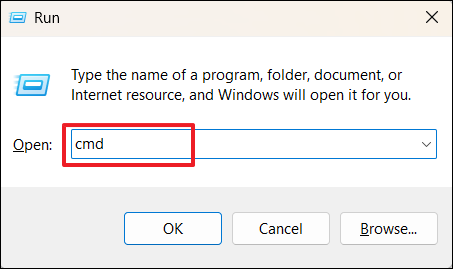
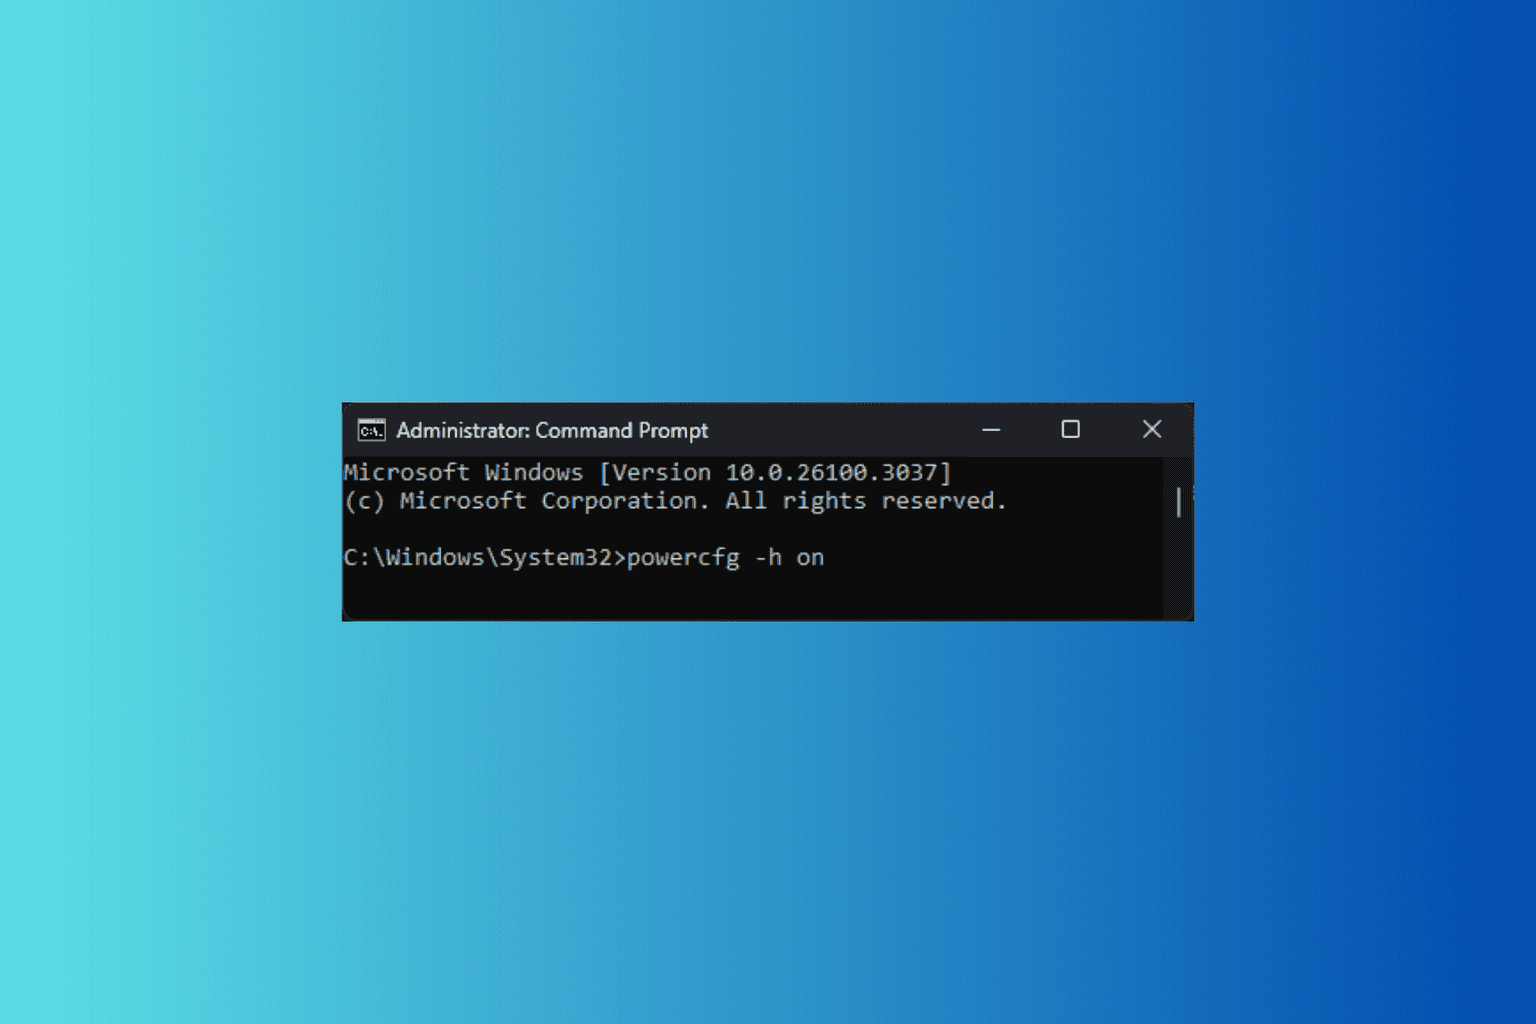
- Press Windows + R to open the Run command box, type cmd, hold the Ctrl + Shift key, and click OK to run Command Prompt as Administrator.
- Click Yes on the User Account Control (UAC) prompt window.
- Type the following command and press Enter:
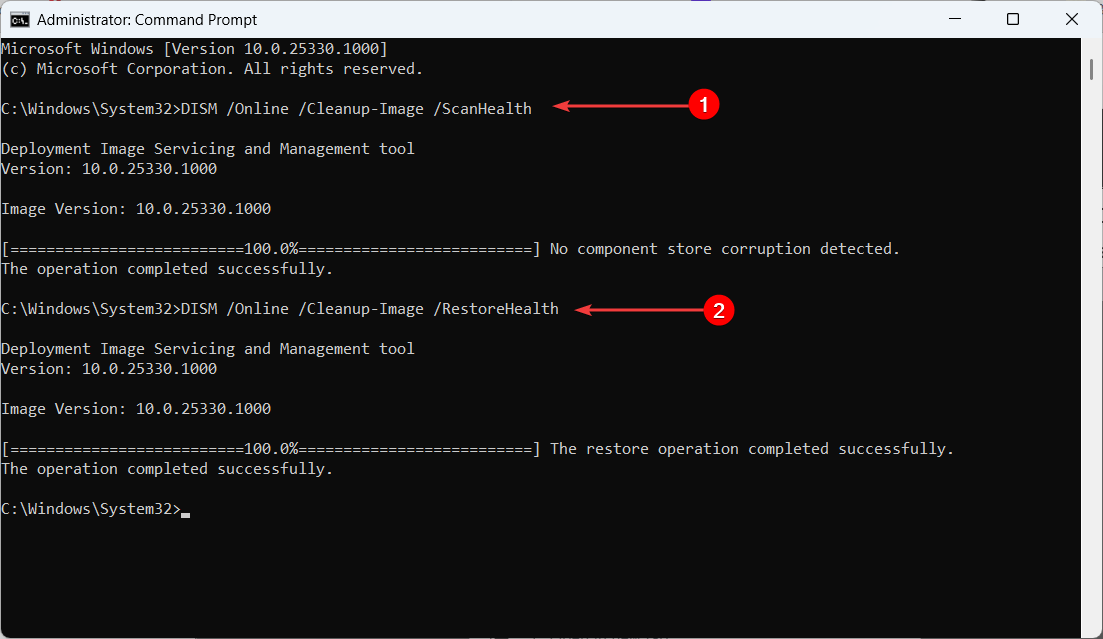
sfc /scannow - After the SFC scan is complete, type the following commands and press Enter after each:
DISM /Online /Cleanup-Image /ScanHealthDISM /Online /Cleanup-Image /RestoreHealth - After the scanning process finishes, restart your computer and verify whether the WdFilter.sys BSoD error has been resolved.
3. Update or reinstall the graphics card drivers
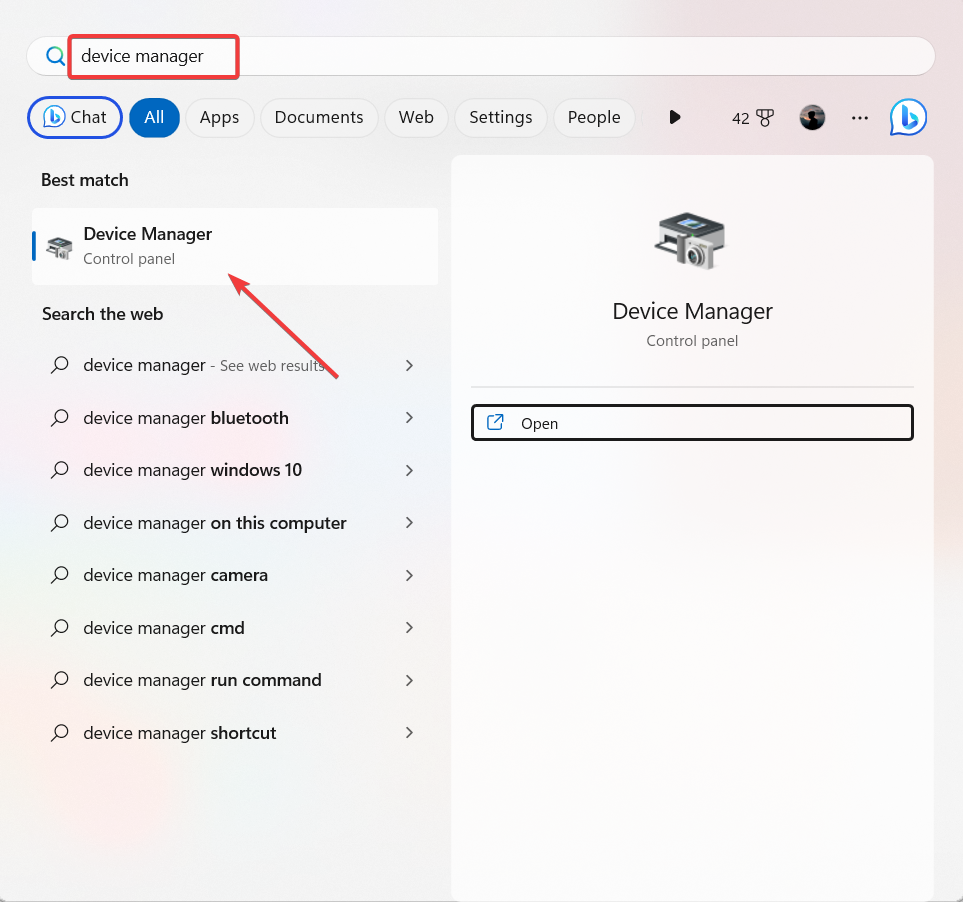
- Click the Start menu button, type device manager, and click on the Device Manager control panel from the search result.
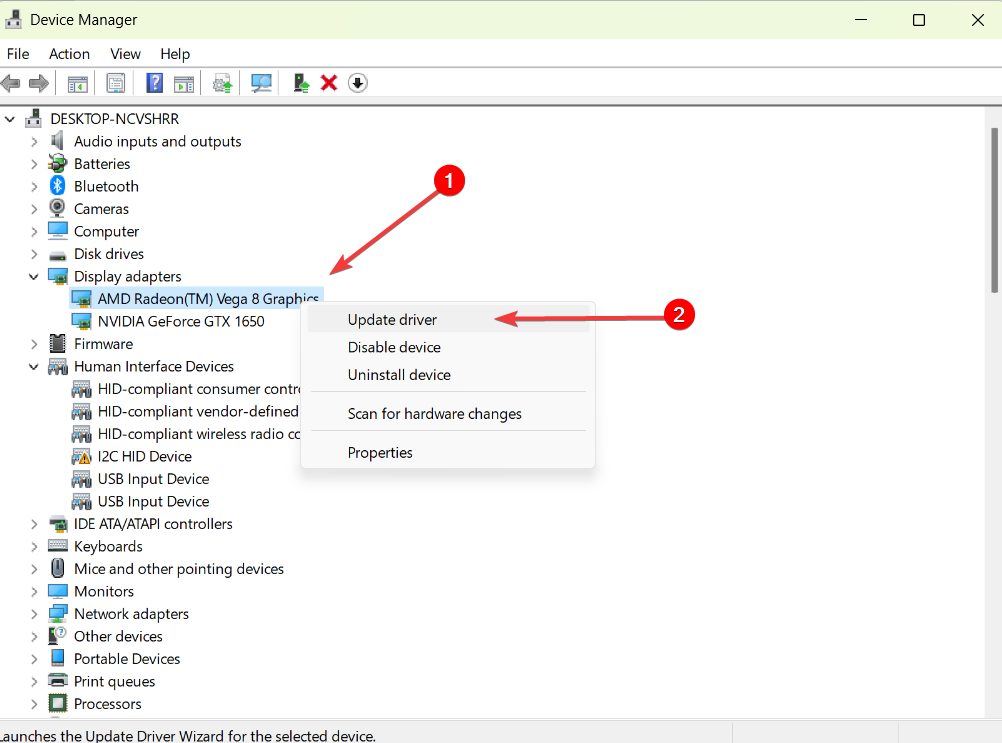
- Click on the Display adapters to expand it and then right-click on the video card driver and select Update driver.
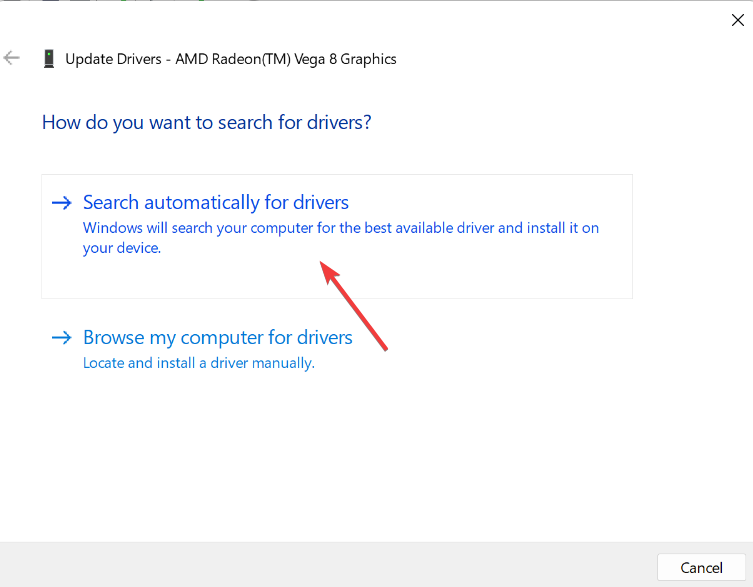
- On the following screen, select Search automatically for drivers.
- If there is an updated driver available, follow the on-screen instructions to install it
- Then, restart your computer.
If the Device Manager fails to update the driver, completely uninstall the driver (Choose Uninstall device option in Step 2). Then manually download the latest driver from the manufacturer’s website. Install the downloaded driver and reboot the computer.
4. Run Driver Verifier
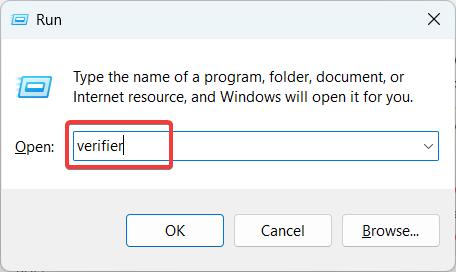
- Press Windows + R to open the Run command box, type verifier, and click OK or press Enter to launch the Driver Verifier Manager.
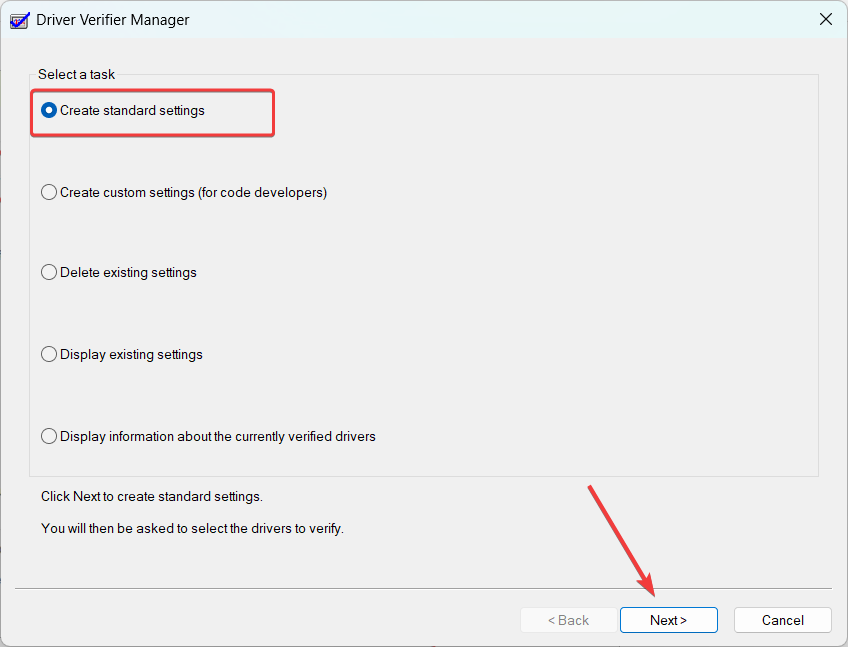
- On the Driver Verifier Manager window, select the Create standard settings radio button and click Next.
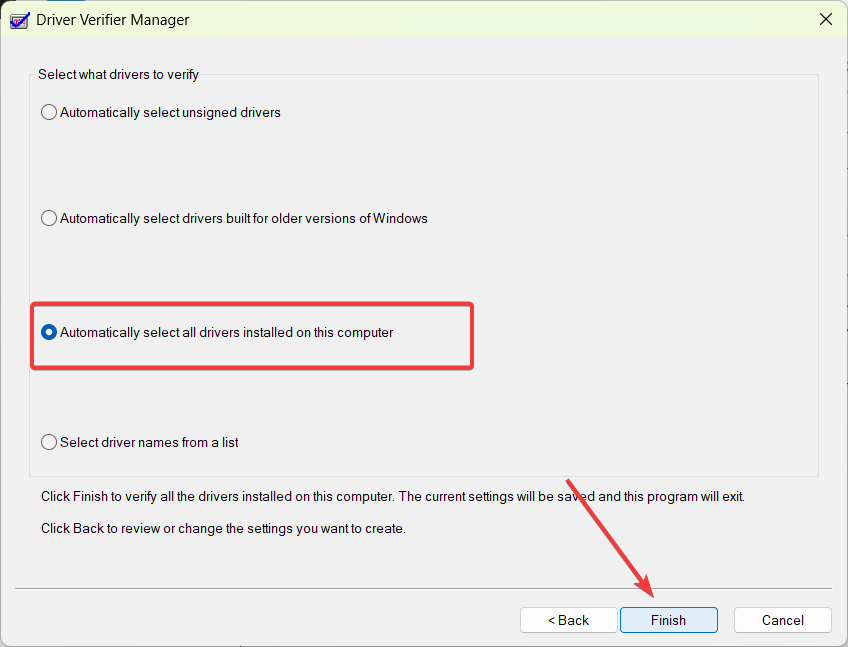
- Now, select Automatically select all drivers installed on this computer and click Finish.
- Restart your computer and use your computer as you normally would.
- Wait for your computer to crash, or if there were specific actions that caused the blue screen before, you could try repeating them to trigger the error again.
- When the system crashes, you will be presented with the buggy driver’s name and the error code. You can use it to fix the issue.
To stop the Driver Verifier app, follow the steps above, but choose the Delete existing settings option in step 2.
5. Boot into Safe Mode with Networking or low-resolution video mode
- Click the Power button on the login screen and then, press and hold the Shift key while clicking on the Restart option.
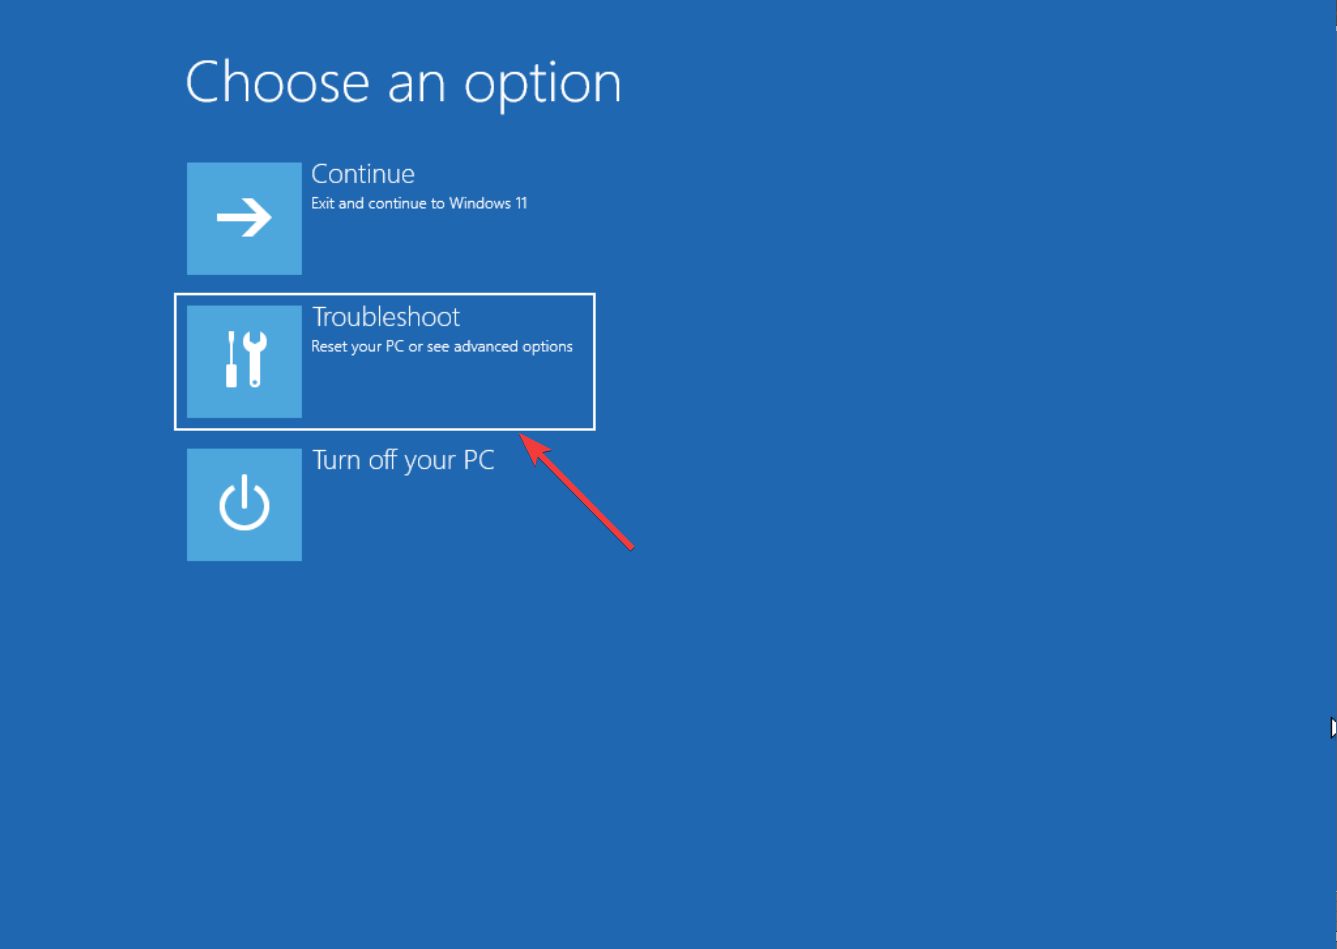
- In the Windows Recovery Environment, select the Troubleshoot option to continue.
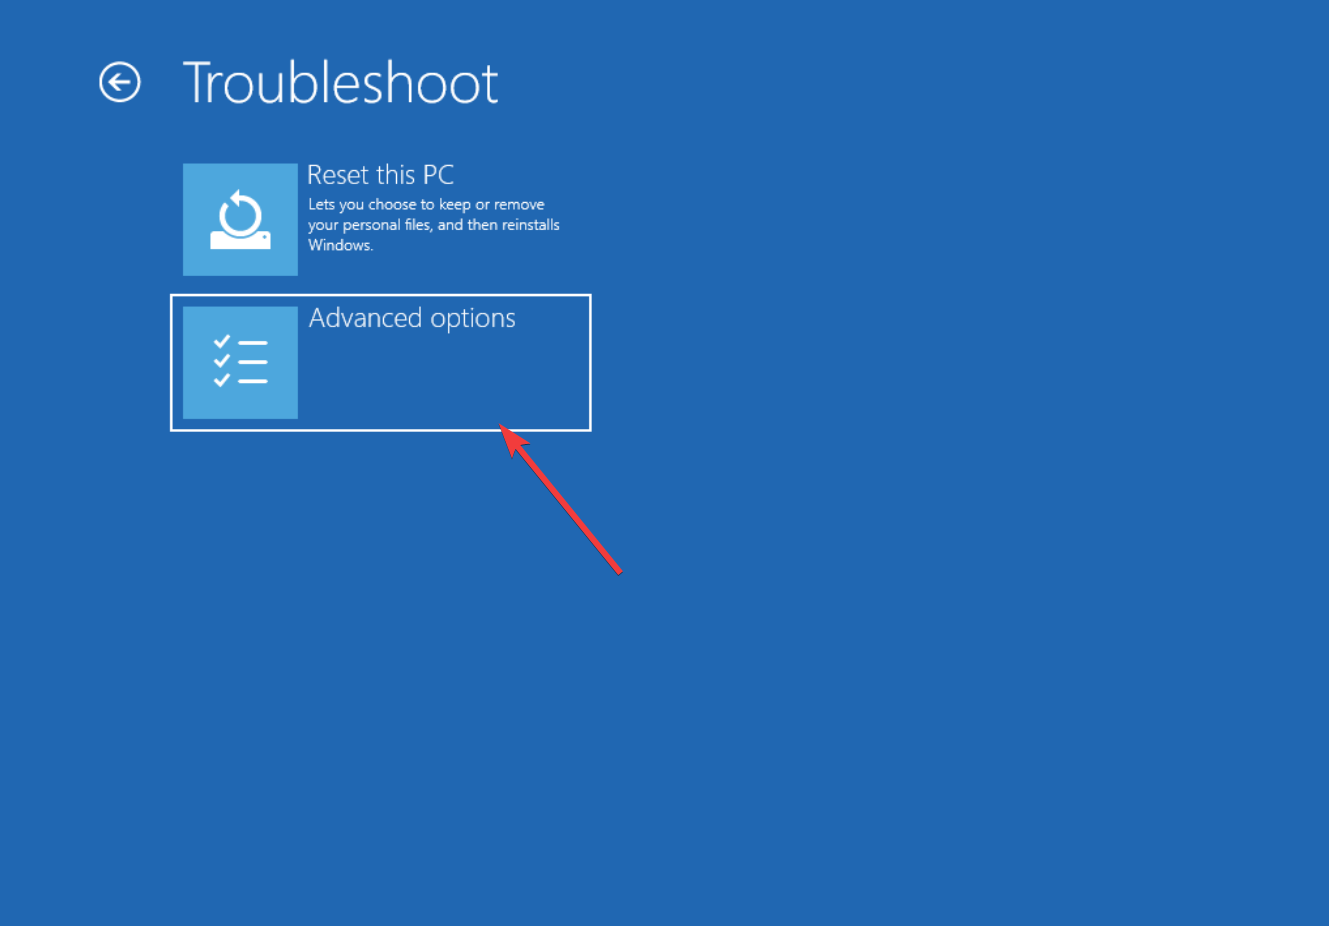
- Next, select Advanced options.
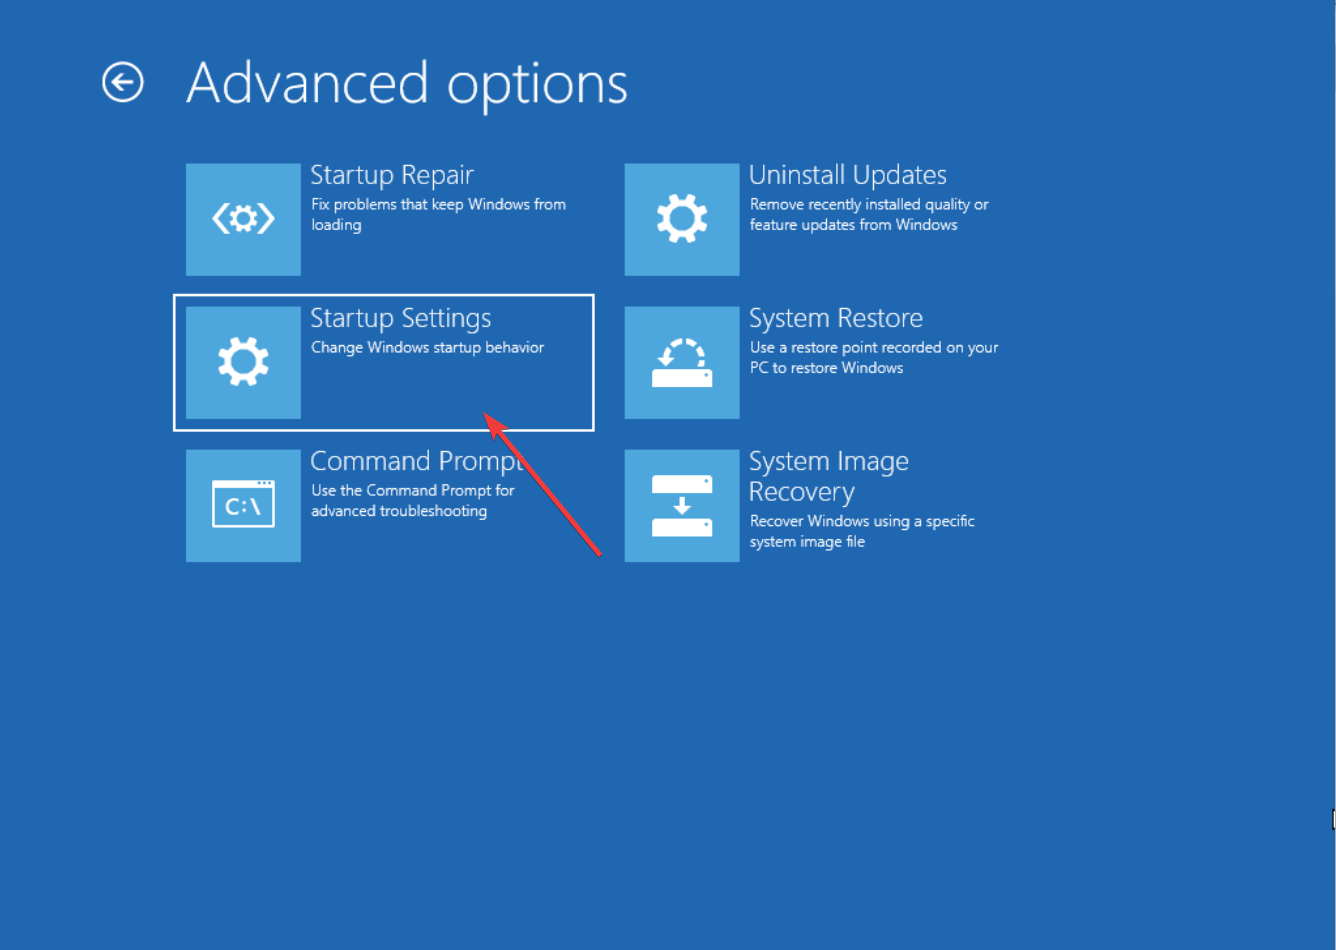
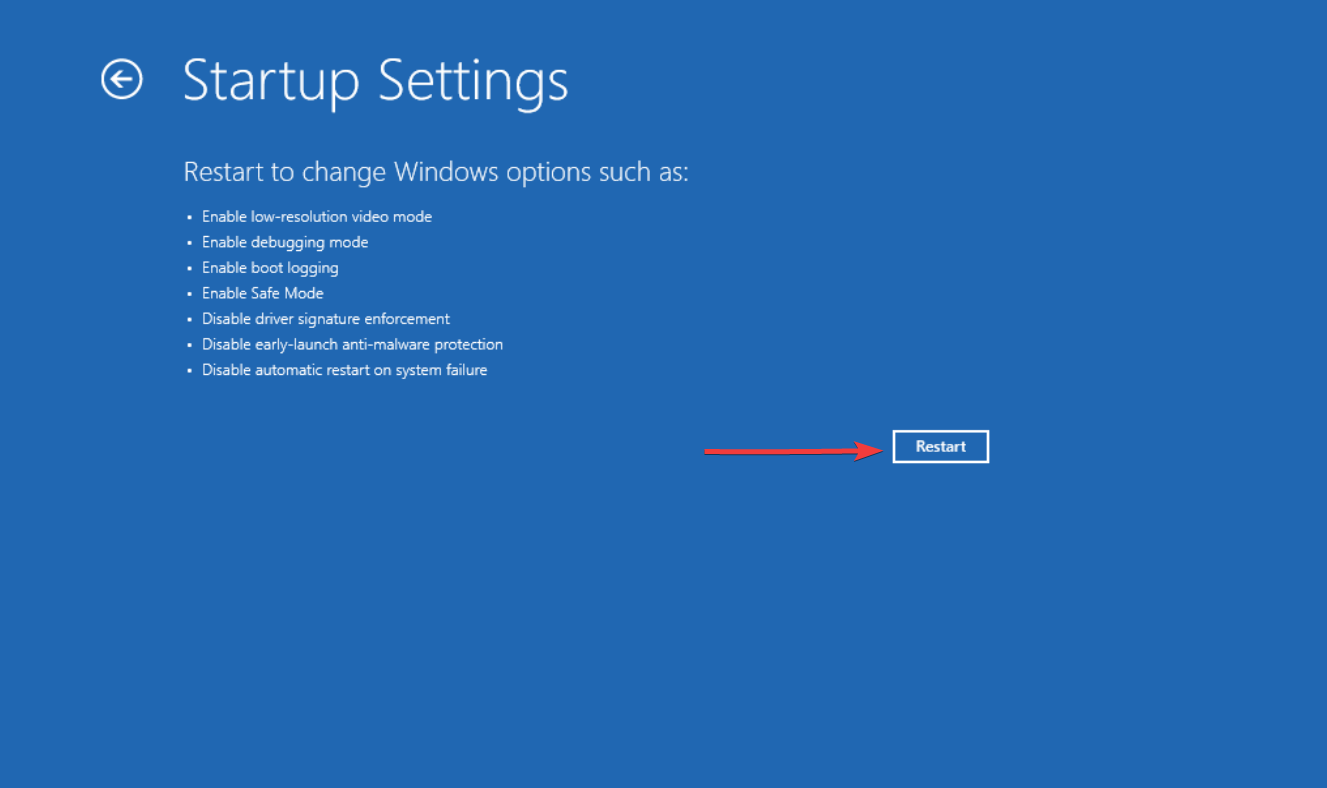
- On the following screen, choose Startup Settings.
- Click the Restart button to reboot your computer and open the start-up-up settings.
- Windows will reboot into Startup Settings with multiple numbered options. Press number 3 on your keyboard for low-resolution mode or press 5 for Safe Mode with Networking.
- Windows will finally boot into Safe Mode or low-resolution mode, depending upon your selection.
The Safe Mode loads only the essential drivers and services needed for the system to run. Once you are in Safe Mode, you can try various troubleshooting steps such as removing recently installed programs, updating drivers, performing system scans for malware, or others.
6. Disable Real-time protection
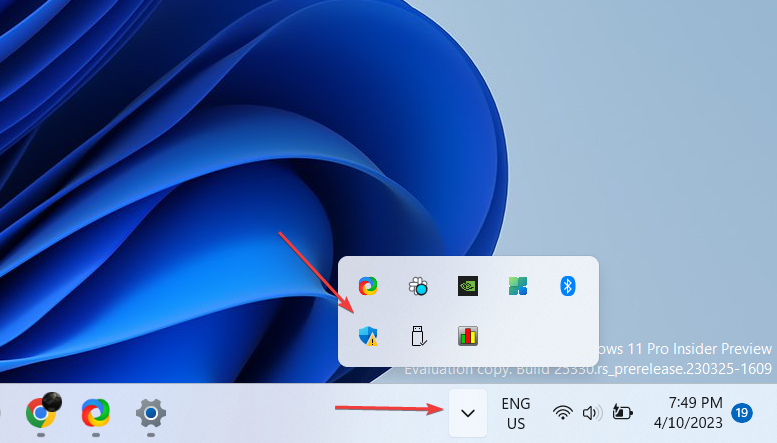
- Click the Show Hidden Icons button on the taskbar to view hidden icons, and click on the Windows Security icon.
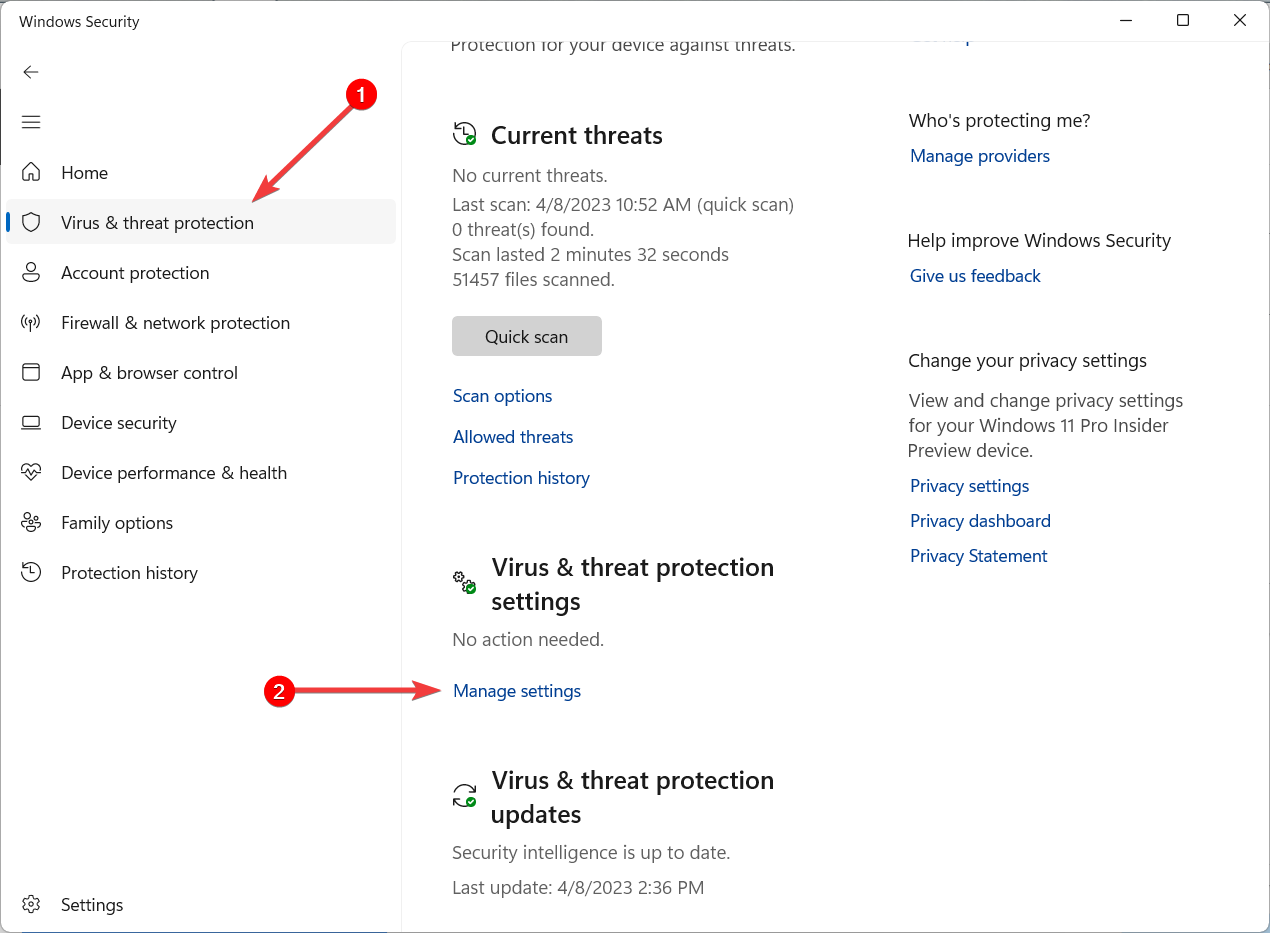
- Navigate to Virus & threat protection on the left-side pane and click Manage settings underneath Virus & threat protection settings on the right pane.
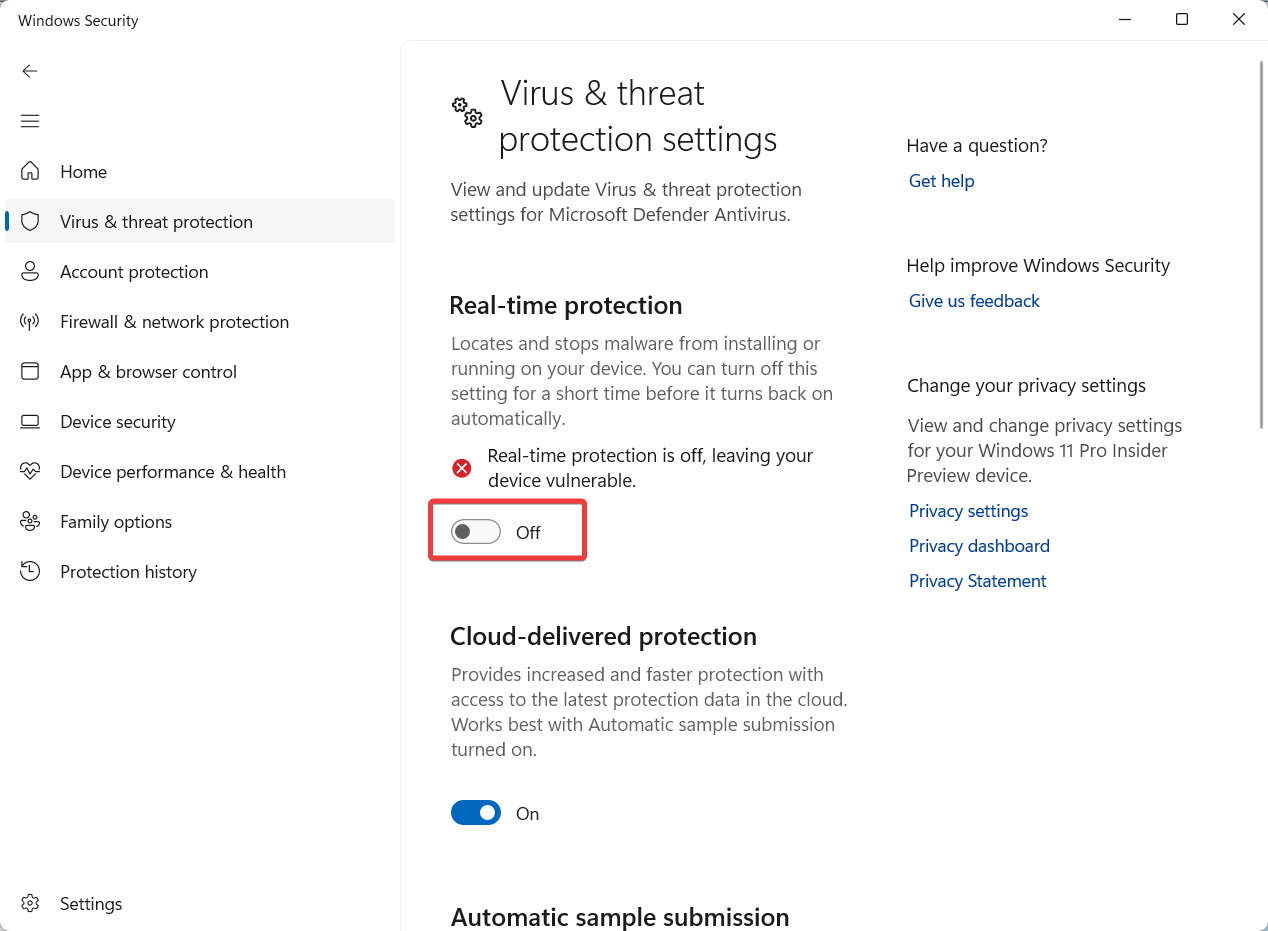
- Then, turn off the toggle under Real-time protection.
7. Restore the Default Startup Configuration for Windows Defender Antivirus Mini-Filter driver
- Press Windows + R to open the Run dialog, type cmd, hold the Ctrl + Shift key, and click OK to run Command Prompt as Administrator.
- Click Yes on the User Account Control (UAC) prompt window.
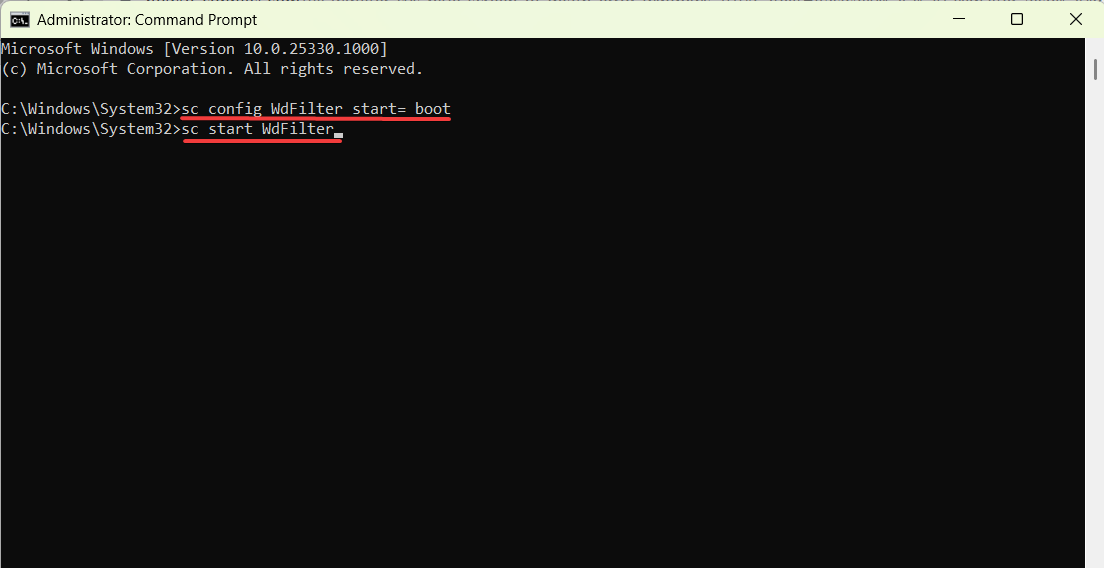
- Type the following commands one after the other and press Enter after each one:
sc config WdFilter start= bootsc start WdFilter - After that, close the Command Prompt and reboot your computer.
If the above methods were not effective in fixing the WdFilter.sys BSoD error on your computer, you could try resetting your PC or take a closer look at our guide on cldft.sys BSOD.
There are many files that can cause these types of errors, and we wrote a guide on how to fix hidparse.sys BSOD, so don’t miss it.
Feel free to use the comments section below if you have any additional questions or suggestions.






User forum
0 messages