How to Delete Domain User Profile on Windows 11 [7 Ways]
Check out the safe ways to delete a domain profile from Windows 11
![]() 7 min. read
7 min. read
![]() Updated on
Updated on
Share this article

Improve this guide
Read our disclosure page to find out how can you help Windows Report sustain the editorial team Read more
Key notes
- Removing a domain profile completely disconnects it from the network.
- It also erases the computer’s files and settings from the profile.
- In this guide, we have given some of the best solutions to remove the domain profile from your Windows 11 PC.

If you are unsure how to delete a domain profile in Windows 11, then you have come to the right place. Because in this guide, we will share with you some of the best and safest ways to delete a domain profile in Windows 11.
User accounts are used by people to authenticate and access resources on a PC. Each user has a user account that is customized the way they want their PCs to be.
There are several instances where you may want to share your programs or documents with someone. Local accounts are stored on the computers, whereas the domain accounts or profiles are saved in Active Directory.
With a domain profile, you can configure the system to access the system and services that are part of the domain.
In this guide, we will learn about how you can delete a domain profile in Windows 11, and want are the effects of removing a domain profile from your PC are. Let us get right into it.
What happens when you remove the computer from the domain?
When you remove the computer from the domain or Active Directory, then it completely disables the domain account of your PC.
This means removing a computer from the domain removes it from the network. Moreover, the computer’s files and settings will also be erased.
The computer will no longer be able to connect to the network. Any files or folders that were shared with the computer will no longer be available.
How do I delete a domain profile?
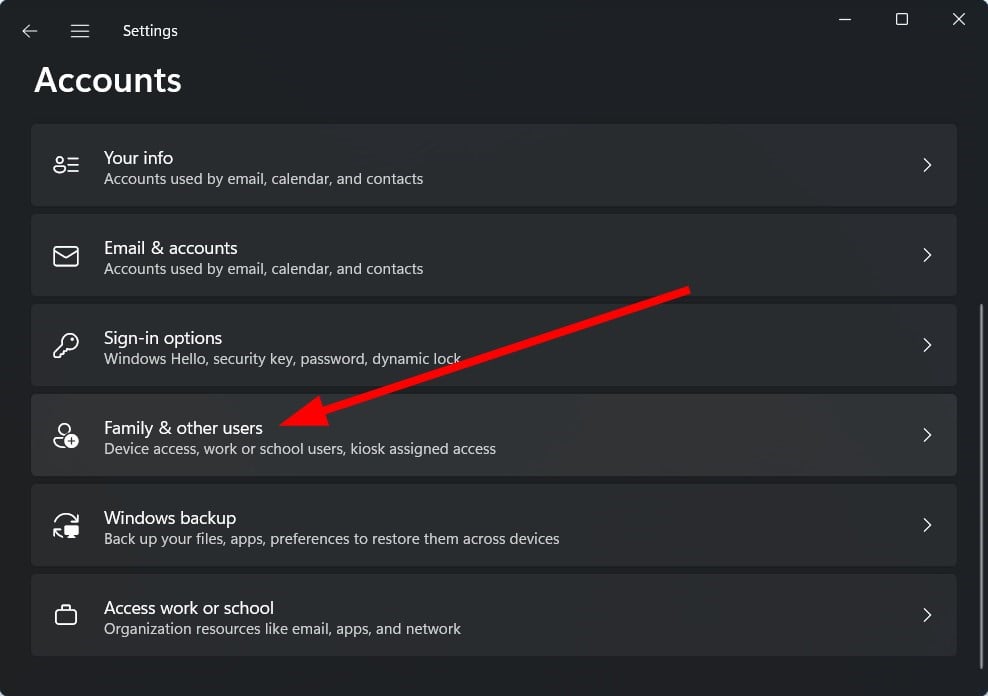
1. Use the Settings app
- Press the Win + I buttons to open Settings.
- From the left side, select Accounts.

- Click on Family & other users on the right side.
- Locate the domain profile you wish to remove under the Other users section.
- Click on the Remove button to remove it.

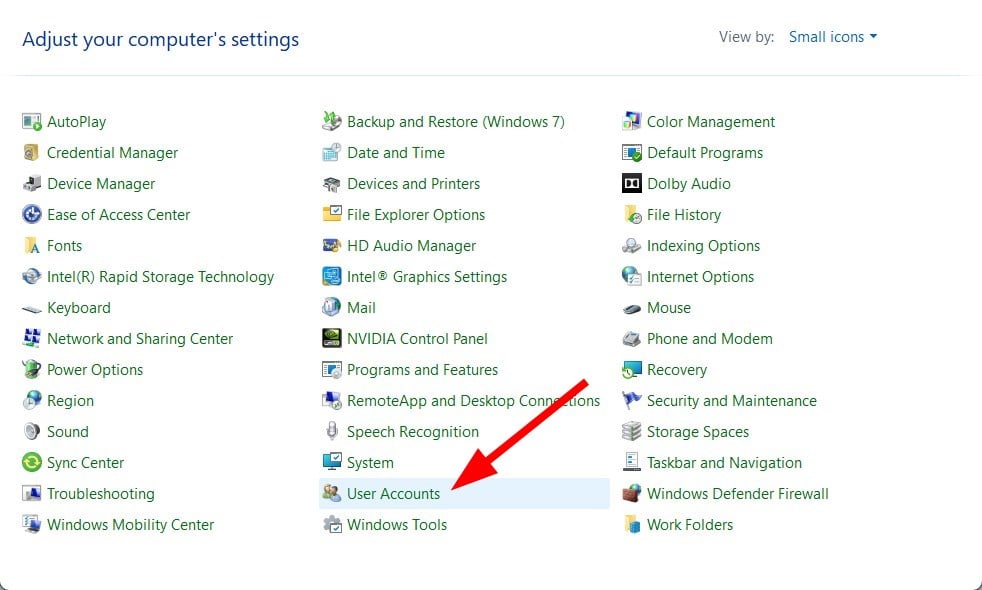
2. Use Control Panel
- Open the Start menu.
- Search for Control Panel and open it.
- Click on User Accounts.

- Click on Remove user accounts.
- It will show you a list of accounts.
- Select the account that you wish to remove.
- Hit the Delete the account button.
- You can choose to either keep or delete the files.
- Click on Delete Account.
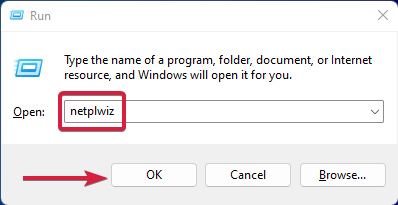
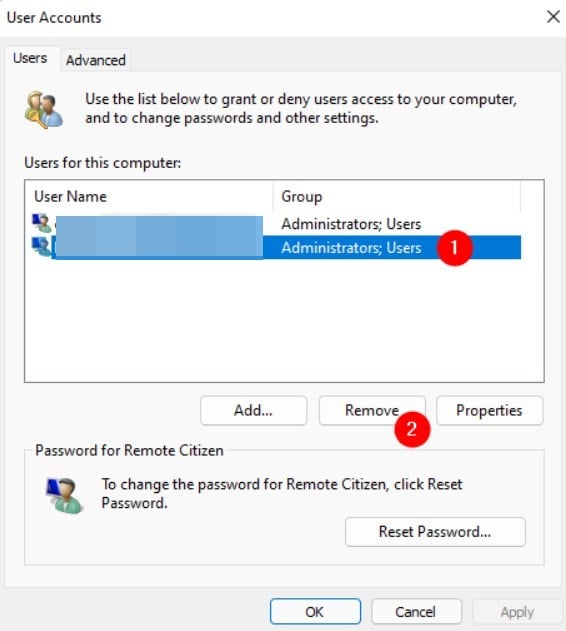
3. Use netplwiz
- Press the Win + R keys to open the Run dialogue.
- Type netplwiz and hit Enter.

- It will open the User Accounts window.
- Select the account that you wish to remove.
- Hit the Remove button.

- In the next pop-up that appears, select Yes to confirm the deletion.
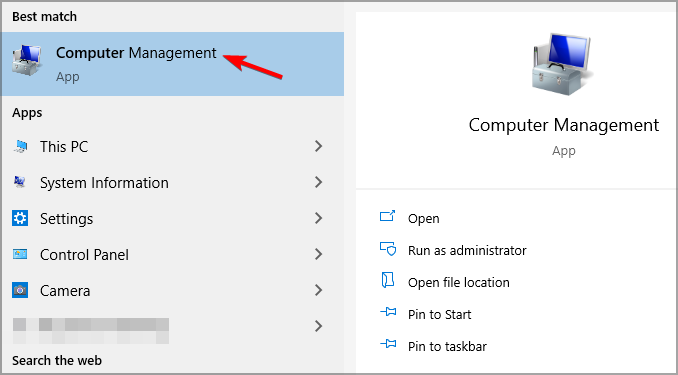
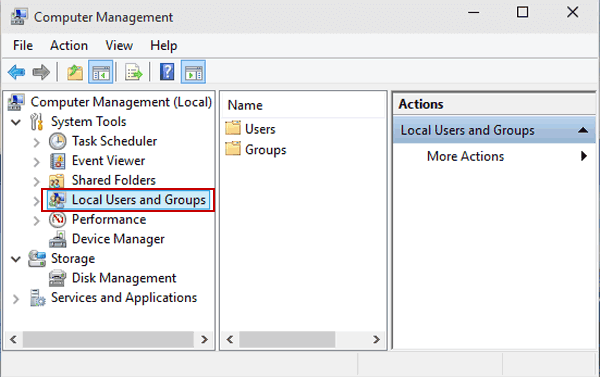
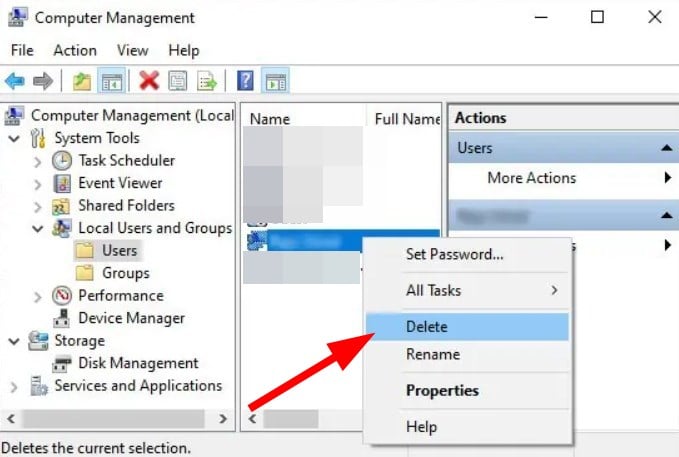
4. Use Computer Management
- Open the Start menu.
- Search for Computer Management and open it.

- Expand System Tools.
- Expand the Local Users and Groups.

- Select the Users folder.
- Right-click on the domain profile your wish to remove from Windows 11.
- From the contextual menu, select Delete.

5. Use Command Prompt
- Open the Start menu.
- Search for Command Prompt and open it as an administrator.
- Type the below command and hit Enter.
net user “username” /delete
You need to replace the username with the actual username of the domain profile you wish to remove. - The account will be immediately removed from your PC.
6. Use PowerShell
- Open the Start menu.
- Search for PowerShell and open it.
- Type the below command and press Enter.
Remove-LocalUser -Name “username”
You need to replace the username with the username of the domain profile you wish to remove from your Windows 11 PC. - The account will be removed from your PC.
How do I rejoin a computer to a domain?
A domain-based network provides the option to centralize the administration of the entire network using a single computer.
Domains allow a computer to log on to any network computer within the network perimeter. Users also get to access permissible resources.
In order to join a domain, you need to have the below details:
- A Windows 11 PC running Professional, Enterprise, or Education
- A suitable account on an Active Directory domain having a username and password
- The device is connected to the same network as the domain with access to the domain controller
Now that you have all the information mentioned above, you are all set to join your computer to a domain. Below are the steps that you need to join a Windows 10 or 11 PC to a domain:
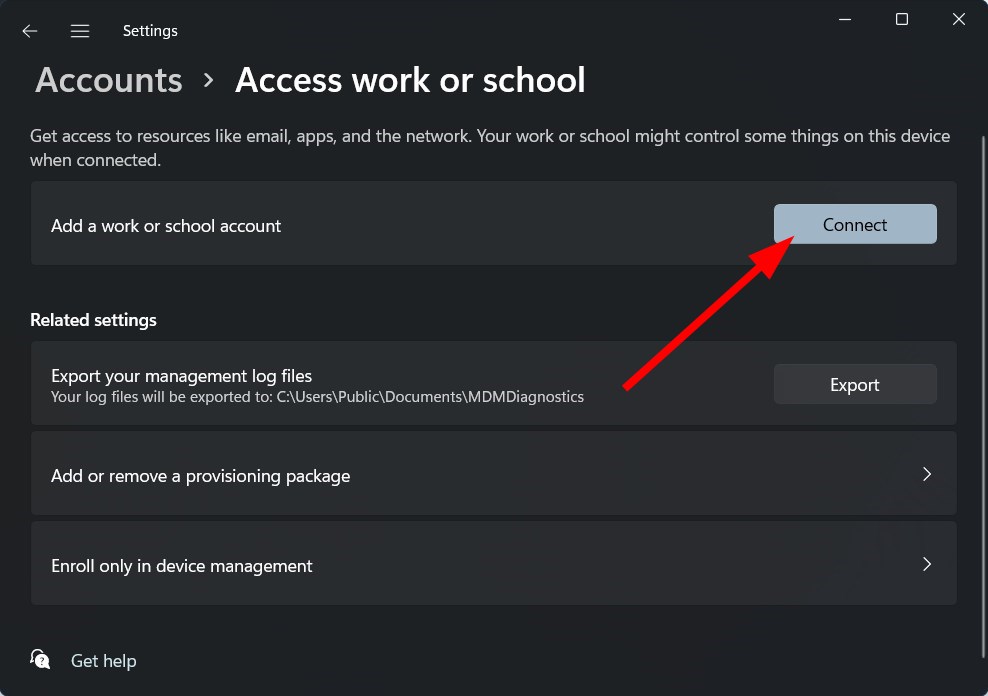
- Open the Start menu.
- Search for Settings and open it.
- On the left side, click on Accounts.

- Click on Access work or school.
- Next to Add a work or school account, click Connect.
- Click on the Join this device to a local Active Directory domain option.
- In the next prompt, type the domain name.
- Click Next.
- Joining the device to the domain requires you to enter the credentials that your network admin has provided you if any.
- In the next Add an account, click Skip.
- Your account will get set up in the Active Directory.
- Restart your PC.
- In the login screen, enter the domain account credentials to access it.
- After you have logged in, head to Settings > Accounts > Access work or school again. Here you can check if you have connected to the domain or not.


Following the above steps, you can easily connect your computer to a domain. Notably, these steps are for Windows 11 PC, and it may vary if you are using Windows 10 or a lower version.
How to leave a domain in Windows 11?
- Open the Settings window.
- Select Accounts from the left side.
- Click on Access work or school.
- Click on the drop-down arrow for Add a work or school account.
- Hit the Disconnect button.
- You will be asked to confirm the action.
- Press Yes, then Disconnect.
- Restart the PC.
If you have followed the above steps carefully, then you will be able to join a domain on your Windows 11 PC in no time. And the steps to leave a domain are also clearly mentioned, so you don’t have to look for the process elsewhere.
Delete domain profile Windows 10/11 greyed out?
You will find multiple search queries where Windows 11 and 10 users have reported that the option to delete the domain profile is greyed out for them.
This is a bit serious because it does not allow you to remove the domain profile from your computer. If you are also experiencing the same issue, we have a solution that will help you delete the domain profile.
It is also one of the ways via which you can delete the domain profile apart from the 6 methods that we have mentioned above. So, consider this as the seventh solution to delete a domain profile from your Windows 10 or 11 PC.
 NOTE
NOTE
- Open the Start menu.
- Type regedit and open the Registry Editor.
- Navigate to the following registry subkey.
HKEY_LOCAL_MACHINE\SOFTWARE\Microsoft\Windows NT\CurrentVersion\ProfileList - In the navigation pane, find the folder that starts with S-1-5 (SID key) followed by a long number.
- You need to click each S-1-5 folder.
- Now find the ProfileImagePath entry in the details pane.
- Double-click to make sure this is the user account profile that has an error for which the domain profile delete option isn’t visible.
- Right-click the SID you want to remove.
- Click Delete.
This is a solution that has been advised by one of the independent advisors and has helped users resolve the delete button greyed out while deleting a domain profile issue.
That is it from us in this guide. We hope that you were able to safely remove the domain profile from your Windows 11 PC, using the seven methods mentioned above.
Let us know in the comments below which one of the above solutions is the one you went ahead to delete the domain profile.