Here are the Windows 11 requirements for VMware and Hyper-V
6 min. read
Updated on
Read our disclosure page to find out how can you help Windows Report sustain the editorial team Read more
Key notes
- Vmware and Hyper-V make it easier to create virtual machines without affecting the main operating systems.
- Both virtual machines work well with Windows 11, and they are some of the best virtual machines in the market.
- Hyper-V and VMware are cheaper and can let you run many errands without trouble.
A virtual machine is computer software that creates a virtual environment on a host computer with its own dedicated memory, hardware, storage, network settings used for different purposes. It gives users the ability to run apps, software, along with cloud testing.
Most virtual machines are free to use, but others have subscription fees for one to access premium features for advanced functionalities and mainly for business users.
Some of the common virtual machines are Hyper-V which comes inbuilt with the Windows operating systems, while VMware is an enterprise virtual machine built by Vmware cloud company.
For example, VMware Workstation is a desktop hypervisor that runs virtual machines on Windows or Linux.
This guide will look at Windows 11 specifications to run Hyper V and Vmware virtual machines without facing any problems.
What are the uses of Hyper-V and VMware?
Keep in mind the folowing aspects regarding virtual machines:
- They help in running several operating systems on one machine.
- It is easier to deploy apps and software, reducing workloads, especially during cloud computing configuration.
- These VMs help in testing apps and softwares that you are unsure of. You use them to test how the app behaves before the release or installation on your local computer or server.
How can I know my Windows 11 specifications are fit for VMware and Hyper-V?
1. Enable Trusted Platform Module(TPM) Version 2
Alternative 1
- Go to the Search box and type Settings, then press Enter.
- Open the Settings app and head over to Privacy & Security tab.
- Select the Windows Security option.
- Choose the Device Security option.
- If there are Security Processor details, select it to verify if it’s version 2.0, and if you do not see any processor, you have to enable the TPM. If this step is hard, use the next step.
Alternative 2
- Press Windows + R to open the empty search box.
- Type tpm.msc and click OK.
- If you see a message confirming TPM is ready, verify the version to make sure it’s 2.0. If you see compatible TPM unavailable, you will have to turn it on.
How to turn TPM on
- Restart your machine.
- Enter the BIOS setup using your boot key, either Esc, F10, F2, F9, and go to the security settings.
- Select the TPM Embedded Security and turn it on.
- Click Save to update the changes, and Exit the BIOS by restarting the computer.
TPM 2.0 makes sure Windows 11 provides identity protection, BitLocker data protection, and other features.
It stores passwords, certificates, encryption keys from hackers. Most of the computers have these features but are off, and it’s you to turn them on.
2. Enable UEFI to Secure Boot
- Restart your computer.
- Boot your computer by pressing the relevant keys, either F9, F10, F2, or F1, to enter into BIOS Setup.
- Change the Boot mode from Legacy mode to UEFI.
Having secure boots help in preventing malware attacks or software when the machine starts. Many PCs come with this feature, but you have to do it manually if your PC doesn’t support it.
All the changes in the BIOS(Basic Input Output System) get done. Most of these settings vary with the type of PC manufacturer. If this step doesn’t work for your PC, try visiting the manufacturer’s website and check how to change this setting.
3. Enable Hardware Virtualisation in the hardware
- Shut down your computer.
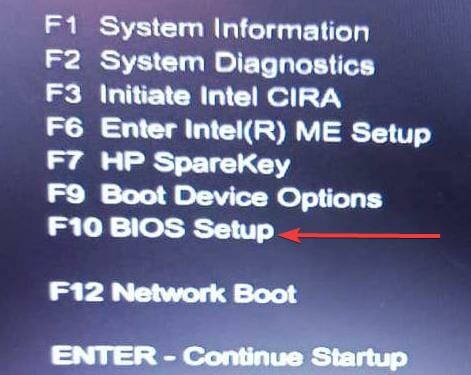
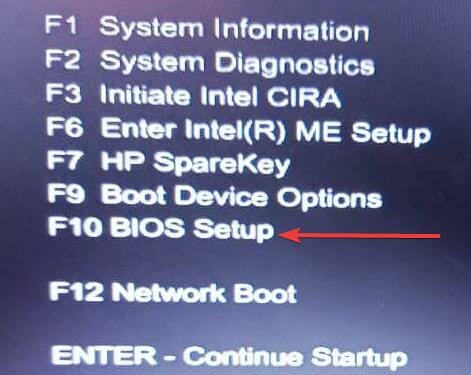
- Start the computer and press F10 to enter into the BIOS Setup.Some computers use F9, F2, F12, F2, DEL, or Esc keys.
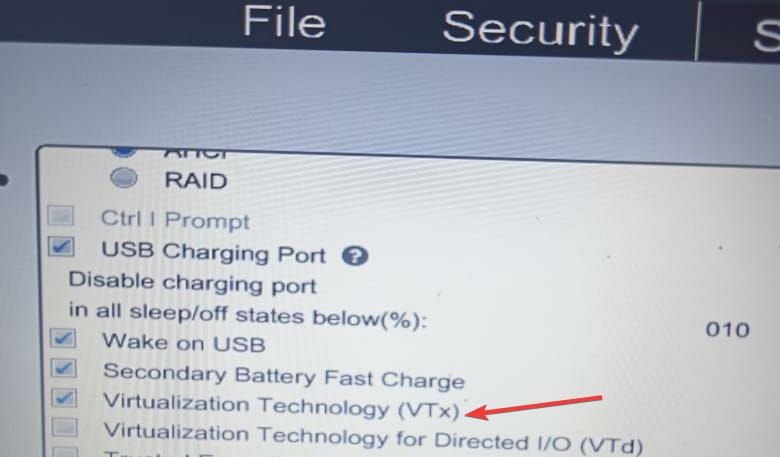
- Select the Configuration tab.
- Choose the Virtualization Technology(VTx) option by moving the down arrow key.
- Save the changes by pressing Save and Exit the BIOS.
- Restart the machine, and you will be able to use Hyper-V and VMware.
4. RAM of 4GB
The computer must have a minimum Random Access Memory(RAM) of 4 GB. Having more memory makes the machine run fast without hanging problems.
5. 1 gigahertz(GHz) processor
You have to make sure that it is compatible with a 64-bit processor and supports AMD, Intel, and Qualcomm processors.
The processor must have two or more cores. It should have second-level address translation that makes sure Hyper-V retrieves data that turns virtual addresses into physical memory, saving memory and CPU usage.
6. Hard disk storage of 60GB and above
It should have minimum storage of 64GB and above. You have to set more storage for future Updates.
7. Graphics card compatible with DirectX 12
It helps improve multimedia usage, i.e., games, audio, graphics, and network graphics.
8. Good Screen Display
The screen display should have 720 Higher Definition that shows 8 bits per color channel. It makes running with the virtual machine’s monitor mode extensions easier.
How can I benefit from running Hyper-V and VMware?
They are more secure by providing extra layers of security to avoid any cybersecurity attacks. It helps in the easier recovery of your servers, data, and apps in case of a malware or cybersecurity attack. They are more secure by providing extra layers of security to avoid any cybersecurity attacks.
It reduces the cost and time since there is no need to set up physical servers, and it’s fast to set up the apps and software on virtual machines.
Due to little or no server downtime, it improves business functioning, especially the apps. They are easier to move the business functionalities from one virtual machine to another in case of any troubles.
It increases productivity in business since all the business products get deployed in one place.
Due to its recent launch, many people struggle to set up virtual machines on Windows 11.
Everyone is embracing virtualization from businesses and individuals. You have to be careful when setting them up to avoid simple mistakes like improper configuration that can lead to cyberattacks, improper running of the apps, e.t.c.
There are several ways to install Hyper-V on your Windows 11 PC. The Hyper-V and VMware give many opportunities to try a lot of stuff from testing, deployment, etc.
You can also look at other virtual machines for Windows 11 that can help you out. For any questions or suggestions about this topic, drop a comment below.


