WSAPPX High CPU on Windows 11: How to Quickly Reduce it
Disabling the Windows Store is a quick way to fix the high CPU usage
Key notes
- The WSAPPX process on Windows 11 is important for installing, updating, and removing Windows Store apps.
- If the process is registering high CPU usage, it might be because of the presence of viruses on your PC.
- A quick way to fix this high CPU usage is to boot your PC in Safe Mode.

WSAPPX is a necessary process on Windows 11 that takes care of removing, installing, and managing apps from the Microsoft Store. However, this important process can sometimes run into problems and start registering high CPU usage.
This is an unusual occurrence. Thankfully, just like the Widgets high CPU usage issue, this problem can be fixed, as shown in this guide.
How to disable WSAPPX in Windows 11?
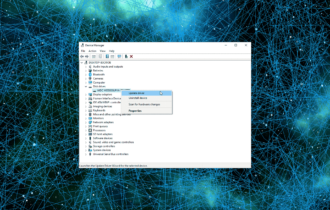
- Press the Windows key + X and select Task Manager.

- Right-click the wsappx option.
- Now, select the End task option.

The WSAPPX on Windows 11 process comes in handy when updating or downloading the Microsoft Store. So, if you are not using the app and find the process running, you can disable it by following the steps above.
How to fix WSAPPX high CPU usage in Windows 11?
1. Disable Windows Store
1. Press the Windows key + R, type gpedit.msc, and click OK.

2. Navigate to the path below in the left pane:
HComputer COnfiguration\Administrative Templates\Windows Components\Store3. Now, double-click the Turn Off the Store application option in the Store folder.

4. Tick the radio button for Enabled.
5. Finally, click the Apply button, followed by OK to save the changes.

The WSAPPX process, as mentioned earlier, is connected to the Windows Store on Windows 11. So, to stop the high CPU usage, you can disable the Store app.
Sometimes, WSAPPX can also cause excessive disk activity in addition to high CPU usage. To learn how to manage both issues effectively, visit our detailed guide on WSAPPX high disk usage for extra troubleshooting methods.
2. Scan for malware
- Press the Windows key, type virus, and select Virus & threat protection.

- Click Scan options.

- Now, select your preferred scan option and click Scan now.

If the WSAPPX consumes high resources on Windows 11, you might need to scan for viruses. This is because a virus might be disguised as the process to consume your PC resources.
3. Perform a clean boot
- Press the Windows key + R, type msconfig, and click OK.

- Click the Services tab at the top, check the box for Hide all Microsoft services, and click Disable all.

- Now, click the Startup tab at the top and select Open Task Manager.

- Right-click each of the services there and select Disable.

- Finally, go back to the System Configuration window and click the Apply button, followed by OK.

If the fixes above failed to solve the WSAPPX high CPU usage on Windows 11, you need to perform a clean boot. This is because a third-party app or process might be causing the issue.
If the process does not occur, you need to enable the disabled apps and services in batches to find the problem.
There you have everything you need to fix the WSAPPX high CPU usage on Windows 11. We hope you can fix the issue in the comments below.
If you are facing the System Idle Process high CPU usage issue on Windows 11, check our detailed guide to fix it quickly.
Feel free to let us know the solution that helped you fix this issue in the comments below.
Read our disclosure page to find out how can you help Windows Report sustain the editorial team. Read more


Improve this guide


User forum
1 messages