0x87d00669 SCCM Update Error: How to Fix It
The reason for the error could be insufficient permissions
![]() 4 min. read
4 min. read
![]() Updated on
Updated on
Share this article

Improve this guide
Read our disclosure page to find out how can you help Windows Report sustain the editorial team Read more
Key notes
- This update error could occur if the content is missing, or boundary or boundary groups are not properly set.
- You can check the boundaries, and boundary groups, or redistribute content to fix this issue.

If you have encountered the 0x87D00669 (-2016410007) error while deploying updates via SCCM on a computer, this guide can help!
This error indicates that the client’s computer can’t find the update in the distribution package. We will discuss some popular fixes to resolve the issue in no time.
What causes the 0x87d00669 SCCM update error?
There are several reasons for the update error to occur; some of the common ones are listed here:
- Content corrupted– If missing or corrupted, the content (update package & files) required for update installation may cause this SCCM update error.
- Permission issues – The user account running the SCCM client doesn’t have appropriate permissions to install updates on the client’s machine.
- Client communication issues – If the client machine cannot communicate with the SCCM server due to firewall settings or network issues, it could lead to an error.
- Missing Boundaries and Boundary Groups – The apps or updates are installed after locating the distribution point and downloading the content; if the client can’t access the content, you might see this error. Check boundaries and boundary groups to ensure the network location is correctly set.
Now that you know how the error occurred, let us move on to the steps to fix the problem.
How can I fix the 0x87d00669 SCCM update error?
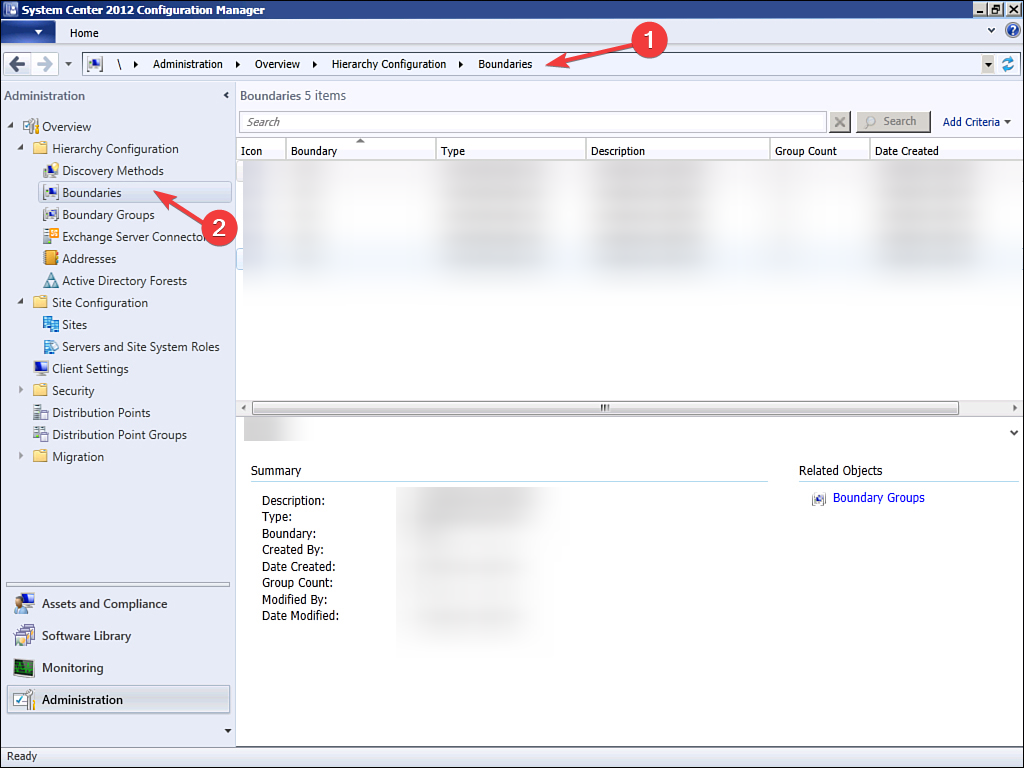
1. Check the boundaries
- Press the Windows key, type configuration manager console, and click Run as administrator to launch SCCM.
- Navigate to this path:
Administration\Overview\Hierarchy Configuration\Boundaries
- Now check the boundary set as IP range or anything appropriate.
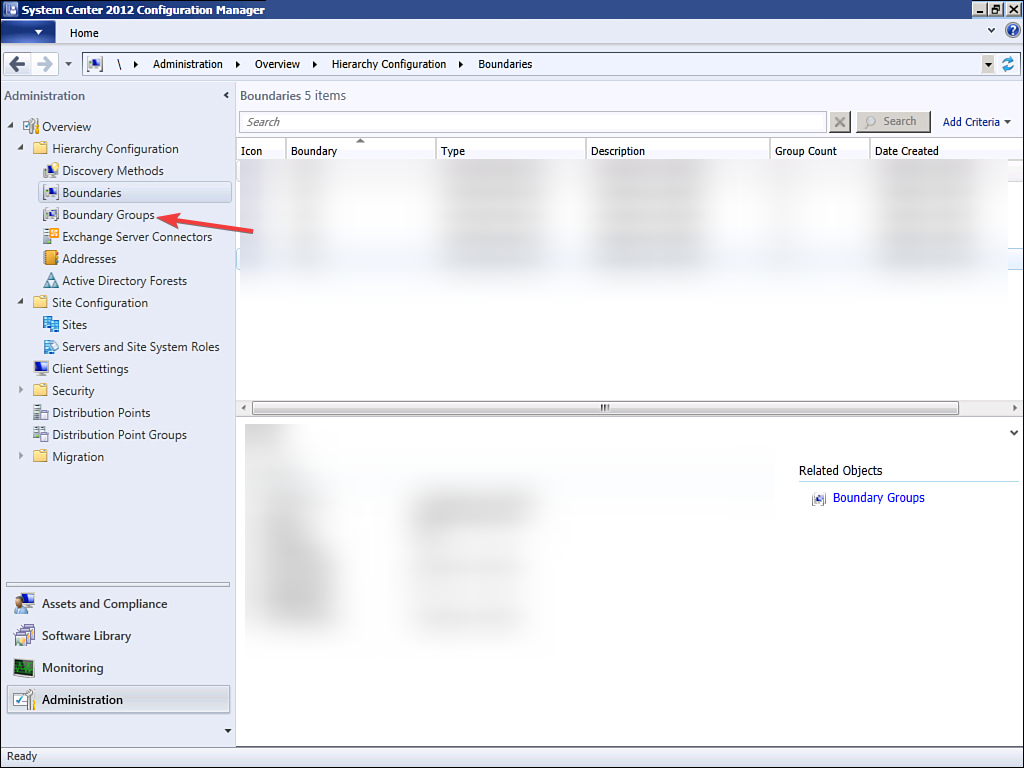
2. Check the boundary groups
- Press the Windows key, type configuration manager console, and click Run as administrator to launch SCCM.
- Go to this path:
Administration\Overview\Hierarchy Configuration\Boundary Groups - Select a boundary group, and right-click it to choose Properties.
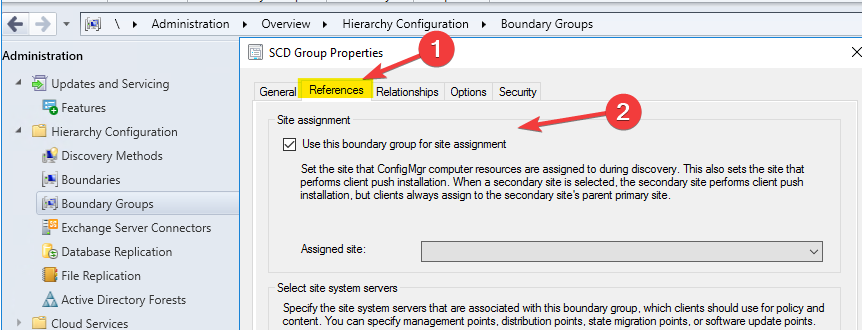
- Switch to the References tab, and click Add to add a new boundary.
- In the Add Boundary window, choose the type of boundary you want to add. You can select among IP subnet, Active Directory site, IPv6 prefix, or IP address range.
- Configure the properties of the boundary according to the selected boundary type and click OK.
- On the References tab, place a checkmark next to Use this boundary group for site assignment and click OK to save the changes.

3. Redistribute an application to the distribution points
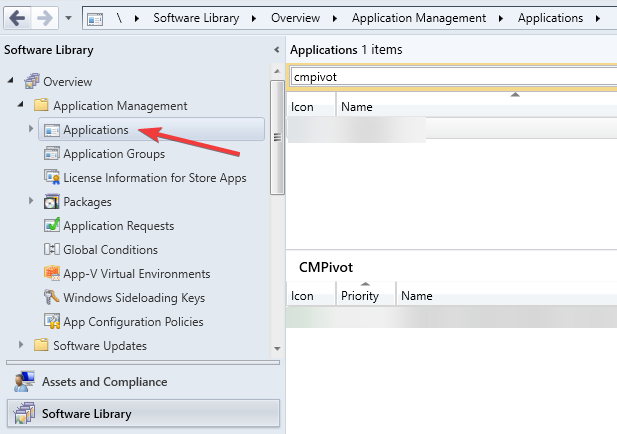
3.1 Use the Software Library
- Press the Windows key, type configuration manager console, and click Run as administrator to launch SCCM.
- Navigate to this path:
Software Library\Application Management\Applications
- Select the application from the available options: Package, Software Update, Applications, Boot Image, Operating system images, and more.
- From the Home tab, click Properties.
- In the Properties wizard, on the Content Locations page, select the distribution points or distribution points groups and click Redistribute.
- Click OK on the following prompt.
3.2 Use the Administration workspace
- On the SCCM console, go to this path:
Administration\Overview\Distribution Points
- Select the distribution point to which you want to redistribute the content.
- From the Home tab, select Properties.
- Go to the Content tab, select the content, and click the Redistribute button.
- Click OK.
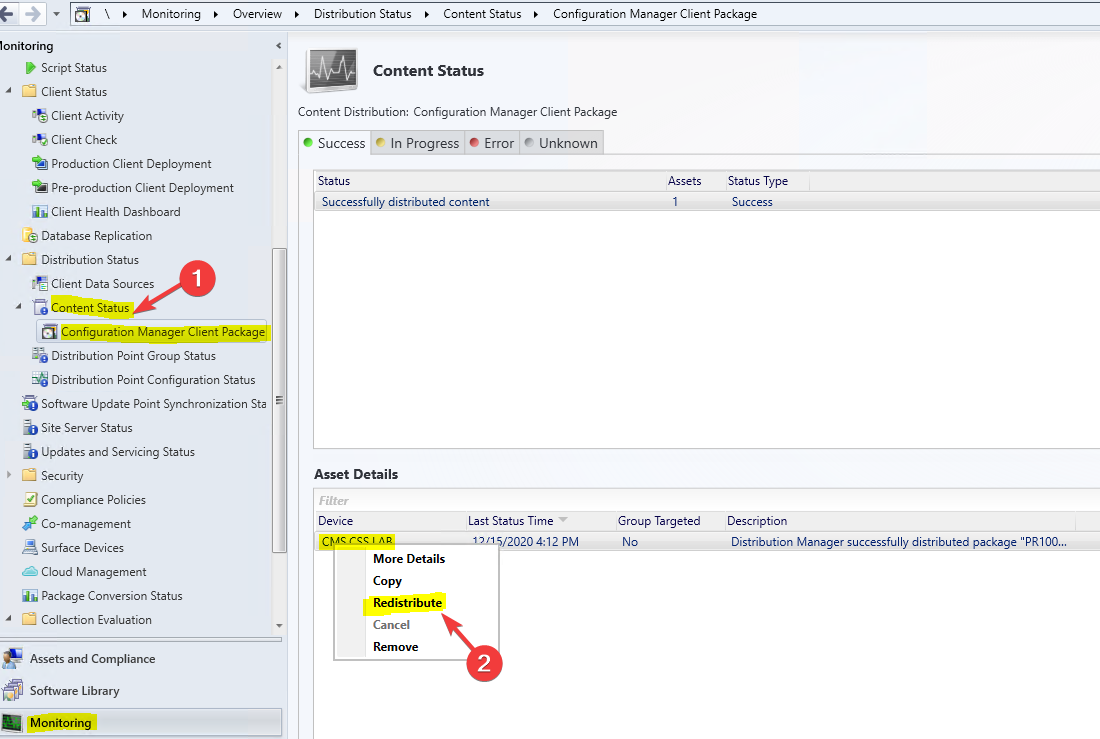
- Go to this path and check if the application content is copied successfully:
Monitoring\Overview\Distribution Status\Content Status - Right-click on the content and select View Status.
- If there is an issue, right-click the Distribution point and select Redistribute again.


In case you’re looking to upgrade your Windows 7 computer to Windows 10 using SCCM, make sure to check out our article.
So, these are the steps you need to follow to fix the 0x87d00669 SCCM update error. If you have any questions or suggestions, please feel free to mention them in the comments section below.