Upgrade from Windows 7 to Windows 10 using SCCM
Windows 7 has reached the end of its life, and due to security concerns, everyone is urged to upgrade to Windows 10 immediately.
The problem is that this isn’t easy when you have multiple PCs that need upgrading, such as the case of IT admins in big companies. That is why using software solutions such as the SCCM (System center configuration manager) is advised.
It allows users to manage a large number of Windows-based computers, as it includes remote control properties, patch management, operating system deployment, network protection, and other various services.
In the case at hand, the SCCM can be used to upgrade multiple Windows 7 PCs to WIndows 10 at once, without going through each PC one by one.
How do I upgrade from Windows 7 to Windows 10 with SCCM?
The first step is to set up the SCCVM sequence, which you can do by following these steps:
1. Set up the SCCM sequence
- Launch the SCCM Console
- Go to Software Library
- Select Operating Systems
- Select Task Sequences
- Right-click Task Sequences
- Select Upgrade an operating system from upgrade package
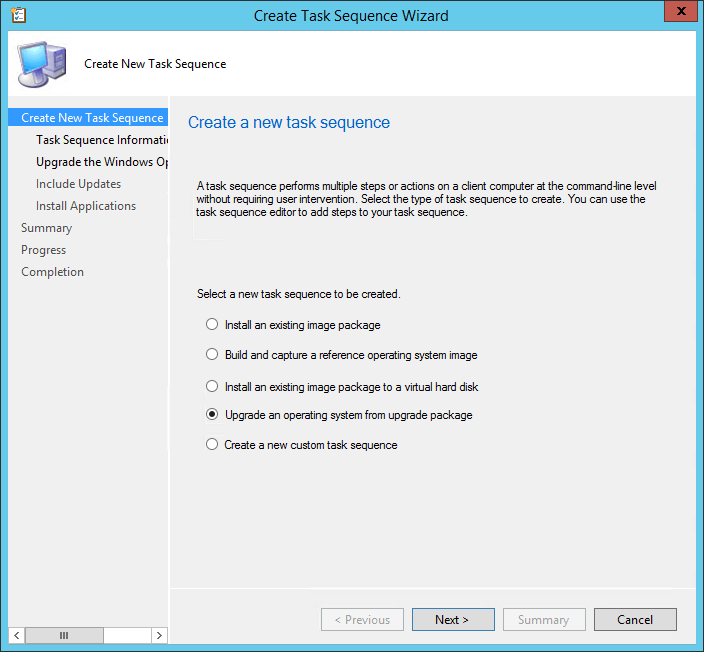
- Go to the Task Sequence Information tab
- Enter a Task Sequence Name and Description
- Go to the Upgrade the Windows Operating System tab
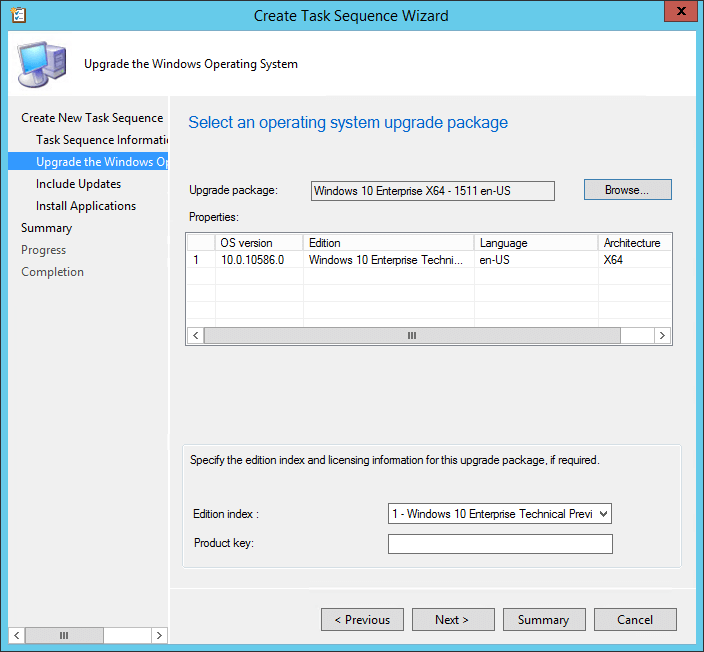
- Use the Browse button to select your upgrade package
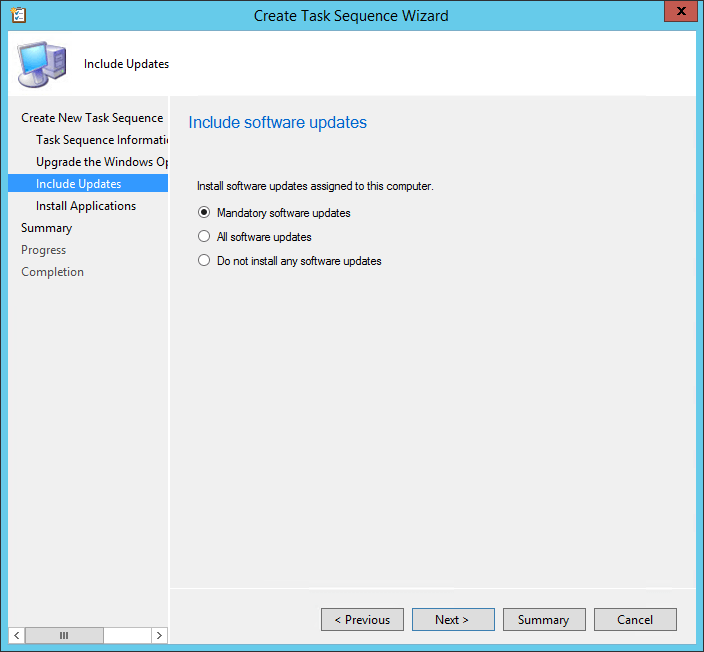
- Go to the Include Updates tab
- Select one of the following Software Update tasks:
- All Software Updates
- This will install the updates regardless of whether there is a deadline set
- Mandatory Software Updates
- This will only install updates from deployments that have a scheduled deadline
- Do not install any software updates
- This will not install any software update during the Task Sequence
- This will not install any software update during the Task Sequence
- All Software Updates
- Go to the Install Applications tab
- Select any application you want to add to your upgrade process
- Go to the Summary tab
- Review your choices and click Next
- In the Completion tab, click Close
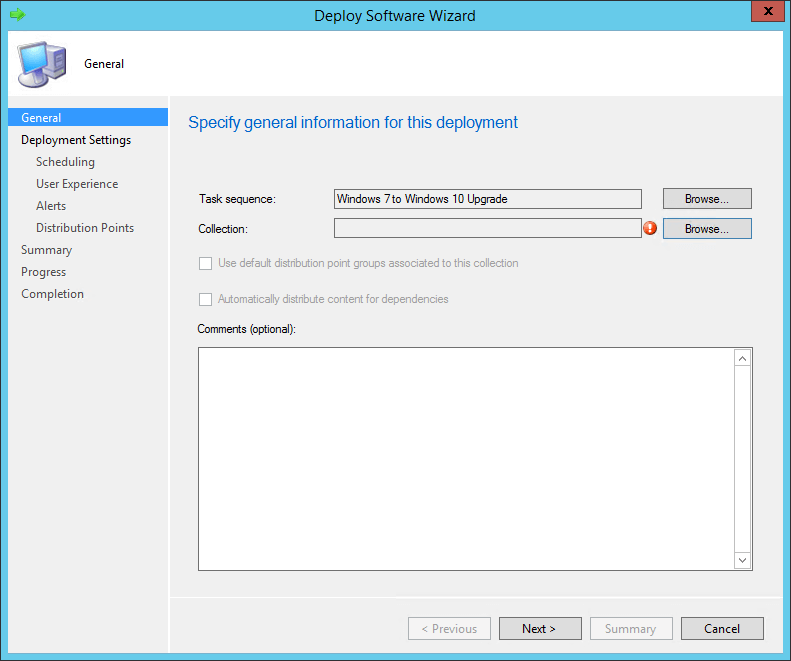
2. Deploy the SCCM sequence
- Go to Software Library
- Choose Operating Systems
- Select Task Sequences
- Right-click Task Sequences and then select Deploy
- In the General pane, select a collection
- In the Deployment Settings tab, select the Purpose of the deployment:
- Available
- This will prompt the user to install at the desired time
- Required
- This will force the deployment at the deadline (see Scheduling)
- This will force the deployment at the deadline (see Scheduling)
- Available
- In the Scheduling tab, enter the date and time
- In the User Experience pane, select whatever options suit you better
- Check Create a deployment alert when the threshold is higher than the following check-box in the Alerts tab if you want to create a failure alert
- In the Distribution pane, select your Deployment options
3. Begin the upgrade process
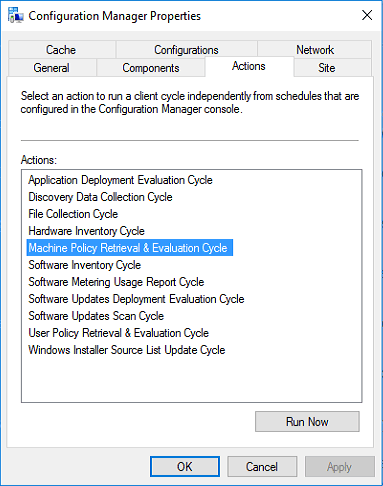
- Log into a Windows 7 PC
- Open the Configuration Manager Icon
- Go to the Actions tab
- Select Machine Policy Retrieval & Evaluation Cycle
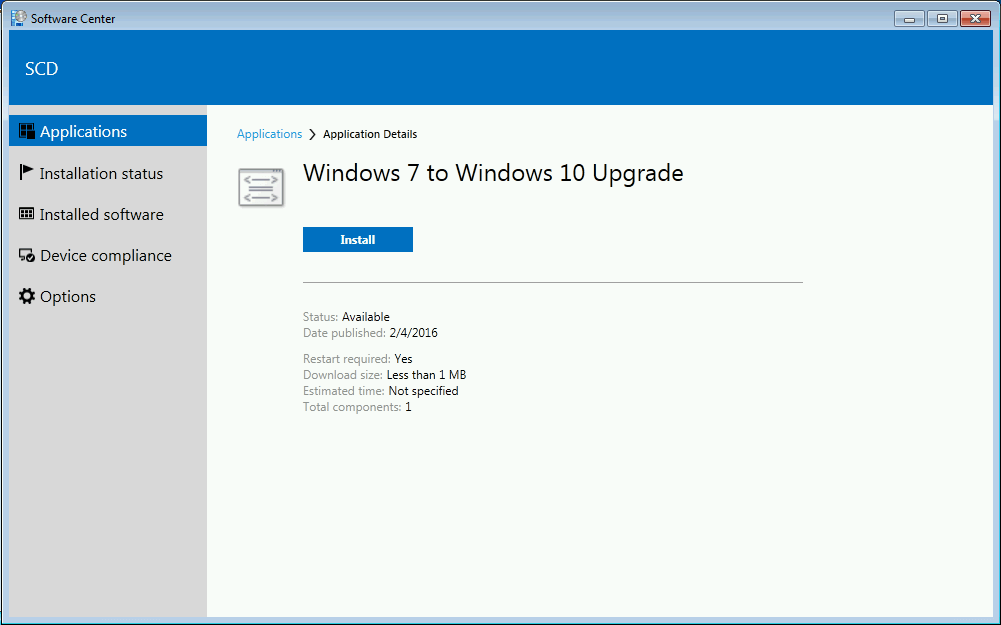
- Open the new Software Center from the Windows 7 Start Menu
- Here you will see the SCCM sequence you created earlier
- Click it, and select Install
- In case a warning will appear, disregard it and select Install Operating System
- Let the upgrade unfold
By following these steps, you should be able to efficiently upgrade a Windows 7 PC to Windows 10 by using an SCCM sequence.
Do you think that this is an efficient method of upgrading Windows 7 PCs? Let us know in the comment section below.
RELATED ARTICLES YOU SHOULD CHECK OUT:
Read our disclosure page to find out how can you help Windows Report sustain the editorial team. Read more


Improve this guide


User forum
0 messages