0xc1190011f on Windows 11: How to Fix This Update Error
Facing the error 0xc1190011f? Try these simple fixes
![]() 4 min. read
4 min. read
![]() Updated on
Updated on
Share this article

Improve this guide
Read our disclosure page to find out how can you help Windows Report sustain the editorial team Read more
Key notes
- When you try to download or install a major update like Windows 11 22H2, the error code 0xc1190011f may appear.
- Internal component problems, third-party services, etc., can cause this issue.
- To solve this problem, you can reset the software distribution folder, run the update troubleshooter and do the other things recommended in this article.
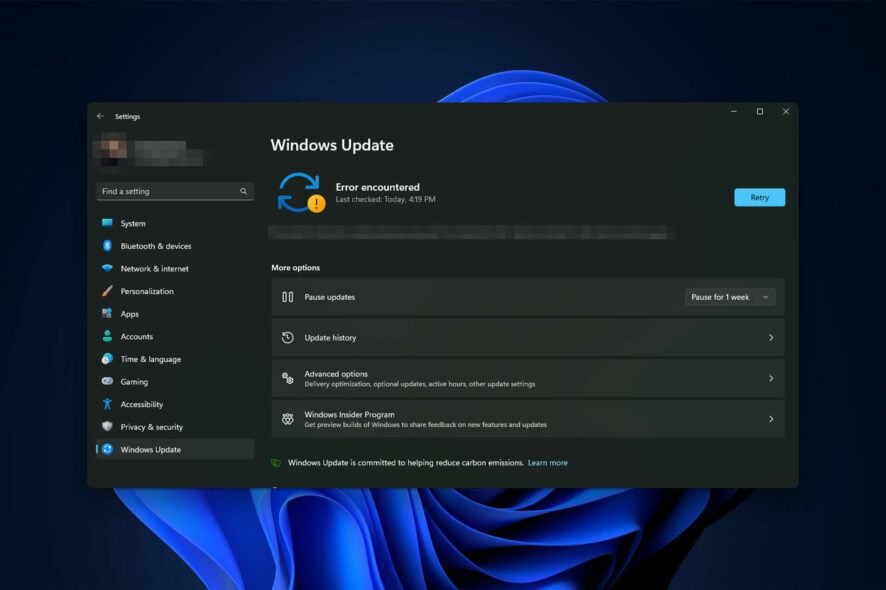
Are you getting the Windows update error code 0xc1190011f constantly? You are not alone. This article will introduce the most effective solutions along with helpful information.
While updating Windows 11 to 22H2, you may get a lot of error codes. However, in a recent case, we have seen that a lot of users have been encountering this error 0xc1190011f even after applying the common fixes for update problems. If you are already hopeless, don’t worry. You can fix it.
Why is Windows 11 showing the error code 0xc1190011f while updating?
You may consider the following:
- Corrupted system files: If somehow, system files get corrupted, Windows may fail to update itself to the latest build.
- Third-party antivirus or services: Third-party antivirus or other services may interrupt the update process, which may cause the error code 0xc1190011f.
- Disk problem: Low disk space or disk storage problems may cause Windows update errors.
- Corrupted update components: If the core update components get corrupted, you may face various error codes while updating Windows.
- Other system issues: There are some other unknown core Windows problems that also may trigger this update error.
How can I fix the update error 0xc1190011f on Windows 11?
After doing some research, we have found effective solutions. However, before going through these ways, we suggest you do the following things:
- Make sure you have a stable internet connection.
- Make sure there is enough disk space.
- Ensure that the disk drive has no bad sectors or is not physically damaged. If necessary, learn how to check and fix bad sectors.
- For safety, update your drivers. If necessary, use Outbyte Driver Updater.
- Disable the antivirus temporarily and see if it helps.
After that, go through these methods to fix error 0xc1190011f.
1. Run update troubleshooter
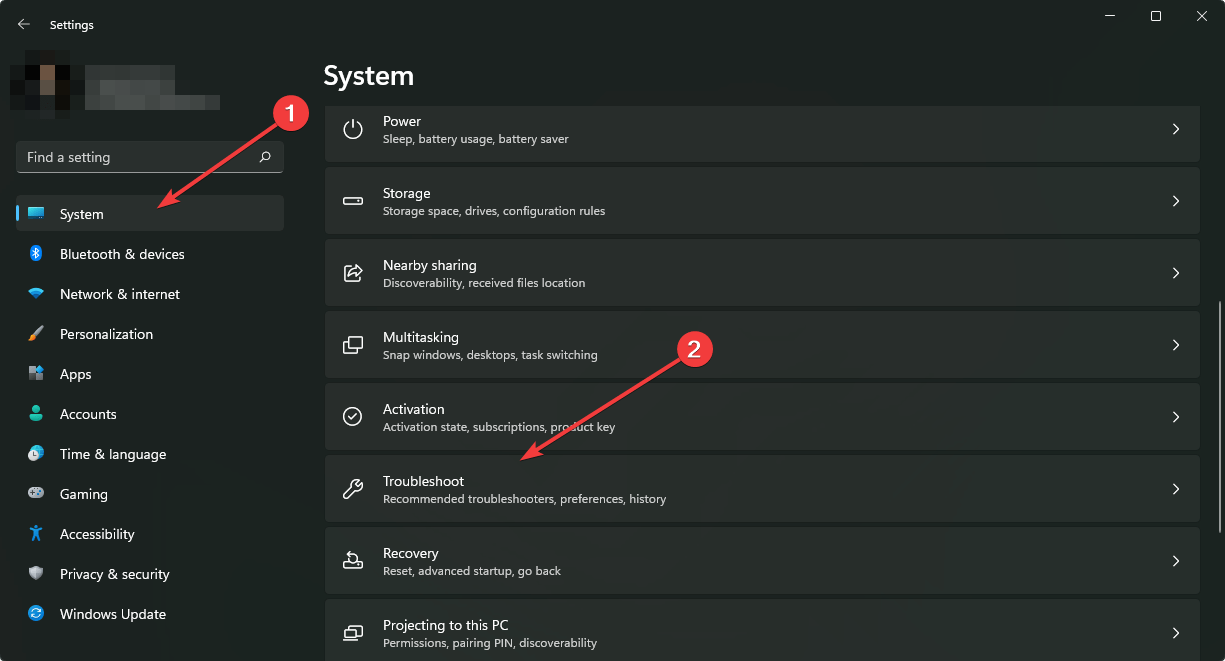
- Press Win + I on the keyboard to open Windows Settings.
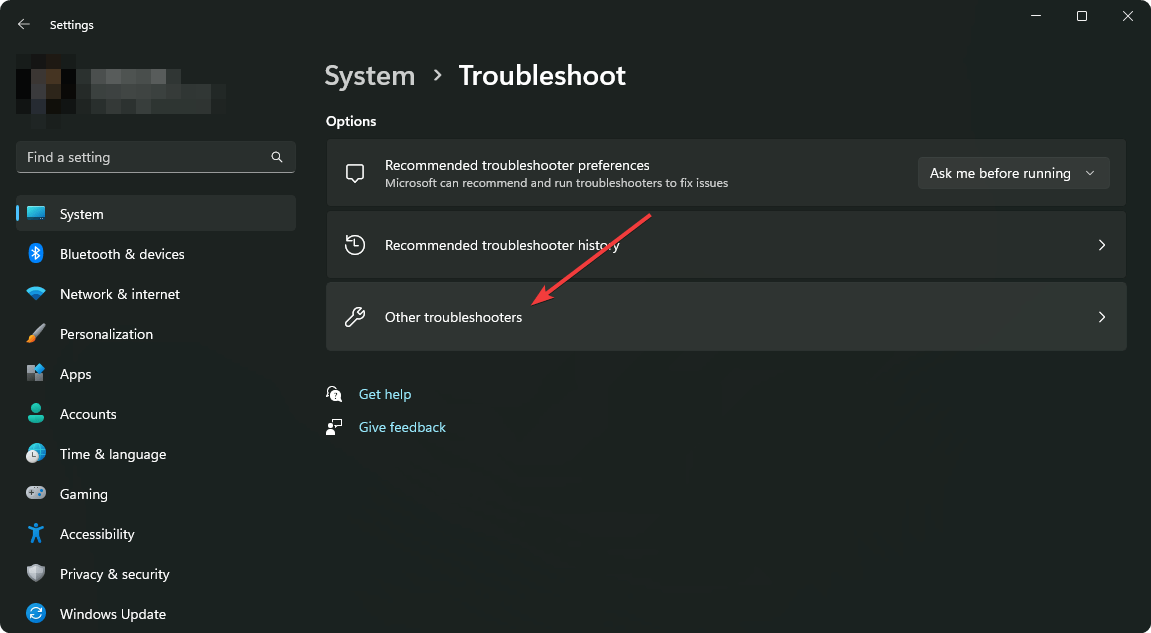
- Go to System and click on Troubleshoot.

- Click on Other troubleshooters.

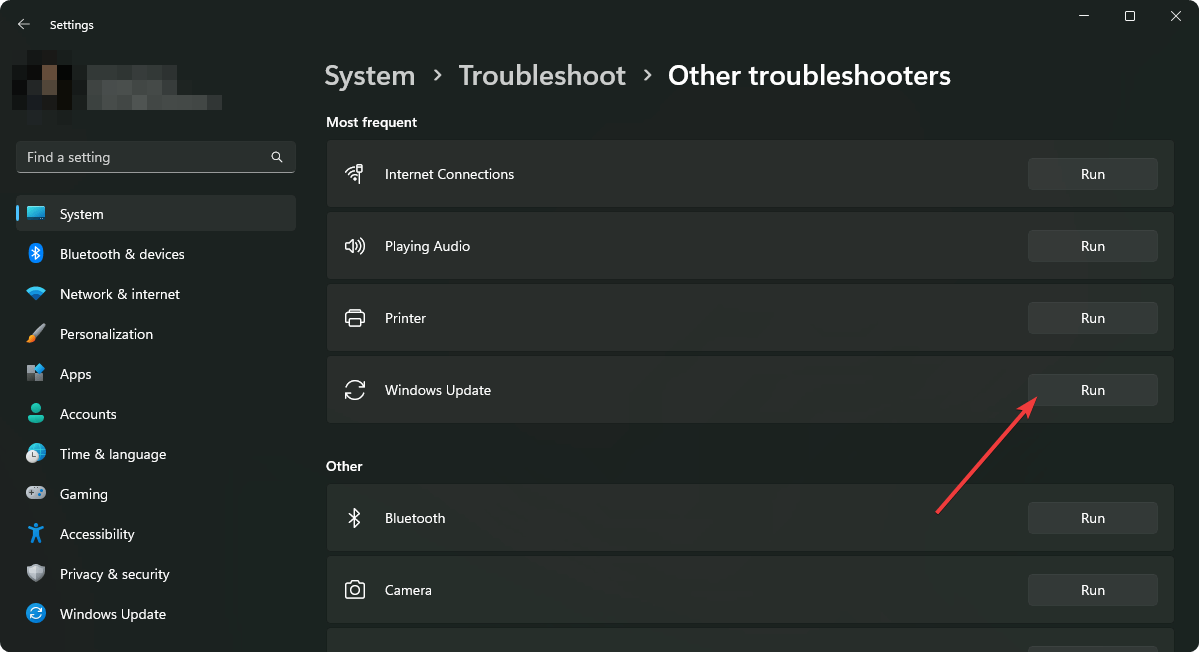
- Then, click on Run next to the Windows Update.

- Finish any on-screen steps to complete the troubleshooting process.
2. Repair internal system components
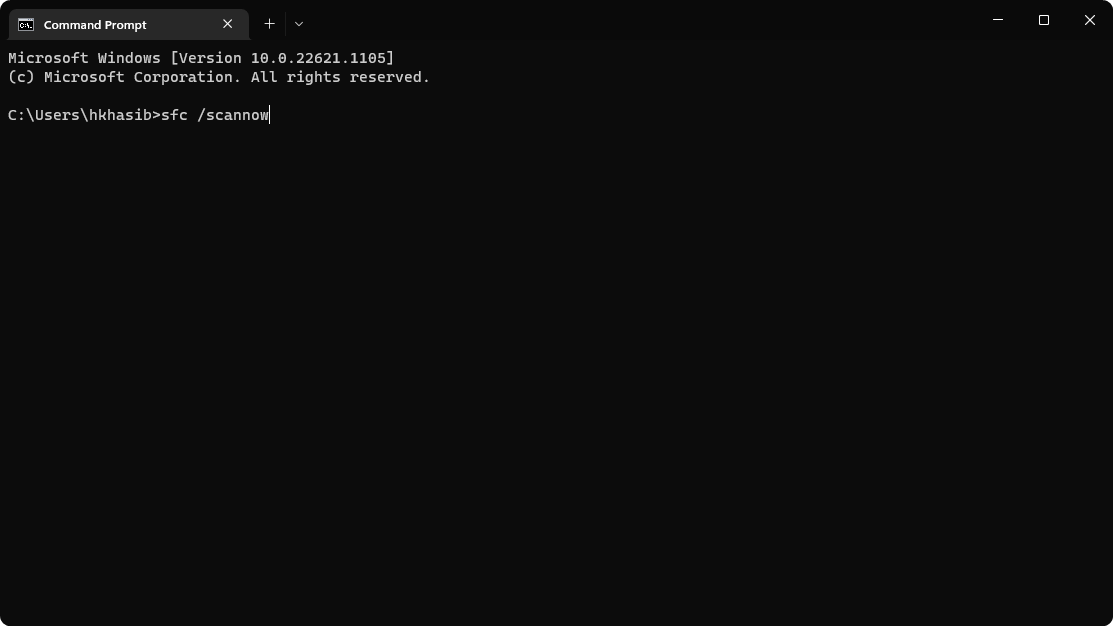
- Open the Start Menu, and type cmd.
- Right-click on the Command Prompt and then click on Run as Administrator.
- Now, type the following command and hit Enter to execute it:
sfc /scannow
- Next, run the following commands one by one:
dism /online /cleanup-image /checkhealth
dism /online /cleanup-image /scanhealth
dism /online /cleanup-image /restorehealth - After repairing, restart your PC.
3. Disable delivery optimization and clear the files
3.1 Diable delivery optimization
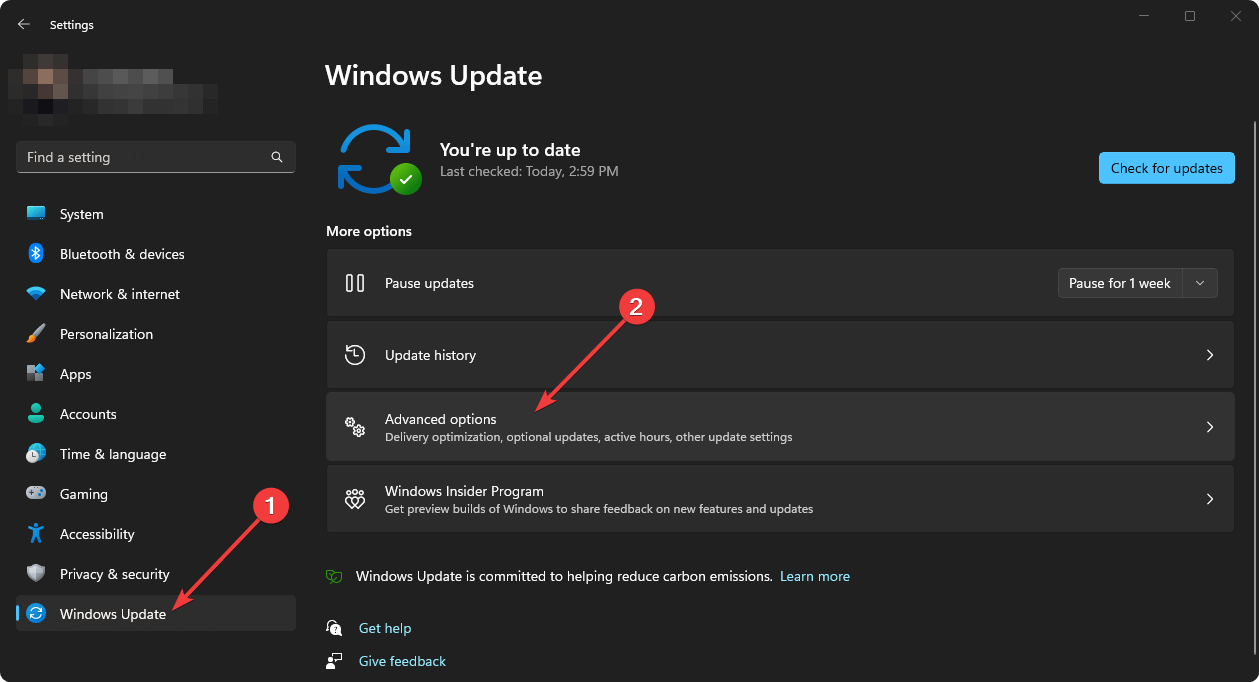
- Open the Windows Settings.
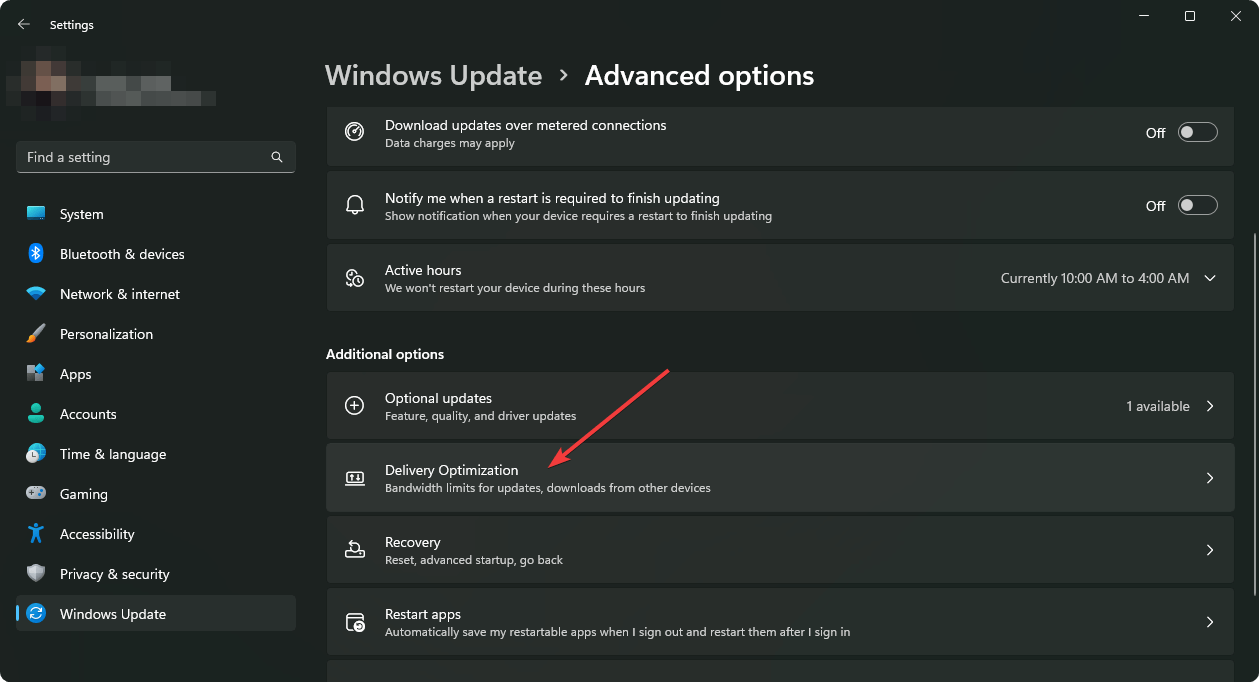
- Fo to Windows Update and click on Advanced options.

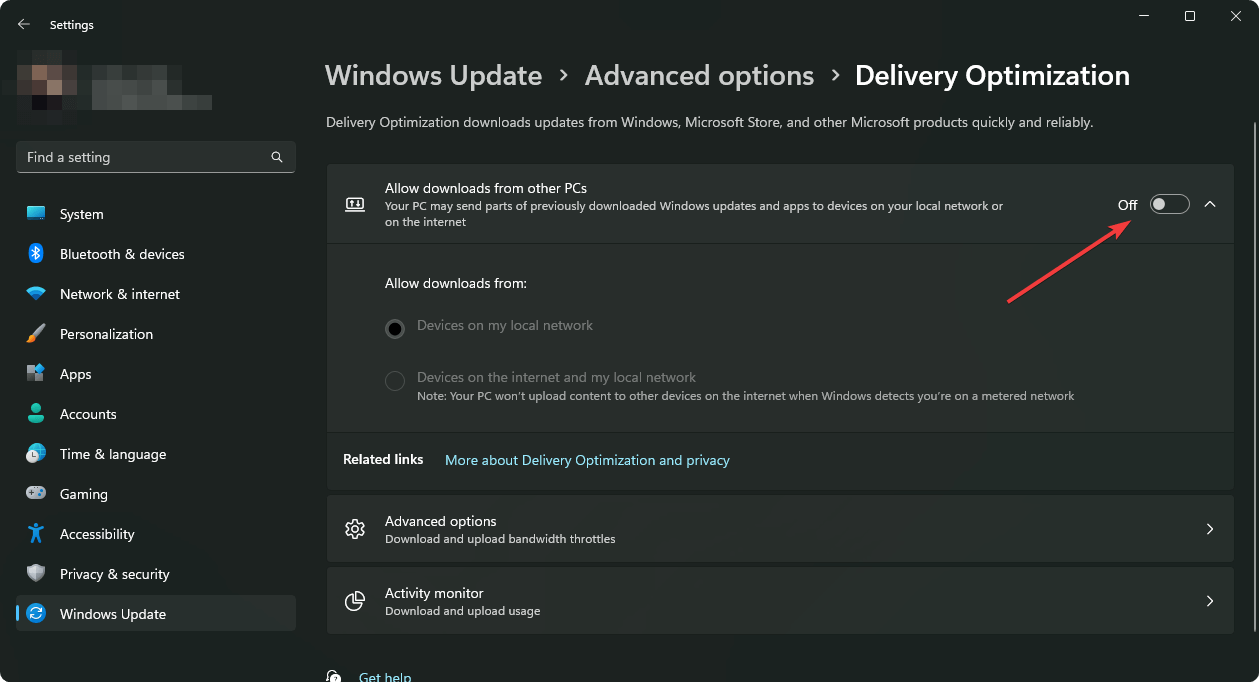
- Go to Delivery Optimization.
- Turn it off by toggling the switch.
After disabling, you will need to clear the existing related temporary files.
3.2 Clear delivery optimization files
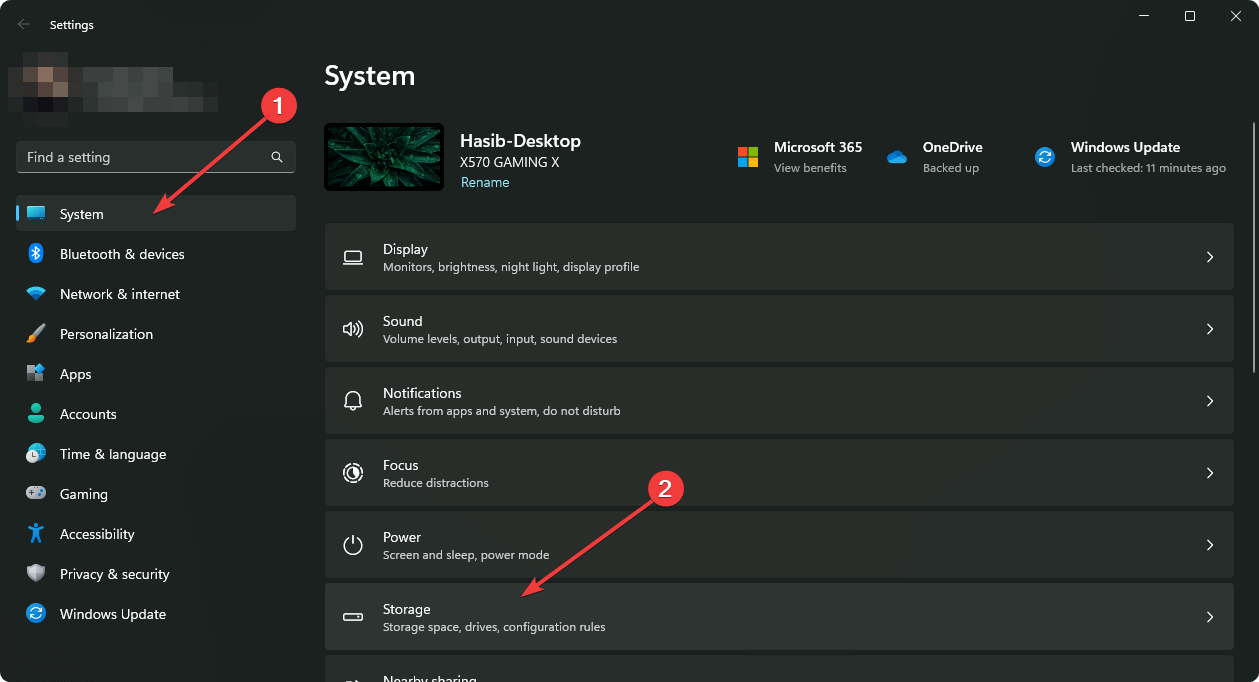
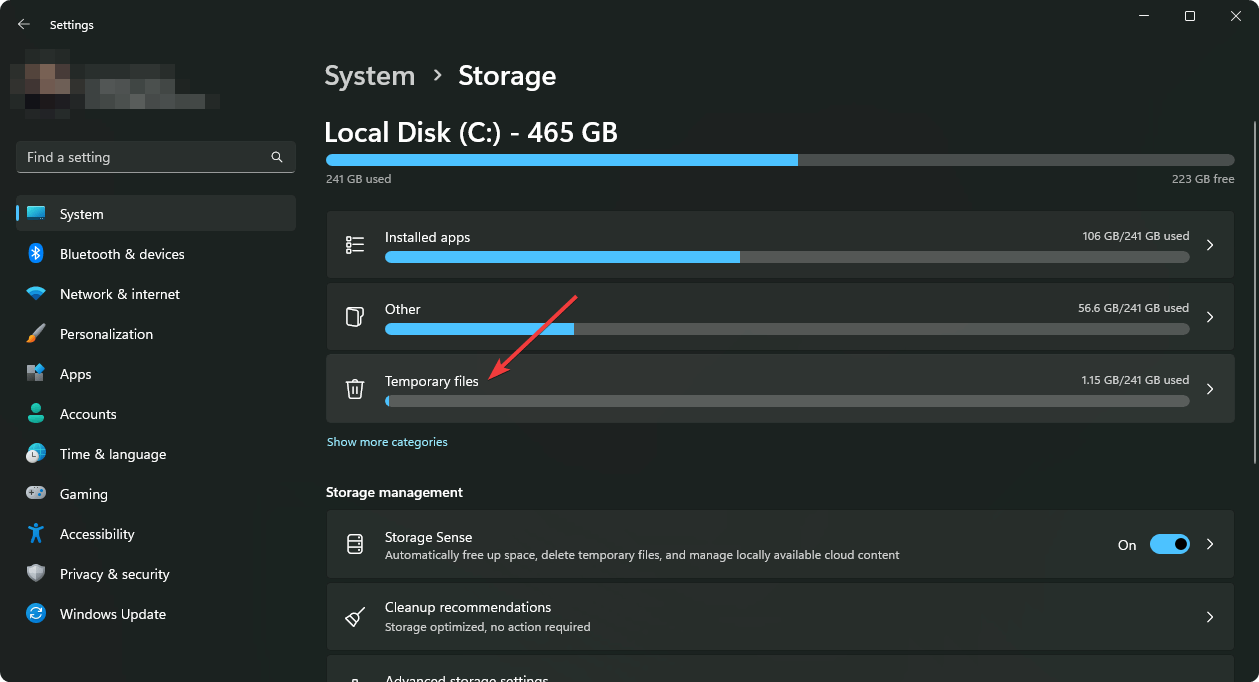
- From Windows Settings, go to System and click on Storage.
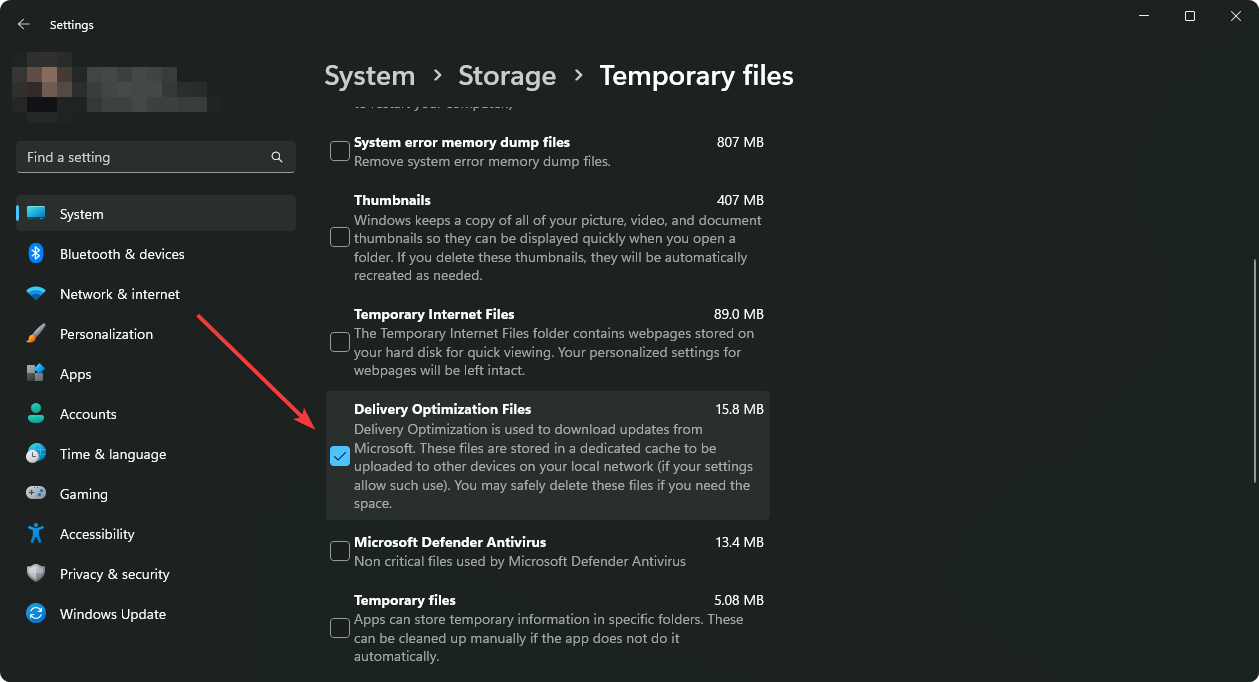
- Click on Temporary files.
- Uncheck everything except Delivery optimization files.
- Click on Remove files.
Now, try to update Windows 11 again and see if it has helped or not.
4. Clear SoftwareDistribution Folder
- Open the Command Prompt like before.
- Run the following command one by one:
net stop wuauserv
net stop bits
net stop cryptSvc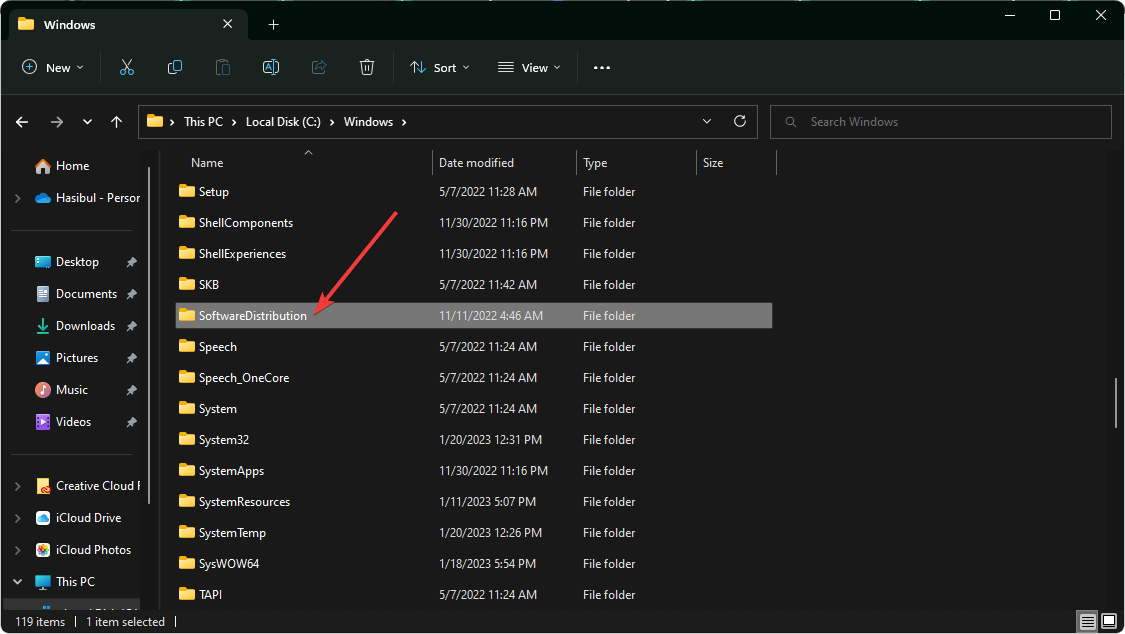
net stop msiserver - Using File Explorer, go to the following location:
C:\Windows\SoftwareDistribution
- Delete everything from there.
- Run the following command:
net stop wuauserv
net stop bits
net stop cryptSvc
net stop msiserver - Restart your PC.
5. Perform Clean boot
- On the Start Menu, type MSconfig, and press Enter.
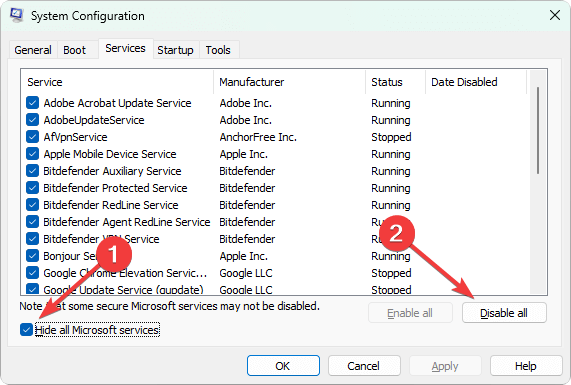
- Go to the Services tab.
- Check Hide all Microsoft Services and click on Disable all.

- Click on OK.
- Restart your PC.
The clean boot will ensure that no third-party background task is active. It will help to understand if any of these services is responsible for the error 0xc1190011f on Windows 11.
If you find that this problem is not appearing in clean boot, enable the third-party services one by one and find out which one is the culprit. Then, keep it disabled or uninstall the related software.
6. Reset Windows
- Open the Windows Settings like before.
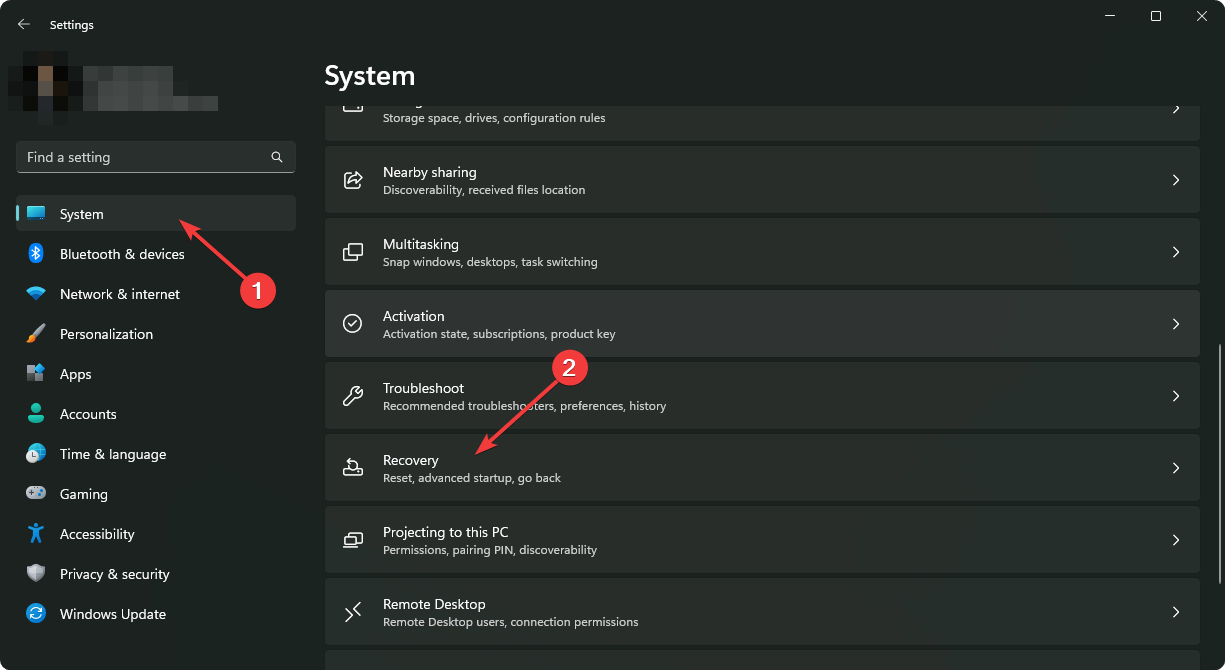
- Go to System and then Recovery.

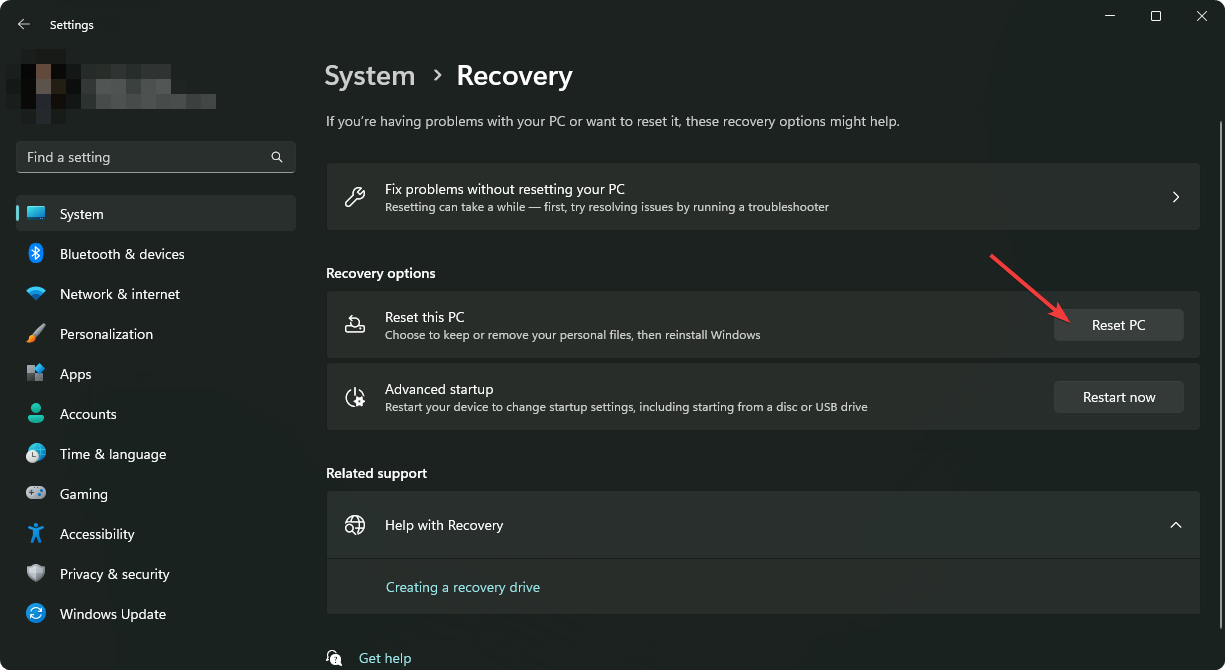
- Click on Reset PC.
- Go ahead and finish the process.
7. Upgrade using a media creation tool
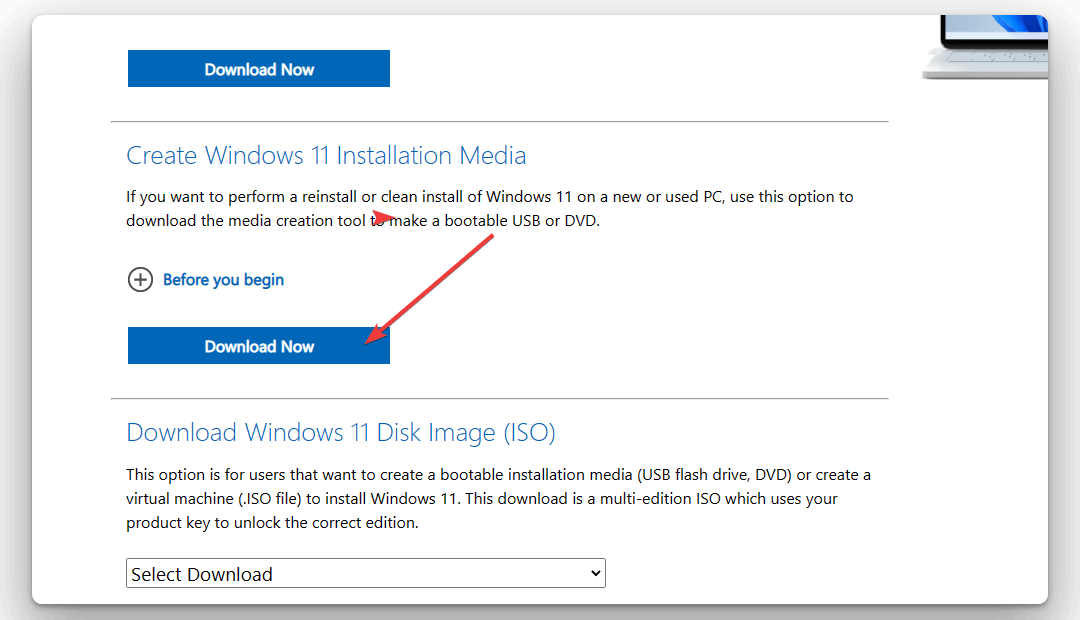
- Go to Windows 11 Media Creation Tool download page.
- Click on Download under the Media Creation Tool section.

- Open it on your PC.
- Go ahead and choose your preferences to install the latest Windows 11 on your computer.
Installing the latest Windows 11, for example, version 22H2, using the Media Creation Tool, is very helpful for other problems as well. After doing this, you will not face any similar update error in the future. If necessary, learn how to use Media Creation Tool.
This article has explained how you can fix error 0xc1190011f while updating Windows 11. If you have any suggestions or opinions, let us know in the comment box.