0xC19A0023 Printer Error: 4 Ways to Fix It
Explore the easiest methods to fix it
5 min. read
Updated on
Read our disclosure page to find out how can you help Windows Report sustain the editorial team. Read more
Key notes
- The printer error 0xc19a0023 could occur due to outdated or corrupted firmware or printer drivers.
- To fix it, you can reset the printer, printer head, and update the printer firmware and PC drivers.
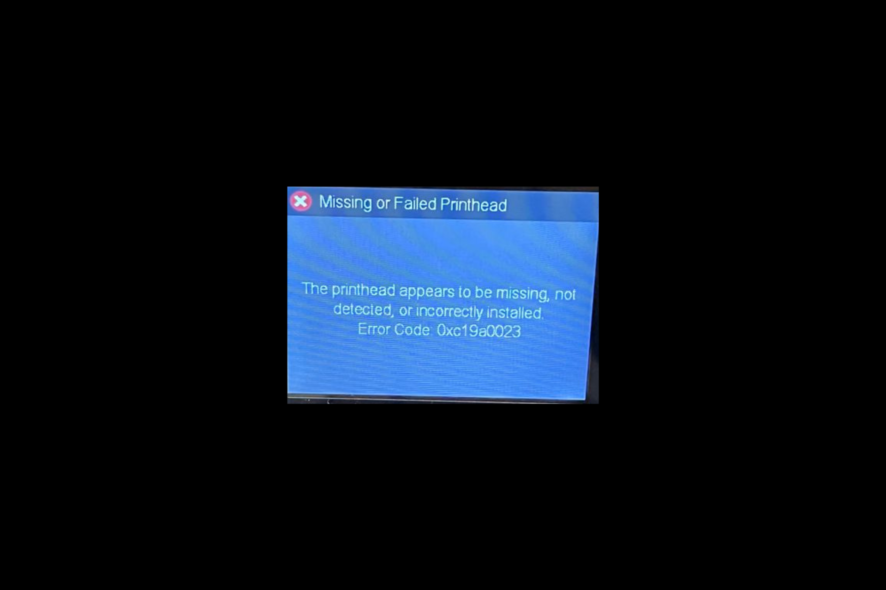
If you have encountered the error code: 0xc19a0023 Printer head appears missing or not detected; this guide can help!
In this guide, we will discuss some of the troubleshooting methods to fix the error right after explaining the causes.
What causes the error code 0xc19a0023?
The error code 0xc19a0023 is typically associated with an issue in HP printers, particularly models in the Photosmart, Officejet, and Deskjet series. There could be various reasons for it; some of the common ones are mentioned here:
- Printhead problem – The printhead, responsible for transferring ink onto the paper, might be clogged or malfunctioning, leading to this error. Try cleaning or replacing the printhead.
- Ink cartridge issue – The error may occur if the ink cartridges are not properly installed or if they are low on ink. Check the cartridges are correctly inserted and have sufficient ink levels.
- Firmware or driver issue –Outdated or corrupted firmware or printer drivers can cause various errors, including this one. Ensure the printer has the latest firmware installed & update the PC drivers.
- System or software conflict – Occasionally, conflicts between the printer software and other programs on your computer can trigger an error. Try restarting your computer and printer.
So, these are the causes of this error; let us dive into the solutions to fix the issue.
What can I do to fix the error code 0xc19a0023?
Before engaging in advanced troubleshooting steps, you should consider performing the following checks:
- Try restarting your computer.
- Check ink cartridges to ensure they are properly installed.
- Clean the ink cartridge contacts.
- Remove dust particles from the printer.
- Turn off the printer and unplug it from the power source. Wait for 30 seconds.
- Reinstall the cartridges and make sure they are properly seated.
Once done, move to the solutions mentioned below.
1. Resetting the printer
- Turn on the printer and wait for a couple of seconds until the printer gets idle and silent.
- Unplug the power cable from the printer while it is ON.
- Disconnect the power cord from the power outlet.
- Wait for a minute, then reconnect the power cable to the printer.
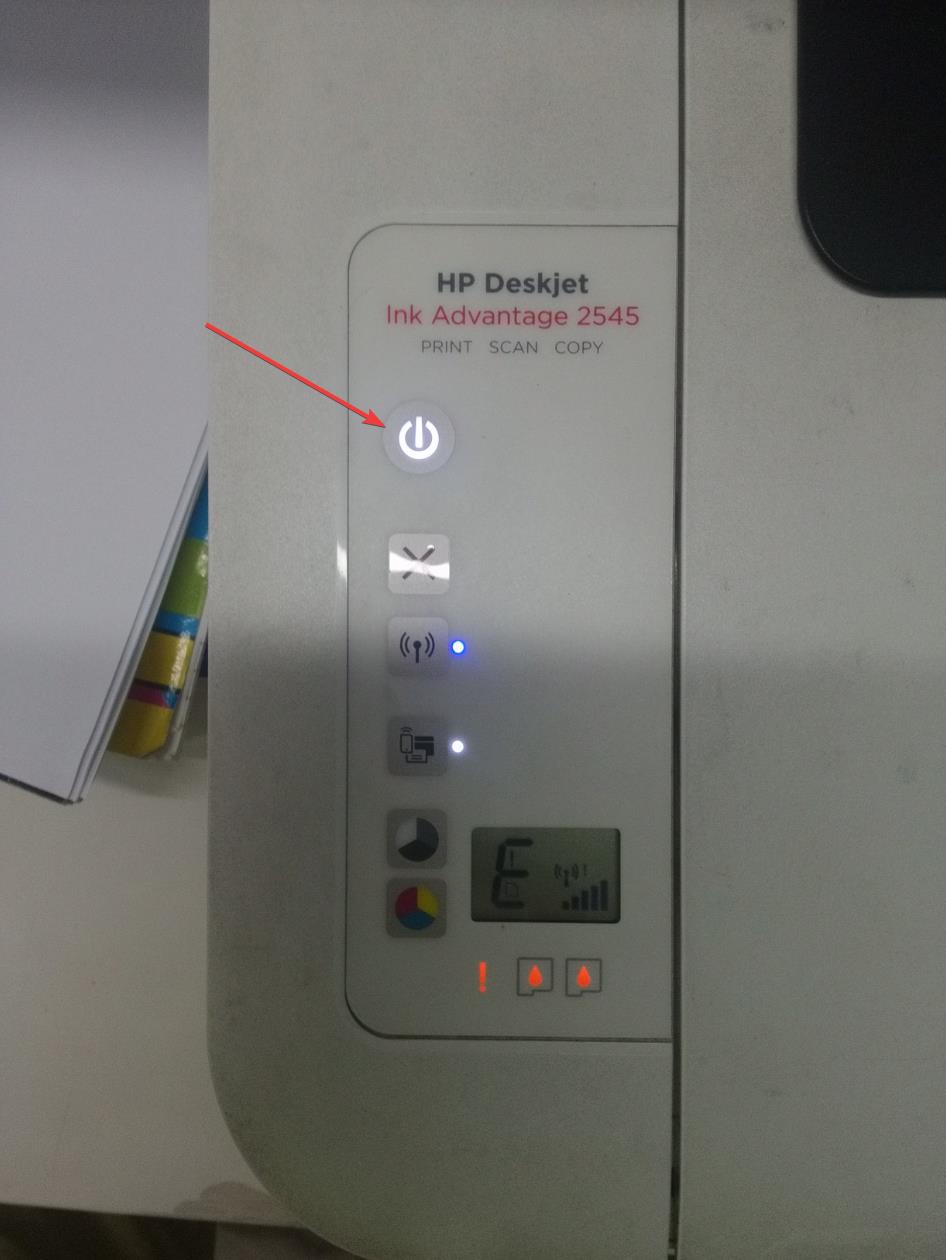
- If the printer doesn’t turn ON automatically, press the Power button on your printer to turn it on.
Now check if the issue is still there, and if it is, move to the next method.
2. Resetting the print head
- Remove the printer power cord so that you can stop the carriage movement.
- Now open the cartridge access door and wait for the carriage to become idle and silent.
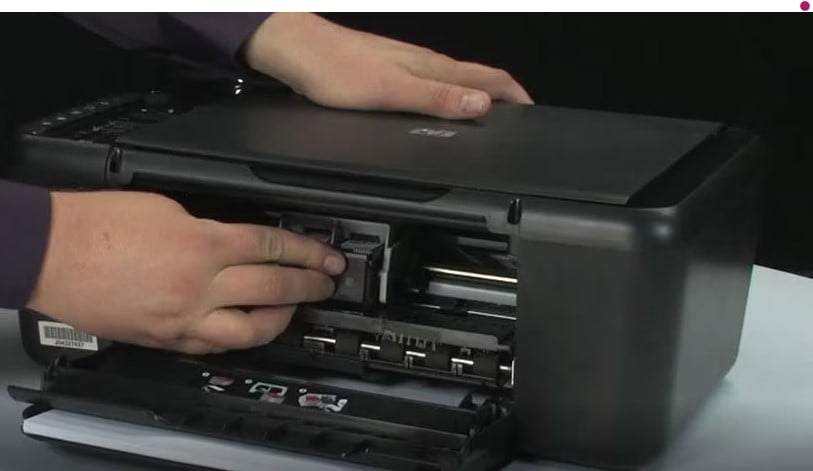
- Next, lift the carriage lever and then lift the print head from the carriage, but don’t remove the printer head fully.
- Reinsert the printer head; Verify that it is properly seated in the carriage by gently moving the print head from left to right.
- Next, lower the carriage lever and close the ink cartridge’s access door.
- Attach the power cable to the printer and turn it ON. Now wait for the printer to get idle and silent.
Check if the error is resolved; if not, reinsert the print head up to three times to fix it. If this doesn’t help, contact the printer manufacturer’s support team.
3. Update your drivers
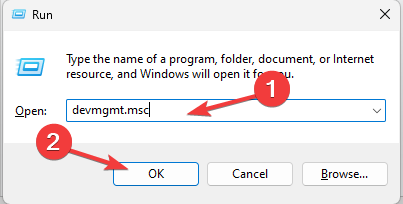
- Press Windows + R to open the Run window.
- Type devmgmt.msc and click OK to open the Device Manager.
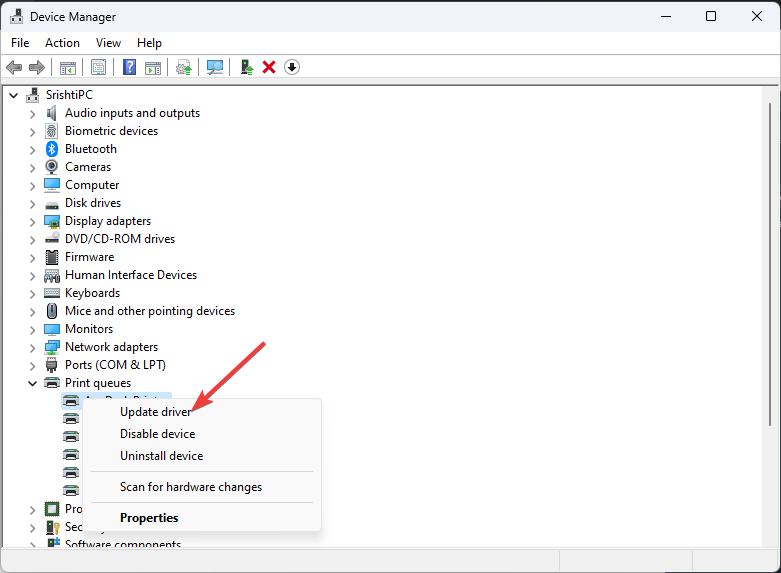
- Locate and expand Print queues. Right-click the printer driver associated and select Update driver.
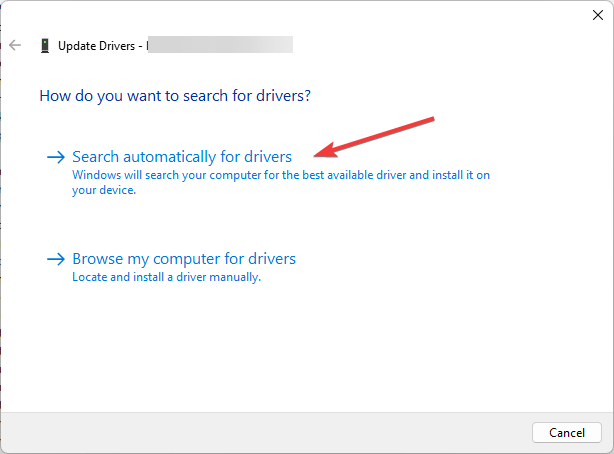
- Click Search automatically for drivers.
- Follow the onscreen instructions to complete the process.
This Device Manager task might not find the latest driver version for your Printer, so you would need an alternative.
Luckily, it’s possible to update or install the latest drivers on your PC using a dedicated driver tool with automatic and secure technology.
4. Update the printer firmware
 NOTE
NOTE
- Make sure your printer is connected to your computer.
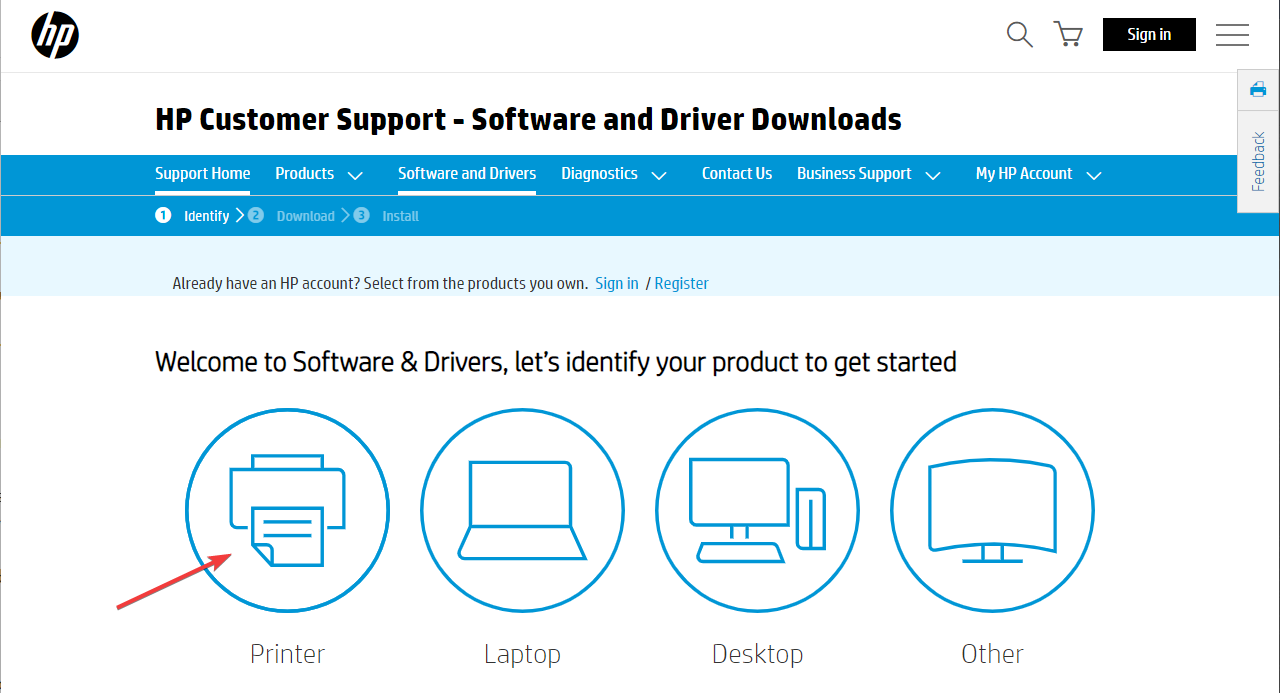
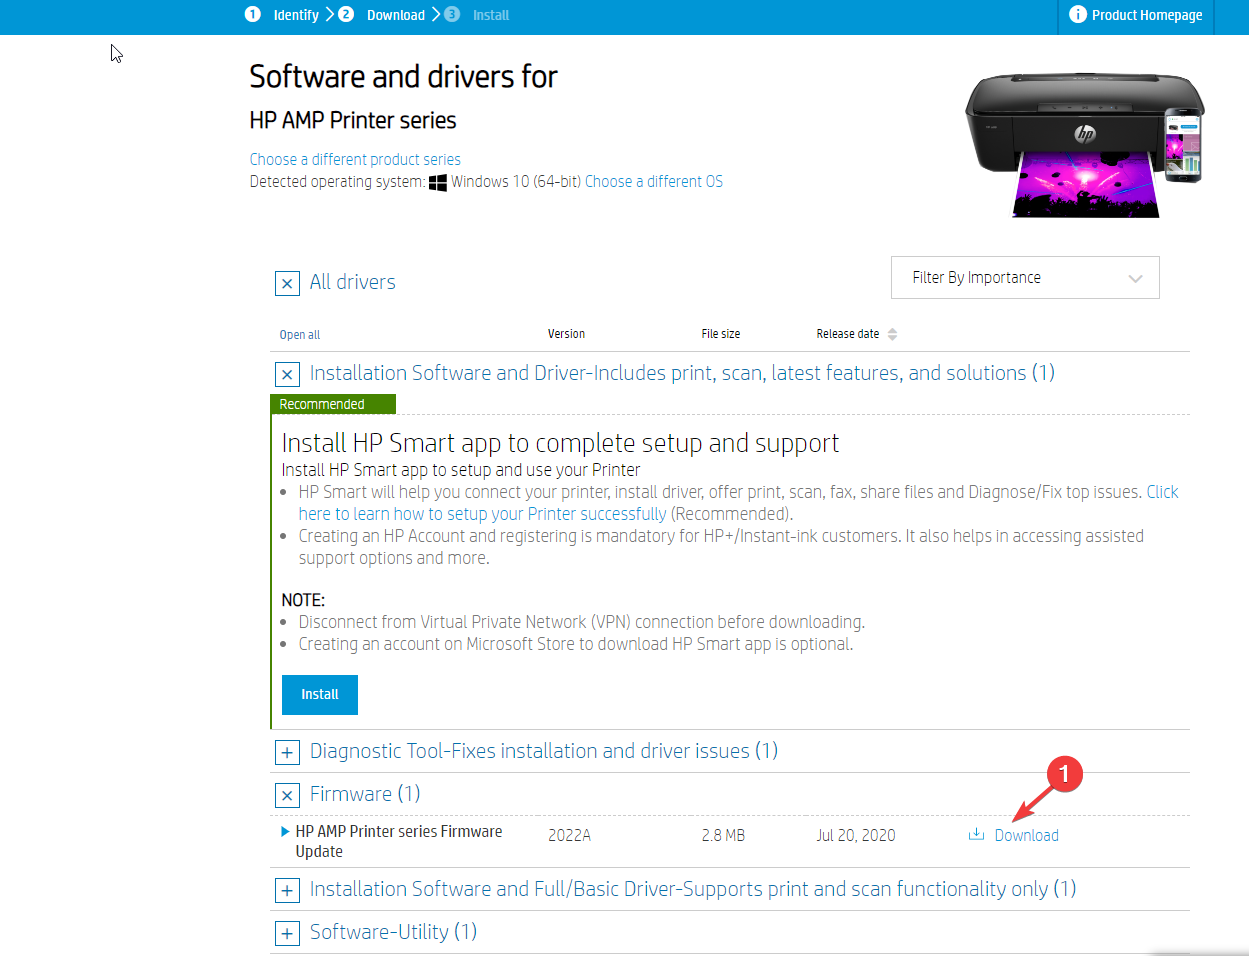
- Go to HP Software and Driver Downloads and click Printers.
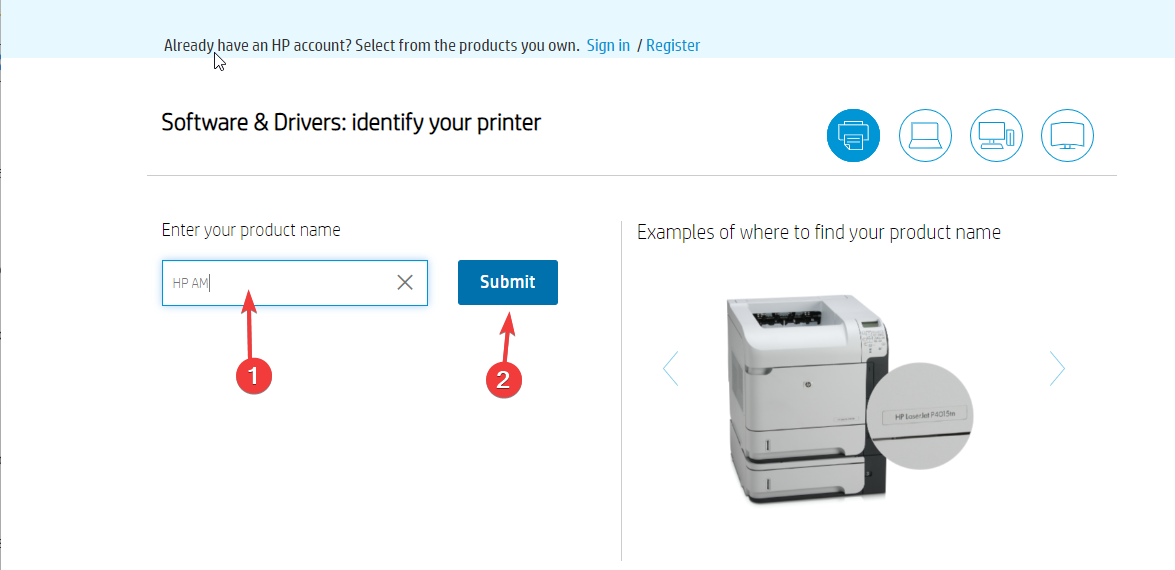
- Enter your printer model and click Submit.
- Choose Firmware from the list of drivers, click Download next to the update, and then follow the onscreen prompts.
- On the HP Printer Update screen, check the status of your printer. If you can’t see the network printer, use a USB cable to connect your printer temporarily to the PC. Wait for 15-20 seconds, then click Refresh.
- Next, if the status says Ready, place a checkmark next to the serial number and select Update.
- Once the status is Up-to-Date, the firmware is updated.
So, these are the methods to fix error code 0xc19a0023 and make your printer up and running. If nothing works for you, the print head or cartridges might be damaged, and you need to replace them to eliminate the error once and for all.
If you are looking for solutions for other HP printer errors like 83C0000B, we suggest you check out this guide.
Please feel free to give us any information, tips, and your experience with the subject in the comments section below.
User forum
0 messages