Fix the 403 Error The Request Could Not Be Satisfied
Check AWS WAF default action set to Web ACL
4 min. read
Updated on
Read our disclosure page to find out how can you help Windows Report sustain the editorial team Read more
Key notes
- If CloudFront distribution is set to allow HTTPS requests, but the request has originated over HTTP.
- To fix this, you must check AWS WAF rules to ensure everything is set in action.
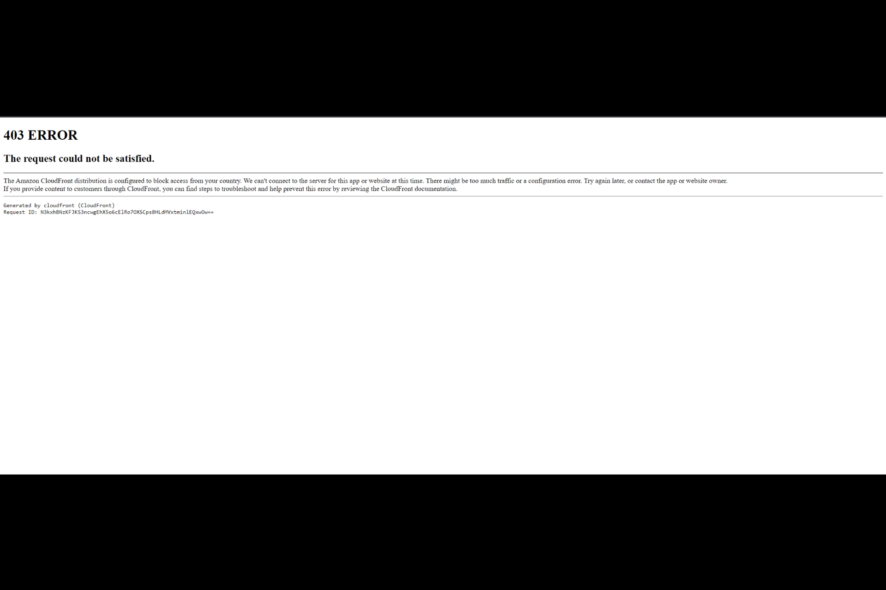
If AWS CloudFront is coming up with the error message 403 Error – The request could not be satisfied. Request Blocked, then don’t worry. It can be fixed in no time.
Here, in this blog, we will discuss a way to fix this error right after talking about what caused this issue in the first place. Let’s get started!
What causes the 403 error the request could not be satisfied request blocked?
There could be a handful of reasons for the issue to occur. Here we have mentioned the popular ones:
- Permission blocked – If you don’t have the necessary permissions to access the content on the server, then you may get this error on CloudFront.
- SSL/TLS certificate misconfigured – If your CloudFront distribution has SSL/TLS certificate and it is not configured correctly, then you can encounter this issue.
- Configuration errors – If CloudFront is configured to block requests from an IP address, you might get a 403 error.
- Domain name not associated – If the requested alternate domain name is not related to CloudFront distribution, you might get this error.
- Action and Rule are not aligned – If the default action is set to Allow, but the request made matches to a rule which is set to Block. If the action is set to Block, but the rule is set to Allow.
How can I fix the 403 errors request could not be satisfied?
1. Modify the AWS WAF Rules if the default action is set to Allow
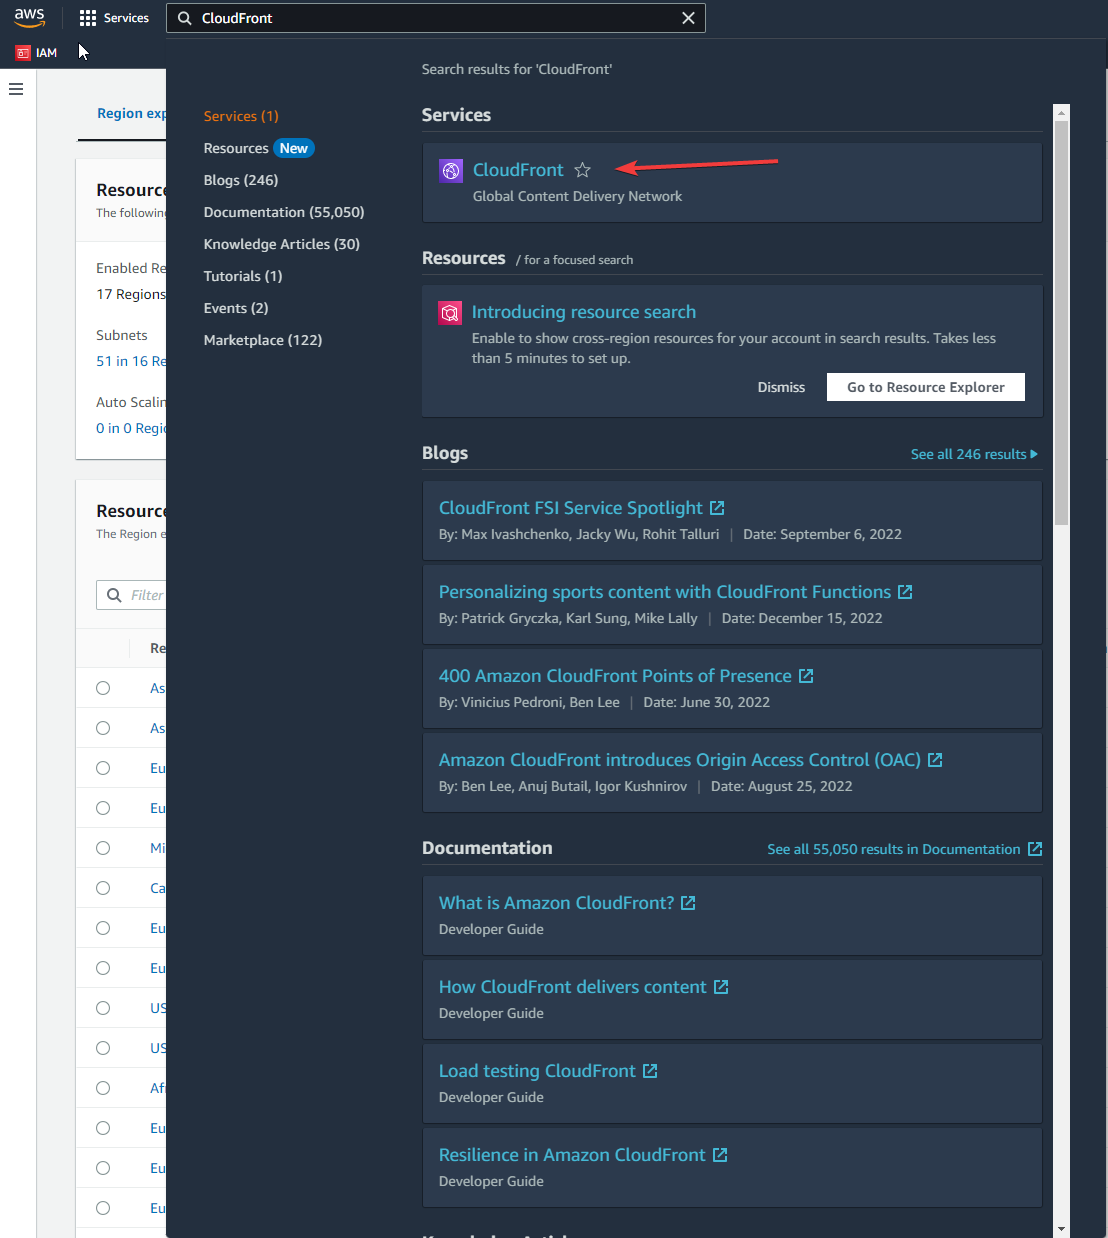
- Login to AWS Management Console. Go to the CloudFront console.
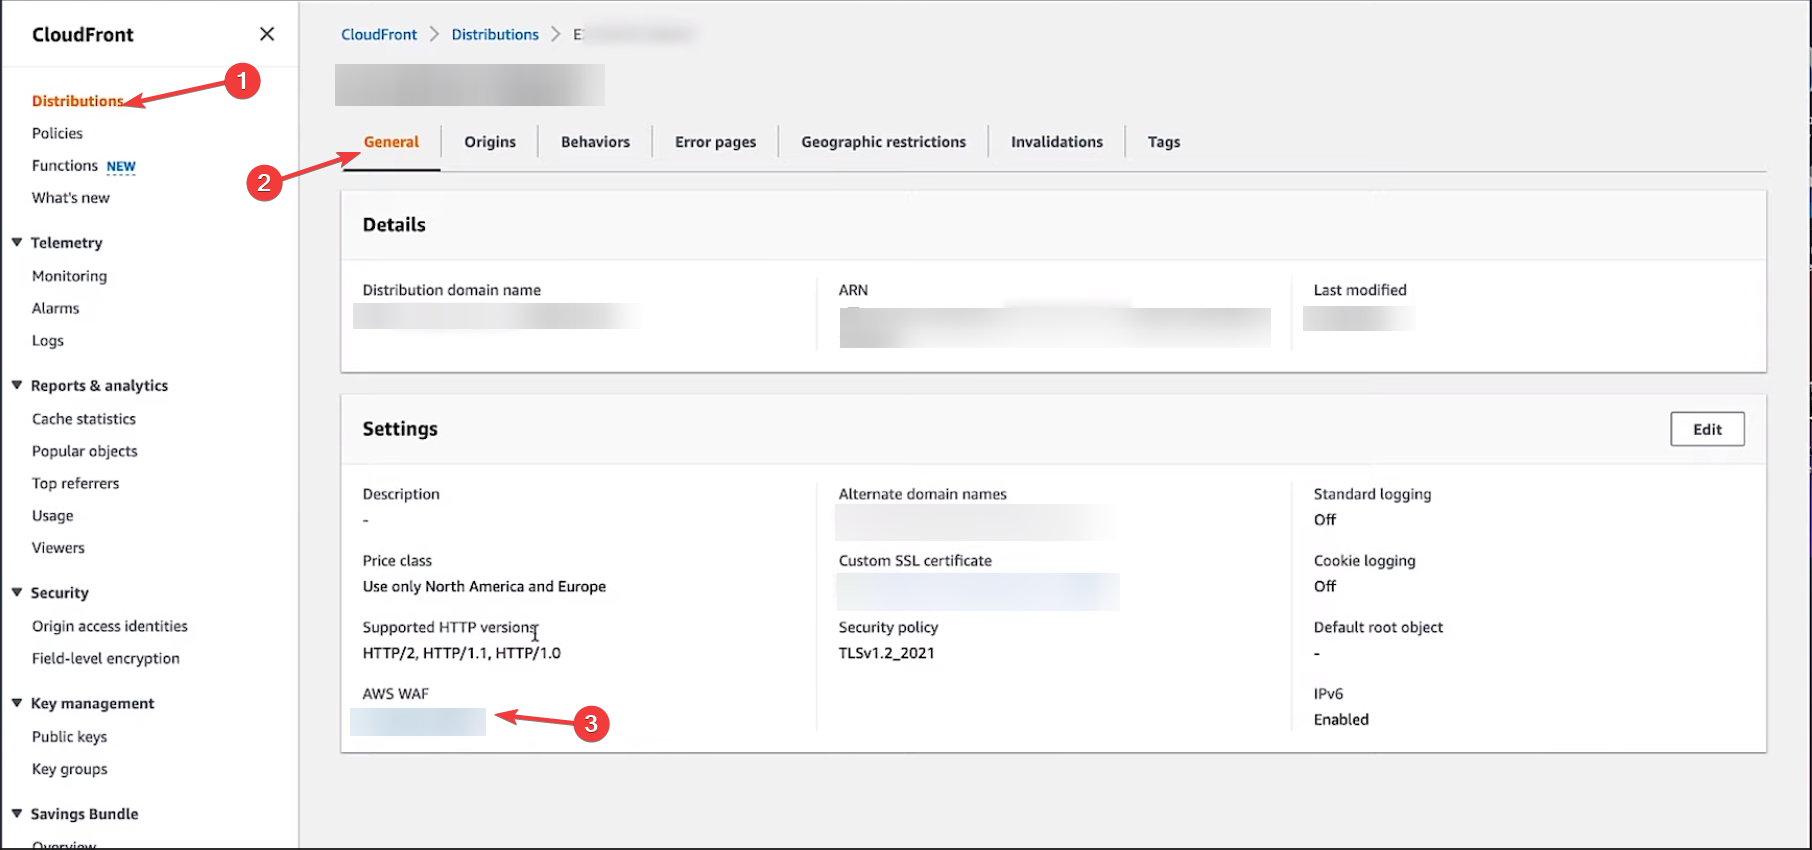
- Select the distribution ID that you want to modify or update.
- Switch to the General tab.
- Under Settings, locate the AWS WAF and select the web access control list related to the distribution.
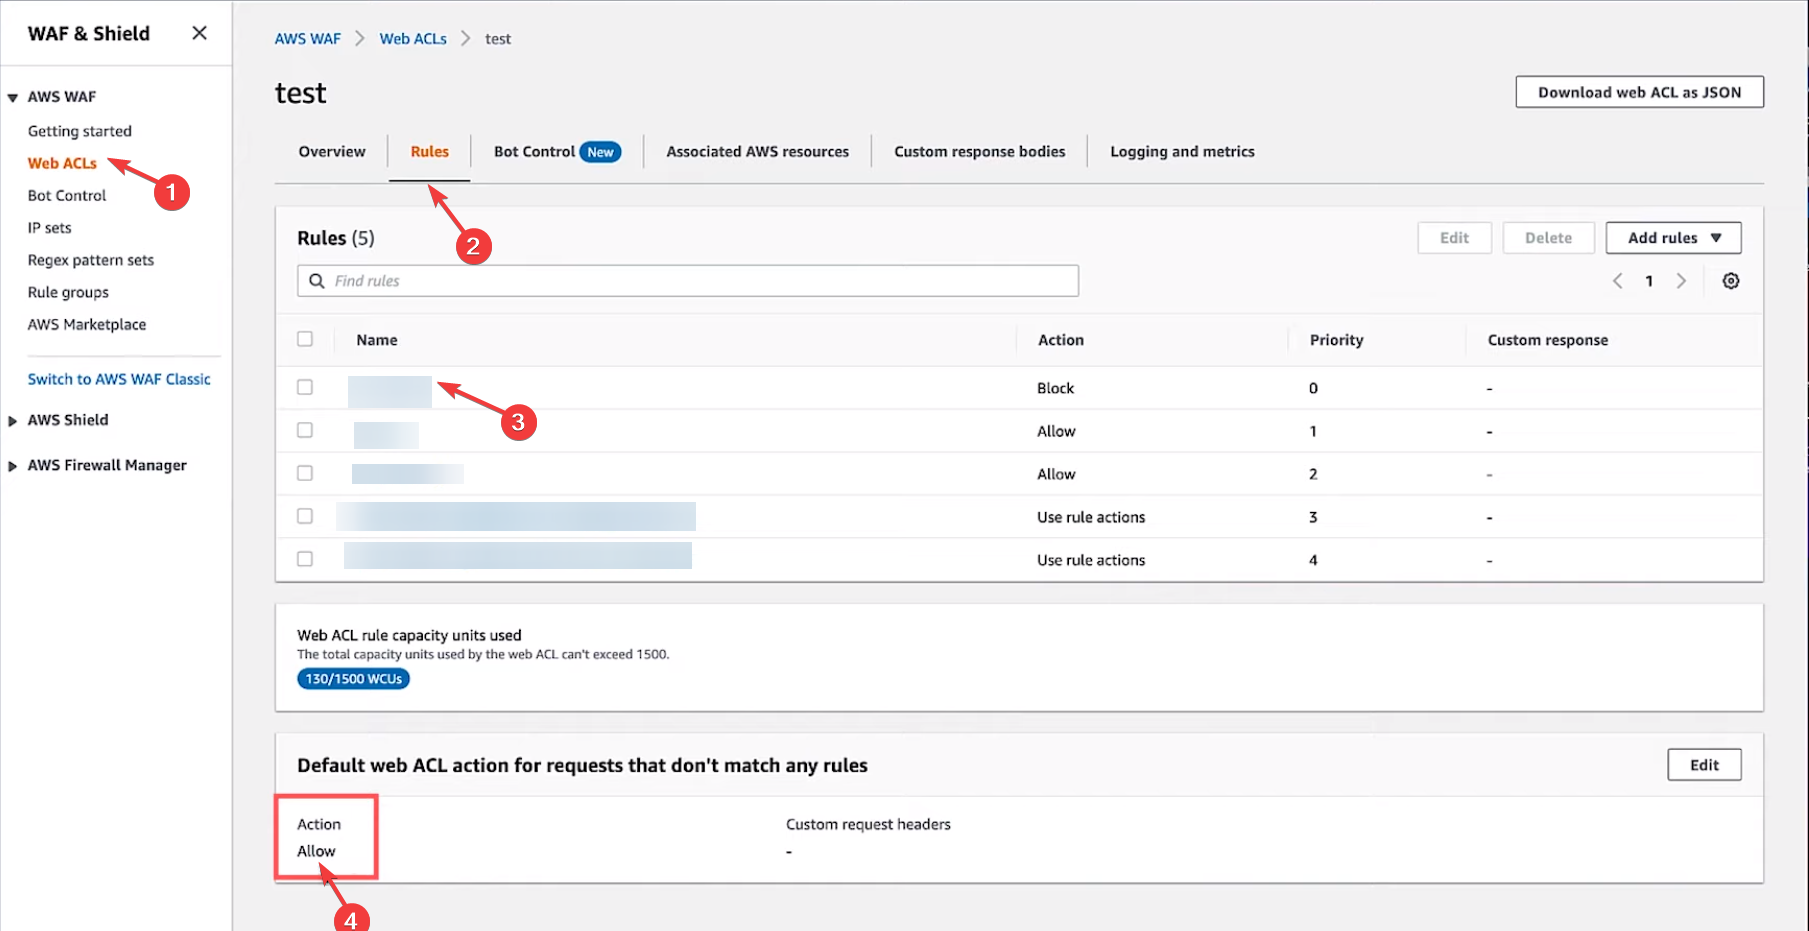
- On the AWS WAF & Shield page, select Web ACLs from the left pane. Now, for AWS Region, choose Global (CloudFront) on the Web ACLs page.
- Go to the Web ACLs you need to review from the right pane.
- Switch to the Rules tab, and under Default web ACL action for requests that don’t match any rules header, make sure Action is set to Allow.
- Now check the request which returns with a request blocked error matches a rule that has set Action to Block.
- To fix this, you need to check the request made doesn’t match the conditions for AWS WAF rules that have Action set to Block. Click on the request that was blocked, and under If the request matches the statement, check for the same.
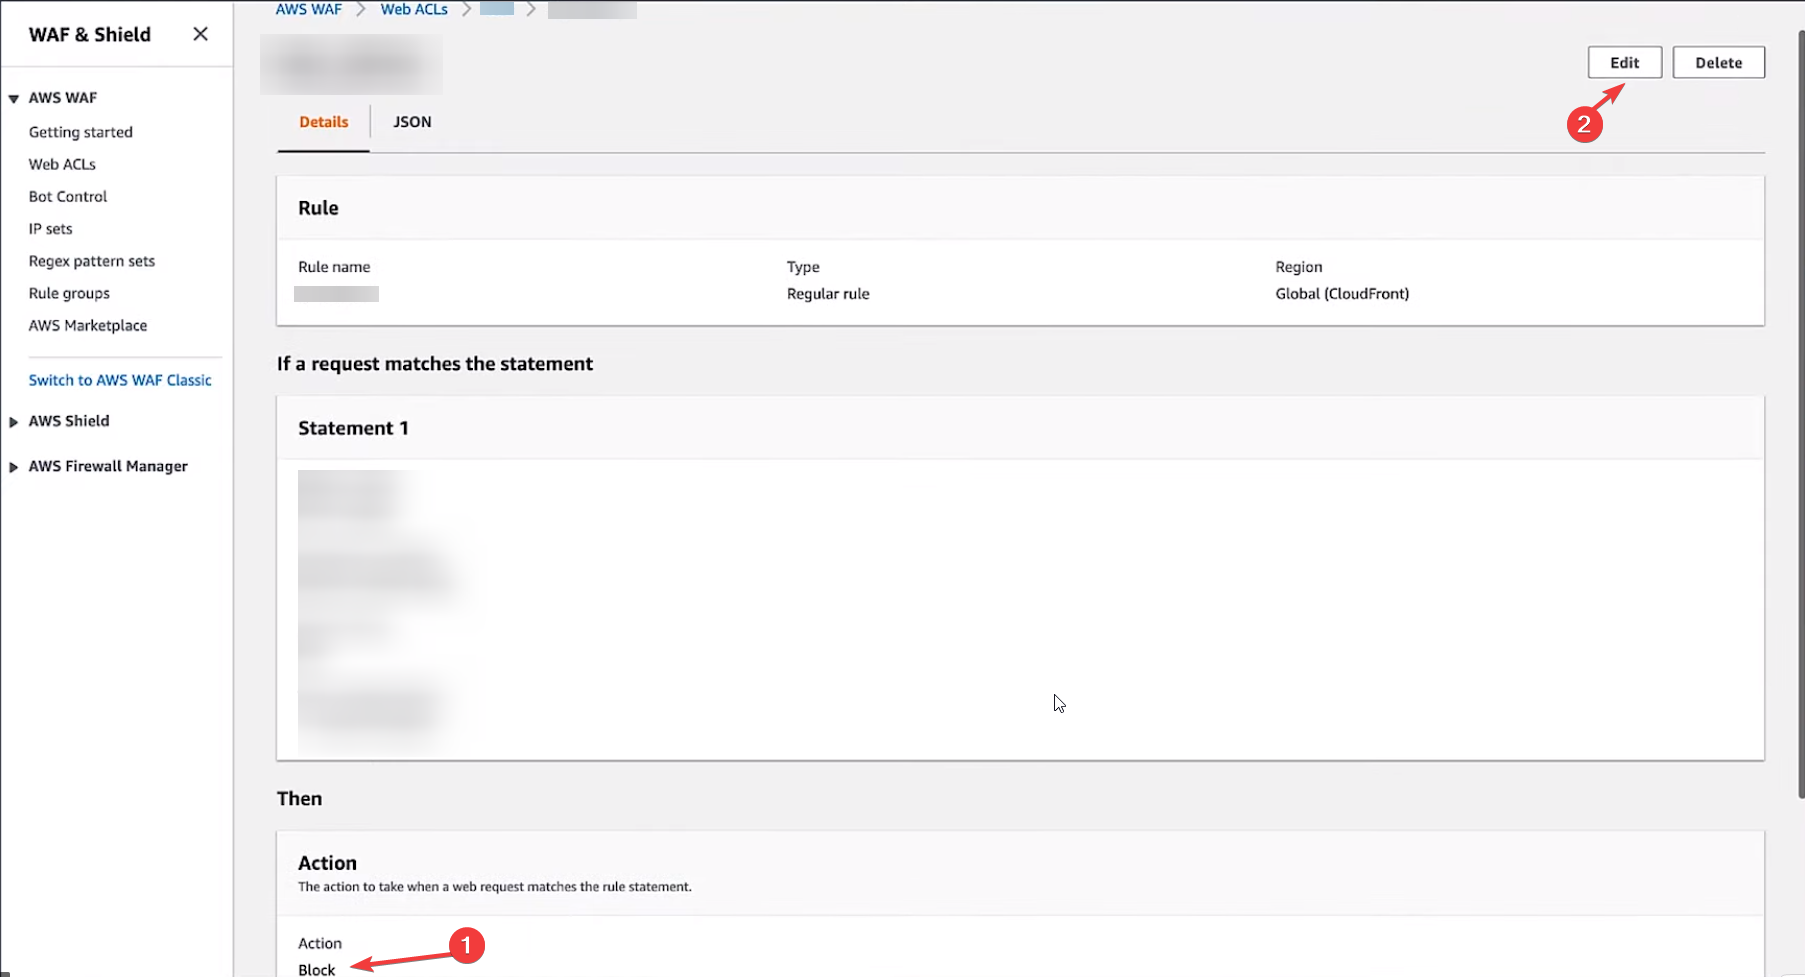
- If valid requests match the prerequisites for a rule that blocks requests, then edit the rule to allow the requests. To do that, click the Edit option.
- On the next page, scroll to find Action. Place a checkmark next to Allow and click Save.
2. Modify the AWS WAF Rules if the default action is set to Block
- Follow the steps mentioned above (1-6) to navigate to the Rules tab on the AWS WAF console.
- Under Default web ACL action for requests that don’t match any rules option, if the Action is set to Block, then check the request to ensure that it matches conditions for all the AWS WAF rules with Action set to Allow.
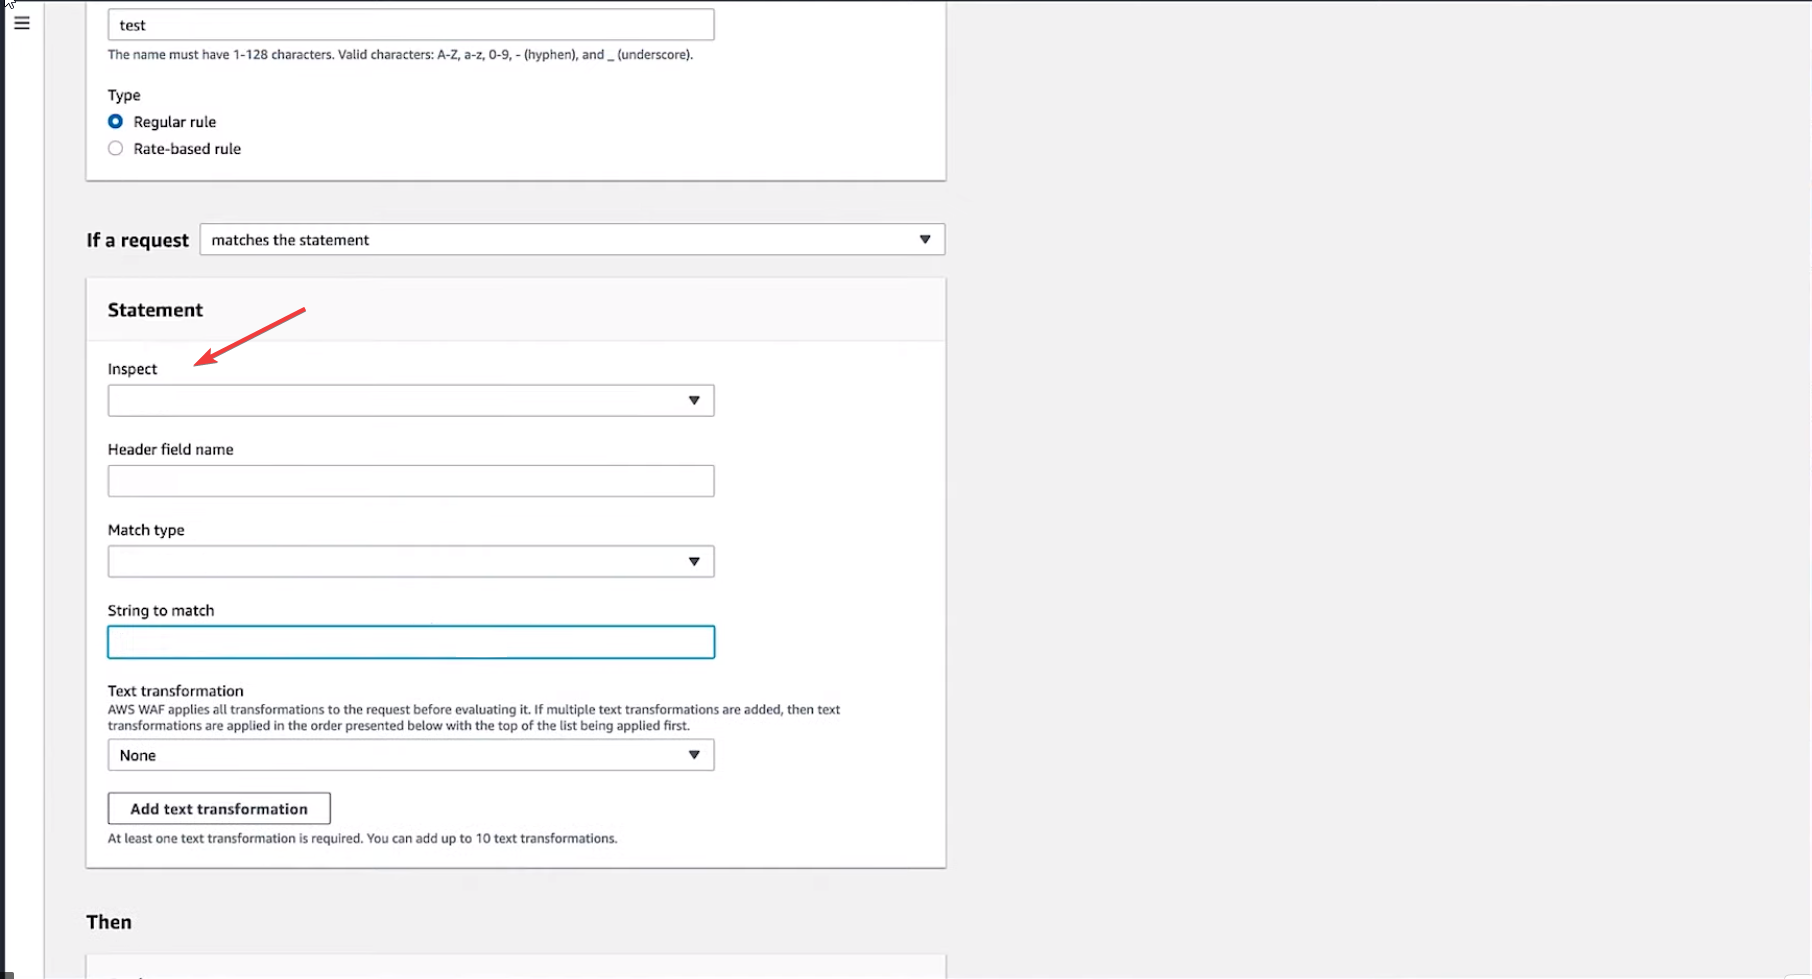
- You can create a rule if the valid request is not related to any current rules that have Action set to Allow. To do that, click on Add rules, then from the drop-down, select Add my own rules and rule groups.
- On the next page, go to the Statement section. For the Inspect field, choose Header.
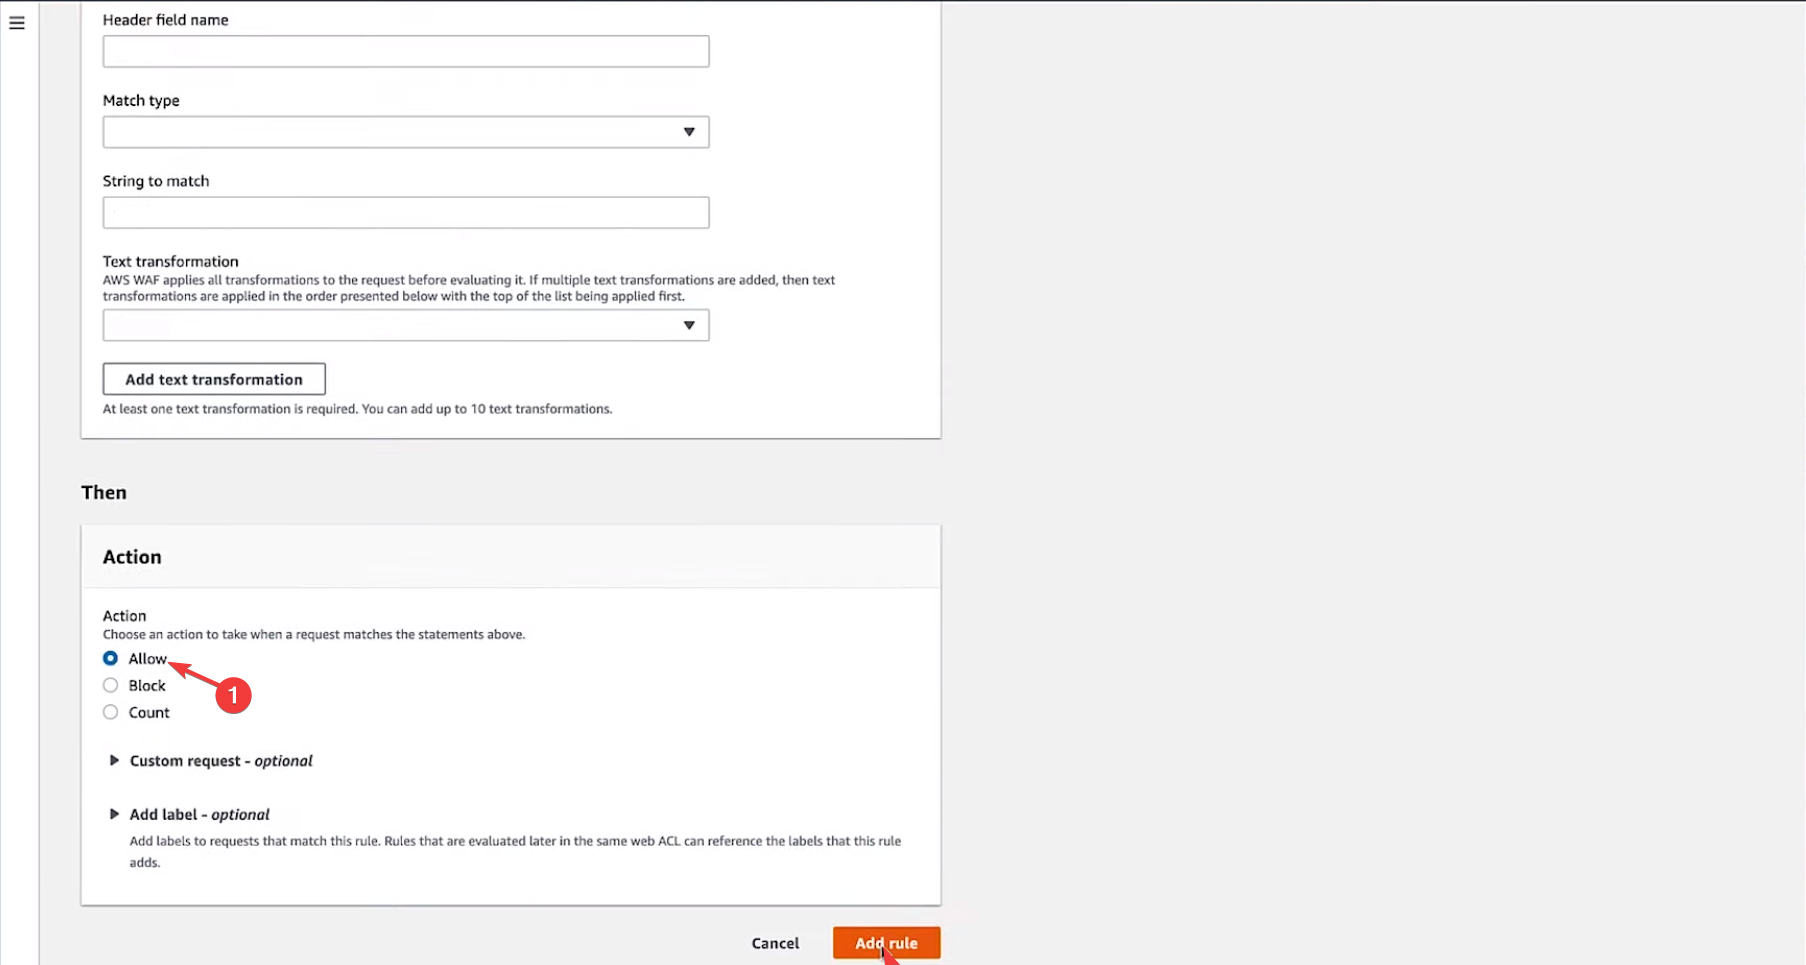
- Fill in the details for the Header field name, Match type, and String to match.
- Choose Action to Allow. Click Add rule to confirm the changes.
So, in this way, you can fix the 403 error the request could not be satisfied error on CloudFront. Follow all the steps and let us know if it worked for you in the comments section below.

