Hardware and Devices Troubleshooter is Missing: 5 Ways to Fix It
Update error can cause missing hardware and devices troubleshooter
![]() 4 min. read
4 min. read
![]() Updated on
Updated on
Share this article

Improve this guide
Read our disclosure page to find out how can you help Windows Report sustain the editorial team Read more
Key notes
- The hardware and devices troubleshooter missing issue on Windows is a problem users may encounter on their PC.
- However, the tool may be missing on your computer due to the decision of Microsoft to hide the hardware and device diagnostics tool in Windows 10 1809.
- Use the hardware troubleshooter command Click on the Start button.
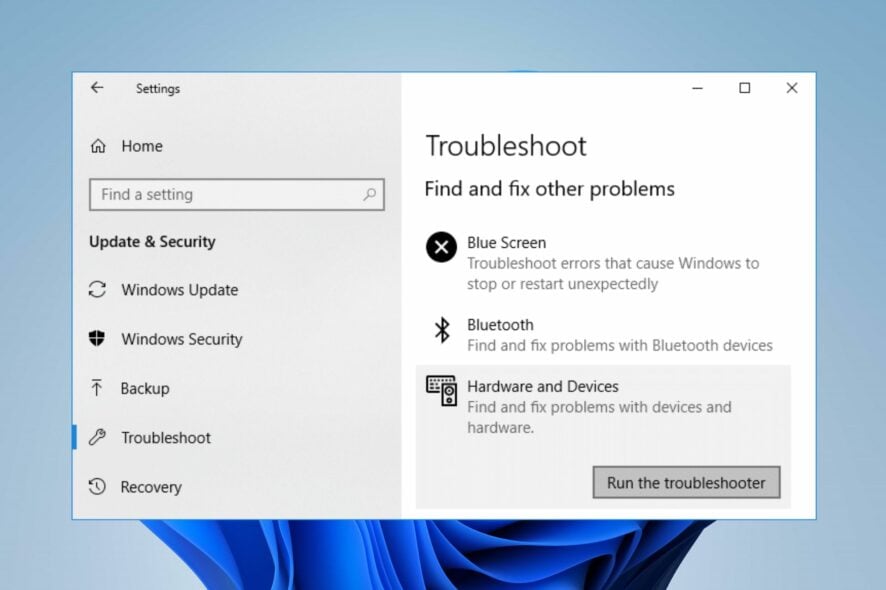
The hardware and devices troubleshooter missing issue on Windows is a problem users may encounter on their PC. It indicates that the Windows in-built troubleshooting tool is not available or working on the computer.
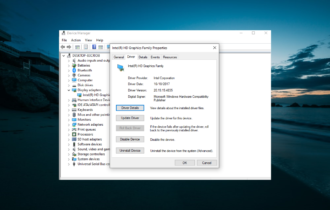
Windows hardware and devices troubleshooter is a built-in tool for detecting and analyzing hardware and device issues on the PC. It comes in handy when you have difficulties with your computer’s hardware and devices, such as Bluetooth, keyboard, audio, printer, Internet connection, battery, etc.
However, the troubleshooter used to be a single app running diagnostics on all hardware and devices on the computer.
The advancement of Windows 10 resulted in the split of its functionality, making the tool inaccessible directly from the Settings app.
Furthermore, the hardware and devices troubleshooter in Windows 11 can be missing for reasons we’ll discuss in this article.
Also, we’ll take you through how you can fix the Windows 10 hardware troubleshooter missing problem on your PC.
Why is the hardware and devices troubleshooter missing on my PC?
The hardware and devices troubleshooter in Windows was accessible in settings for end-users as a single tool for troubleshooting hardware components of the device.
However, the tool may be missing on your computer due to the decision of Microsoft to hide the hardware and device diagnostics tool in Windows 10 1809.
Because most users are using Windows 10, the troubleshooter may not be accessible to the end-user. Instead, deeper toggling needs to be done to access the tool.
Likewise, issues like the Windows update troubleshooter is missing may occur due to update errors encountered during installation.
Nonetheless, Microsoft’s decision to remove the hardware and devices troubleshooter or other factors doesn’t mean users can invoke the troubleshooting tool on their computers.
You may be interested in how to update drivers in Windows 10/11. Likewise, we recommend you read our guide on how to fix the error 0X800f081f on Windows 10 update on your PC.
What can I do to fix the hardware and devices troubleshooter when it is missing?
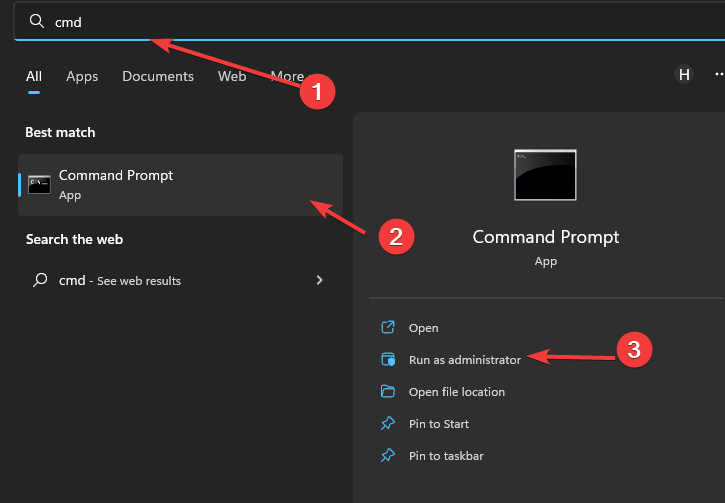
1. Access the troubleshooter via the command line
- Click on the Start button.
- Type cmd in the search box, then press Enter.

- Select the Command Prompt from the search results.
- Type the following in the Command Prompt:
msdt.exe -id DeviceDiagnostic - Press Enter to invoke the Hardware and Devices Troubleshooter.

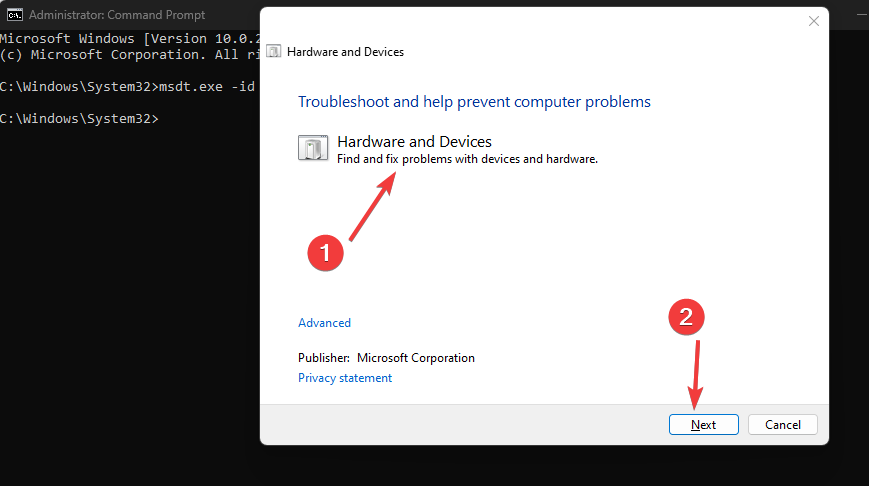
Once the troubleshooter appears, you’ll be able to troubleshoot various hardware issues on your computer.
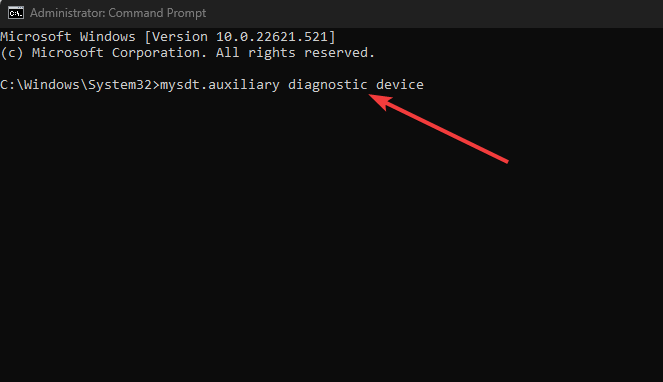
2. Use the hardware troubleshooter command
- Click on the Start button.
- Type cmd in the search box, then press Enter.
- Select the Command Prompt from the search results.
- Type the following in the command prompt:
mysdt.auxiliary diagnostic device
- Press Enter to prompt the Windows Hardware and Device Troubleshooter.
- Click Next to proceed with the analysis and troubleshooting process.
Accessing the troubleshooter via CMD is an alternative if the Windows 10 hardware troubleshooter is missing.
3. Uninstall recent Windows updates
- Press Windows + I to open Settings.
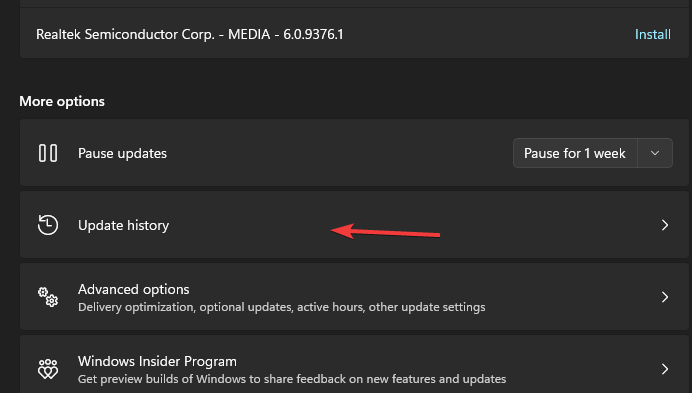
- Go to Windows Update and select Update history.

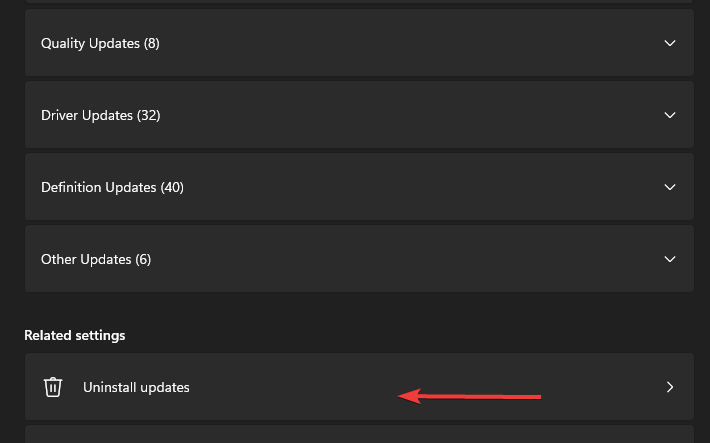
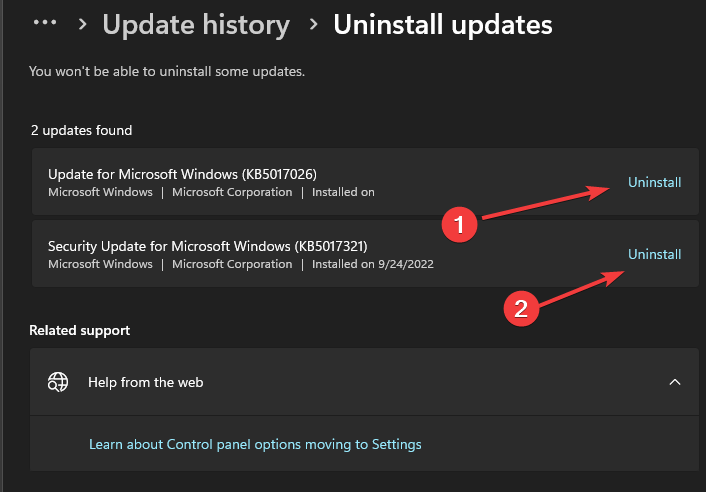
- Click Uninstall updates and select the most recent update.

- Click on Uninstall.

Uninstalling the recent Windows update should help fix any issue with the Windows troubleshooter.
4. Use an alternative troubleshooting tool
Sometimes, you may require the aid of an external tool to help diagnose and troubleshoot issues like this.
You may use a multi-purpose tool designed to solve most problems that users cannot solve. A system repair tool focuses on damaged registries, system files, and DLL files. It also offers malware scanning and other security features.
Scanning your PC will detect and fix all these errors. If the file is corrupted, it will be replaced with the original Windows version.
Using such a troubleshooter will save you the hassle of fixing the problem.
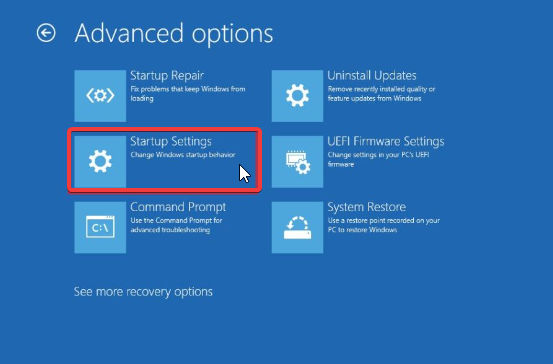
5. Restart Windows in Safe Mode
- On the sign-in screen, press Shift while clicking the Power button.
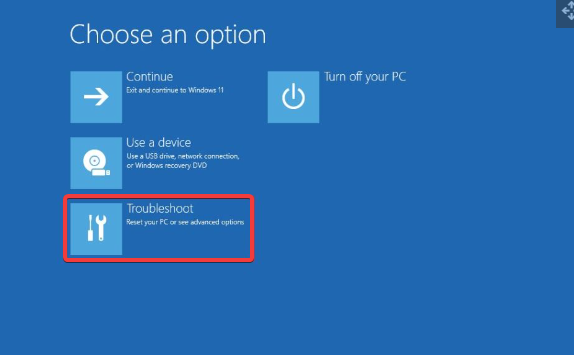
- Press shift to prompt the Advanced Recovery Options window.
- Click on Troubleshoot and select Advanced options.

- Click on Startup Settings and select Restart.

- Press 4 to Enable Safe Mode.


We recommend you read how to start Windows 11 in Safe Mode for smooth performance.
Where can I find hardware settings on Windows 11?
- Open Files on your computer and navigate to your Desktop.
- Right-click on This PC and select Properties from the drop-down.

- Click on Advanced System Settings and go to the Hardware tab.
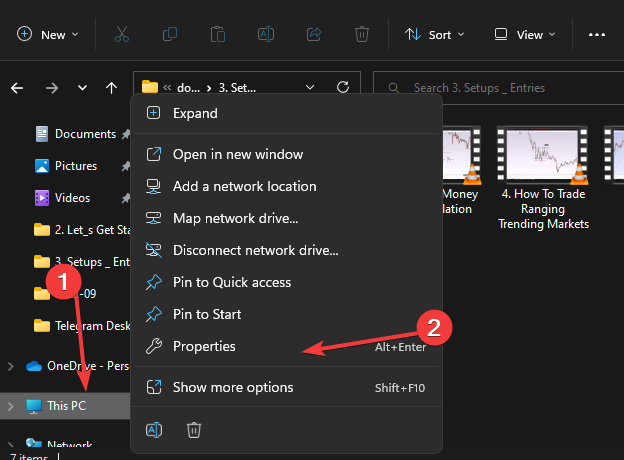
You can see the hardware settings on the Hardware tab in the Advanced system settings.
Check some of our articles that may be beneficial for fixing Windows issues. You may encounter Windows PowerShell not working on your PC.
Likewise, read our article on how to fix network profile type issues in just a few steps.