Windows Sandbox Failed to Start: How to Fix This Error
Enable the Virtualization service to fix this issue
4 min. read
Updated on
Read our disclosure page to find out how can you help Windows Report sustain the editorial team. Read more
Key notes
- The error could come up if Windows Sandbox is disabled or Hyper V service and its dependencies are not running.
- This guide will cover all the available solutions to eliminate this problem.
If you are looking for solutions to fix the Windows Sandbox failed to start error, this guide can help! We will cover all the available methods to resolve the issue right after discussing the causes. Let’s get started!
What causes the Windows Sandbox failed to start error?
There could be various reasons why the Windows Sandbox is not working; some of the common ones are mentioned here:
- Services disabled – If the services related to the Sandbox are stopped, Windows Sandbox will not start. You must ensure the services and the dependencies responsible for the feature are running.
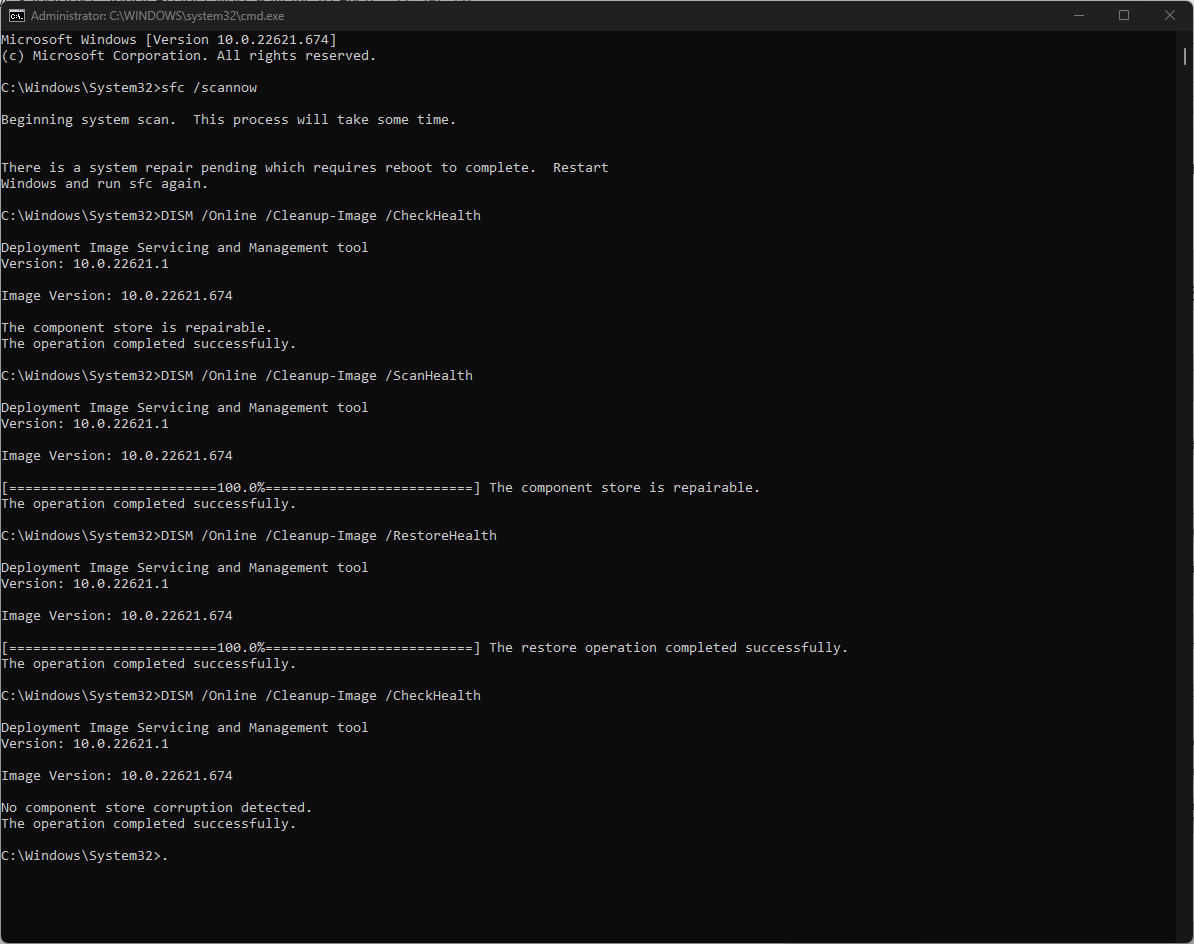
- System files are corrupt or missing – If the system files are damaged, the Sandbox might fail to launch. To fix it, you must repair the system files via Command Prompt.
- System requirements don’t match – Your system must meet the minimum hardware requirements to run Sandbox. If not, you might face this error.
- Sandbox feature not enabled – If the Sandbox feature is not selected from the Windows Features list, Windows Sandbox might not start.
- Third-party antivirus software – Some security software may conflict with the working of the Sandbox. You may have to disable your antivirus temporarily.
- Outdated graphics driver – If the graphics driver is old or outdated, then you might face this issue. You need to install the latest drivers to fix the problem.
What can I do to fix the Windows Sandbox failed to start error?
Before engaging in advanced troubleshooting steps, you should consider performing the following checks:
- Check for Windows updates.
- Disable your security software temporarily.
1. Disable and enable Windows Sandbox
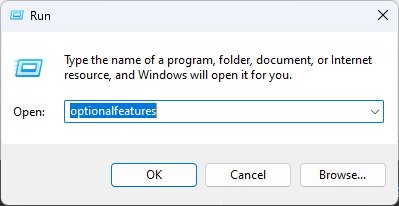
- Press Windows + R to open the Run console.
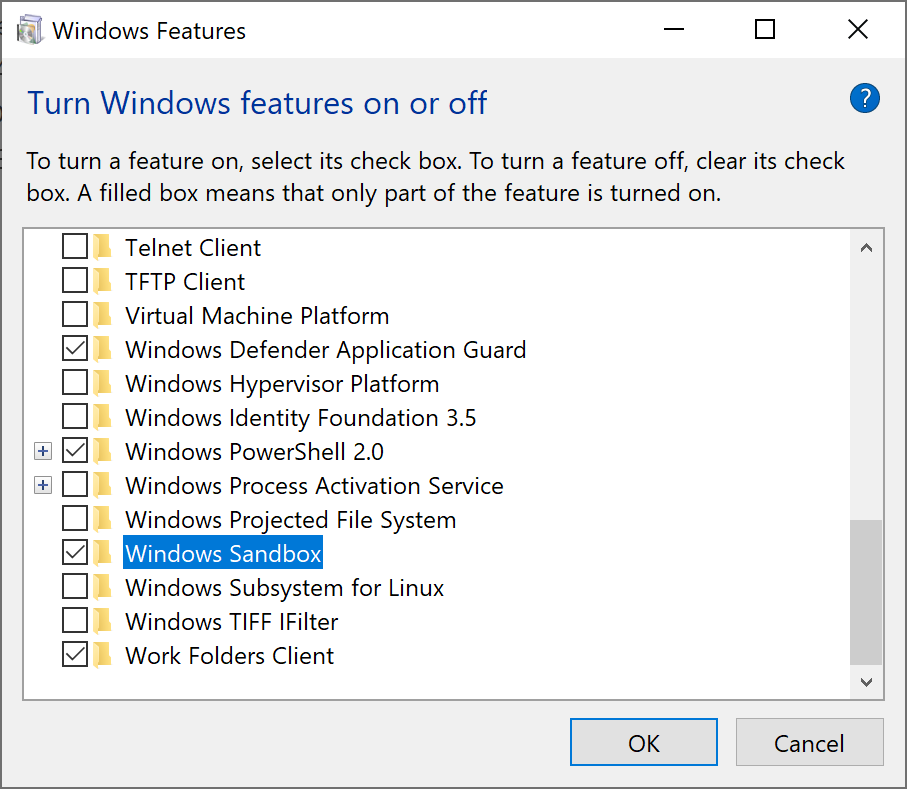
- Type optional features and press Enter to launch Windows Features.
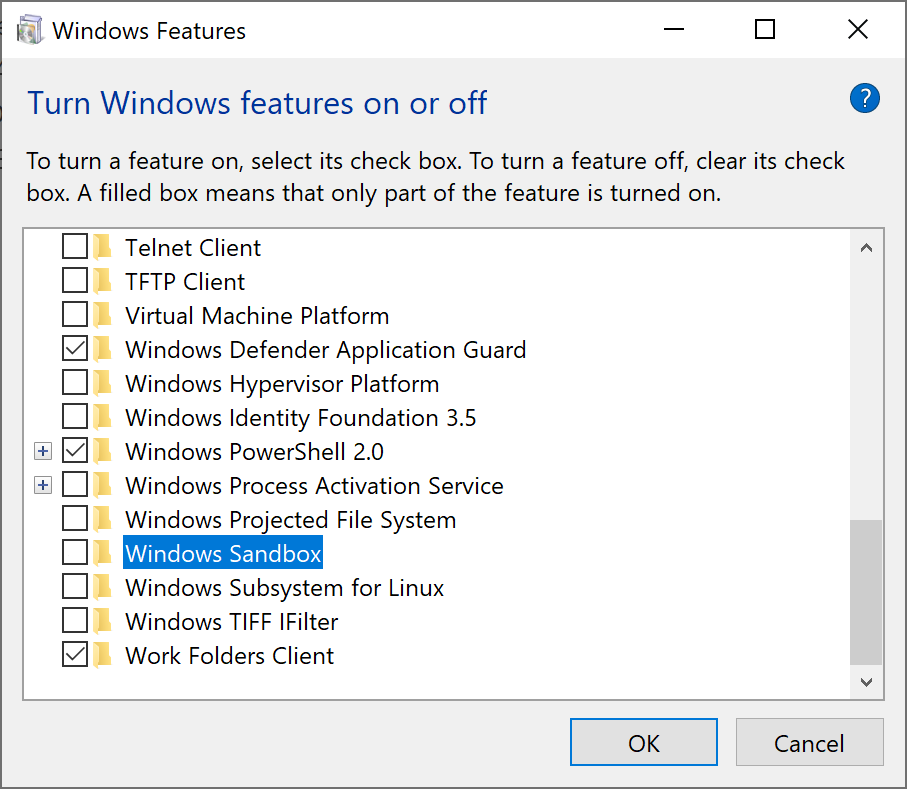
- Scroll down and remove the checkmark next to Sandbox.
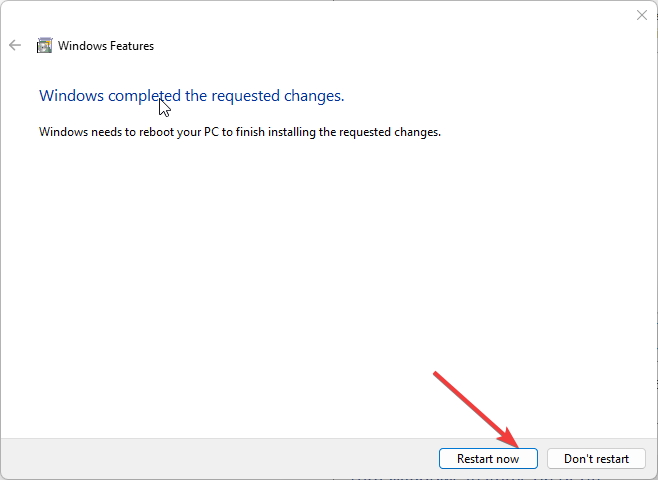
- Choose Restart now to let the changes take effect.
- Enable the Windows Sandbox option and click Restart now.
2. Start Sandbox services
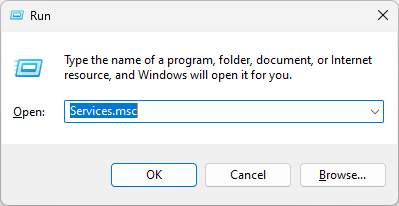
- Press Windows + R to open the Run dialog box.
- Type services.msc and press Enter to open Services.
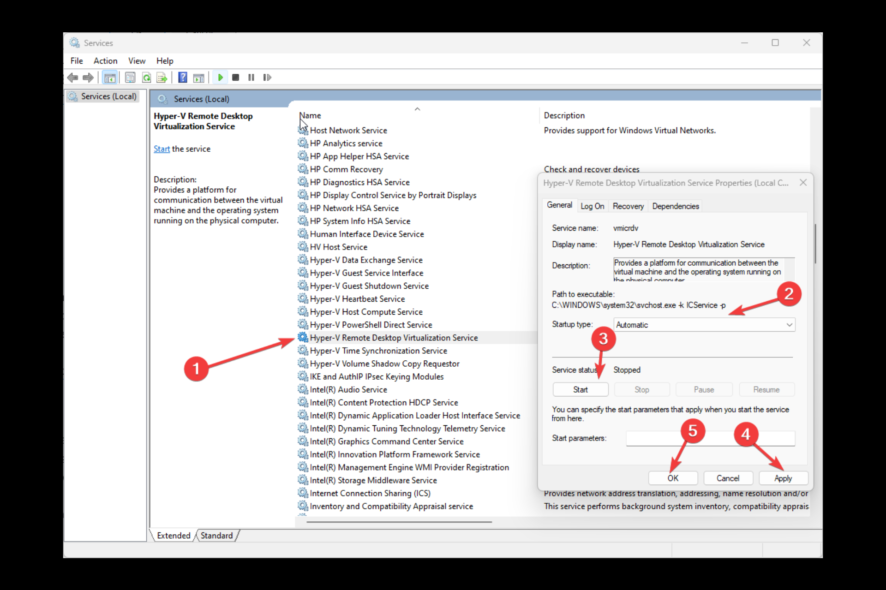
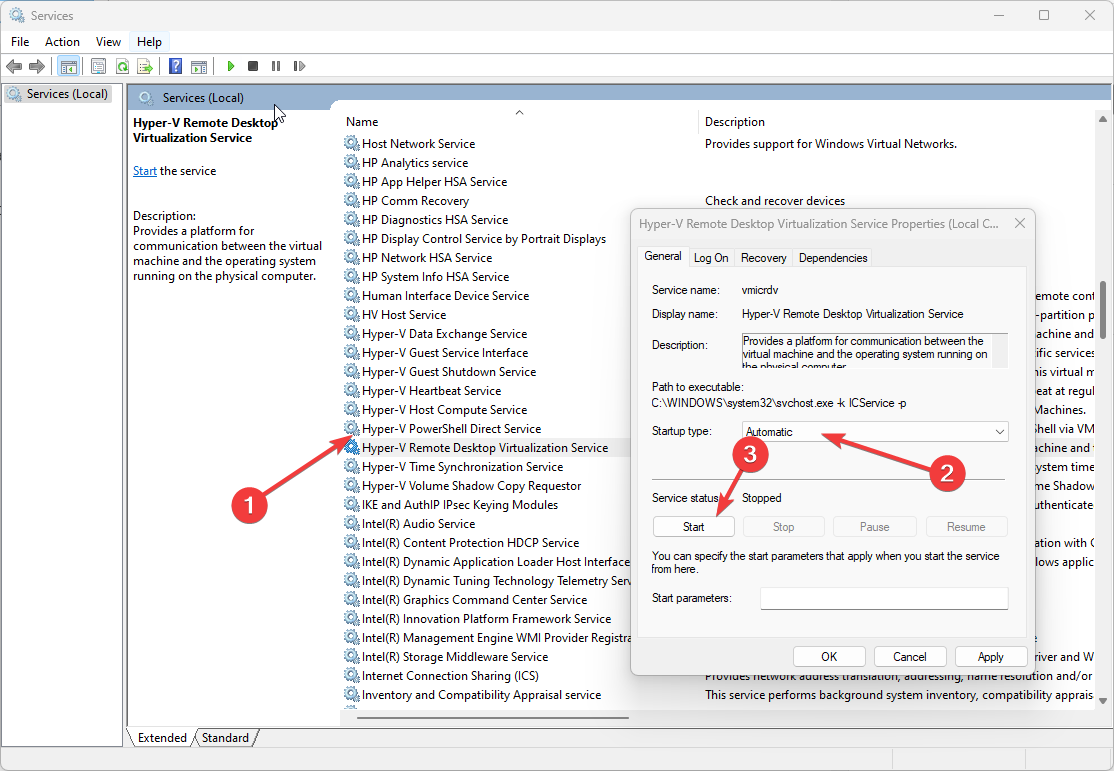
- Locate and double-click Hyper-V Remote Desktop Virtualization Service to open Properties.
- For Startup type, select Automatic; for Services status, choose Start.
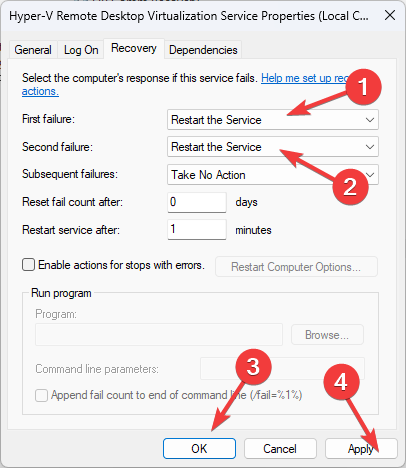
- Now go to the Recovery tab; for the First failure, select Restart the service from the drop-down.
- For the Second failure, select Restart the service.
- Click Apply and OK.
- Make the same changes for Hyper-V Host, Hyper-V Time Synchronization, and Virtual Disk.
3. Restart Hyper V and other programs
- Press Windows + R to open the Run window.
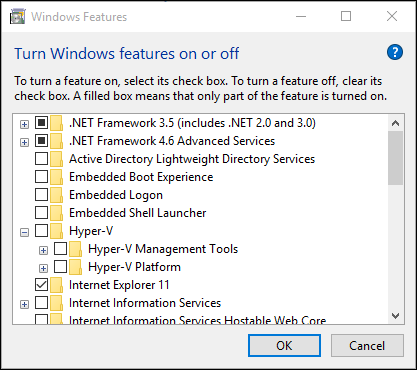
- Type optionalfeatures and press Enter to open Windows Features.
- Locate and expand the Hyper-V option.
- Remove the checkmark next to the Hyper-V Management Tools and Hyper-V Platform.
- Click OK, close the program, and restart your computer.
4. Use Windows troubleshooter
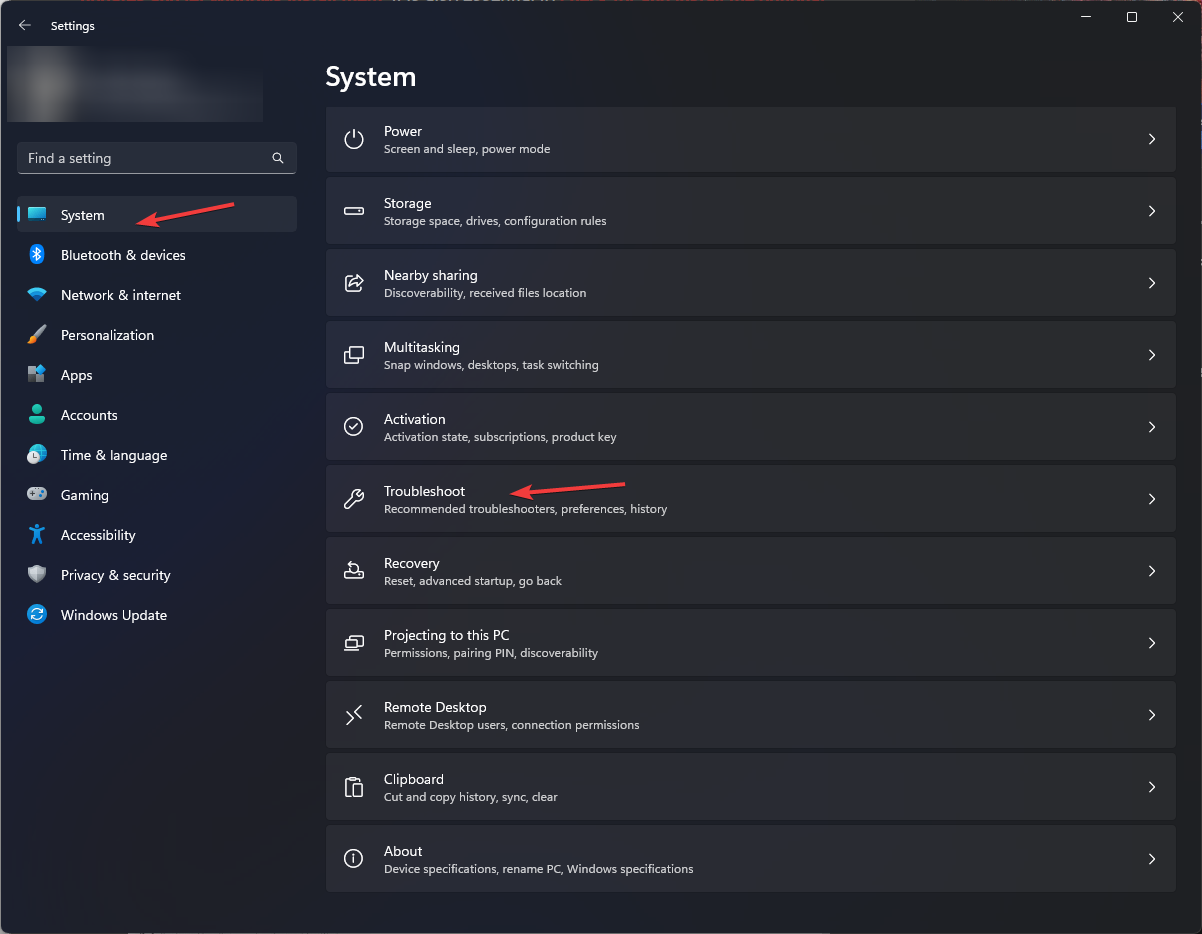
- Press Windows + I to open Windows Settings.
- Go to System, then click Troubleshoot.
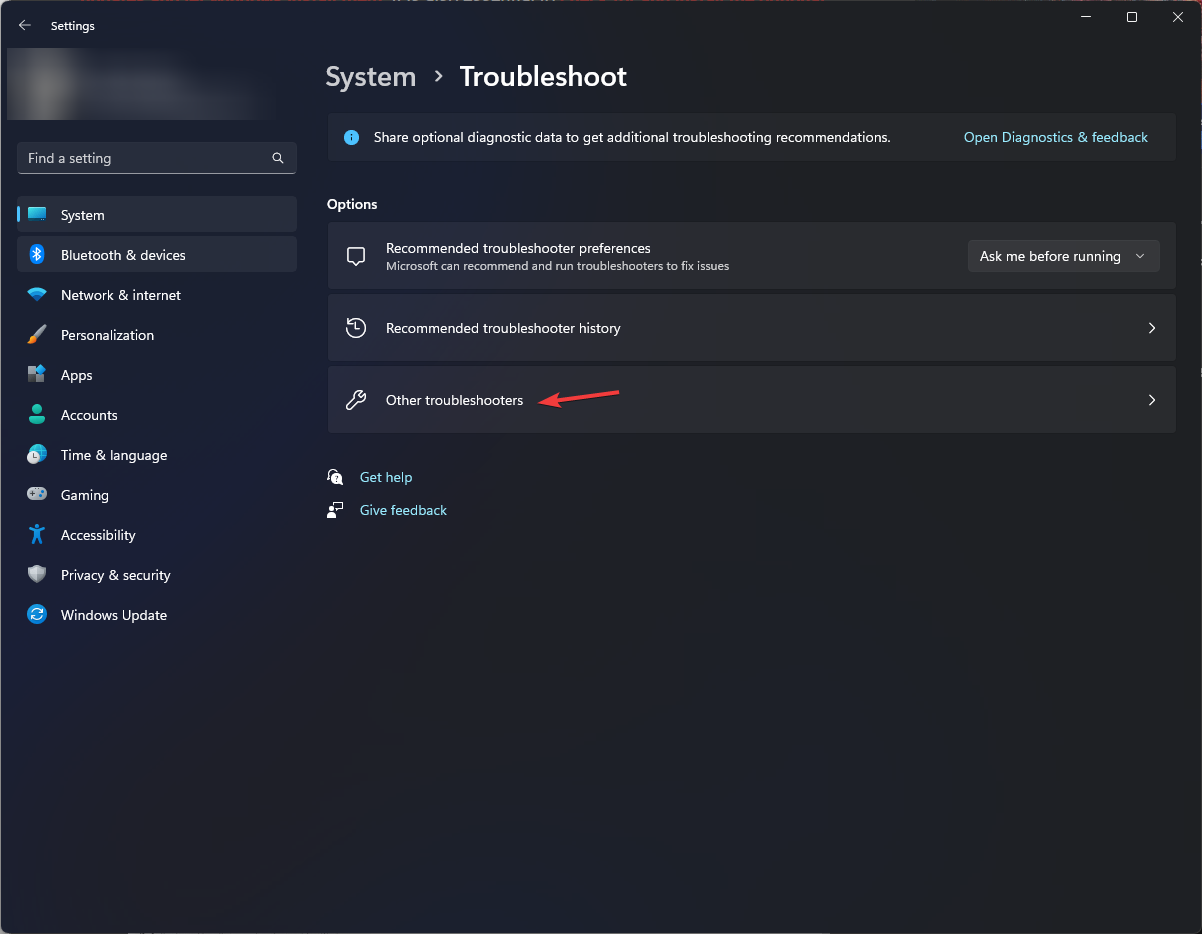
- Click Other troubleshooters.
- Select hardware or device and click Run.
- Follow the onscreen instructions and restart the computer.
5. Repair system files
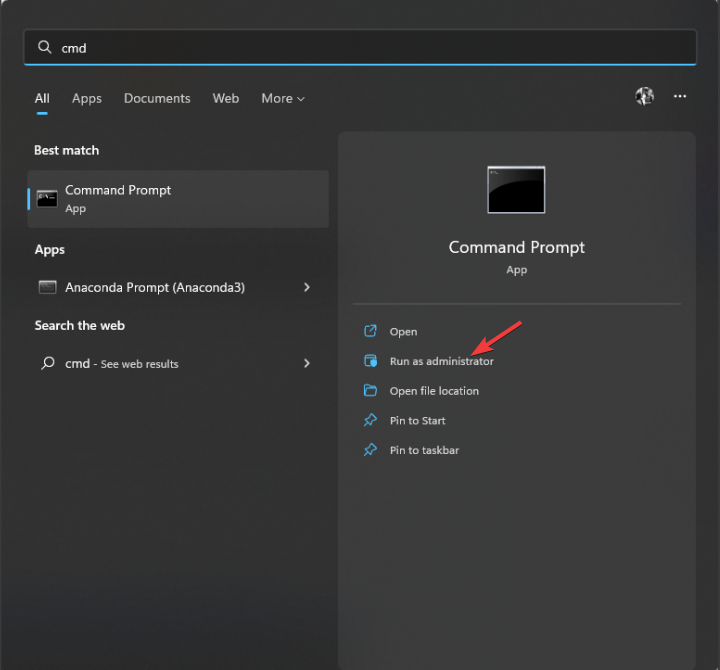
- Press the Windows key, type CMD, and click Run as administrator.
- Type the following command to repair system files and press Enter: sfc/scannow
- Then, copy and paste the following commands one by one and press Enter after every command:
DISM /Online /Cleanup-Image /CheckHealthDISM /Online /Cleanup-Image /ScanHealthDISM /Online /Cleanup-Image /RestoreHealth - Close the Command Prompt window and restart your computer.
6. Restore Windows to its previous version
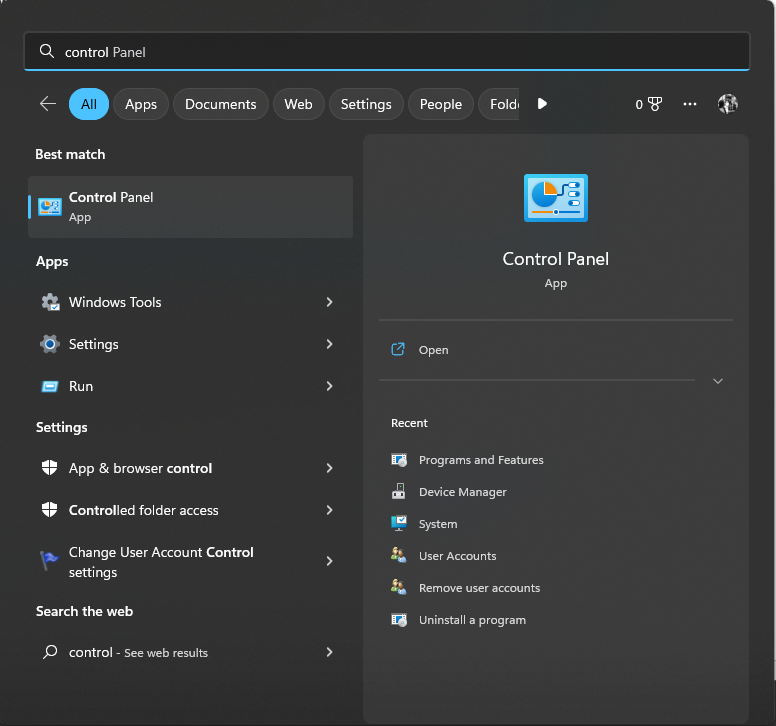
- Press the Windows key, type Control Panel, and click Open.
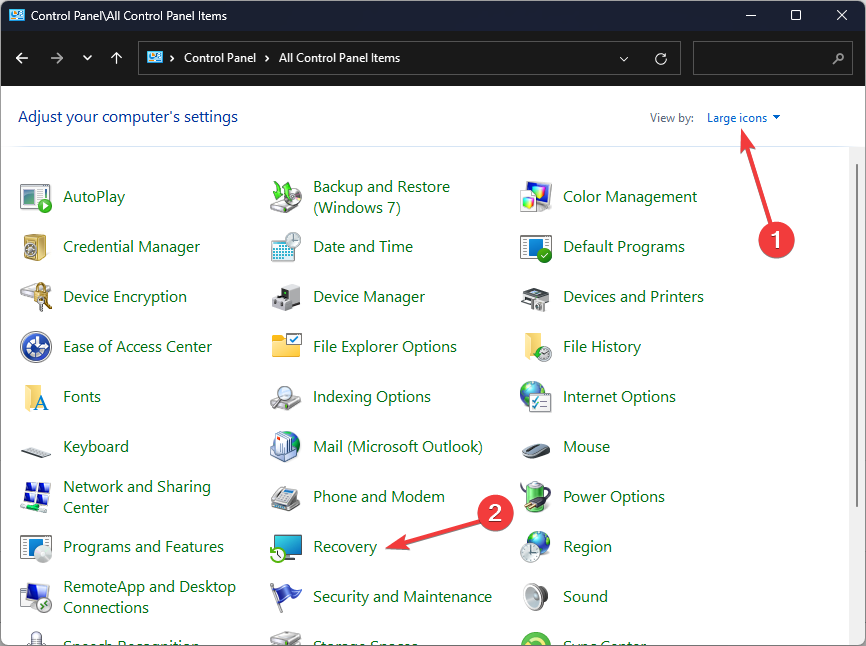
- Select Category as Large icons and click Recovery.
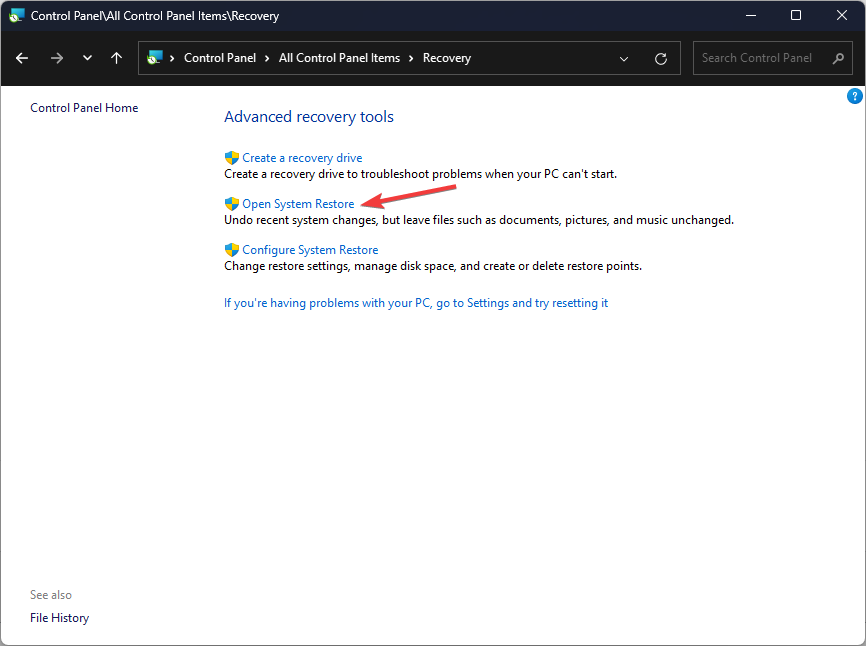
- Now click Open System Restore.
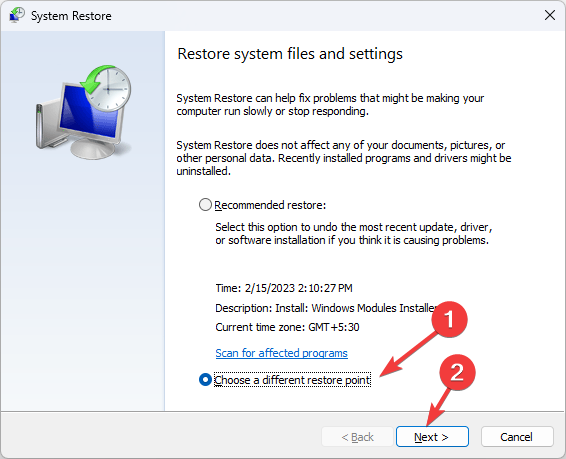
- You will now see the System Restore window; select Choose a different restore point and click Next.
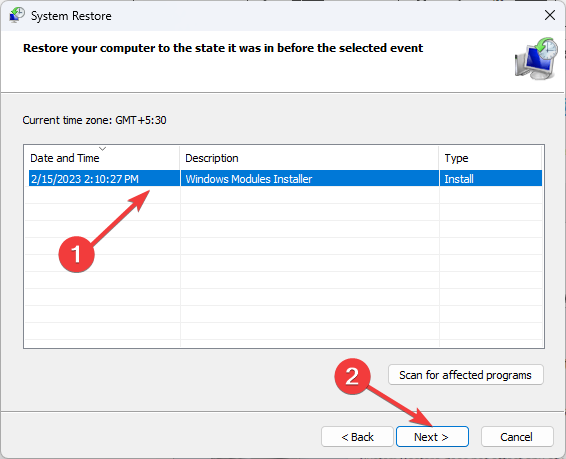
- Choose the system restore point and click Next.
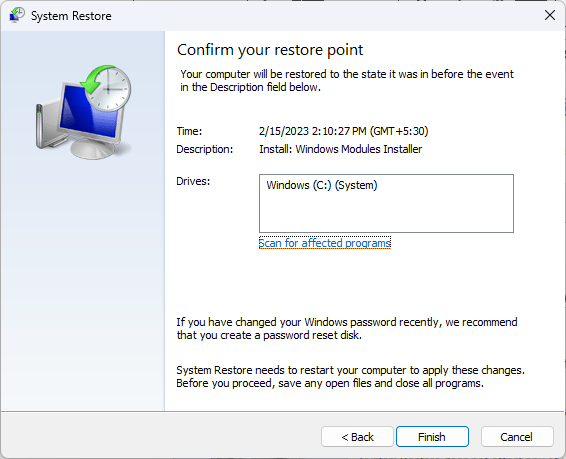
- Now click Finish and wait for the process to complete.
7. Update the device drivers
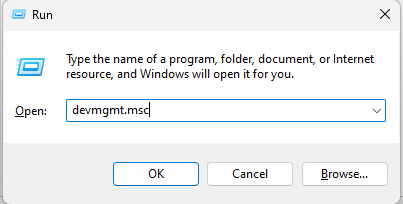
- Press Windows + R to open the Run window.
- Type devmgmt.msc and press Enter to open Device Manager.
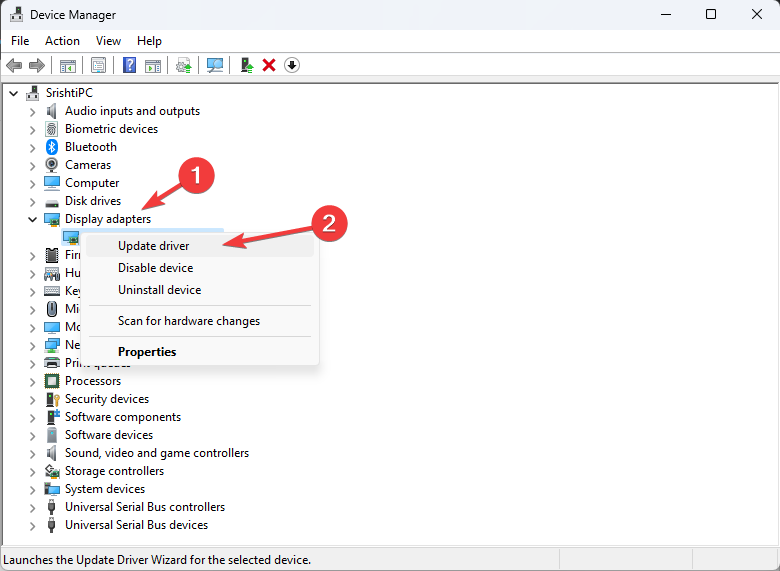
- Go to Display adapters and expand it.
- Select and right-click the graphics drivers to choose the Update driver.
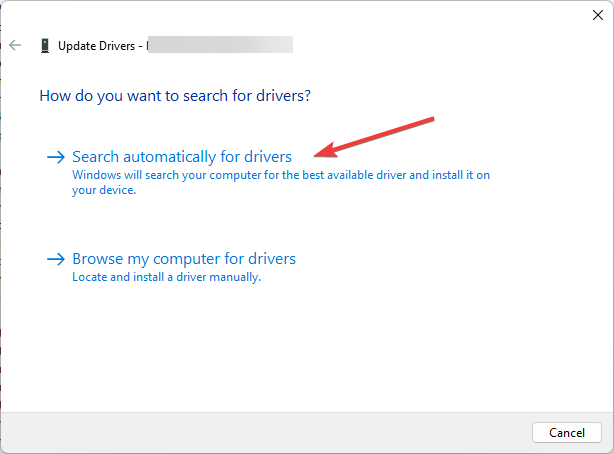
- Click Search automatically for drivers.
- Follow the onscreen instructions to complete the process.
A better alternative to installing your drivers manually, in our view, is using a professional driver tool that can perform it automatically and without any risks of system damage.
Outbyte Driver Updater is the ideal solution for updating any driver and repairing or optimizing your Windows PC.
So, you need to take these steps to fix the Windows Sandbox failed to start error. If you have any questions or concerns about the error, you can mention them in the comments section below.


User forum
0 messages