How to Update Graphics Driver in Windows 11: 5 Simple Ways
Find out multiple ways to bring your GPU drivers up-to-date

Today, we’ll show you how to update your graphics driver in Windows 11 and get the best out of it.
You must update your graphics frequently to have the most optimal performance possible. Not only for gaming and graphic design, but also for day-to-day simple PC tasks.
Check out the 5 methods explained below.
How do I update my graphics drivers?
Here’s a quick video summary. Much more details and step by step instructions, below.
1. Using a third-party driver updater
To update your display driver in Windows 11, you can always rely on specialized driver updating software. These tools allow you to run a scan and quickly identify the driver you need.
Hence, this solution is safe and can guarantee increased system performance and up-to-date drivers without causing system malfunctions.
2. Using built-in tools
2.1 Check what graphics drivers you already have
- Click on the magnifying glass icon to bring up the search bar.
- Type in System Information and click on the first entry you see to open the System Information app.

- Under System Summary, click on Components.

- Then click on Display.
- Locate the Adapter Type and Adapter Description to see your graphics card model. In this example, the graphics card comes from the virtual machine used, whereas you typically see an Intel card.

2.2 Update the graphics drivers via Settings
- Bring up the Start menu and click on the Settings icon.

2. Click on the Windows Update tab on the left side of the Settings menu.

3. Select Advanced options.

4. Click Optional updates.

5. Click on the top drop-down menu to see if any driver updates are available.

6. If there are any updates, click the update to highlight them.

7. Then click the Download & install button.

8. The driver will begin downloading and will finish after a few minutes.

9. Press the Restart now button to finish the installation.

Updating the graphics drivers though Settings it’s easier with the following step-by-step guide:
3. Update the graphics driver using Device Manager
You can easily update the graphics driver Windows 11 using the built-in Device Manager. This tool can automatically search for drivers for your GPU, to ensure you are always up to date with the newest updates.
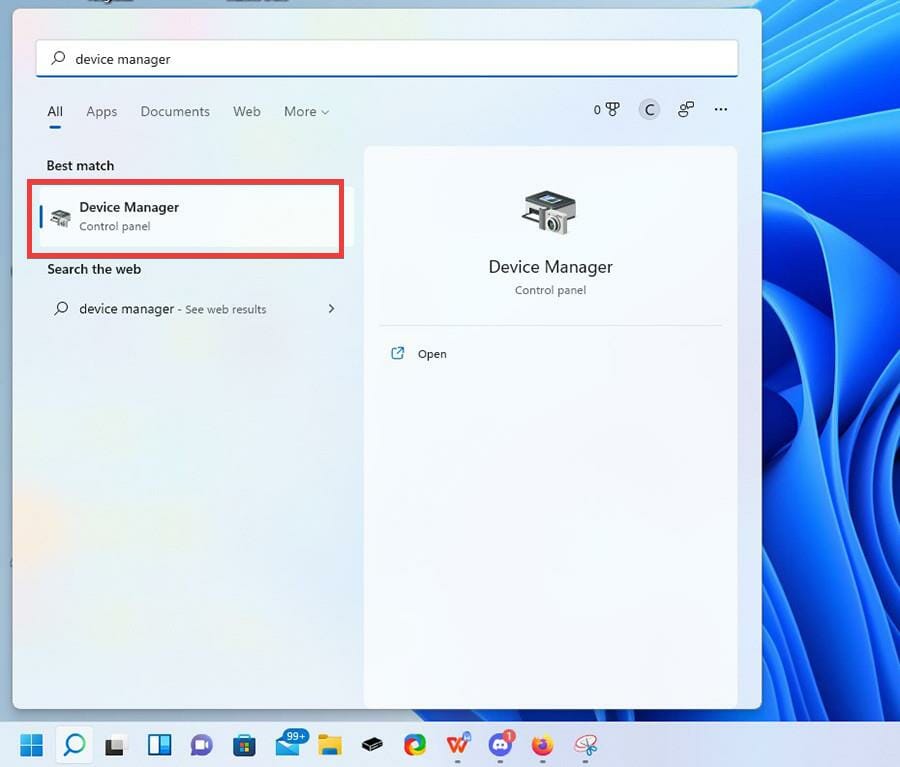
1. Open up the search bar in the lower left side of your screen and type device manager.
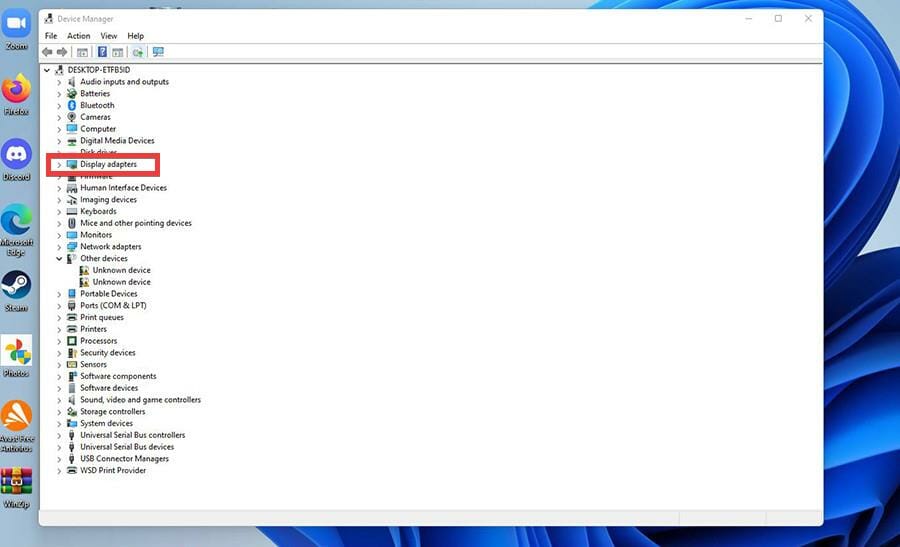
2. In the Device Manager, click on Display adapters.
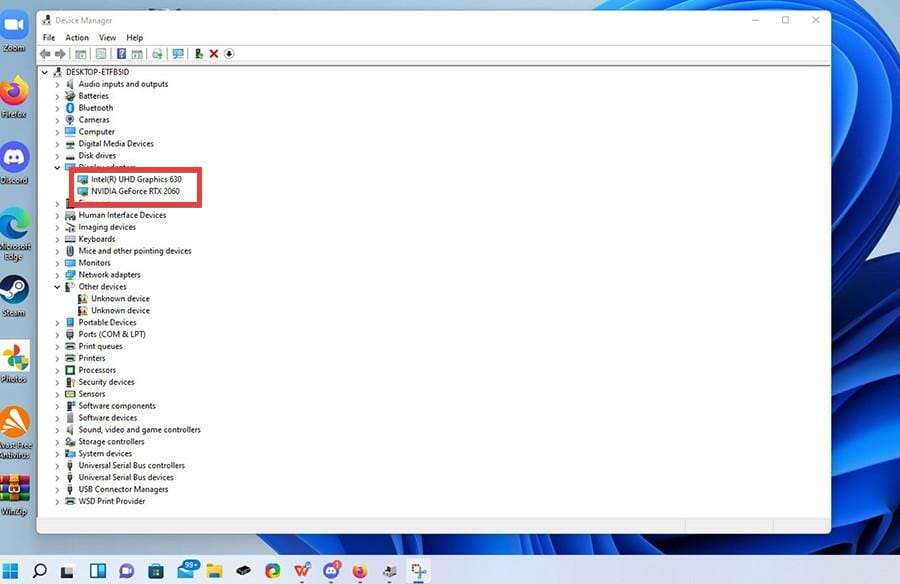
3. Here you will find your Windows 11 computer’s graphics card or cards.
4. To update a graphic card from the list, right-click on it and select Update driver.
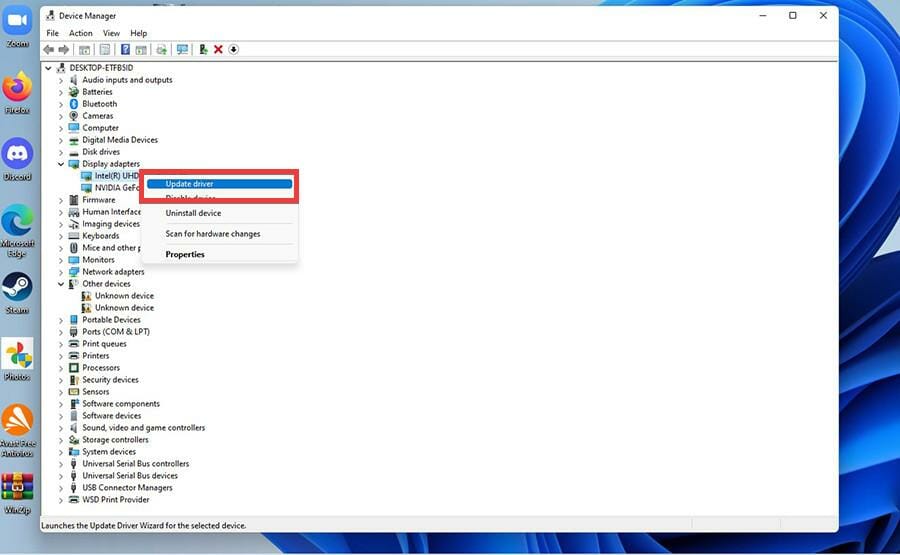
5. A window will appear asking how you want to search for available drivers.
6. Select Search automatically for driver to make it easy.
7. At that point, the Device Manager will automatically download and install the drivers.
8. The window may tell you that the best drivers are already installed. In that case, just close the window.
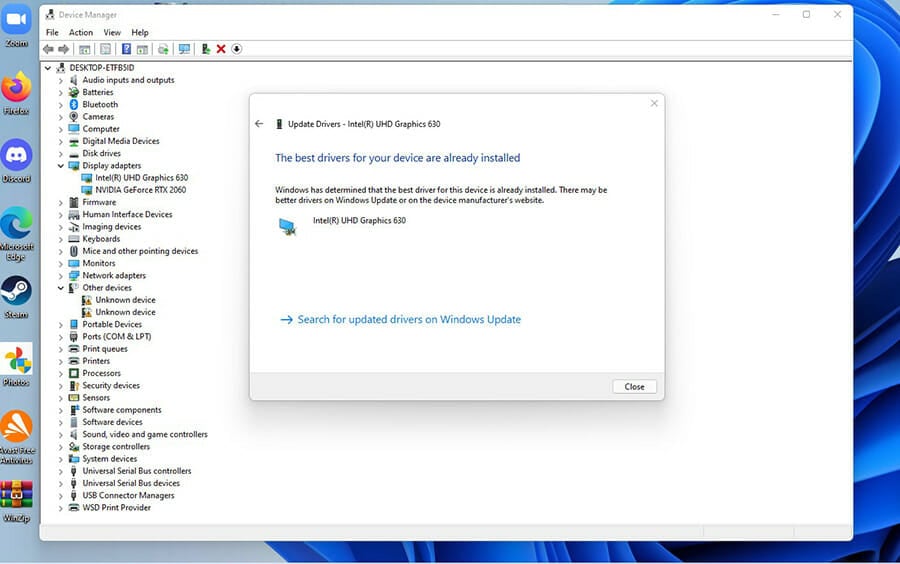
The built-in Device Manager can easily update the graphics driver Windows 11. This tool can automatically search for drivers for your GPU to ensure you are always up to date with the newest updates.
4. Update the graphics driver with external official tools
4.1 Updating NVIDIA graphics driver
- Go to Nvidia GeForce Experience’s website to download drivers for Windows 11.

- On the GeForce Experience page, click the Download Now button.

- Click on Save File in the small window.

- Go to where the file was downloaded and double-click it to install.

- In the wizard, select Agree and Install.

- Create an account for GeForce Experience.

- In GeForce Experience, click on Drivers at the top.

- Click on Check For Updates in the corner to see if there’s anything available.

- For other drivers, click on Download.

- After a short time, the drivers will download.

- You can click either Express Installation or Custom Installation.

- The installation will take a few minutes.

4.2 Updating Intel graphics driver
- Go to Intel Graphics Driver.

- On the next page, click Get started.

- Click Download now to download the Intel Driver & Support Assistant.

- Click Save File in the small window that appears.

- Go to the location of the downloaded app and double-click it.

- Click Install and run through the installation wizard.

- After installation, click Restart to finish.

- Open the Intel Driver and Support Assistant app.
- In the app, select Support on the left-hand side.

- Select Download Graphics Driver to download the latest drivers.

- You will go back to the Drivers and Software page. Select Get started again.

- Here you will now see all the drivers available for download. You can choose which ones you want or select Download all, which is what this guide will select.

- Give it a few minutes to download.

- Click Install on a driver.

- A small window will appear, asking you if you want to upgrade. Click Yes.

- Run through the installation wizard.

- It may ask you to choose a setup type. Select Typically, or you can customize the installation.

- Select Finish to complete the installation.

For AMD drivers, you can check out our post on how to update the AMD graphics drivers on Windows 11.
You can learn more about the full Intel GPU update process by reading the detailed guide on updating Intel graphics drivers.
5. Reinstalling the graphics driver
- Return to the Device Manager and click on Display adapters. In this example, the guide will reinstall Intel UHD Graphics 630, but the instructions are the same for all drivers.

- Right-click on the graphics card and select Uninstall device.

- A small window will appear. Click the box next to Attempt to remove the driver for this device.

- If you want to manage the driver separately, click Device by the driver in the small window.

- Click the Uninstall button.

- Now head over to the official download page of the driver’s respective manufacturer. This guide will go to Intel’s page, but there’s also AMD and NVIDIA.
- Locate the drivers you uninstalled. In this case, it’s Intel UHD Graphics 630.

- Locate the drivers and click Download.

- Click Save File when the small window appears.

- After downloading, go to where the file is located and double-click it.

- In the small window that appears, click Run.

- A graphic driver installer will appear. Begin the installation.

- Run through the installation wizard and the instructions of your respective driver.

- After installing, restart your computer.
- You can check if the installation was successful by going back to the Device Manager and seeing if the Windows 11 graphics driver problem is solved.
That’s about it. Now your graphics card show work seamlessly with your up to date drivers. If you want your audio hardware to work well too, consider updating your audio drivers too.
Windows 10 may be out of style, but Windows 11 computers are expensive so you may be holding onto that old laptop. Until the day arrives when you buy a Windows 11 machine, we recommend learning how to update drivers on a Windows 10 computer.
Before you go, check our GetMyDrivers review to learn how to update all your drivers quickly and automatically.
These methods should help you if the GeForce Experience driver downloads but doesn’t install, so don’t hesitate to try them.
Feel free to comment below if you have any questions about other Windows 11 apps. Also, leave comments about what reviews you’d like to see or information on other Windows 11 features.
Read our disclosure page to find out how can you help Windows Report sustain the editorial team. Read more


Improve this guide


User forum
0 messages