7 Ways to Check Wi-Fi Signal Strength on Windows 11
Use Command Prompt tell you all about Wi-Fi signal strength
5 min. read
Updated on
Read our disclosure page to find out how can you help Windows Report sustain the editorial team. Read more
Key notes
- Are you curious about your Wi-Fi signal strength? There is a way to find out just how strong it is without additional tools.
- From the Taskbar to the Command prompt, you can check your signal strength and adjust accordingly until you get your desired strength level.
If you are using Wi-Fi or a wireless router, you may want to check the Wi-Fi signal strength. This is important for your connection. The Wi-Fi signal strength is the strength of the wireless network you are connected to.
You may experience slower speeds and more dropped connections if you have a weak Wi-Fi signal. Checking the signal strength will help you adjust your router accordingly to boost your speeds. Find out how you can check the Wi-Fi signal strength here.
What factors influence the Wi-Fi signal strength?
It’s important to check the Wi-Fi signal strength on your computer because if you can’t connect to the internet, you might be unable to do anything.
The strength of your Wi-Fi signal depends on many factors, including:
- Your location – If you’re too far from the access point, you won’t get enough power to send a signal back. The further you are from the router, the weaker the signal.
- The type of device you are using – If you have an older router, it may be having difficulties keeping up with the demand for Wi-Fi. If this is the case, consider upgrading to a newer model that has more processing power.
- How crowded the area is – If there are many people around, or if there are lots of walls blocking signal, you’ll have trouble connecting to the network and receiving any data.
How do I check my Wi-Fi signal strength on Windows 11?
1. Use the Taskbar
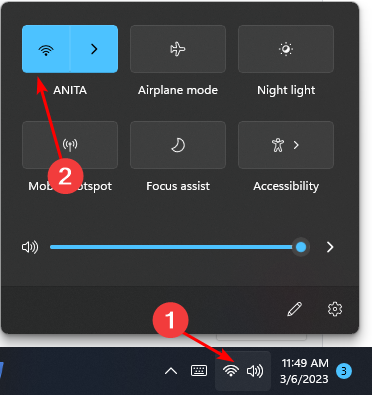
The Taskbar is the easiest tell-tale sign for your Wi-Fi signal strength. When you click on the signal bar at the bottom right, the Wi-Fi menu will pop up along with other available connections. Opening this window shows you how strong your connection is.
If the bars are full, it means you have a strong connection, but if the bars are one or two, you may have trouble connecting to the Internet. If the signal strength is low, it could mean that you’re not getting enough power from your router or modem.
2. Use Task Manager
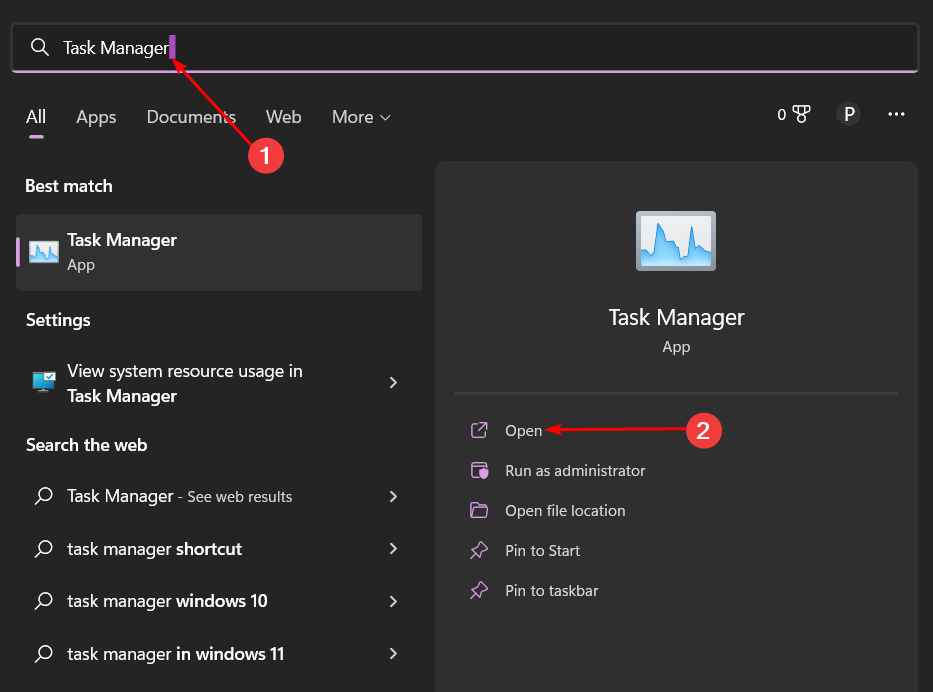
- Hit the Windows key, type Task Manager in the search bar, and click Open.
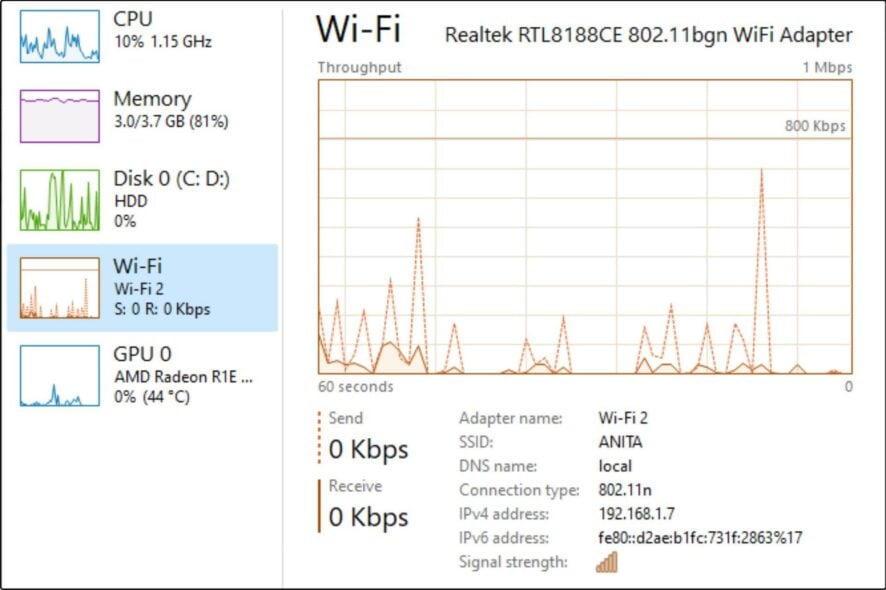
- Navigate to the Performance tab and click on Wi-Fi.
- You should be able to check the Wi-Fi signal at the bottom. Again, the strength of the connection is dependent on how full the bars are.
3. Use the Settings app
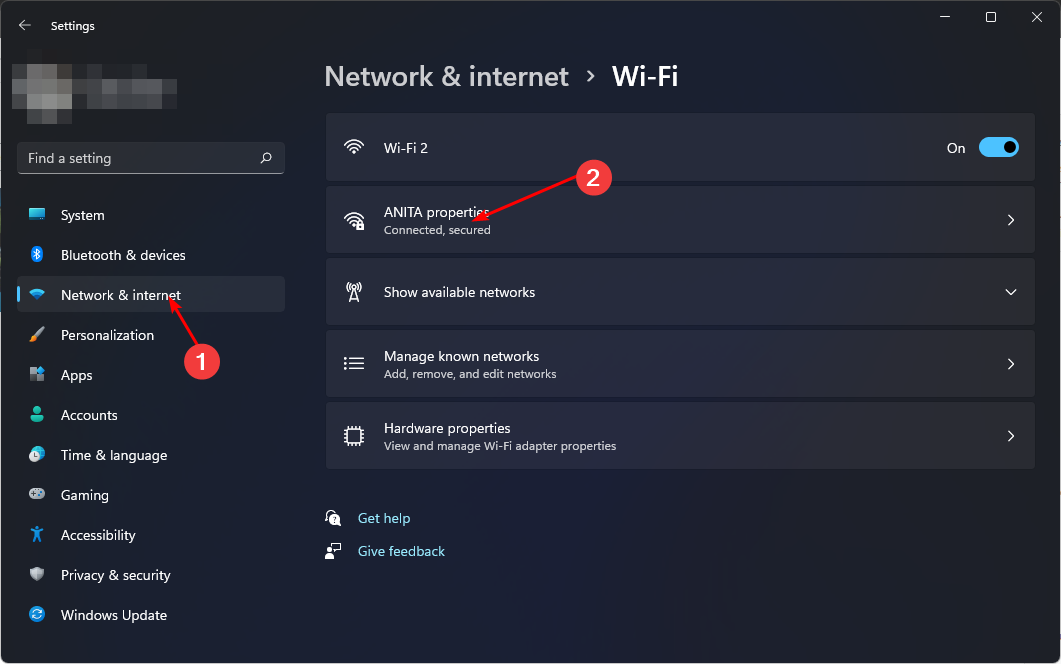
- Hit the Windows key and click on Settings.
- Navigate to Network & internet, then click on Wi-Fi.
- Your available networks will be listed, each with its status bar. The fuller the bars, the stronger your connection.
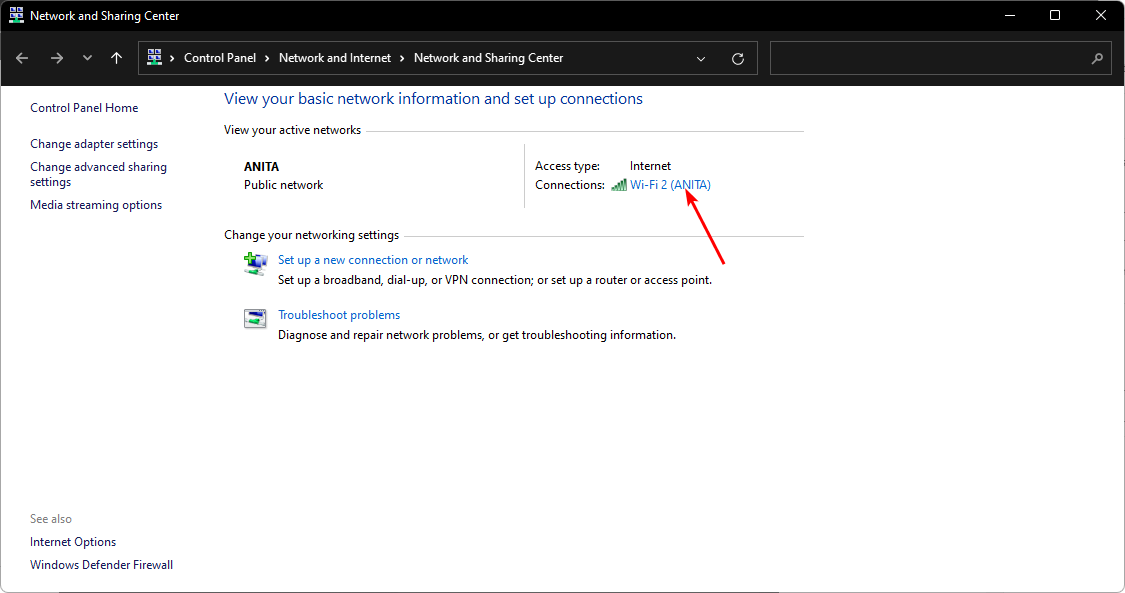
4. Use the Control Panel
- Hit the Windows key, type Control Panel in the search bar, and click Open.
- Navigate to Network and Sharing Center.
- Your active connections will be listed, and beside each will be a status bar that shows your Wi-Fi signal strength.
5. Use the Command prompt
- Hit the Windows key, type cmd in the search bar, and click Run as administrator.
- Type the following command, then press Enter:
netsh wlan show interfaces - Your Wi-Fi signal strength will be listed in form of a percentage. The higher the percentage, the stronger your connection.
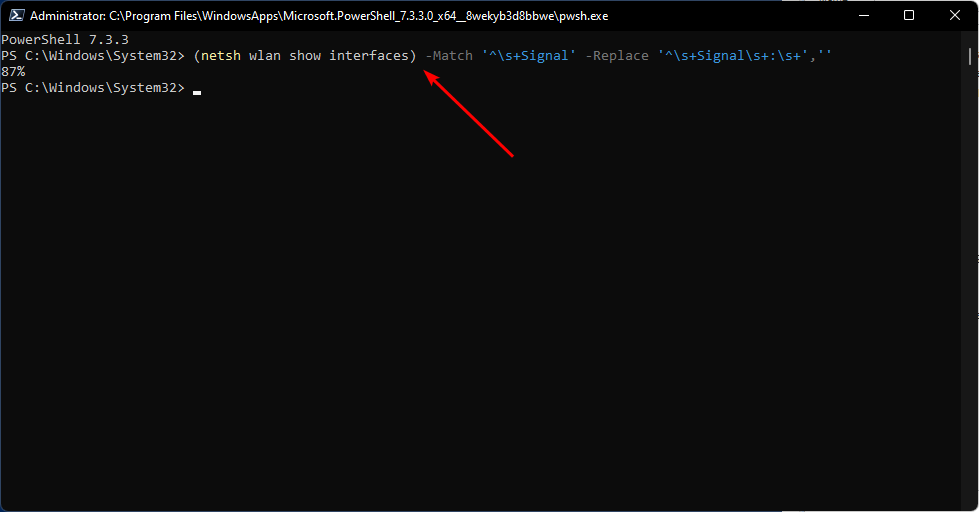
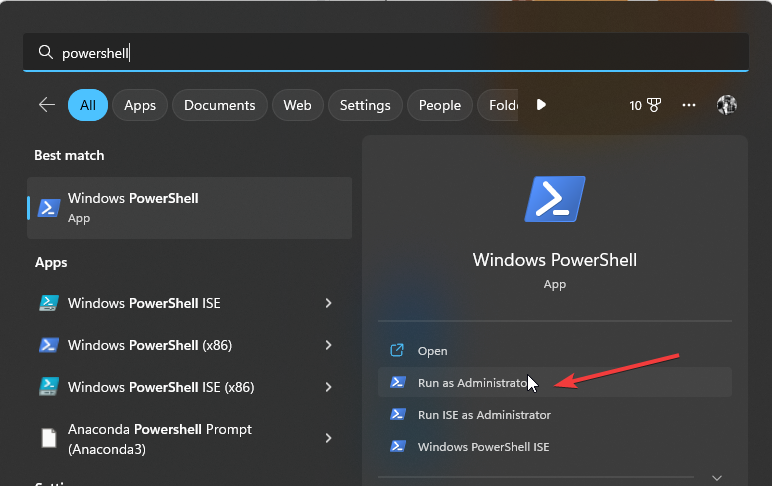
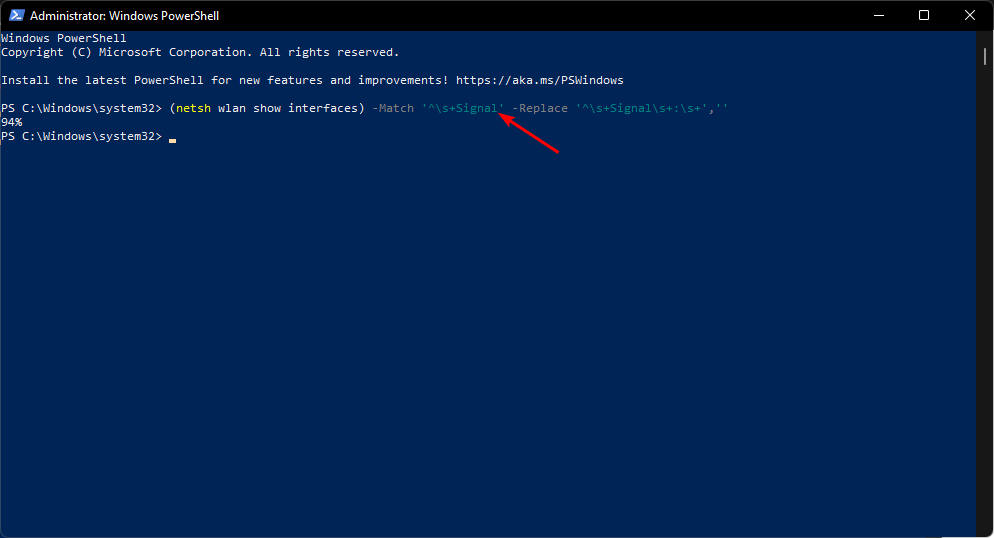
6. Use the Powershell Command
- Hit the Windows key, type Powershell in the search bar, and click Run as administrator.
- Type the following command, then press Enter:
(netsh wlan show interfaces) -Match '^\s+Signal' -Replace '^\s+Signal\s+:\s+','' - Your Wi-Fi signal strength will be listed in form of a percentage. The higher the percentage, the stronger your connection.
7. Use third-party tools
While the built-in Wi-Fi settings on Windows options will give you a rough estimate of the Wi-Fi signal strength, they are not always accurate. As you can see above, each option has a different reading for the same connection.
If you want more detailed information about your Wi-Fi connection and connectivity, you can use third-party tools. Wi-Fi analyzer tools will be useful to get a comprehensive report on your Wi-Fi performance.
They can also help you troubleshoot many connection problems you might be facing. Speed tester tools are also worth checking out if you want to monitor your speeds closely.
One of the third-party tools we recommend you try is PRTG Network Monitor, as it can monitor not only your network connections but all your systems, devices, apps, traffic, and others, basically your entire IT infrastructure.

PRTG Network Monitor
Keep track of your WiFi signal strength with this easy-to-use monitoring expert.How do I boost the Wi-Fi signal on a Windows 11 laptop?
When you’re trying to boost your Wi-Fi signal, it’s important to remember that not all Wi-Fi routers are created equal. Still, there are some tweaks you can do to boost the Wi-Fi signal, such as:
- Use wired connections – If you have an Ethernet cable, you can connect it directly to an available port on your router.
- Update your network drivers – These drivers will allow your computer to communicate with the wireless adapter, increasing signal strength.
- Change your network bands – Changing from 2.4GHz to 5GHz band on your wireless router settings will provide more bandwidth for faster internet speed.
- Use a Wi-Fi extender/repeater – You might also want to consider using a wireless repeater or extender. These are devices that boost the signal for longer distances.
- Use a Wi-Fi antenna booster – There are several types of antenna boosters available in the market. They work by boosting the Wi-Fi signal of your laptop by amplifying it with a specific frequency.
And that’s how to check your Wi-Fi signal strength in your Windows 11.
That’s all we had for this article, but keep the conversation going in the comment section below. Let us know your tips to keep your Wi-Fi signal strength stable.








User forum
0 messages