How to Change The Keyboard Settings to Default on Windows 11?
Before resetting the keyboard, ensure there is no hardware issue
2 min. read
Updated on
Read our disclosure page to find out how can you help Windows Report sustain the editorial team. Read more
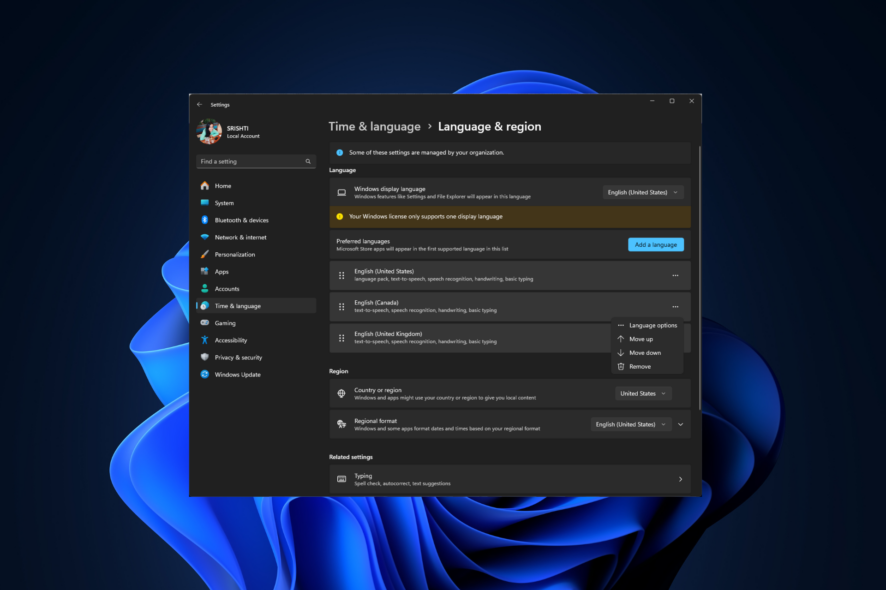
If you are experiencing issues with your keyboard, you need to reset the keyboard settings to default. In this guide, we will discuss the steps to change keyboard settings back to normal.
How can I change the keyboard settings back to normal?
1. Select the preferred language again
- Press Windows + I to open the Settings app.
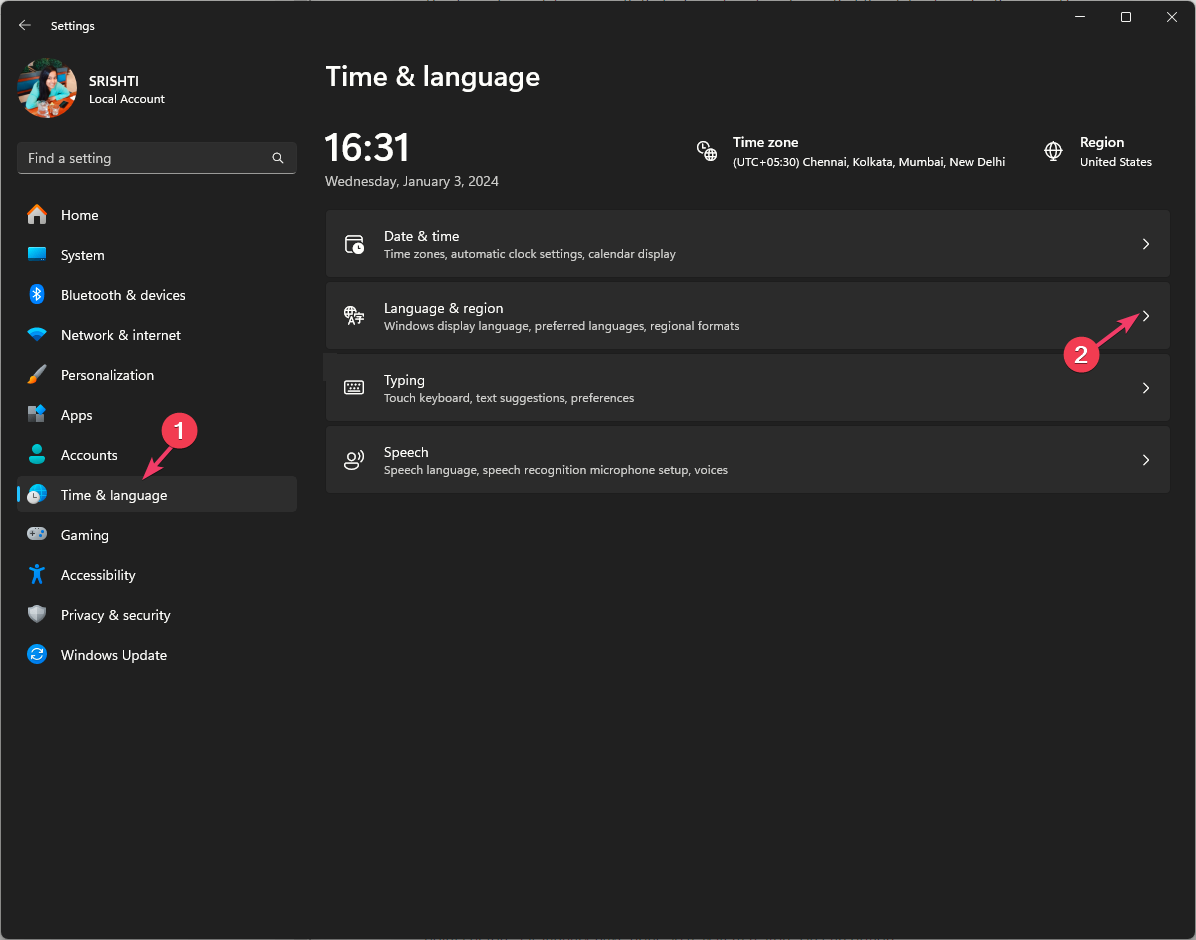
- Click Time & language from the left pane.
- Choose Language & region.
- Under Preferred languages, click Add a language.
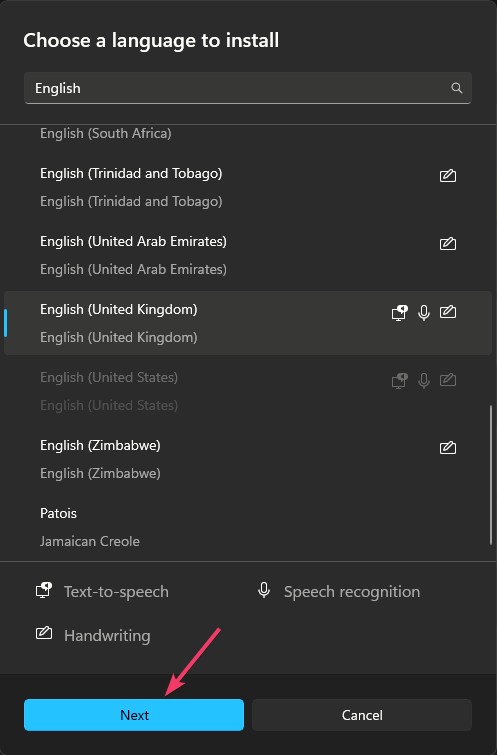
- Choose any other language like English UK, and click Next.
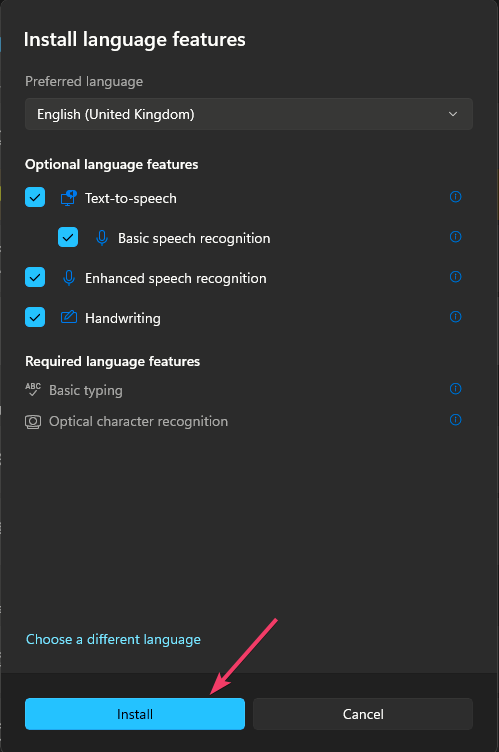
- Select Install.
- Once installed, click the three dots icon next to the newly installed language and choose Move up to make it the default language.
- Now restart your computer, and follow the steps from 1 to 4.
- Locate the old default language, click the three dots icon, and select Move up.
This will reset your keyboard settings back to the default. In case you already have multiple languages added, move up any of the listed to make it the most preferred, then restart your computer and move up the old preferred language again.
You can use similar steps to change the keyboard settings to normal on Windows 10 as well.
2. Reinstall the keyboard driver
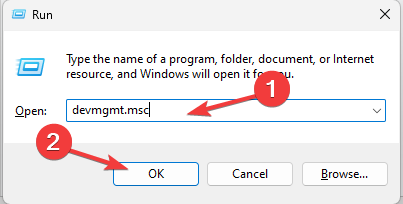
- Press Windows + R to open the Run dialog box.
- Type devmgmt.msc and click OK to open the Device Manager app.
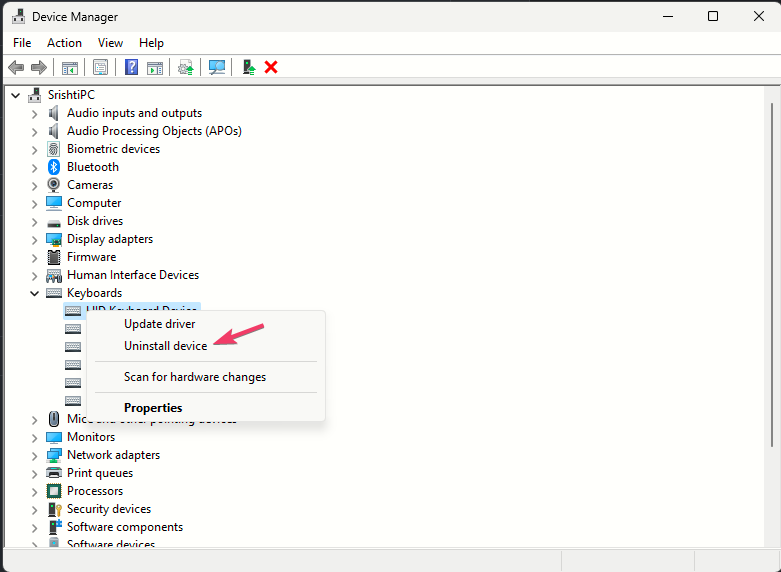
- Go to Keyboards and click to expand the category.
- Right-click the keyboard listed, and choose Uninstall device.
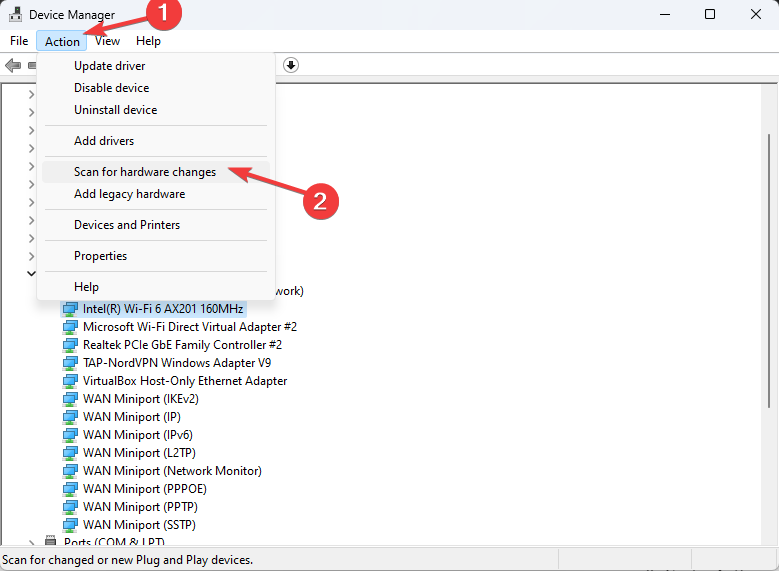
- Go to Action and select Scan for hardware changes.
Windows will scan and install the latest driver available for your device, then reboot your PC to finish.
Once you have reset the keyboard, you can add or remove a keyboard layout to customize it accordingly; read this guide to check the detailed steps.
In case you are facing issues while removing the keyboard layout, it might be because of the lack of permissions, corrupted settings, or it being a default layout; read this guide to learn how to fix it.
If you have any questions or suggestions about changing the keyboard settings back to normal, feel free to mention them in the comments section below.





User forum
0 messages