Windows 10 PC Wakes up From Sleep by Itself? How to Stop it
Use Command Prompt to determine which device wakes up your PC
6 min. read
Updated on
Read our disclosure page to find out how can you help Windows Report sustain the editorial team. Read more
Key notes
- If your PC keeps waking up from sleep, you must adjust your power settings accordingly.
- Scheduled tasks can also cause your PC to wake up, so be sure to disable them.
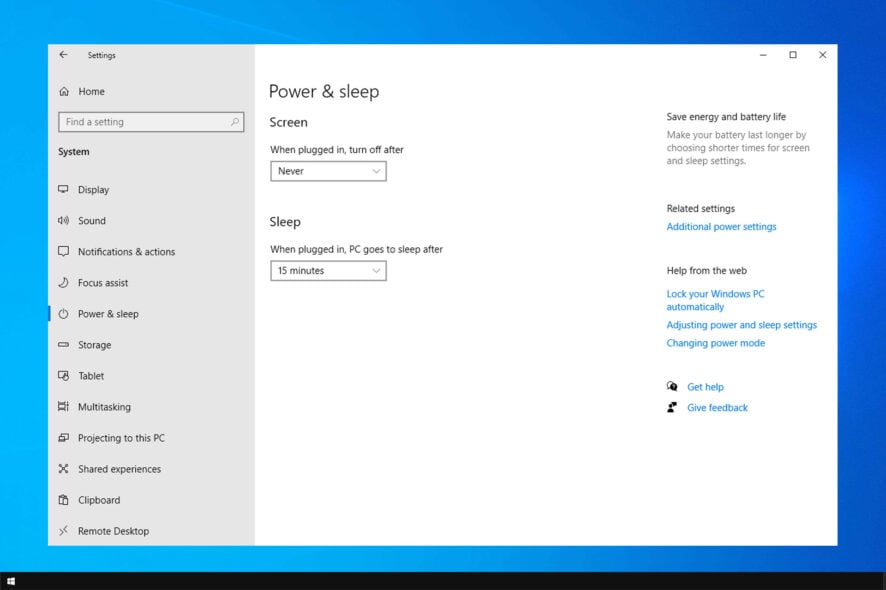
If your PC wakes up from sleep by itself, that can cause certain inconveniences and unnecessary power consumption. While this isn’t a big problem, some users can’t put their PC to sleep at all.
In case you’re dealing with such an issue, in today’s guide, we’re going to take a closer look at causes and solutions that can help you fix it.
Why does my computer wake up from sleep on its own?
- One or more devices are configured to wake up your PC. It can be your keyboard, mouse, or network adapter.
- You have scheduled tasks that will wake up the PC automatically.
- Certain services or applications can also wake your PC without your knowledge.
How do I stop Windows 10 from waking up from sleep?
Before we start fixing this issue, try connecting your mouse or keyboard to a USB 2.0 port instead of a 3.0 port, since that can help with this and many other issues.
1. Prevent your devices from waking up the PC
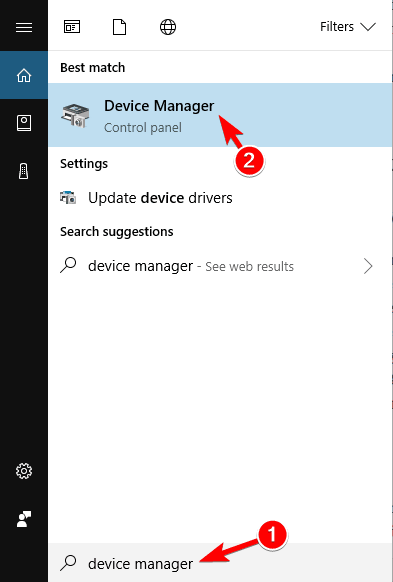
- In the Search bar enter device manager. Select Device Manager from the list of results.
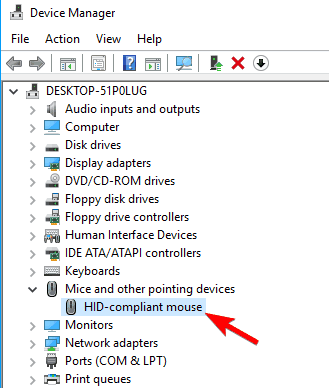
- Locate your mouse on the list and double-click it to open its properties.
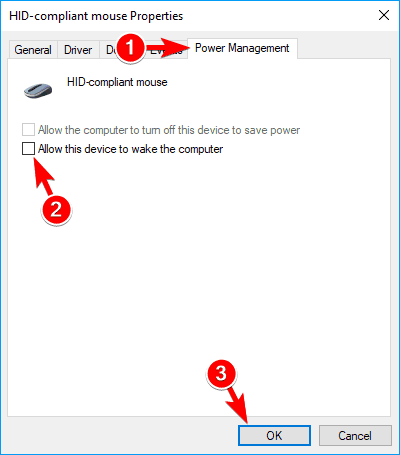
- Left-click or tap on the Power Management tab. You will need to uncheck the box next to Allow this device to wake my computer. Now left click or tap on the OK button.
- Close all the windows you opened so far.
- Reboot the Windows 10 device.
- Place the Windows 10 devices into sleep mode and see if you still have this issue.
Keep in mind that you might have to repeat these steps for other input devices to fix this problem.
2. Prevent the network adapter from waking up your PC
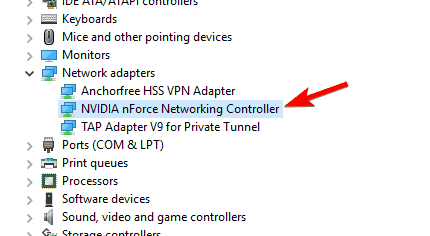
- Open Device Manager, expand the Network adapters section, and double-click your network adapter to open its properties. Note: If you find more adapters there you will need to do the same steps for all of them.
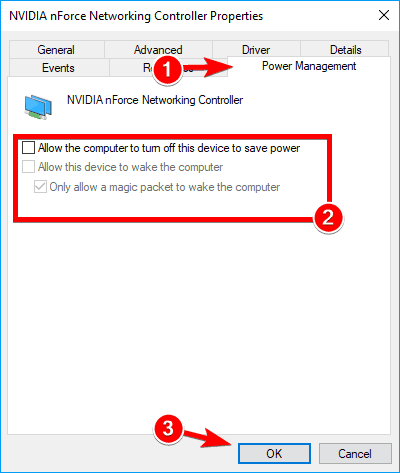
- In the Properties window, click on the Power Management tab. Uncheck all checkboxes and click on OK to save changes.
- Check and see if you still have the same sleep mode issue now.
3. Use lastwake command
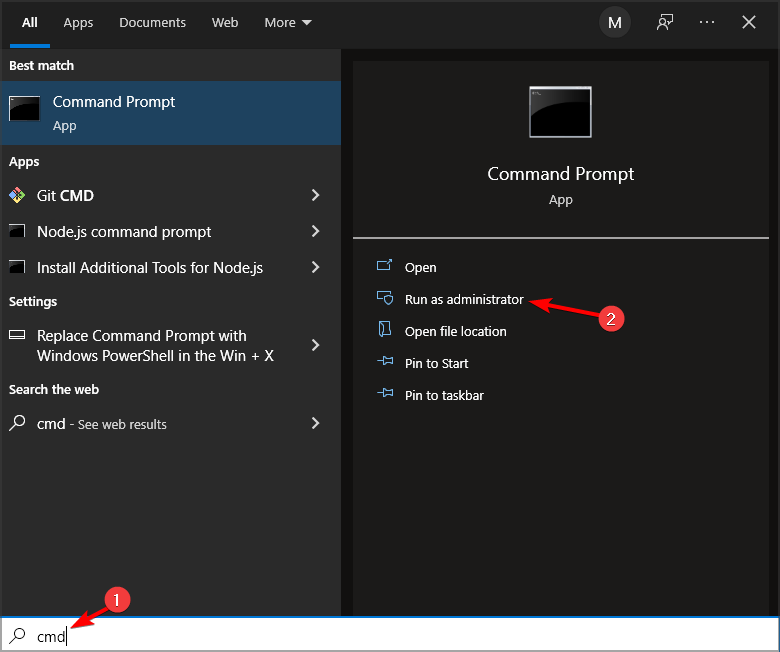
- In the search box, type cmd and choose Run as administrator.
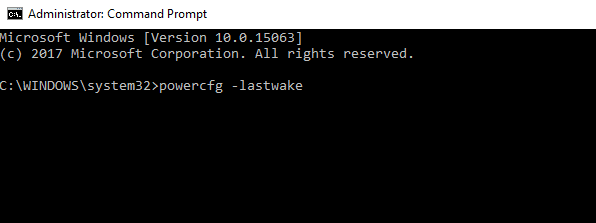
- In the Command Prompt window, run the following command:
powercfg –lastwake - It will show you which device woke up your Windows 10 operating system last time.
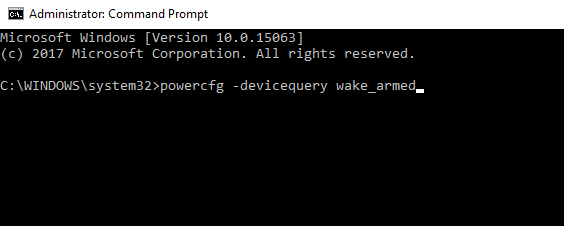
- Now write in the Command Prompt window the following command:
powercfg -devicequery wake_armed - Now it will display the devices that can wake up your computer from sleep mode and you will only need to go and disable this feature as you did in the options above.
If you want to know more about these commands, be sure to check our guide on shell commands on Windows 10.
4. Check your scheduled tasks
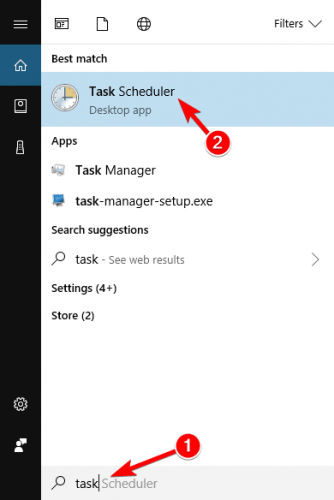
- Press the Windows key + S and enter tasks. Select Task Scheduler from the list of results.
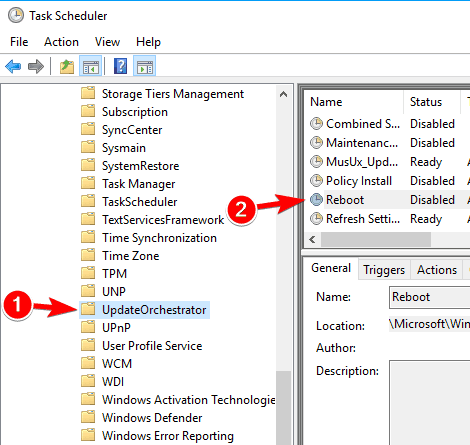
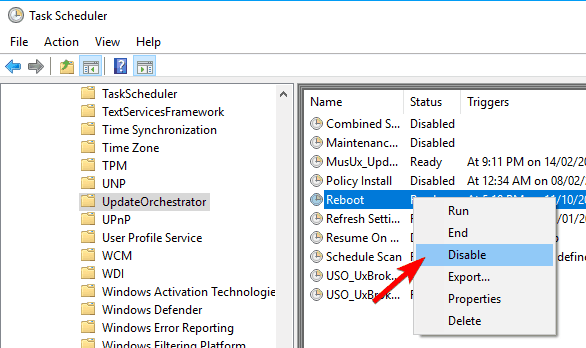
- In the left pane, navigate to Task Scheduler Library and then Microsoft. Next, go to Windows and select UpdateOrchestrator. In the right panel, double-click on Reboot.
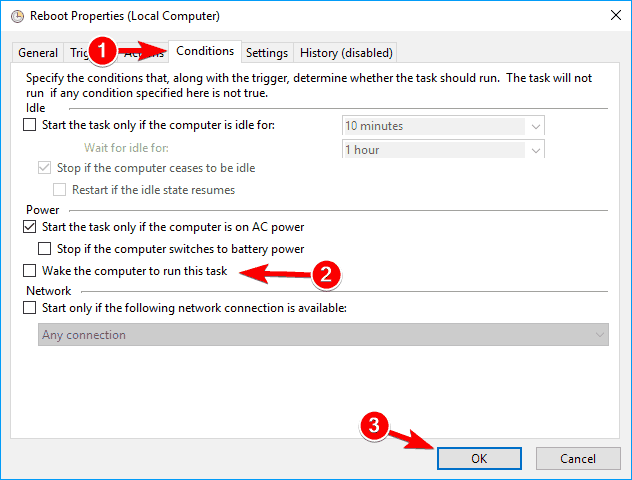
- When the new window opens, go to the Conditions tab. Now uncheck Wake the computer to run this task option and click on OK. If you want, you can uncheck all the other options as well.
Some users are also suggesting to disable this task completely. To do that, just do the following:
- Locate the Reboot task in Task Scheduler, right-click it and choose Disable from the menu.
- After doing that, go to
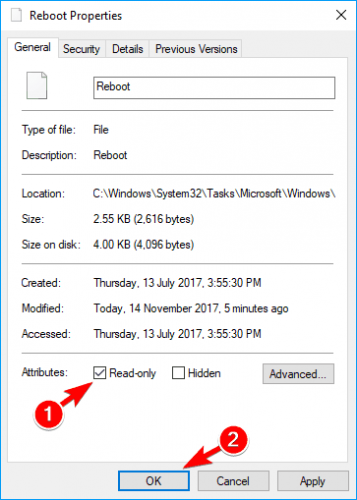
C:\Windows\System32\Tasks\Microsoft\Windows\UpdateOrchestrator - Now locate the Reboot file, right-click it and choose Properties from the menu.
- Check the Read-only option and click on Apply and OK to save changes.
Other applications can also cause this problem, and users reported that McAfee and Media Center tasks are responsible for this issue, so disable them if you have them on your PC.
5. Use Command Prompt
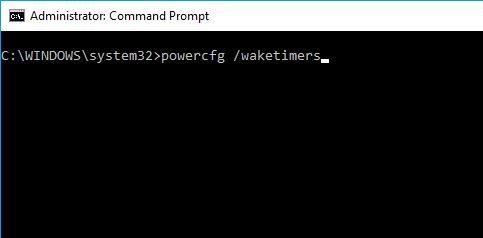
- Start Command Prompt as administrator.
- Now enter
powercfg /waketimers
- Now you should see the list of apps that can wake up your PC.
To stop your PC from waking up, simply find those apps and change their configuration or remove them from your PC. Users reported that Verizon apps, Go To Meeting app and Teamweaver can cause this problem, so be sure to disable them.
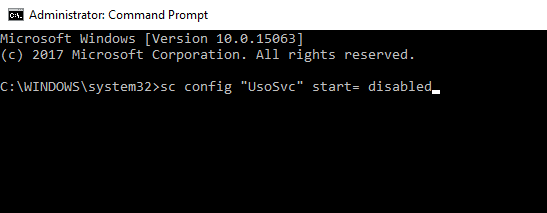
6. Disable UvoSvc service
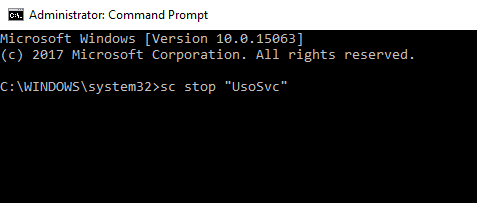
- Open Command Prompt as administrator.
- Enter the following commands:
sc stop UsoSvc
sc config UsoSvc start= disabled
After running these two commands the issue should be resolved.
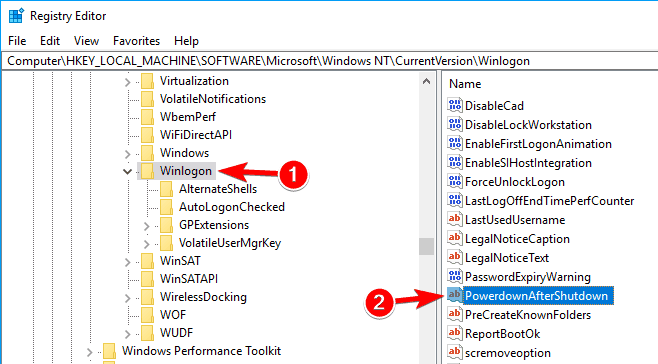
7. Modify your registry
- Press the Windows key + R and enter regedit. Press Enter or click OK.
- In the left panel, navigate to
HKEY_LOCAL_MACHINE\SOFTWARE\Microsoft\Windows NT\CurrentVersion\Winlogon
- In the right panel, double-click PowerdownAfterShutdown.
- Set Value data to 1 and click on OK to save changes.
After doing that, the problem should be completely resolved.
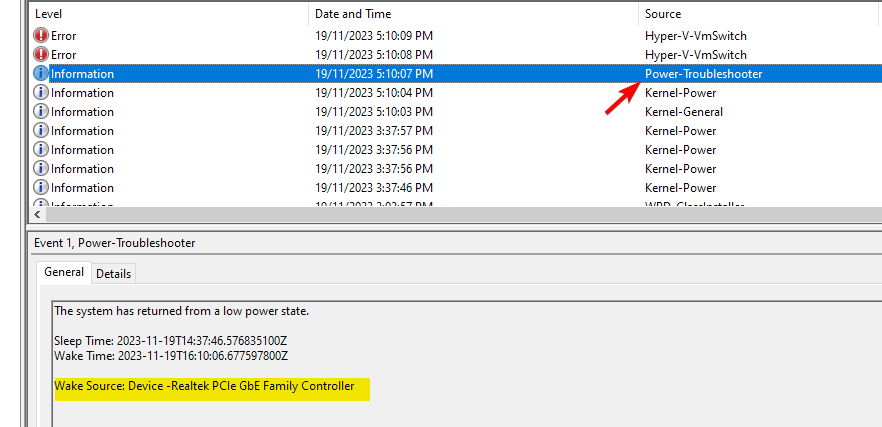
How do you find out what keeps waking my computer?
- Press the Windows key + X and select Event Viewer.
- Expand Windows Logs and select System.
- Select the event that has Power-Troubleshoter source and check the Wake Source.
Alternatively, you can use the Command Prompt and commands that we used in the solutions above.
There you go, a few easy options will help you if your PC wakes up from sleep by itself. For more solutions, be sure to visit our laptop wakes up from sleep on its own guide.
To ensure that no random wake-up occurs, we advise you to disable wake on LAN and disable mouse wake up as well. We have dedicated guides that explain how to configure these settings; don’t hesitate to check them out.
You can also write us below with any additional questions regarding this subject, and we will help you as soon as possible.









User forum
15 messages