How to test Python on Windows 11 to make sure that it installs correctly
2 min. read
Published on
Read our disclosure page to find out how can you help Windows Report sustain the editorial team. Read more
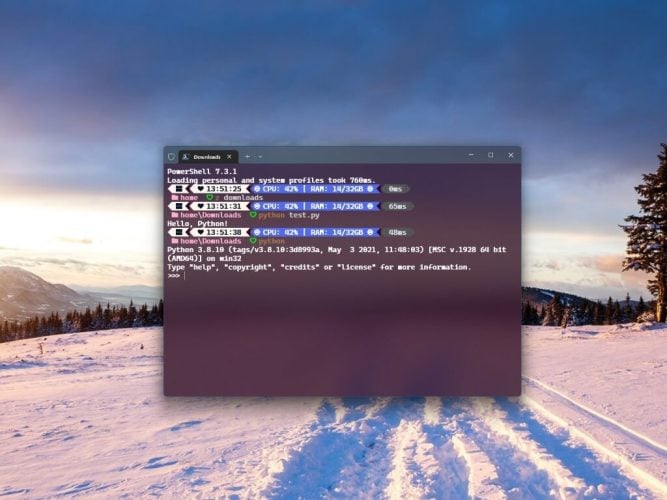
The first thing you should do after installation is to test Python on Windows 11 to ensure that it is working correctly. There are a couple of ways to do this that this guide will show you.
Test Python on Windows 11 via Terminal
You can test Python on Windows 11 by opening a new Terminal (PowerShell or Command Prompt) window and typing python and pressing Enter. If Python is properly installed, you should see the version number and a prompt to enter a command. This means that Python is installed and working correctly on your system.
Test Python using a simple script
Another way to test your python installation is by running a simple script. Open Notepad on Windows 11, create a new text file, name it “test.py” and add the following line of code:
print("Hello, Python!")
Save the file and then go back to the Terminal window from the first step and navigate to the directory where the file is saved. Once you are in the correct directory, type python test.py and press Enter. If everything is working correctly, you should see the message “Hello, Python!” printed in the Terminal.
Additionally, you can also test specific modules or packages by installing them using pip and importing them in a script or shell. pip is a package management system for Python that installs different software packages to your machine.
Check the Python Package Index to browse packages you can use. Type pip install <package_name> and press Enter, and pip will install the package. Once it is installed, you can test it by importing it in a script or the Python shell and using the functionality provided by the package.
Once you confirmed that Python is installed and working correctly, you can start learning more about Python by going through the tutorials and documentation available online.





User forum
0 messages