MSConfig Only Shows 1 Processor? Here's How to Fix the Problem
Don't worry, the cores are still there
![]() 4 min. read
4 min. read
![]() Published on
Published on
Share this article
Improve this guide
Read our disclosure page to find out how can you help Windows Report sustain the editorial team. Read more

Dealing with the issue where MSConfig only shows one processor can be quite frustrating, especially when you know your system has multiple cores. Don’t worry, it’s dust a issue with the settings. All the cores are there.
What can I do if MSConfig only shows one processor/core?
1. Verify Task Manager and Resource Monitor
- Press Ctrl + Shift + Esc to open Task Manager. Alternatively, right-click on the taskbar or the Start button and select Task Manager.
- In Task Manager, click on the Performance tab.
- Look at the bottom of the window to see the number of cores and logical processors.

- In Task Manager, click on the Open Resource Monitor link at the bottom. On Windows 11, click on the three dots icon and select Resource monitor.
- In Resource Monitor, go to the CPU tab.
- Look for activity by each logical processor on the right pane.
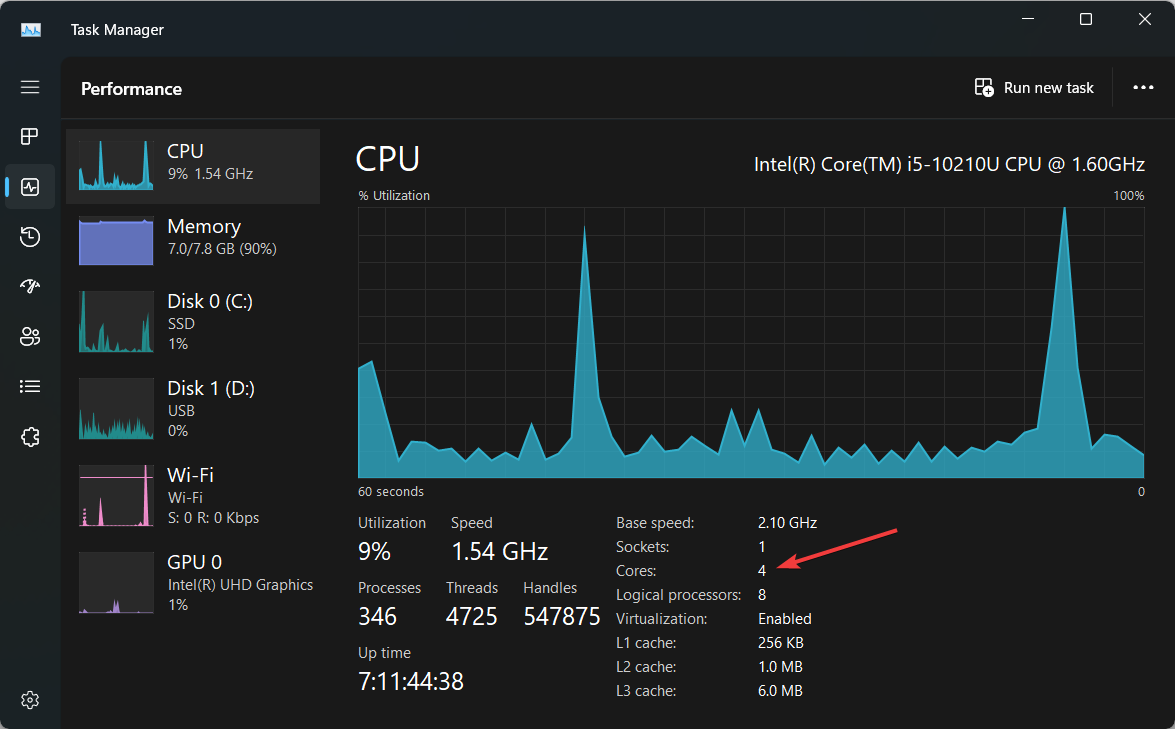
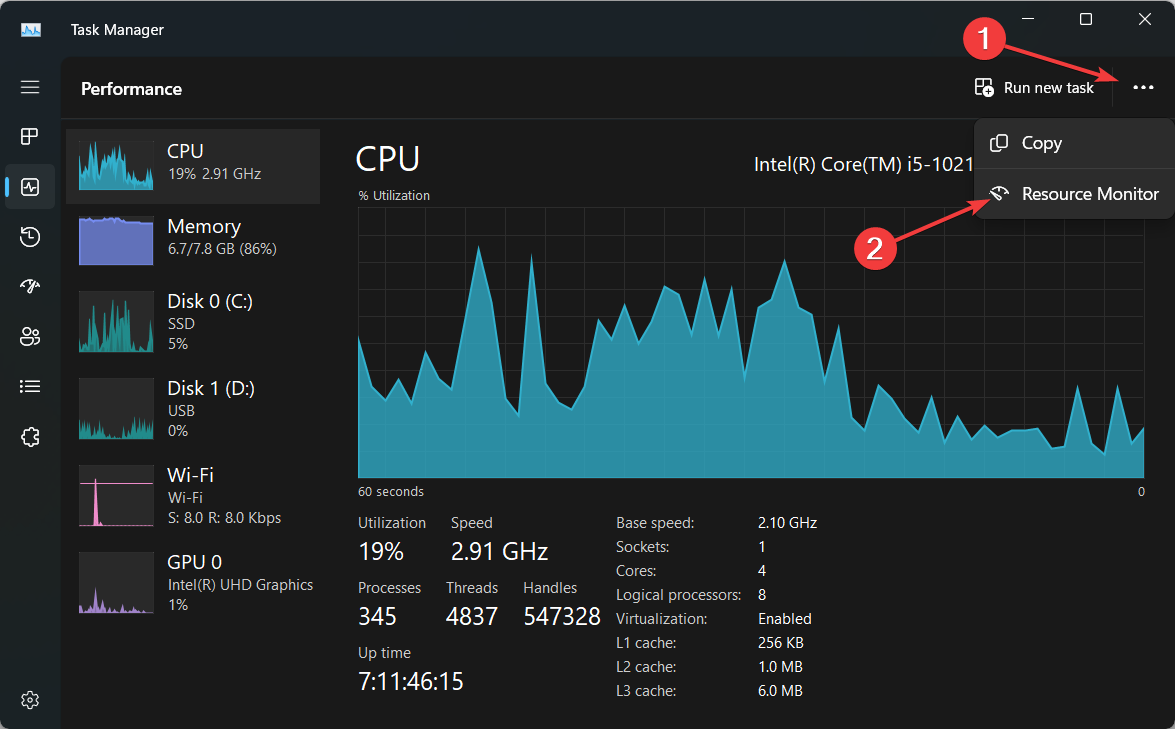
This method helps you verify if all the cores are being recognized and used by your system, providing a clear view of your CPU activity.
There’s also an option to change the number of processors in MSConfig. Check the highlighted guide if you made any changes by mistake.
2. Uncheck the Number of Processors in MSConfig
- Press Win + R to open the Run dialog, type msconfig and press Enter.
- In the System Configuration window, go to the Boot tab, then click on Advanced options….
- Ensure that the Number of processors checkbox is unchecked.
- Click OK and then Apply.
- Restart your computer to apply the changes.
By unchecking the Number of processors box, you allow Windows to use the maximum number of cores available. This ensures that all your cores are active.
3. Enable Turbo Mode and EIST in BIOS
- Restart your computer and press the key to enter BIOS (usually F2, Delete, or Esc).
- Navigate to the CPU settings, then enable Turbo Mode and Enhanced Intel SpeedStep Technology (EIST).
- Save the changes and exit the BIOS setup.
Enabling Turbo Mode and EIST in BIOS ensures optimal performance by allowing the CPU to use all its cores and operate at higher speeds when needed.
4. Ensure the cores are not disabled in BIOS
- Restart your computer and press the key to enter Restart your computer and press the key to enter BIOS (usually F2, Delete, or Esc).
- Navigate to the CPU configuration or similar settings and make sure that all the CPU cores are enabled.
- Save the changes and exit the BIOS.
This step ensures that no cores are disabled at the hardware level, allowing Windows to recognize and use all cores.
5. Reset the Boot configuration
- Click the Start button, type cmd and click on Run as administrator from the results.
- Type the following command and press Enter:
bcdedit /deletevalue {default} numproc - Restart your computer to apply the changes.
This command removes any boot configuration option that limits the number of processors, ensuring that Windows uses all available cores.
6. Perform a clean boot
- Press Win + R, type msconfig, and press Enter.
- In the General tab, select Selective startup and uncheck Load startup items.
- Go to the Services tab, check Hide all Microsoft services, and then click Disable all.
- Restart your computer to see if the cores are recognized.
Performing a clean boot can help identify if a third-party application or service is interfering with the CPU core recognition.
Of course, also make sure that you installed all impending Windows updates. This might also be a bug that has already been fixed in the latest patch.
By following these steps, you should be able to resolve the issue of MSConfig only showing one processor.
You might also find useful our guide on fixing MSConfig if it keeps reverting to selective startup.
If your access is denied while trying to change a service in MSConfig, the highlighted guide will help you retake control.
For any questions or suggestions, hit the comments section below and write about them.


User forum
0 messages