The Salesforce Report Failed to be Saved: 5 Quick Fixes
This issue is usually due to lack of permissions or unnecessary report complexity
![]() 4 min. read
4 min. read
![]() Published on
Published on
Share this article
Improve this guide
Read our disclosure page to find out how can you help Windows Report sustain the editorial team. Read more
If the report failed to be saved in Salesforce, the error can be quite a headache because the app doesn’t offer too much information about the situation. Moreover the Salesforce failed report saving can be due to a myriad of causes, but below we covered most instances and solutions.
What do I do if Salesforce failed to save the report?
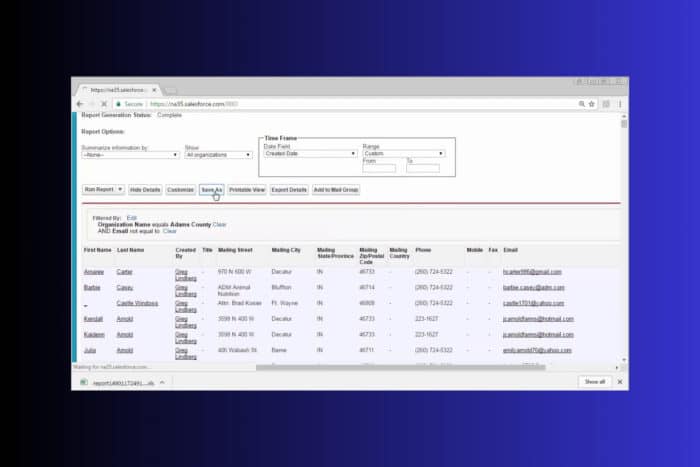
1. Check the Report folder permissions
- Click on the Salesforce logo at the top left corner to ensure you are on the main page.
- From the main menu, find and click on the Reports tab.
- Find the report that fails to be saved. You may use the search bar at the top of the Reports tab.
- Click on the drop-down arrow next to the report name and select Edit Folder or Folder Sharing depending on your Salesforce version.
- Ensure the user has Edit access and not just View access.
- If the folder is public, make sure the user has the Manage Public Reports permission enabled on their profile.
Ensuring proper permissions on the report folder allows the user to save changes directly instead of using Save As. This removes the frustration caused by duplicates and ensures smoother workflow management.
2. Enable Manage Public Reports on a profile
- Click on the gear icon at the top right corner of the Salesforce interface, then select Setup.
- In the Quick Find box on the left, type Profiles and click on it.
- Find and click on the profile corresponding to the user experiencing the issue.
- Scroll down to the Administrative Permissions section.
- Look for the Manage Public Reports permission and check the box next to it.
- Click on the Save button at the top or bottom of the page to apply the changes.
Enabling this permission ensures that the user can manage and save changes to reports in public folders, avoiding the need to create new reports each time they make edits.
3. Adjust the report type and filters
- Navigate to the Reports tab, find the problematic report, and click on it to open the editor.
- Click on the Report Type drop-down at the top of the editor.
- Ensure the report type is suitable for the data you are working with, avoiding the need for complex cross-filters.
- Simplify filters by using EQUALS instead of CONTAINS and remove any unnecessary row-level formula filters.
- Look at the columns in the report and remove any columns that are not essential to the report’s purpose.
Simplifying report types and filters reduces the complexity and load time of reports, making it easier for Salesforce to process saves without errors.
4. Convert the report to a data extension
- From the Reports tab, click on New Report or open the existing report.
- Simplify the report as much as possible by removing unnecessary columns and filters.
- Click on the Export button and choose a suitable format, like CSV.
- Now, go to the Data Extensions section.
- Create a new Data Extension and upload the exported CSV file.
- Instead of running operations directly on the report, use the Data Extension.
Converting complex reports to data extensions helps Salesforce handle large datasets more effectively, reducing the likelihood of save errors due to system limitations.
5. Retry saving the report
- Go to the Reports tab and open the report that failed to save.
- Remove complex filters and unnecessary columns to reduce load.
- Click on the Save button at the top right of the report editor.
- If the save fails, try again at a different time when the system might be less busy.
Sometimes, report saves fail due to temporary system issues or high traffic. Retrying after simplifying the report and at a different time can resolve transient issues.
By following these steps, you can minimize disruptions and keep your Salesforce reports running smoothly. Remember to periodically review permissions and simplify your reports to avoid similar issues in the future.
You might be interested in checking our guide on what to do if a Salesforce report is not visible to a user.
We also have a useful guide to fix Salesforce if it’s not working in Chrome.
For any other suggestions or questions, feel free to use the comments below and let us know.


User forum
0 messages