6 Simple Ways to Fix System Restore Greyed Out Issue
The easiest way is to enable System protection through System Properties

Many readers have complained that they cannot create a System Restore on their Windows computer, as the System Restore option is greyed out.
This could occur if System Protection is turned off, you are not logged in as an administrator, the computer has corrupt system files, security software interferes, or there is less disk space. To begin with, ensure you have logged in with an account with administrator rights.
How can I fix the System Restore greyed out issue?
1. Turn on System Protection
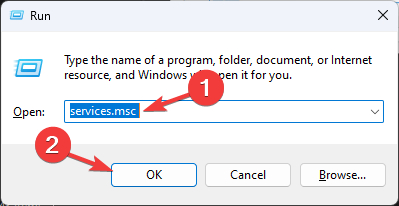
- Press Windows + R to open the Run window.
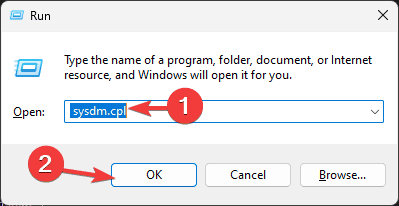
- Type sysdm.cpl and click OK to open the System Properties.
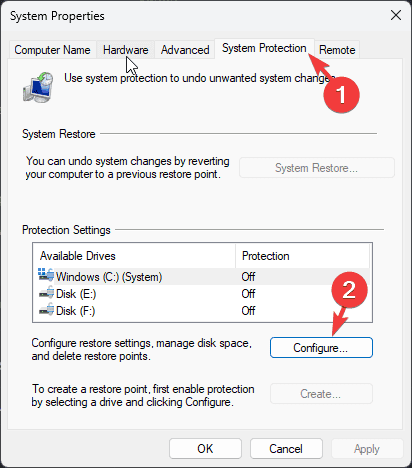
- Go to the System Protection tab and click the Configure button.
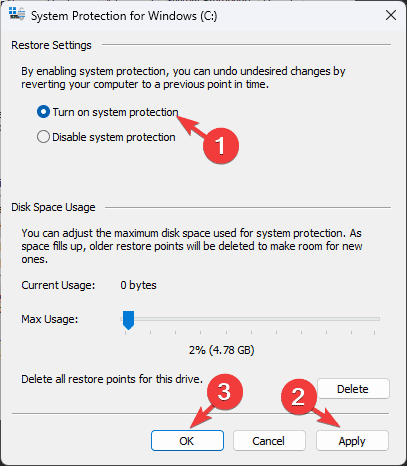
- On the following window, place a checkmark next to Turn on system protection, then click Apply and OK.
2. Set the Volume Shadow Copy Service to automatic
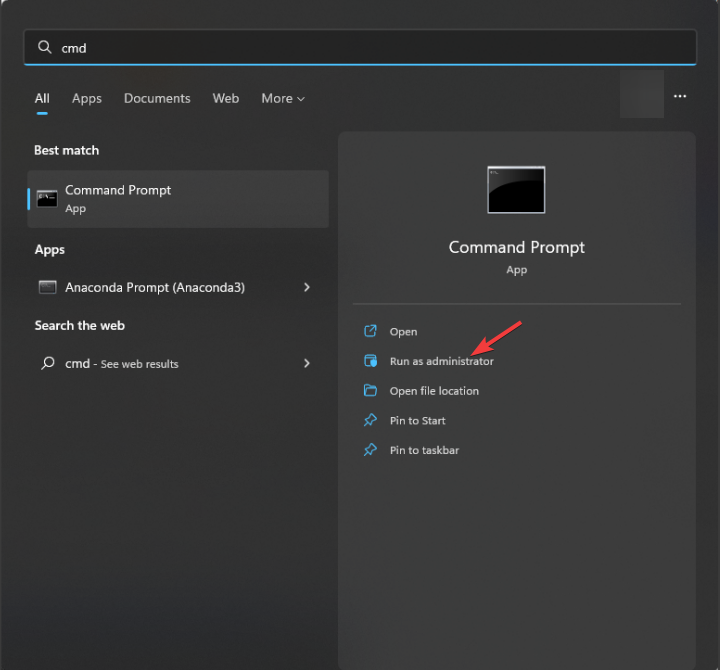
- Press the Windows key, type cmd in the search box, and click Run as administrator.
- Copy & paste this command and hit Enter:
%windir%\system32\rundll32.exe /d srrstr.dll,ExecuteScheduledSPPCreation
The Volume Shadow Copy Service might not be running in the background therefore you need to start it. To do so, follow these steps:
- Press Windows + R to open the Run window.
- Type services.msc and click OK to open the Services app.
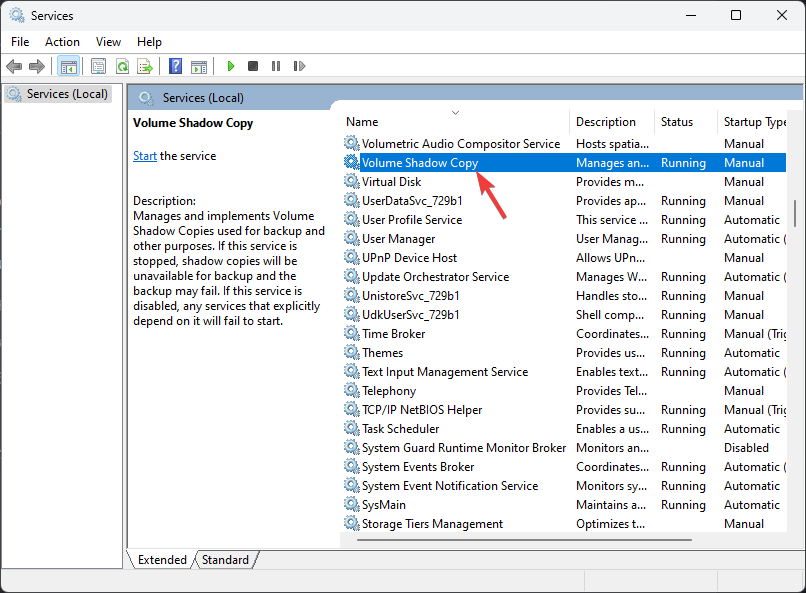
- Locate and double-click the Volume Shadow Copy Service to open properties.
- On the following window, select Automatic for Startup type, then locate and click Start under Service Status.
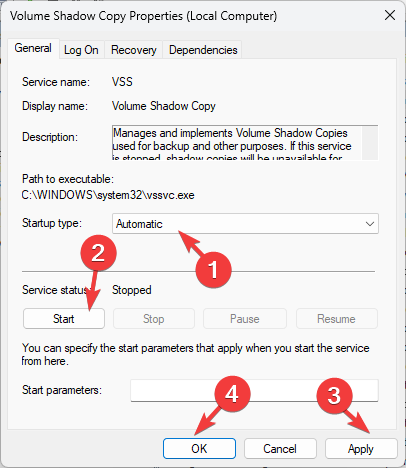
- Click Apply and OK to save the changes.
3. Using the Windows PowerShell
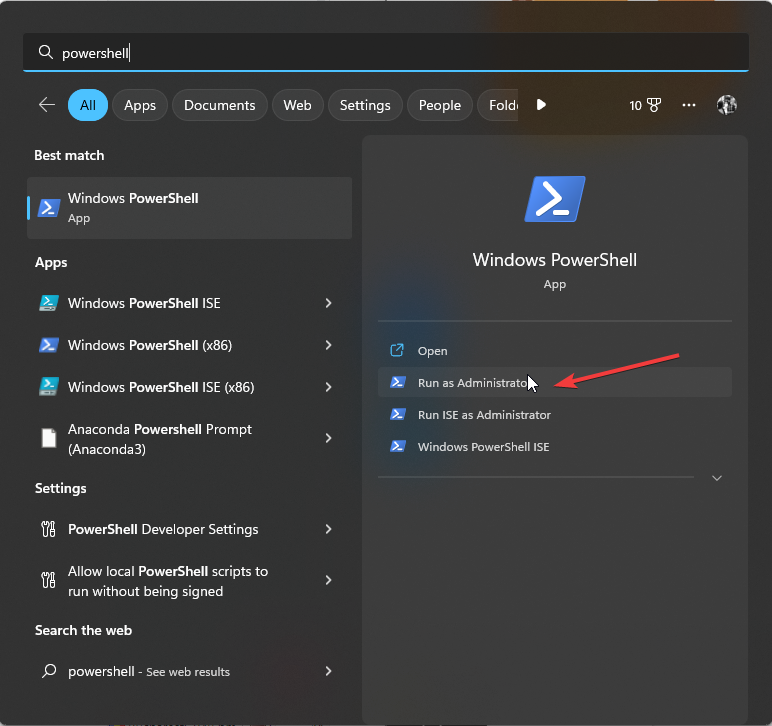
- Press the Windows key, type powershell in the search box, and click Run as administrator.
- Type the following command after replacing C with the system drive letter on your computer and hit Enter:
Enable-ComputerRestore -Drive "C:\"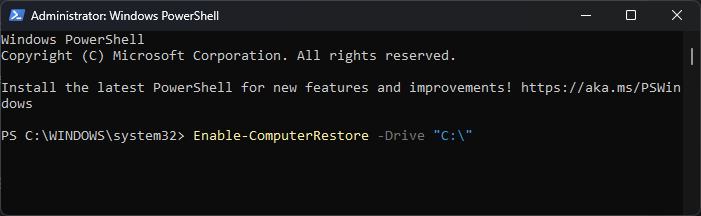
- If you want to disable these settings again, you can copy & paste this command after replacing C with the system drive letter on your computer and press Enter:
Disable-ComputerRestore -Drive "C:\"
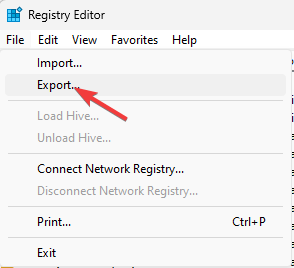
4. Using the Registry Editor
- Press Windows + R to open the Run window.

- Type regedit and click OK to open the Registry Editor app.
- Before making changes, you should backup registry entries. To do so, go to File, then click Export. On the following window, name the .reg file and save it to an accessible location.
- Go to this path:
Computer\HKEY_LOCAL_MACHINE\SOFTWARE\Policies\Microsoft\Windows NT\SystemRestore - Alternatively, you can copy and paste this path into the Registry Editor’s address bar.
- On the right pane, locate Disableconfig and DisableSR, press Ctrl, then select them both and press Delete on your keyboard.
- Click Yes on a prompt confirming the choice.

5. Using the Group Policy Editor
- Press Windows + R to open the Run window.
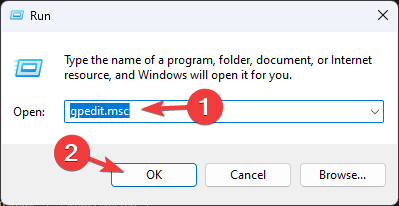
- Type gpedit.msc and click OK to open the Group Policy Editor app.
- Go to this path:
Computer Configuration\Administrative Templates\System\System Restore - Locate and double-click the Turn off System Restore policy to open its properties.
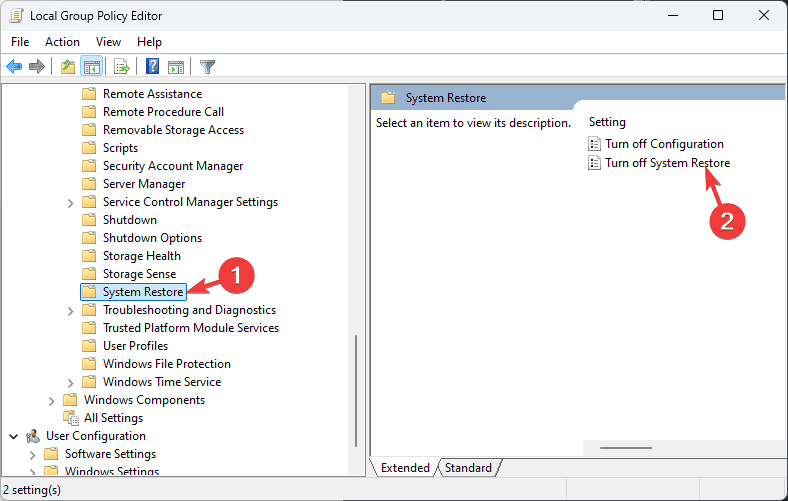
- On the following window, select Disabled.
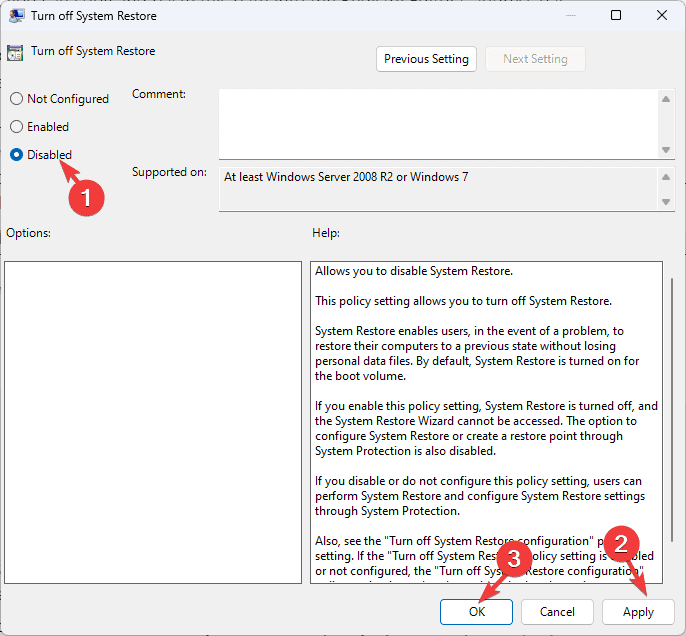
- Click Apply, then OK.
- Reboot your computer to let the changes take effect.
Disabling System Restore policy from Group Policy Editor can also help you fix the restore point not working on Windows 10; read this guide to learn more.
6. Using the Command Prompt
- Press the Windows key, type cmd in the search box, and click Run as administrator.
- Copy & paste these commands one by one and hit Enter after every command:
reg delete "HKLM\SOFTWARE\Policies\Microsoft\Windows NT\SystemRestore" /v "DisableSR" /f
reg delete "HKLM\SOFTWARE\Policies\Microsoft\Windows NT\SystemRestore" /v "DisableConfig" /f
reg add "HKLM\SOFTWARE\Microsoft\Windows NT\CurrentVersion\SPP\Clients" /v " {09F7EDC5-294E-4180-AF6A-FB0E6A0E9513}" /t REG_MULTI_SZ /d "1" /f
- Close the Command Prompt window and restart your computer to save the changes.
These methods allow you to easily enable System Protection and quickly create System Restore points whenever needed, ensuring you can restore your system settings if unexpected issues arise.
If while restoring your system to a previous setting, you get the System Restore did not complete successfully. Your computer’s system files were not changed message, it could be due to conflicting apps, driver issues, or startup apps; read this guide to learn quick solutions.
If you have any questions or suggestions on the topic, feel free to mention them in the comments section below.
Read our disclosure page to find out how can you help Windows Report sustain the editorial team. Read more


Improve this guide


User forum
0 messages