How to Get Rid of TOO_MANY_RECURSIVE_FAULTS
Ensure BIOS/UEFI firmware of your device is up to date
![]() 5 min. read
5 min. read
![]() Published on
Published on
Share this article
Improve this guide
Read our disclosure page to find out how can you help Windows Report sustain the editorial team. Read more
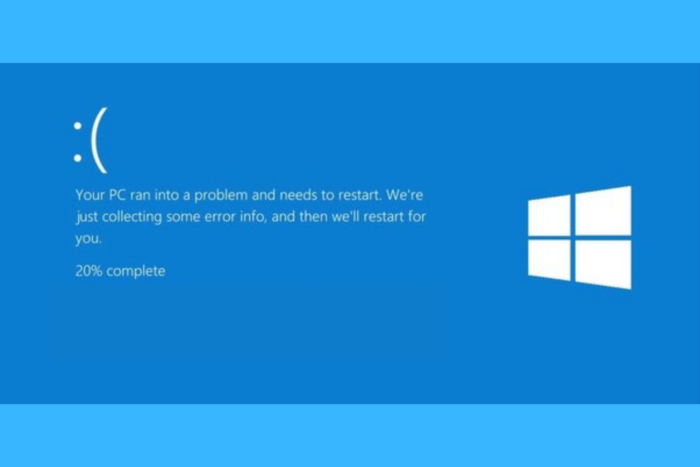
The TOO_MANY_RECURSIVE_FAULTS error with code 0x0000011E appears when your system has encounters a large number of nested faults or exceptions, usually resulting in a recursive loop.
The issue could be caused by incompatible drivers, third-party software conflicts, incorrect system settings, or faulty hardware. First, ensure your computer has the latest version of Windows and BIOS/UEFI firmware is up to date.
How can I fix the TOO_MANY_RECURSIVE_FAULTS error?
1. Boot your PC into safe mode
- Press Windows + R to open the Run console.

- Type msconfig and click OK to open the System Configuration window.
- Switch to the Boot tab, locate Boot options, and place checkmarks next to Boot and Network.

- Click Apply, then OK to save the changes.
- Click Restart.


Your Windows will restart in safe mode with networking. The computer will work with minimal drivers so that you can eliminate the real reason of the error.
2. Update the device driver
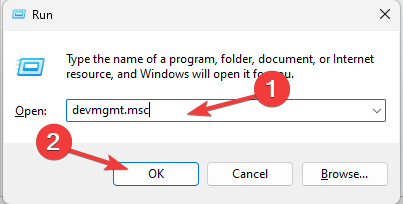
- Press Windows + R to open the Run window.

- Type devmgmt.msc and click OK to open Device Manager.
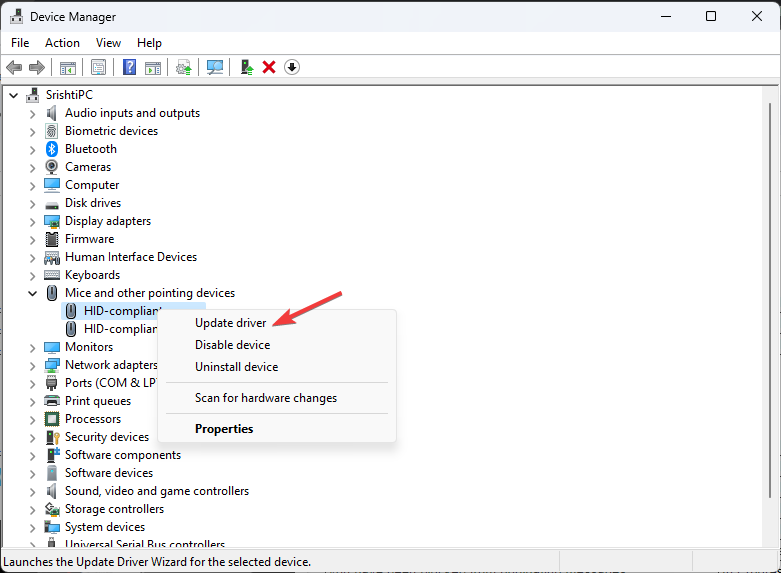
- You will get a list of system components. Click on them one by one to expand them, and look for a driver with a yellow triangle and an exclamation mark inside it.
- Once located, right-click the driver and choose Update driver from the context menu.

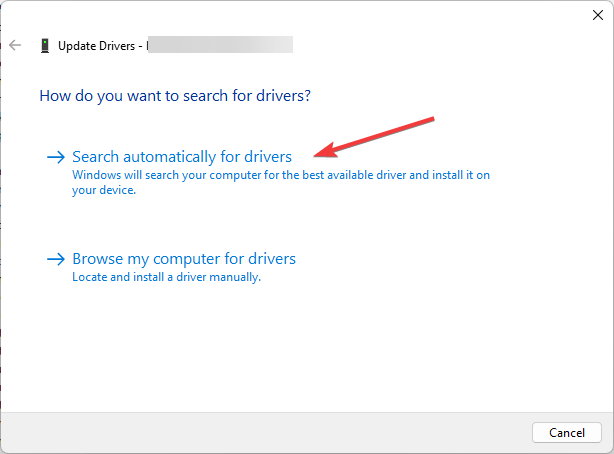
- Click Search automatically for drivers.

- Windows will try to find your device’s latest or most compatible version of the driver. Follow the on-screen prompts to complete the process.
If there is more than one problematic driver, you can follow these steps again, or you can use a third-party driver updater tool. You can also head to the manufacturer’s website to download and install the latest driver manually.
3. Run the SFC scan
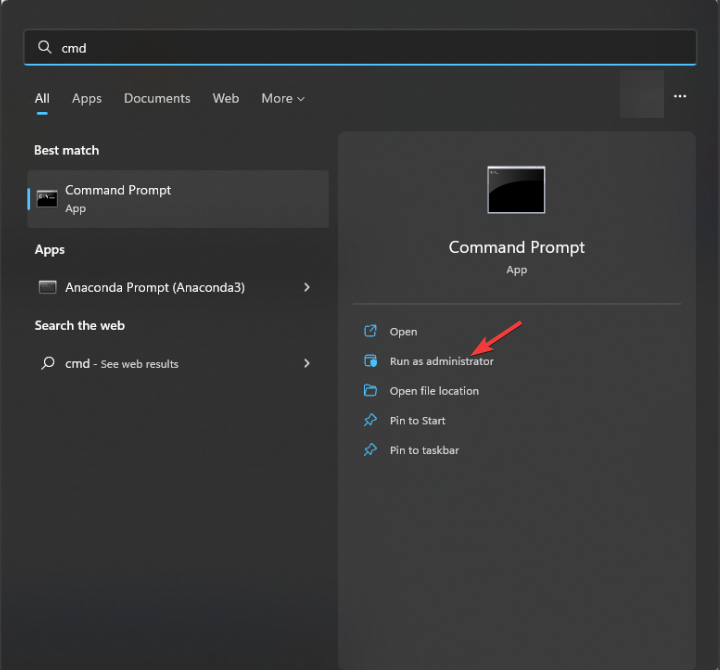
- Press the Windows key, type cmd in the search box, and click Run as administrator to launch Command Prompt with administrative permissions.

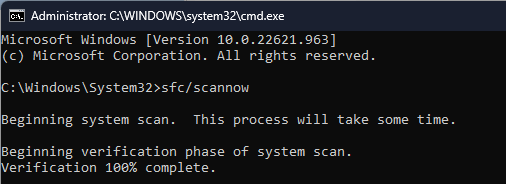
- Copy & paste the following command to scan and repair/restore the corrupted system files and press Enter:
sfc /scannow
- Wait for the command to execute, then restart your computer to let the changes take effect.
4. Uninstall recently installed software
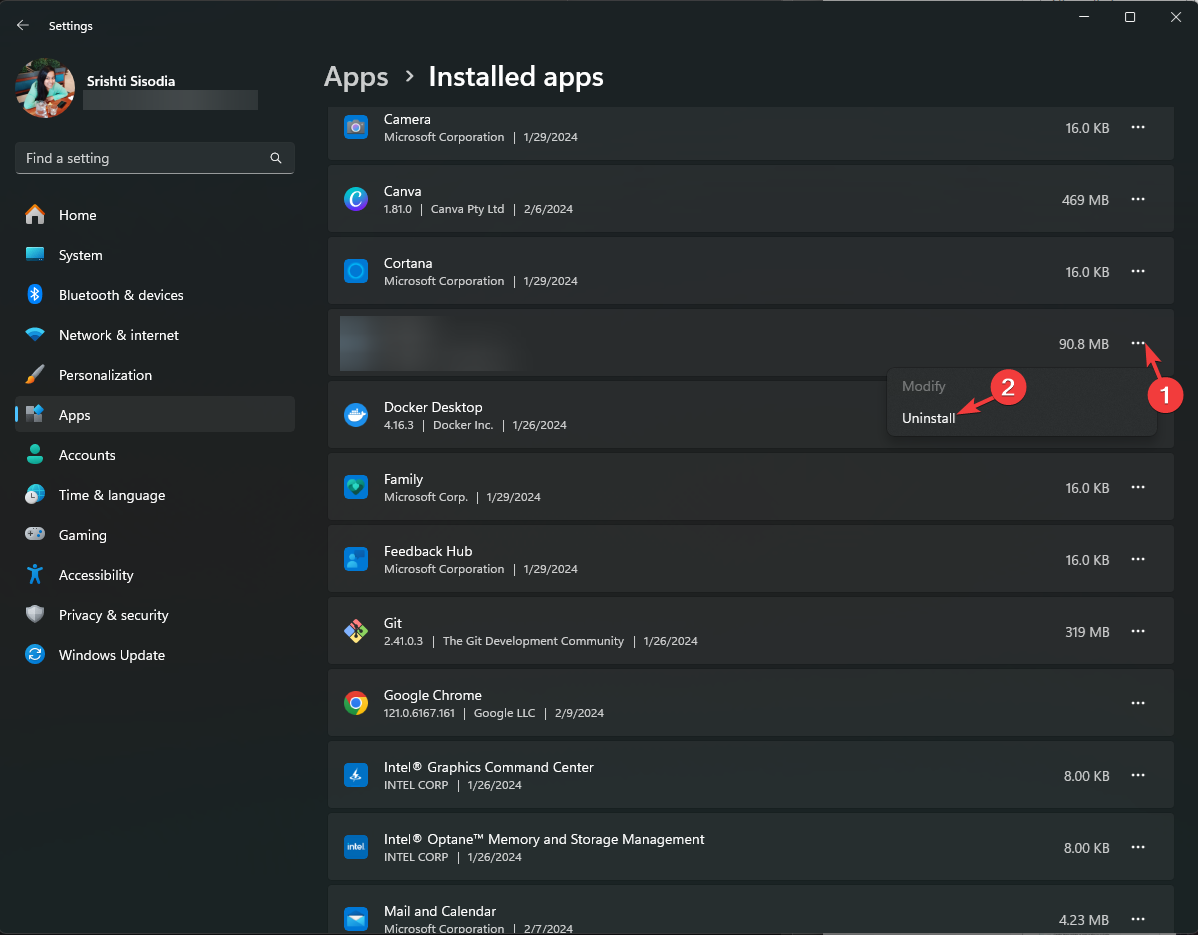
- Press Windows + I to open the Settings app.
- Go to Apps, and click Installed apps.

- Locate the app you recently installed, click the three-dot icon, and choose Uninstall from the context menu.

- Click Uninstall again to confirm. You can use the same steps to delete other conflicting apps from your computer to fix the TOO_MANY_RECURSIVE_FAULTS error.


5. Restart your computer in a clean boot environment
- Press Windows + R to open the Run window.
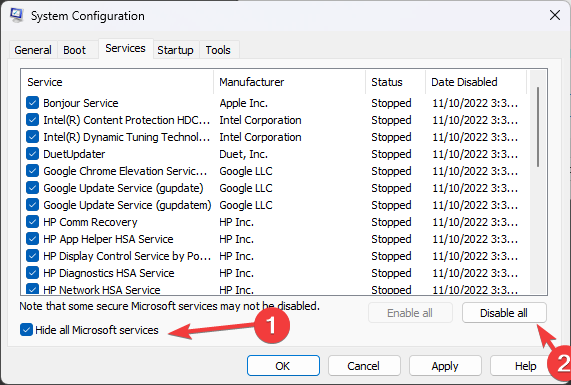
- Type msconfig and click OK to launch the System Configuration window.
- Navigate to the Services tab, select Hide all Microsoft services, and then select Disable all to disable all third-party services.
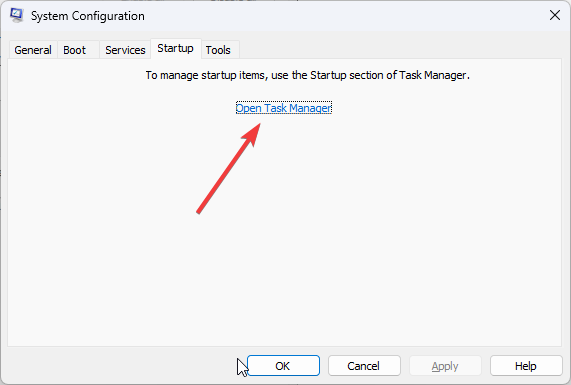
- Go to the Startup tab and click the Open Task Manager link to launch Task Manager.
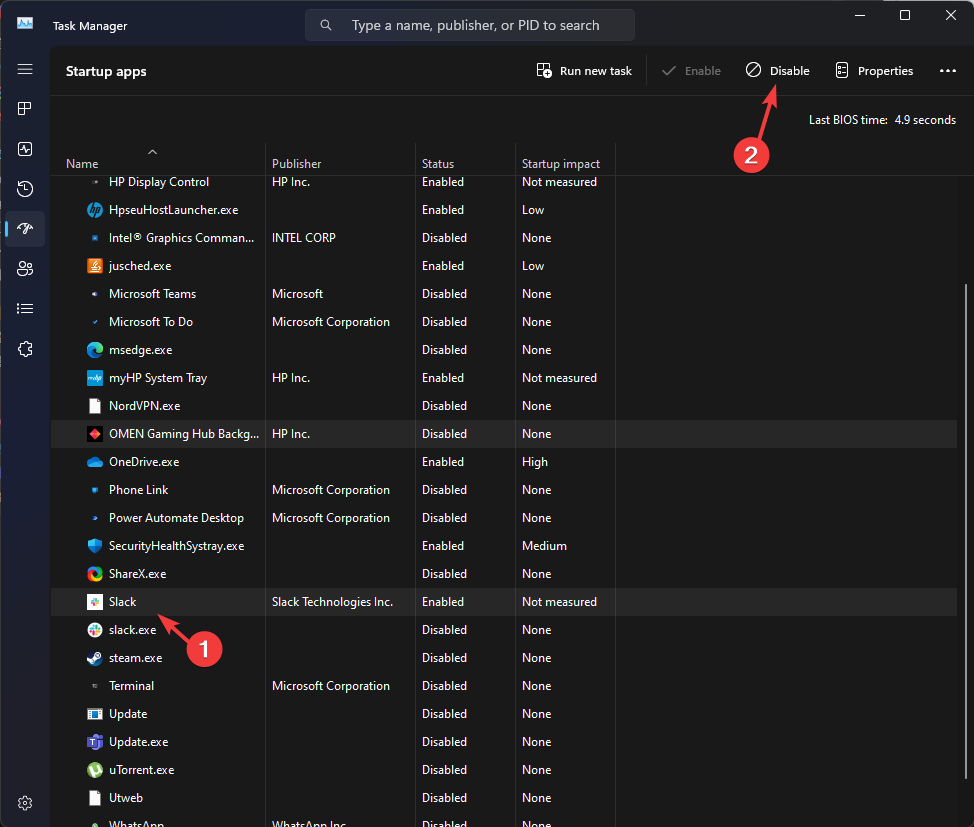
- On the Task Manager window, locate & select each Enabled item one by one, then choose Disable, then close the window.

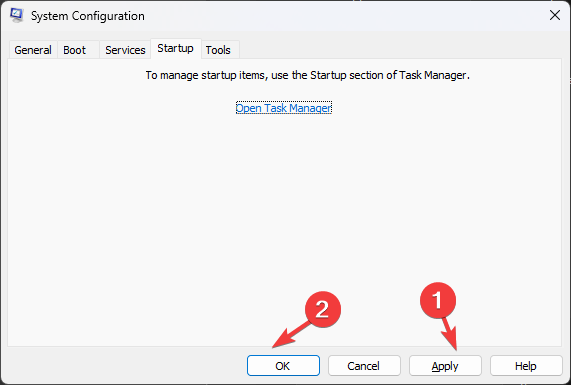
- On the System Configuration window, click Apply, then OK to confirm the changes.
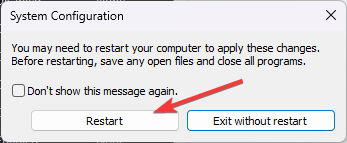
- Click Restart.

6. Reinstall Windows
 NOTE
NOTE
6.1 Create an installation media
- Visit the Microsoft software download website on another PC and click the Download now button.
- When the download is complete, double-click the tool from the desktop to open and select Yes on the UAC prompt.
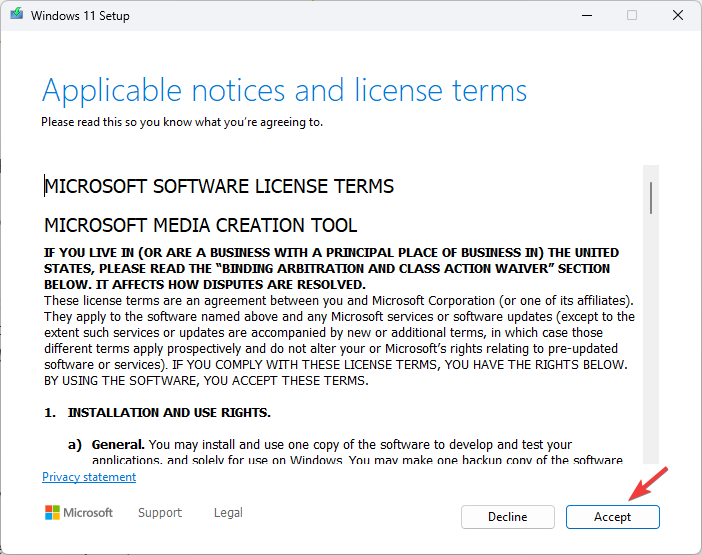
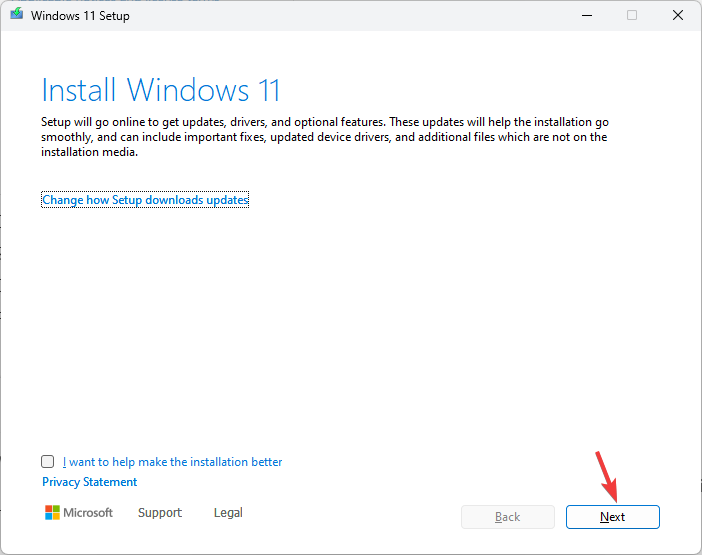
- You will get the Windows 11 Setup page; click Accept to agree to the license terms and agreements to proceed.

- Click Next.
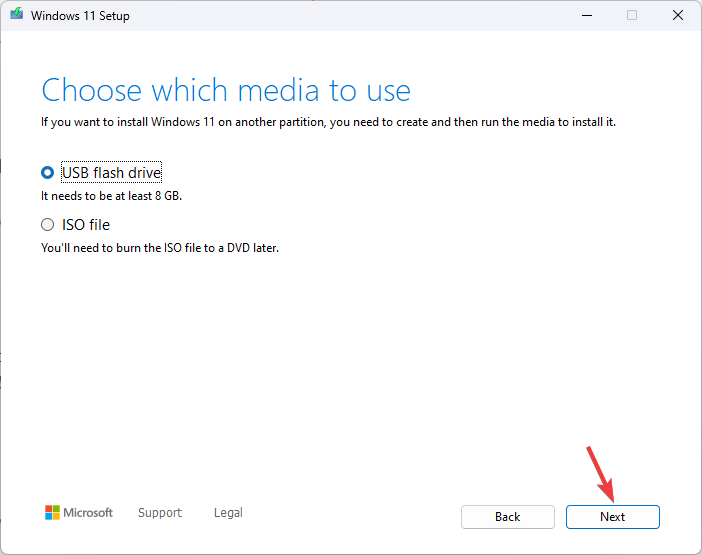
- Select USB flash drive, and click Next.

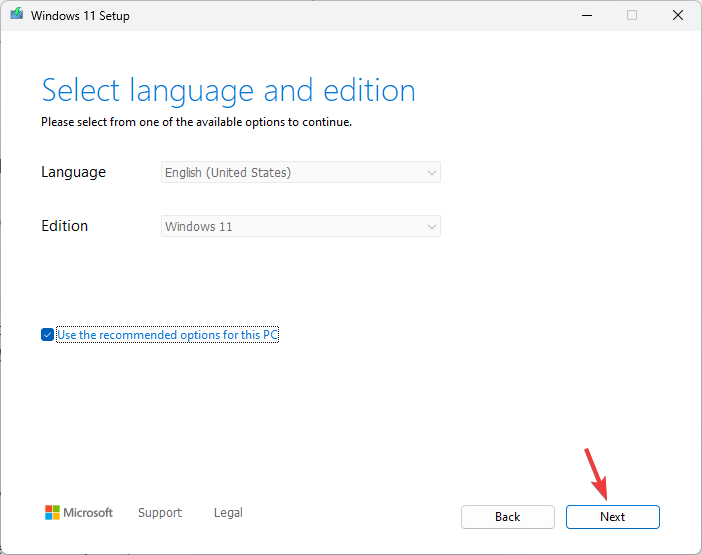
- Choose a language, edition, and architecture (64-bit or 32-bit), and click Next.
- Ensure the USB drive you want to select is displayed, then click Next.
- The installation media will be created; once you see the Your USB flash drive is ready message, click Finish.
6.2 Reinstall Windows
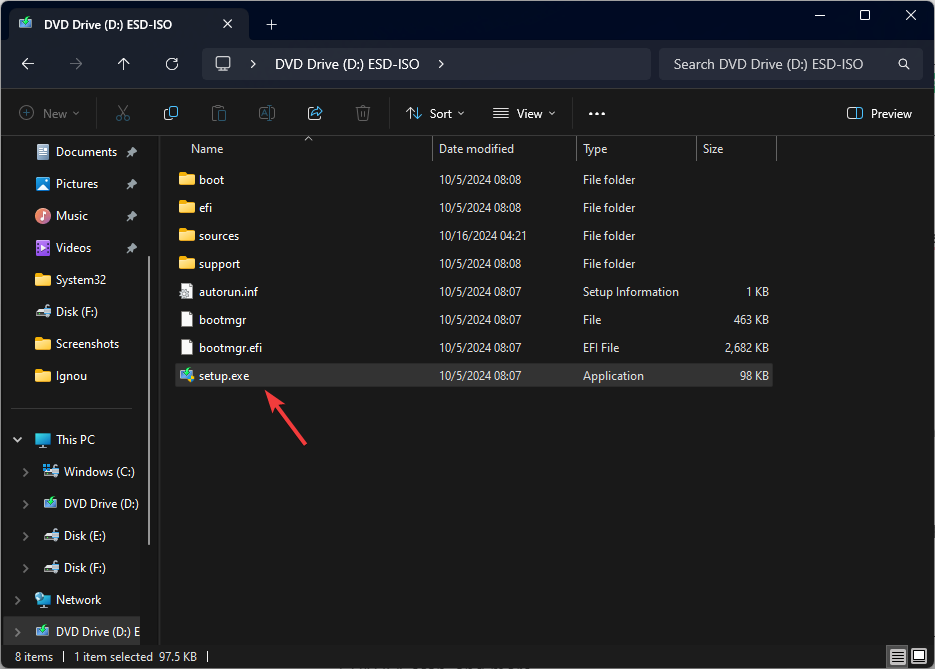
- Connect the flash drive to the affected computer, then press Windows + E to open the Windows File Explorer window.
- Select the drive with the installation media, locate and double-click setup.exe, and click Yes on the UAC prompt.

- Click Next.
- Click the Accept button to agree to the terms of the agreement and license.

- Click Change to specify what you want to keep or delete. Select one of the following options, then click Next:
- Keep personal files and apps – Allows you to keep your data, apps, and settings.
- Keep personal files only – Allows you to keep your data and settings but removes the installed apps.
- Keep nothing – Deletes all personal data, settings, and apps.
- Select Install to reinstall Windows 11 on your computer and get rid of TOO_MANY_RECURSIVE_FAULTS error.

In conclusion, to fix the TOO_MANY_RECURSIVE_FAULTS BSoD error, restart your computer in safe mode, update device drivers, uninstall recent software, perform a clean boot, or reinstall Windows on your device.
If you want to learn more about BSoD errors and their causes, we have a detailed guide for you; don’t forget to check it out! We have covered another BSoD issue, Error_not_joined, so check it out to learn more about it.
If you have any other questions or suggestions about this BSoD error, feel free to mention them in the comments section below.


User forum
0 messages