Canon ImageFormula R40 Won't Print on PC: How to Fix it
Restart critical services to re-establish connection
3 min. read
Published on
Read our disclosure page to find out how can you help Windows Report sustain the editorial team. Read more

If your Canon ImageFormula R40 won’t print on your PC, it’s likely an issue of outdated drivers causing compatibility issues.
The Canon ImageFormula R40 is a scanner hence does not possess any printing capabilities. However, it is likened to a printer because you can feed in paper and drawn out once you finish scanning your document.
So if your Canon scanner fails to print, make sure it’s not a paper jam on your Canon printer or your PC can’t detect your Canon printer.
How do I get my Canon ImageFormula R40 to print?
1. Run the hardware troubleshooters
1.1 Printer troubleshooter
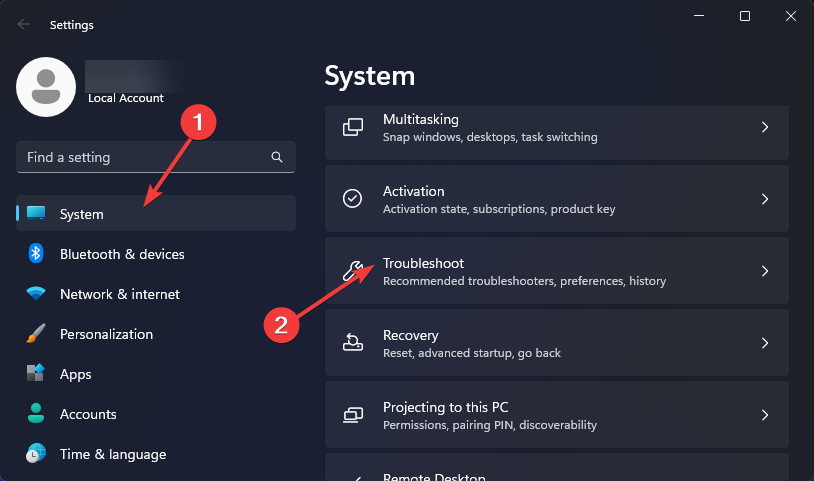
- Hit the Windows key and click on Settings.
- Select System on the left pane, then click Troubleshoot on the right.
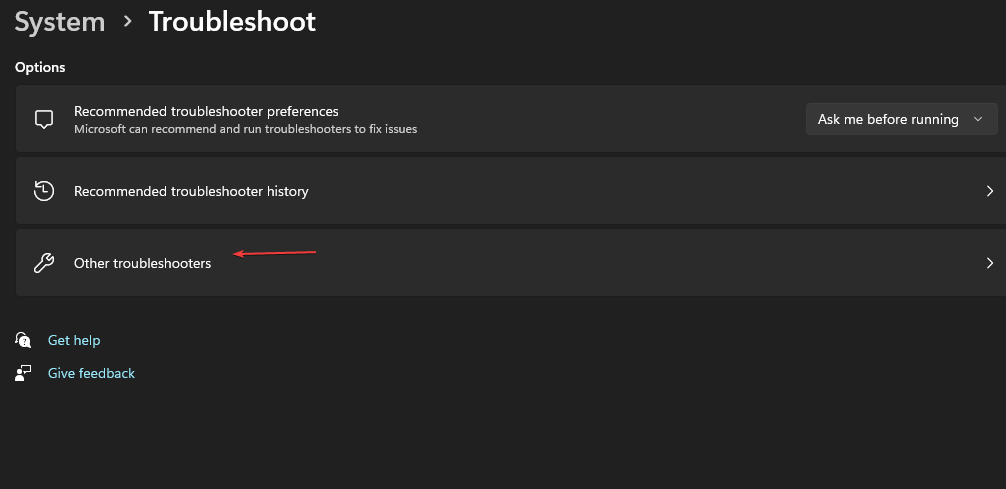
- Click on Other troubleshooters.
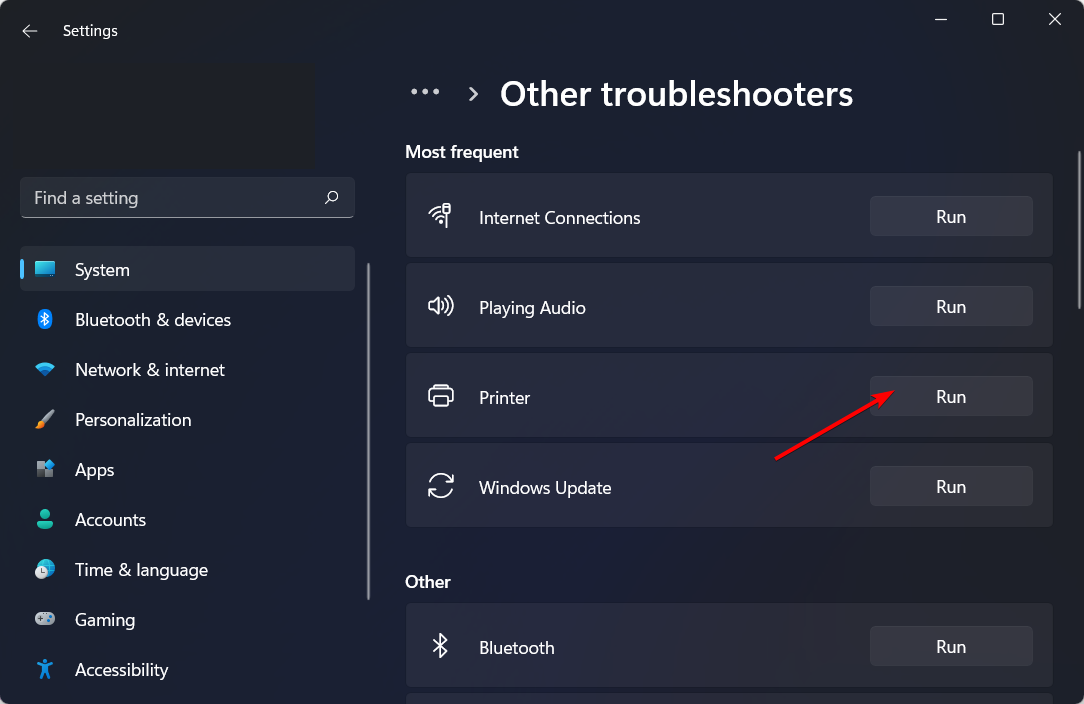
- Find the Printer troubleshooter and click the Run button next to it.
1.2 Hardware and Devices troubleshooter
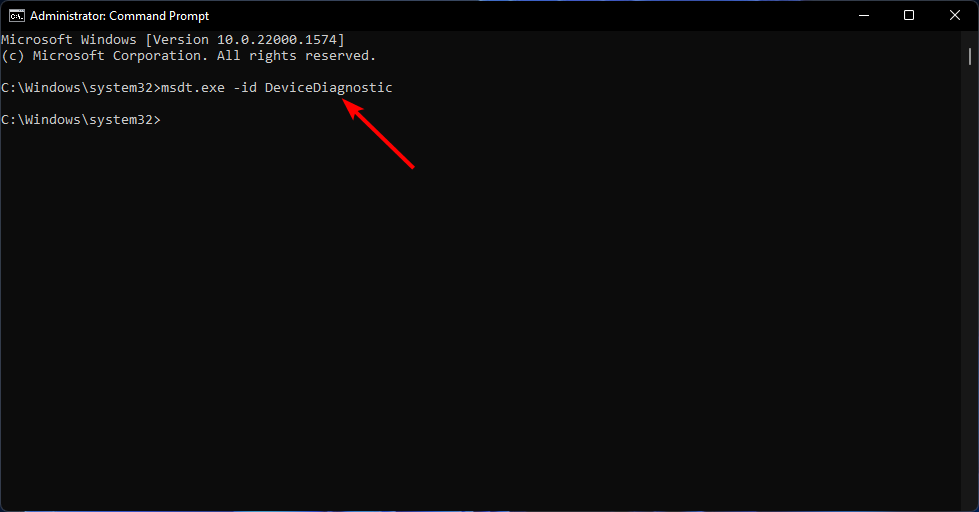
- Hit the Windows key, type cmd, and select Run as administrator.
- Type the following command and hit Enter:
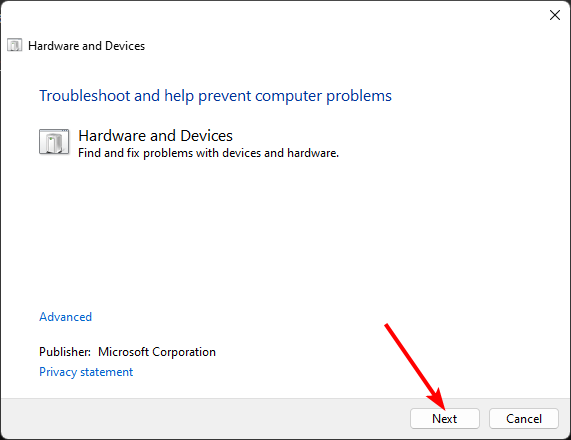
msdt.exe -id DeviceDiagnostic - In the Hardware and Devices dialog that appears, click Next.
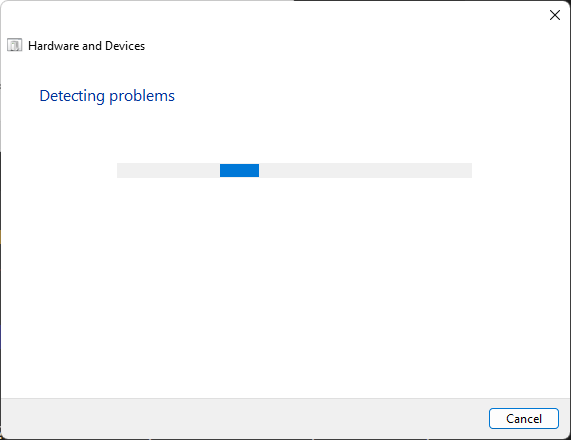
- The tool will start scanning for any problems with your hardware and recommend a fix. After it is done, try again and check if your Canon ImageFormula R40 accepts print jobs now.
2. Restart the Print Spooler service
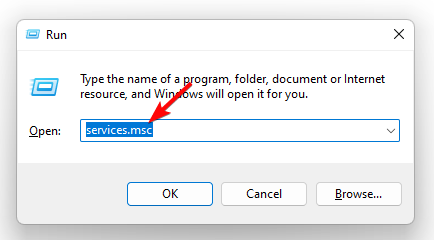
- Hit the Windows + R keys to open the Run command.
- Type services.msc in the dialog box and hit Enter.
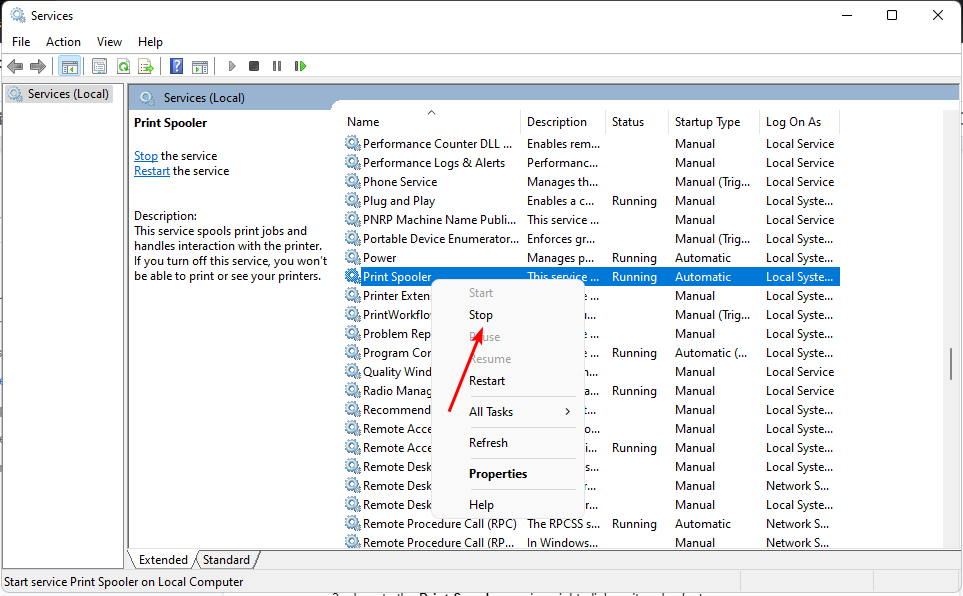
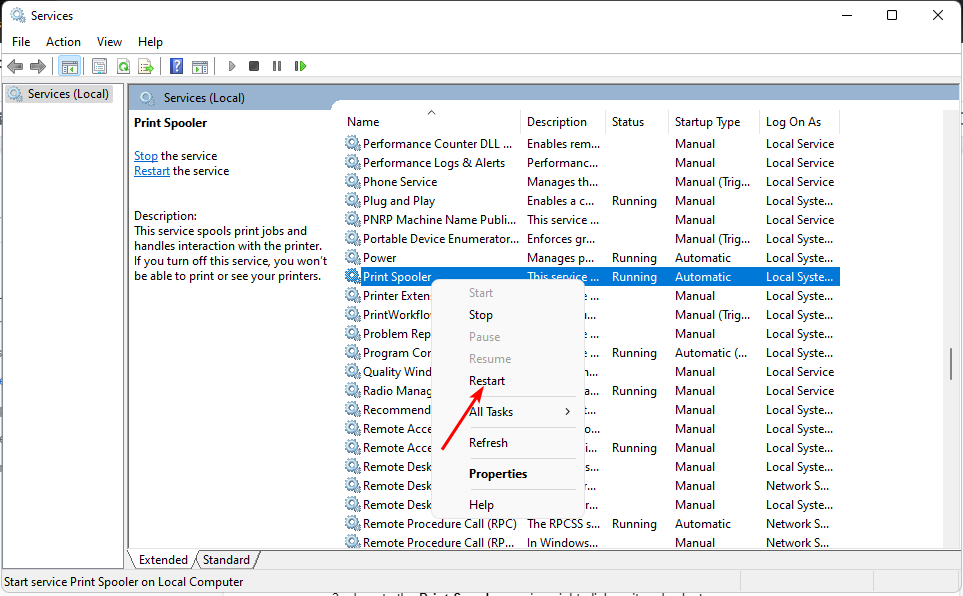
- Locate the Print Spooler service, right-click on it, and select Stop.
- Right-click on it again, then select Restart.
3. Restart the Windows Image Acquisition service
- Press Windows + R to get the Run console.
- Type services.msc and press Enter to open the Services window.
- On the next screen, locate and double-click on Windows Image Acquisition.
- On the WIA Properties window, click on Stop under Service status.
- If the service restarts, change the Startup type to Disabled.
The WIA service acts as the communication tool between your Canon printer and Windows 11 device. If the communication was cut, re-establishing it may allow your Canon printer to print.
4. Update Printer drivers
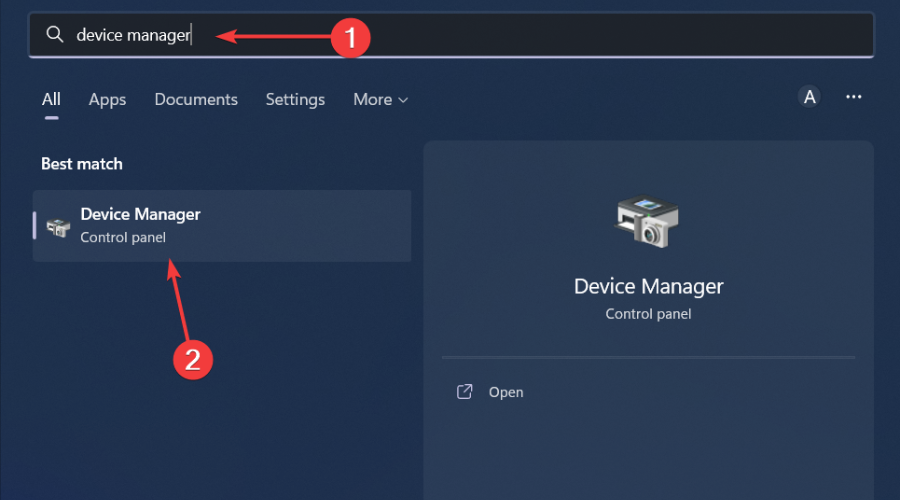
- Hit the Windows key, type Device Manager in the search bar, and click Open.
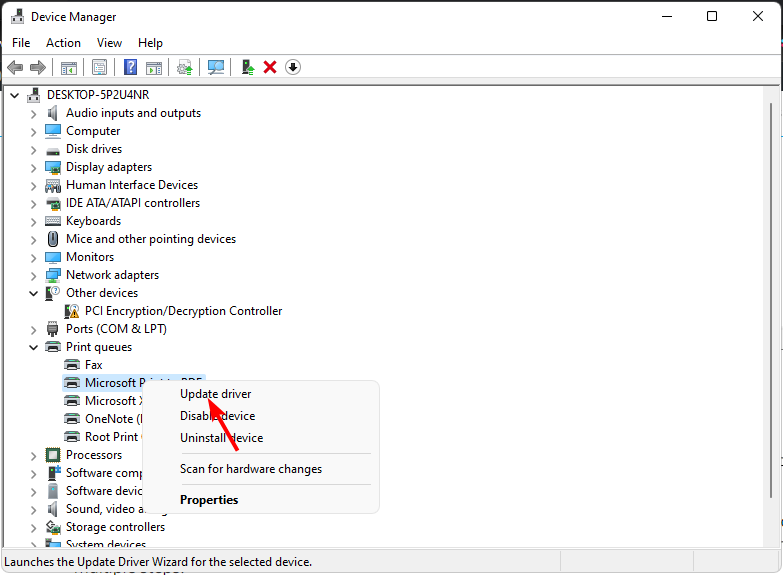
- Navigate to Printers and locate your printer.
- Right-click on it and select Update driver.
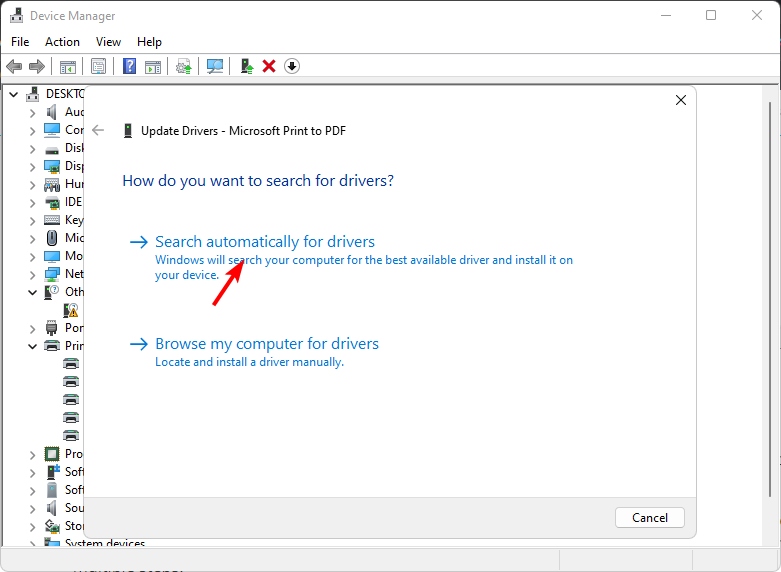
- Select Search automatically for updated drivers.
- Windows will find the most suitable driver and recommend you install it.
5. Remove and re-add your printer
- Open the Control Panel, and select View devices and printers under Hardware and Sound.
- Now right-click on the Canon printer and select Remove Device.
- Click Yes to confirm the action.
- Next, click the taskbar’s magnifying glass icon.
- Type Control Panel within the search tool that opens then select Control Panel to open that window.
- Next, select Large Icons on the View by drop-down menu.
- Click Devices and Printers in the Control Panel.
- Then press the Add a printer button.
- Choose a printer on the Add a device window, and press the Next button to install it.
- Press the Finish button after the printer has been added.
If none of these help you out with your problem, contact Canon support directly. They may be able to help you figure out the issue.
With such issues, we recommend getting an all-in-one printer and saving yourself the headache of printing using your scanner.
That’s a wrap from us. Do let us know if you have any other solutions that worked for you that you’d like to share down below.






User forum
0 messages