Windows 7, 8 and 8.1 Now Supported by Azure Backup
2 min. read
Updated on
Read our disclosure page to find out how can you help Windows Report sustain the editorial team. Read more
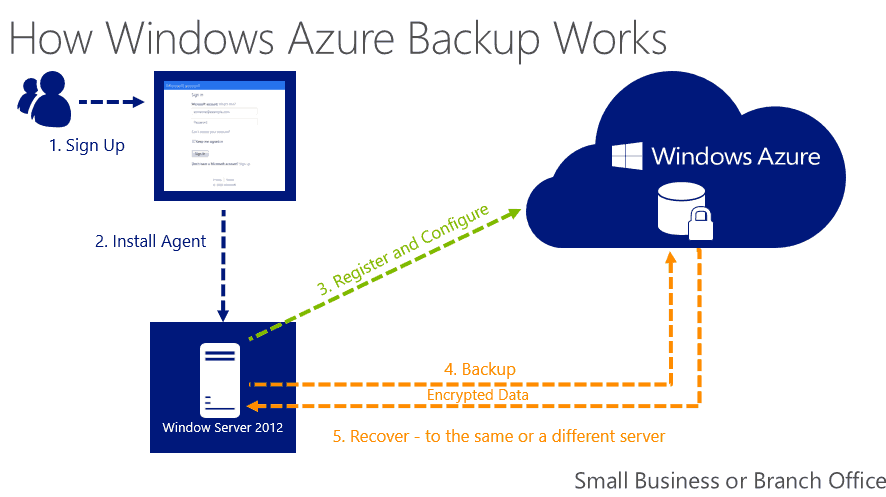
Good news for Windows 7, Windows 8 and Windows 8.1 users. Azure Backup now supports Windows client operating systems which means that you can back up your on-premises files and folders directly to Azure. In other words, Azure becomes Microsoft’s cloud platform.
This is how it works. Azure Backup saves your initial back up copy and then keeps a record of all the modifications made the that file. Only the changed content is then transferred over HTTPS.
In order to benefit from this feature, you need to download the KB3015072 update. There is no need to make any changes to the registry to apply this update but you may have to restart your computer after having installed it.
As the official Microsoft blog informs us, by downloading this update you also have access to the following features released in the last few months:
- KB2989574: Support for data sources more than 850GB
- KB2997692: Long Term Retention and Simplified Signup & Registration
- KB2999951: Support for Windows Server 2008
- KB3015072: Support for Windows 7, Windows 8, Windows 8.1
Here are some details about the Azure Backup:
- You can register one machine on the backup vault or you can choose to registrer multiple machine. If you want to register more than 50 machines on the same data vault, then you should choose the second option.
- A user provided encryption passphrase controls the access to the backup data. For each machine, you have a different passphrase.
- If you’re using you laptop’s battery, scheduled backups are postponed until you plug the laptop in for charging.
- Make sure you schedule the backup when your computer is turned on.
- The first 5GB per month are free of charge, then you pay $0.20 per GB per month.
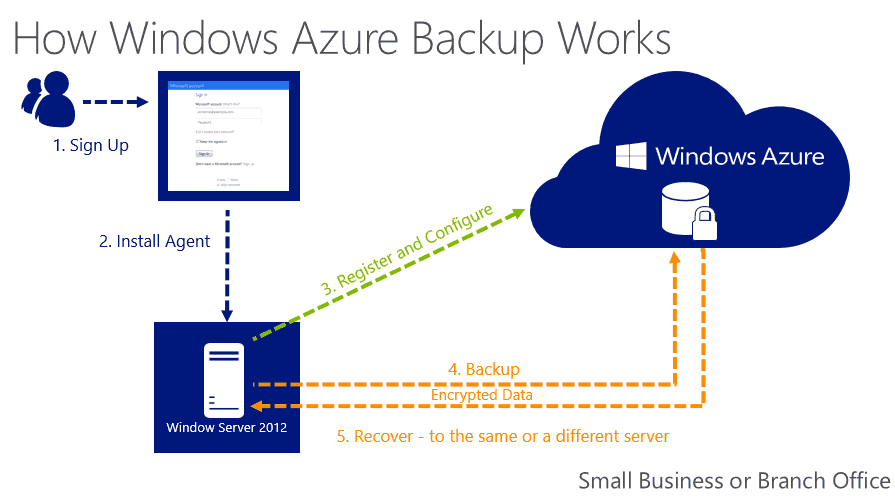
Here are the three steps necessary for you to get started:
- Sign in to Azure Portal and create a back up vault
- From the backup vault page, download agent and vault credential
- Install Recovery Services agent and then register the server.
For a step-by-step tutorial on how to get started, check out Microsoft’s Azure Blog.
READ ALSO: Windows Apps and Windows Servers Are Now Supported by Google Cloud Platform.


User forum
0 messages