Fix: Server Denied POP3 Access for Username and Password
4 min. read
Updated on
Read our disclosure page to find out how can you help Windows Report sustain the editorial team. Read more
Key notes
- Seeing the Server denied POP3 access error will affect the way you're able to use your mailing application.
- To start fixing this annoying issue, enable POP in the source account, and then follow the next methods described below.

Gmail is perhaps the most popular email domain, but you may be unlucky to run into a couple of challenges, such as the server denied POP3 access for the given username and password problem. This is a POP3 Gmail error in your account, and with it, you won’t be able to receive emails.
If you’re experiencing this error, you know that it’s most likely caused by the POP3 forwarding feature. Several factors can cause the POP3 Gmail error, some of which include the following:
- Two-factor authentication is enabled on the source account, but it’s not working. This problem is most prominent on accounts hosted on the Zoho domain.
- POP forwarding is disabled on the source account.
- Incorrect login information.
- You’ve exceeded your POP data limit.
What does POP3 unable to fetch mail mean?
If you refresh your inbox and instead of receiving new mails, you get an error that says POP3: Unable to fetch mail, your POP3 server details are incorrect. In most cases, it’s caused by an incorrect username or password.
To fix this issue, open Gmail and navigate to Settings > Accounts > Check mail from other accounts. Here, modify your settings with the correct details.
How do I fix the server denied POP3 access issue?
1. Enable POP in the source account
- Log in to the source account (the account with the emails you want to access). In this guide, we’ll make use of Gmail.
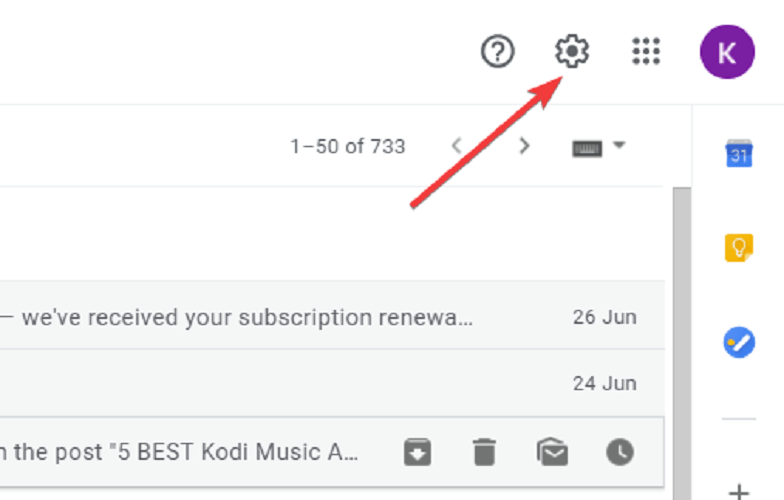
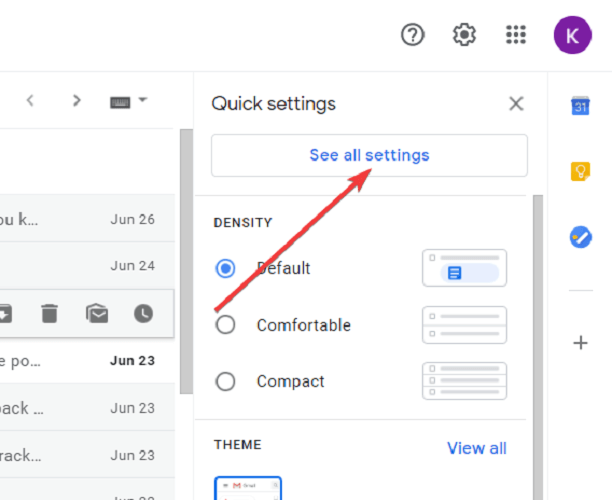
- When you log in to the email account, click on the gear icon and select Settings and hit See all settings.
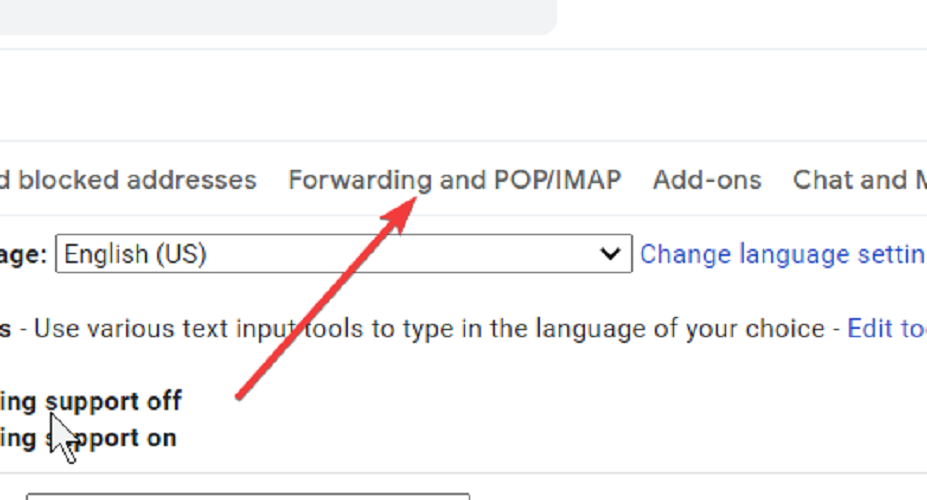
- Next, click on the Forwarding and POP/IMAP tab.
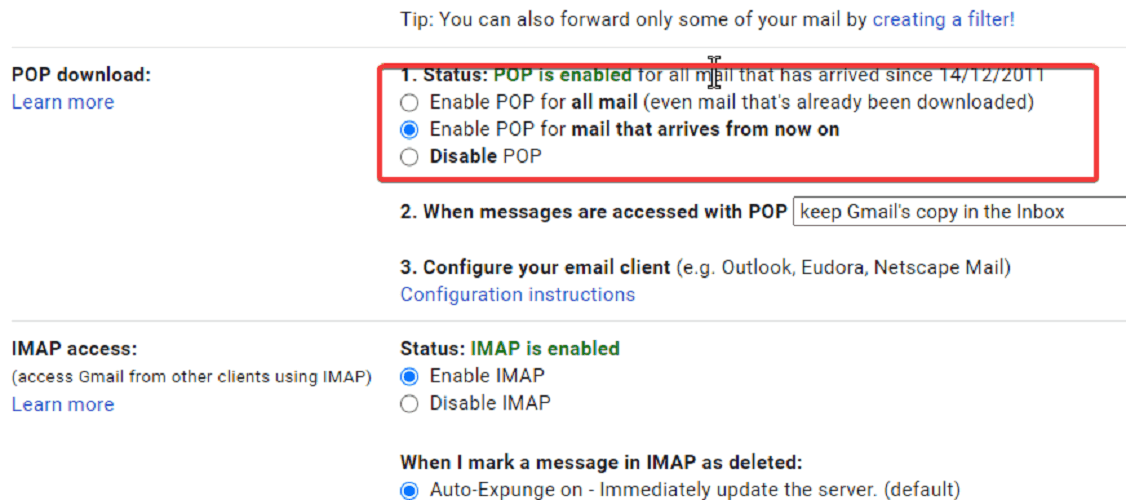
- You now have to Enable POP for all mail or Enable POP for mail that arrives from now on. Click on either of those options from the POP Downloadarea.
- POP is now active on your source account, and its options will be enabled. Select an option from the dropdown menu.
- Finally, save your settings by hitting the Save Changes button.
2. Force fetch emails to the destination account
- Sign out of the source email account completely and sign in to the destination account.
- Similar to the previous method, click on the gear icon at the top right-hand area of your screen and click on See all settings. You will now be taken to the settings page.
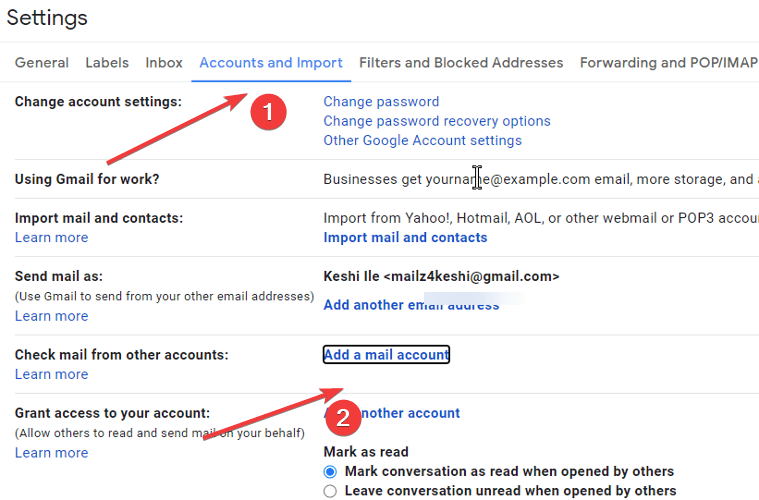
- Here, navigate to the Accounts and Import tab.
- After that, go to Check mail from other accounts and hit Add a mail account. Clicking on Add a mail account triggers open a popup window.
- On this new window, type in the email address of the source account. Click on the Next Step >> when you’re done here.
- Next, input your account password and leave the settings as mail.google.com with port 995. Click on the Add Account button to proceed.
- After clicking on Add Account, if the server denied POP3 access for the given username and password message shows up, it means that the destination account is not trusted by the source account. Hence, follow the steps below to rectify it:
- Using the same web browser, sign out of the destination account and sign in to the source email account.
- Next, go to the Allow Access page and hit the Continue button. This action will help the source account trust the destination account by reducing its security for the next ten minutes.
- Now, log out of the source account and log in to the destination account. Next, click on Add Account like in step 7 above. This time around, the account will no longer return the POP3 Gmail error.
3. Use a device-specific password
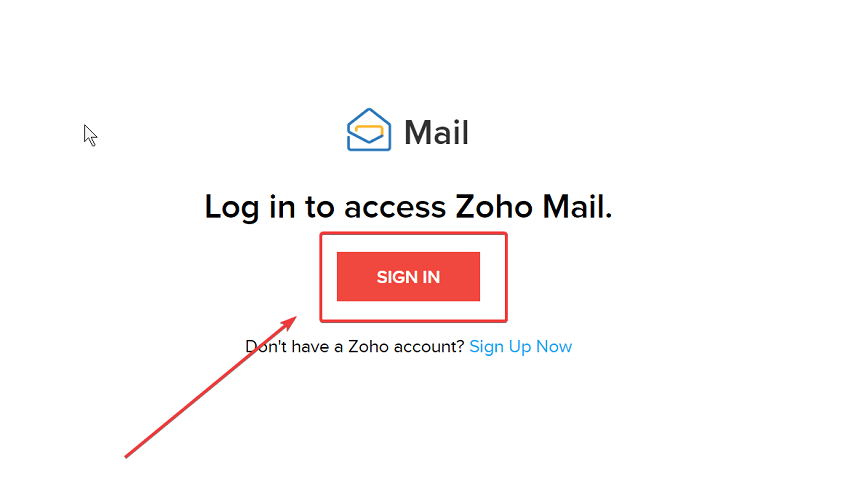
- Sign in to your Zoho Mail account.
- Next, go to the My Account button at the top of your screen to see the logged in Zoho Mail account.
- Here, click on Two Factor Authentication and choose Manage Application Specific Password.
- Next, type in the name of your device and your password. Hit the Generate button at the bottom of the screen to get a password.
- Using this newly generated password, access POP forwarding settings for the source account and confirm that the POP3 Gmail error has disappeared.
This solution is mainly for accounts hosted on the Zoho mail domain. With two-factor authentication enabled on your email account, your account password may no longer work for incoming email verification.
For all the scenarios where you get the server denied POP3 access for the given username and password error message, above are solutions that will work. I recommend that you attempt the solutions as they are listed here. However, Zoho Mail users may jump to the third troubleshooting solution to fix the problem.

User forum
5 messages