Fix: Your Digital ID Name Cannot Be Found by The Underlying Security System
Check the Trust Center Settings
5 min. read
Published on
Read our disclosure page to find out how can you help Windows Report sustain the editorial team. Read more
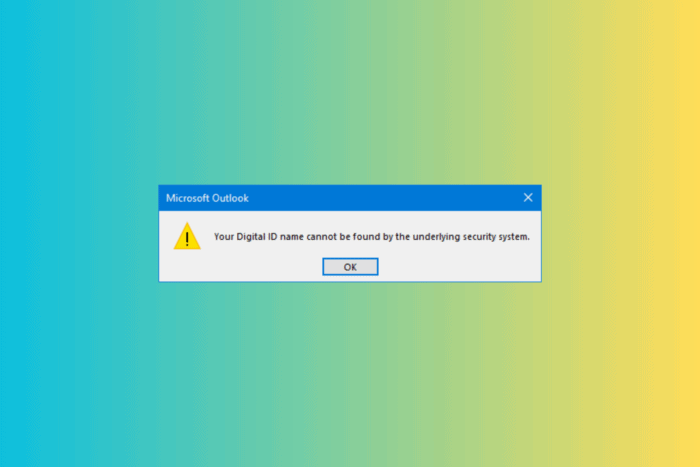
Many readers have complained about getting the Your Digital ID name cannot be found by the underlying security system issue while opening S/MIME encrypted emails. The error usually occurs when Outlook users try to decrypt an encrypted message. Let’s discuss how to fix the problem in a few minutes.
How can I fix the Your Digital ID name cannot be found by the underlying security system issue?
1. End all Outlook processes
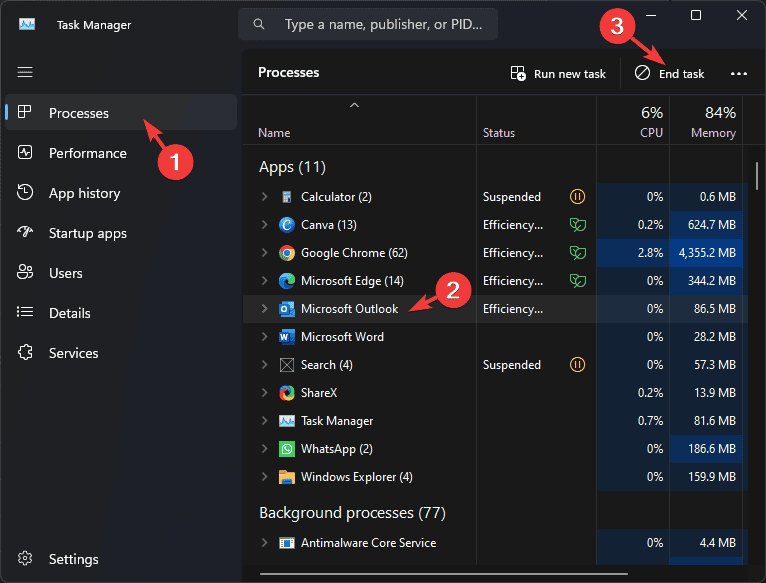
- Press Ctrl + Shift + Esc to open the Task Manager app.
- Under the Processes tab, look for Outlook-related processes, then select them one by one and click End task.
- Restart your computer.
2. Outlook in Safe mode
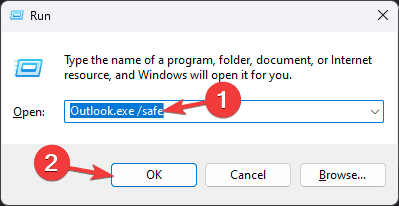
- Press Windows + R to open the Run window.
- Type the following command and click OK: Outlook.exe /safe
- From the Choose Profile pop-up, select Outlook and click OK.
3. Check the Outlook certificate
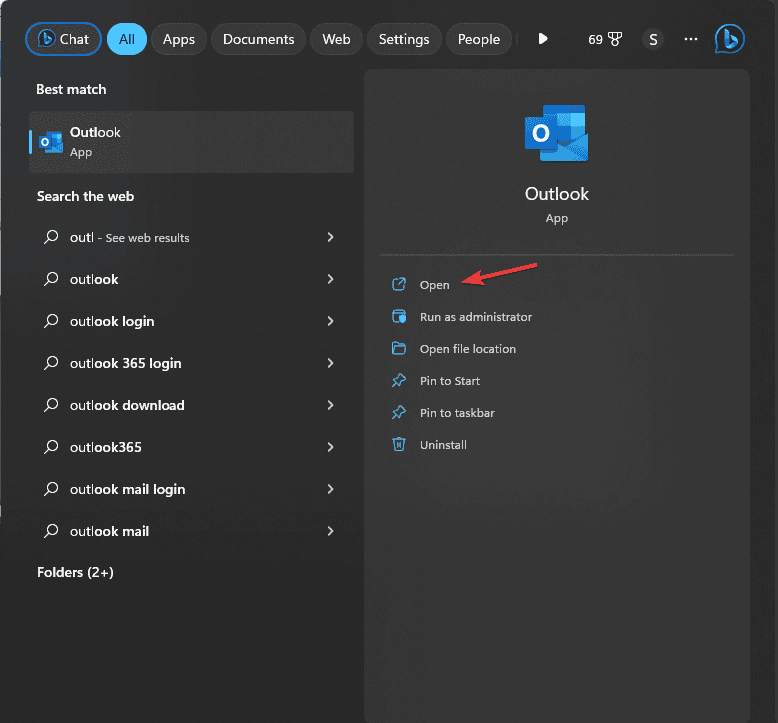
- Press the Windows key, type outlook, and click Open.
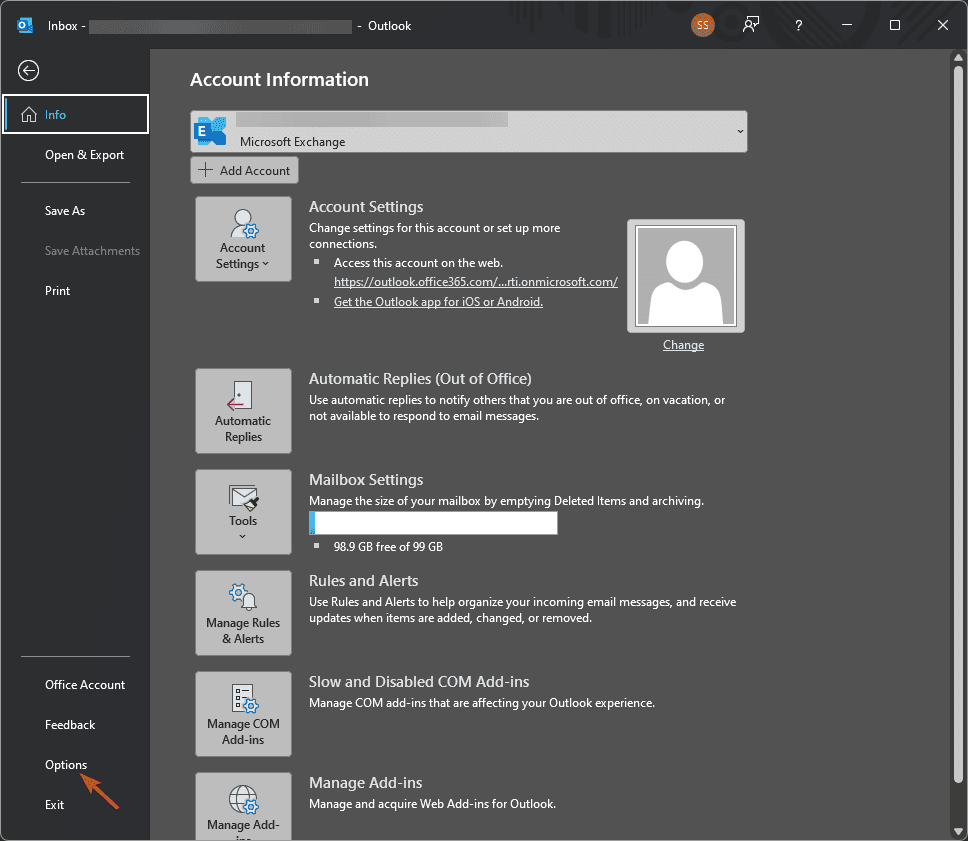
- Go to File.
- Select Options.
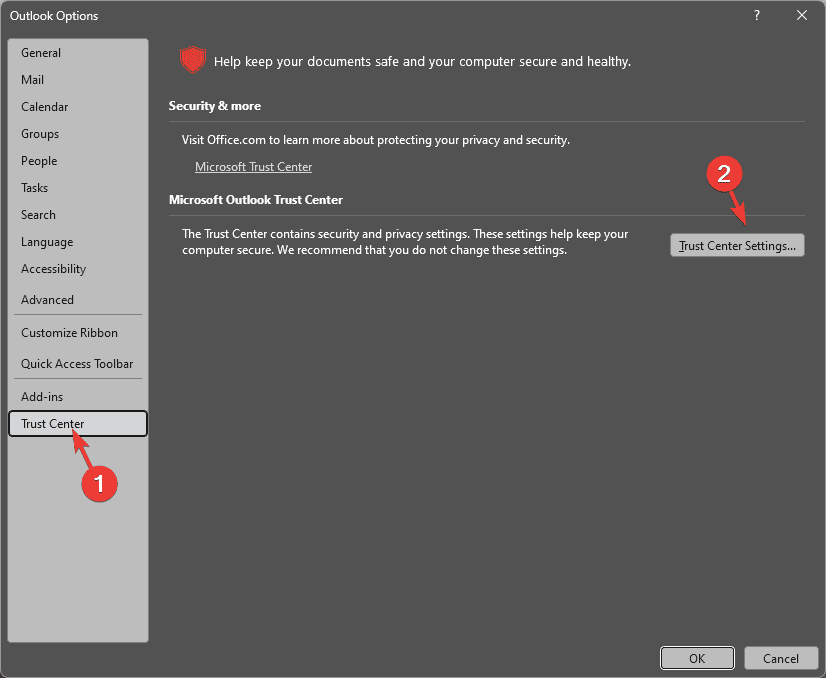
- From the Outlook Options window, click Trust Center.
- Click Trust Center Settings.
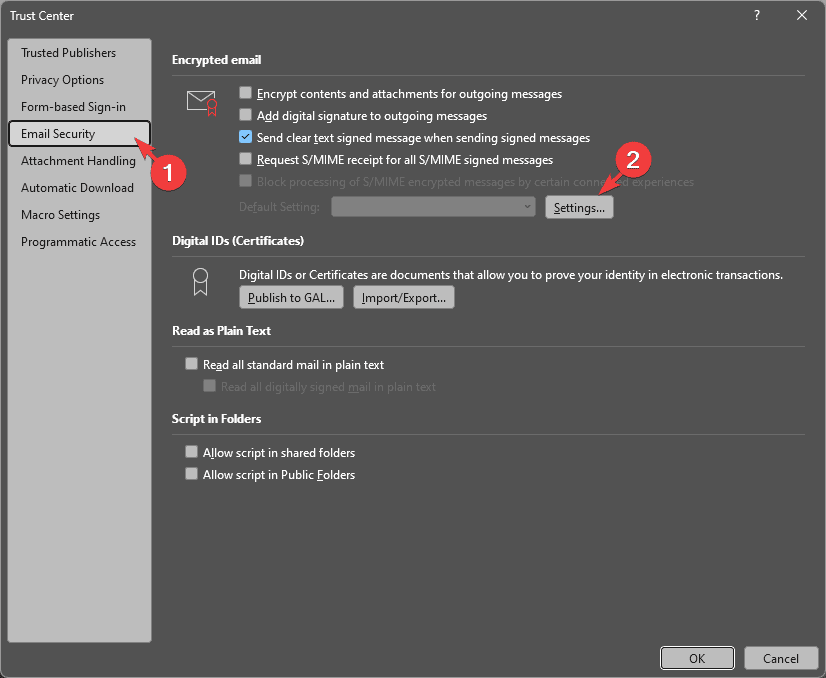
- Go to the Email Security tab on the left pane.
- Locate Encrypted mail, select a certificate, then click Settings.
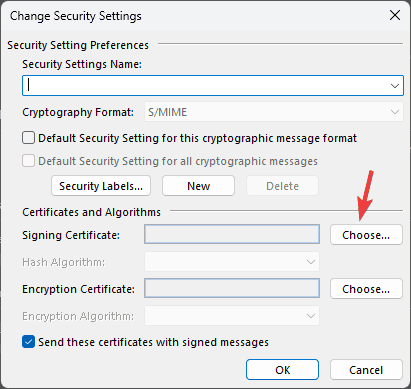
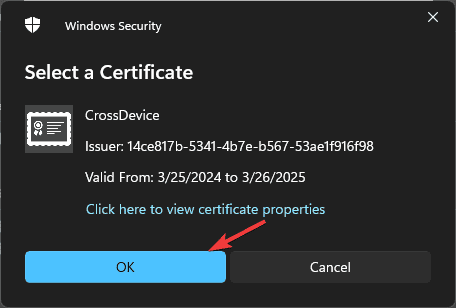
- Go to the Certifications and Algorthrims section, click the Choose button.
- You will see a certificate, then click OK. And, click OK three times to close the window.
- If they are blank, then you need to buy a new certificate.
4. Modify the server timeout setting
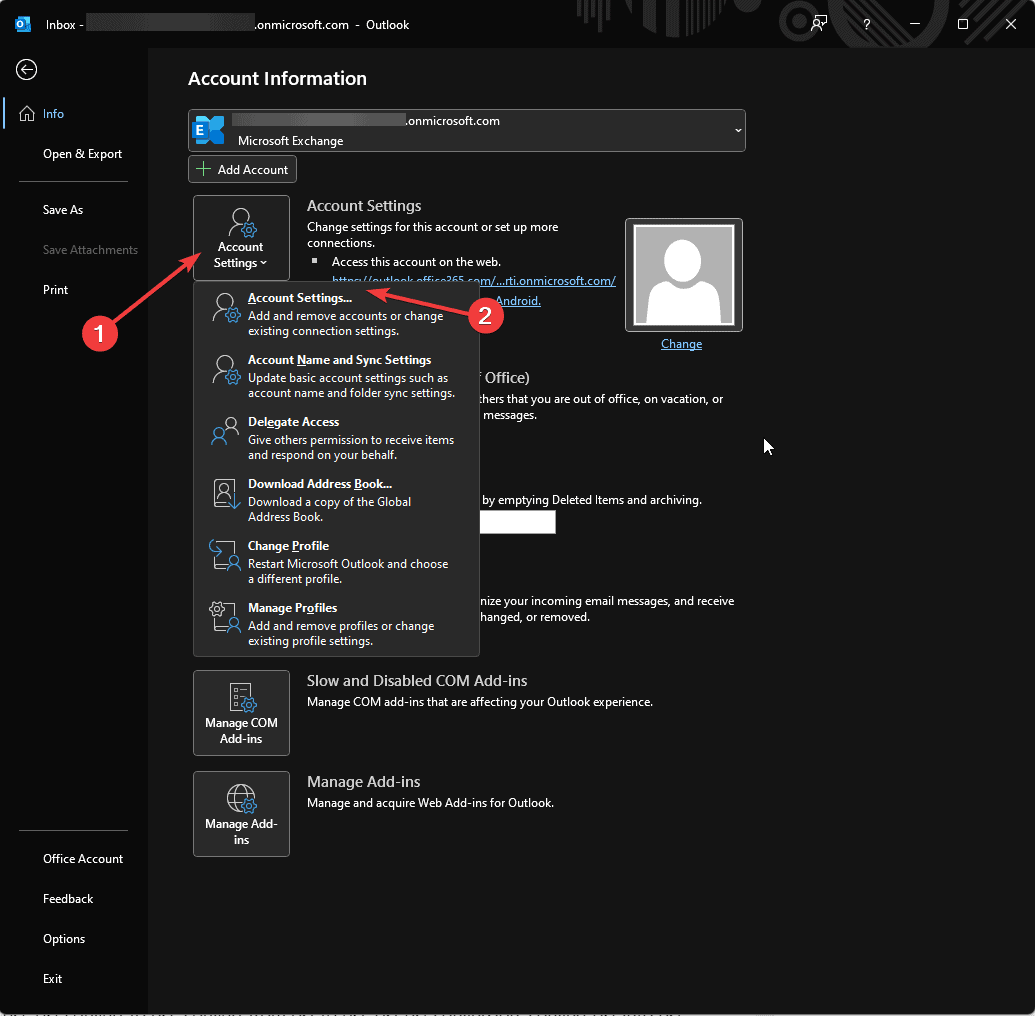
- Press the Windows key, type outlook, and click Open.
- Go to File.
- Select Account Settings, and click Account Settings from the drop-down.
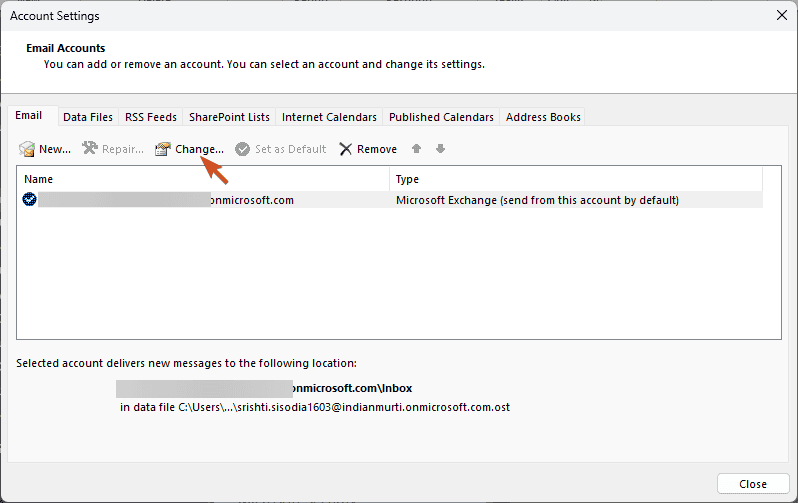
- Click Change.
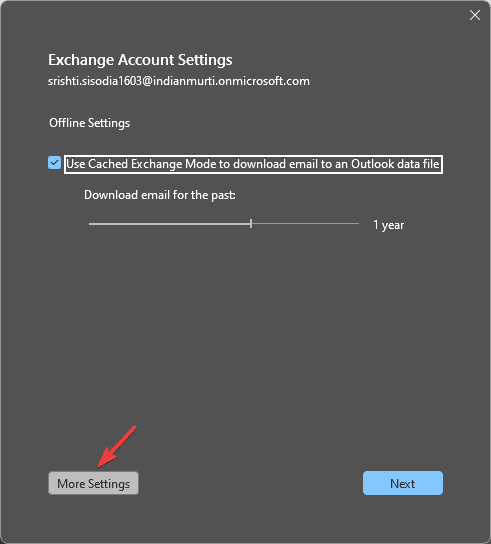
- Now click the More Settings option.
- Go to the Advanced tab and move the slider to the right to adjust the server timeout time.
- Click OK to save the changes.
- Click Next, then Finish to close the window. Restart Outlook to let the changes take effect.
5. Turn off Windows Firewall
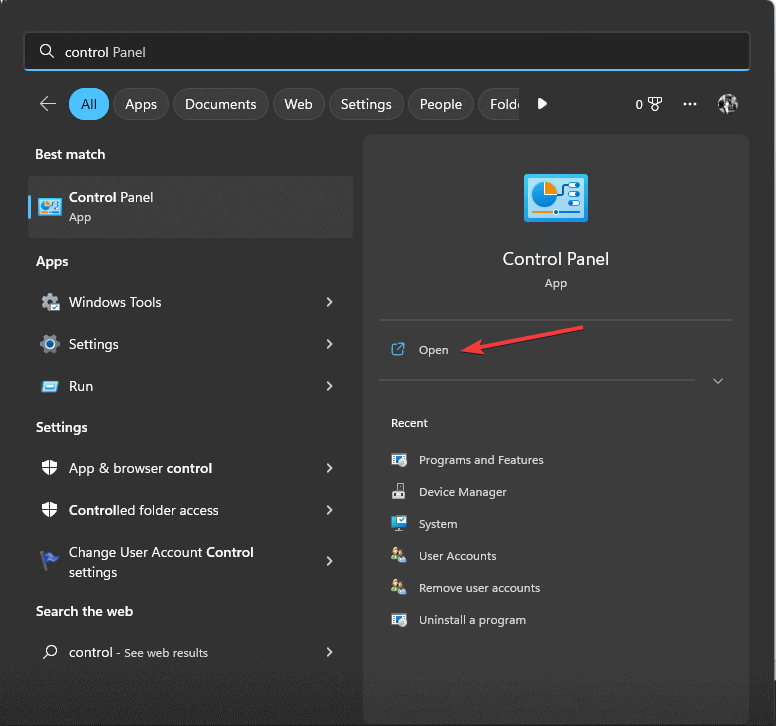
- Press the Windows key, type control panel, and click Open.
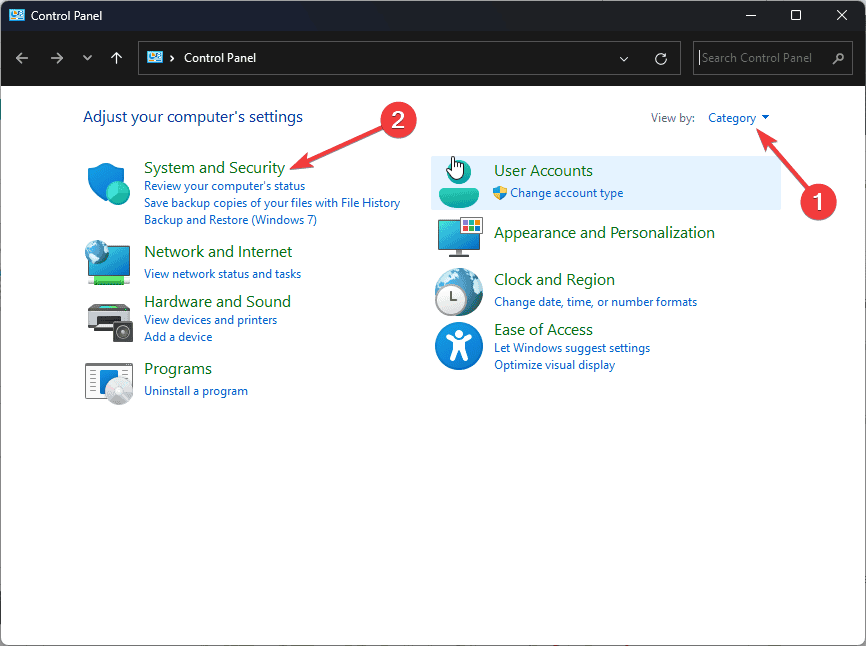
- Select View by as Category, then click System and Security.
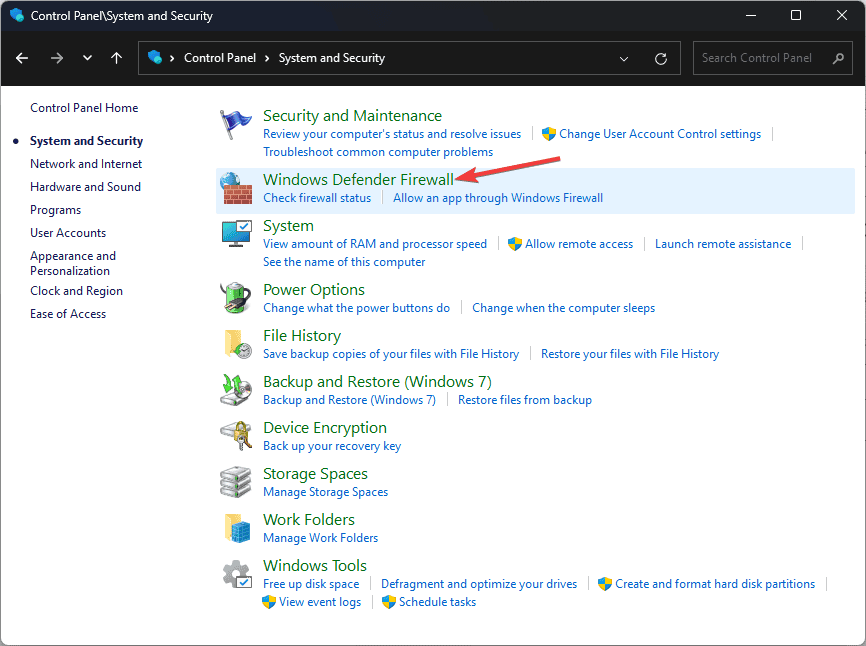
- Click Windows Defender Firewall.
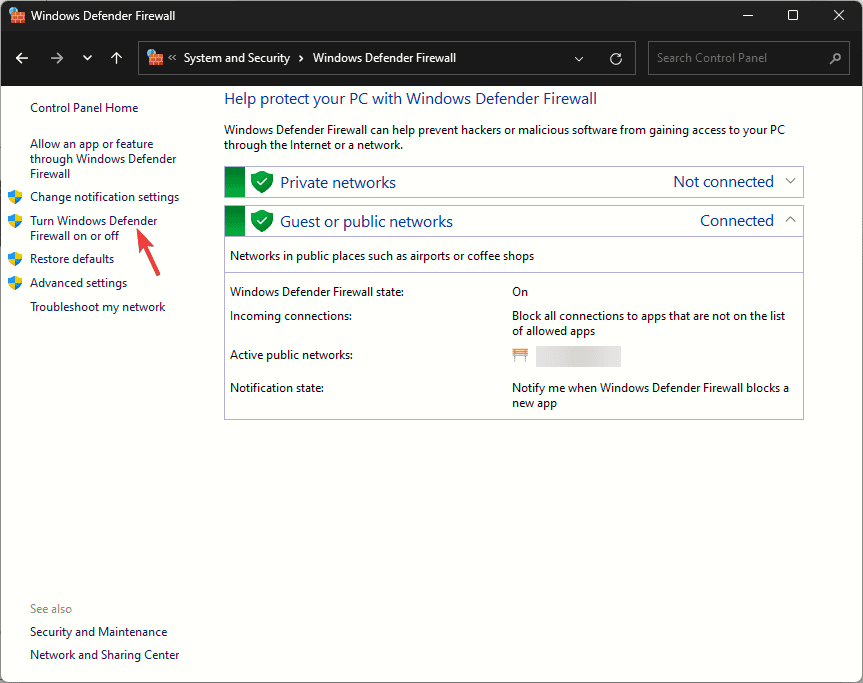
- From the left side, click the Turn Windows Defender Firewall on or off option.
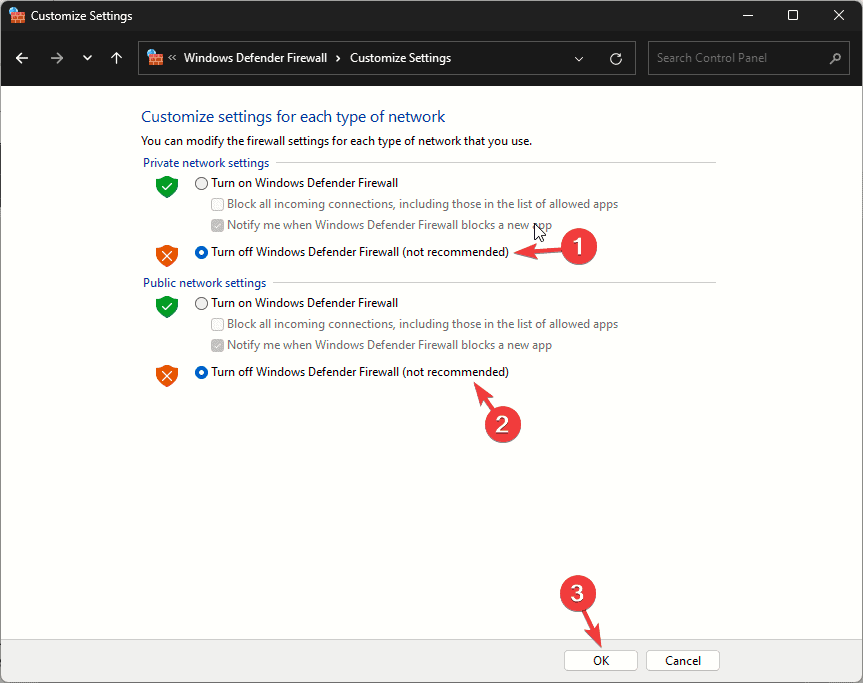
- Next, under Private and Public network settings, select Turn off Windows Defender Firewall (not recommended), then click OK.
You can also temporarily disable your security software to resolve this problem. Once you can access the mail, don’t forget to reverse engineer these steps to turn on the Windows Defender Firewall and enable security software if it is disabled.
6. Enable Client authentication and Secure Email
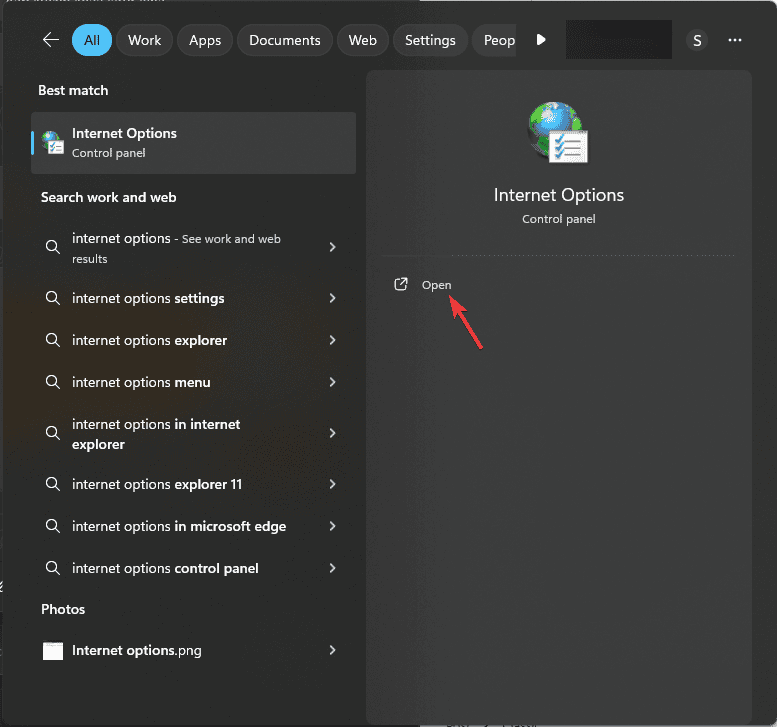
- Press the Windows key, type internet options, and click Open.
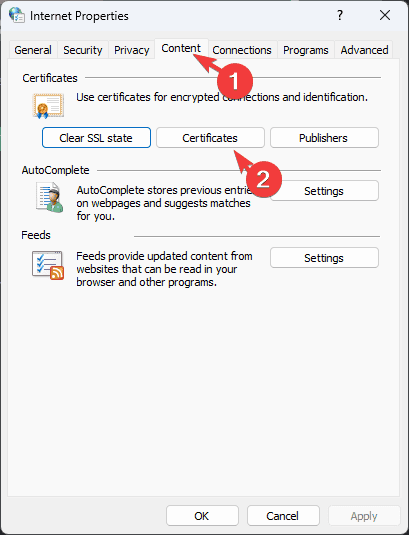
- Go to the Content tab and click the Certificates button.
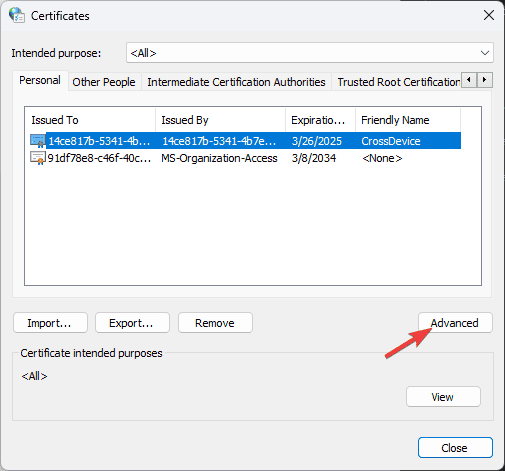
- Click the Advanced button.
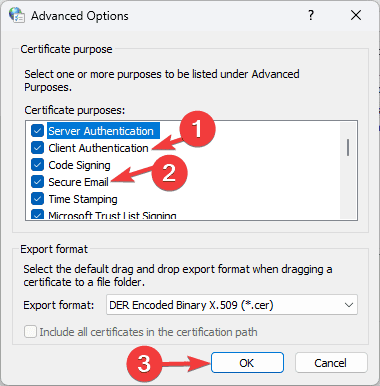
- On the Advanced Options window, under Certificate purposes, look for Client Authentication & Secure Email.
- Click the checkbox next to it, then click OK to save the changes.
7. Delete unwanted certificates
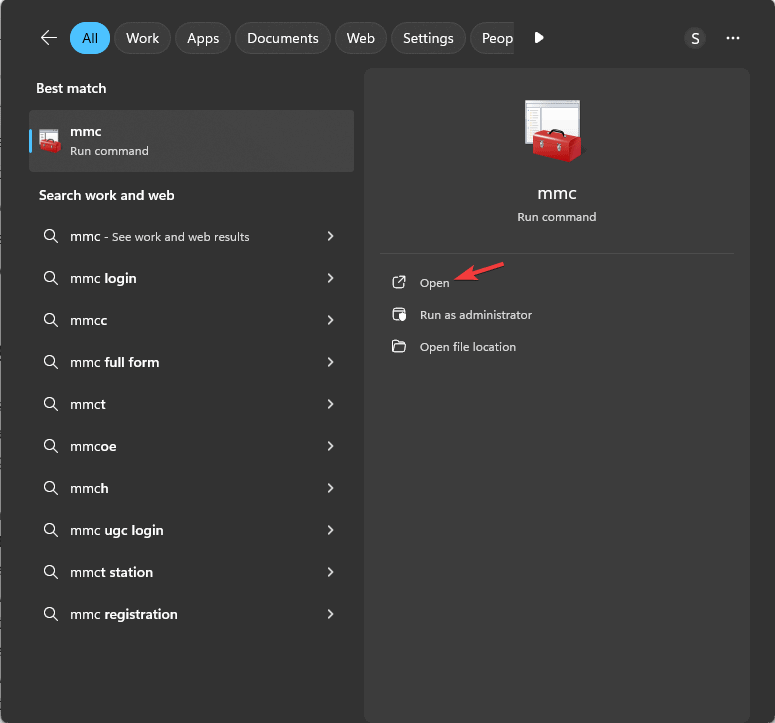
- Press the Windows key, type mmc, and click Open to open Microsoft Management Console.
- Click Yes on the UAC prompt.
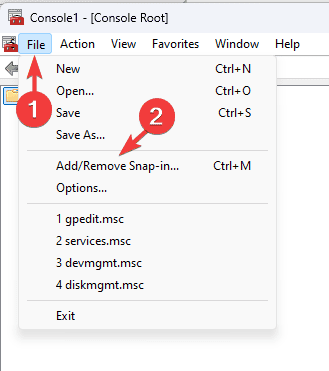
- Go to File, then select Add/Remove Snap-in.
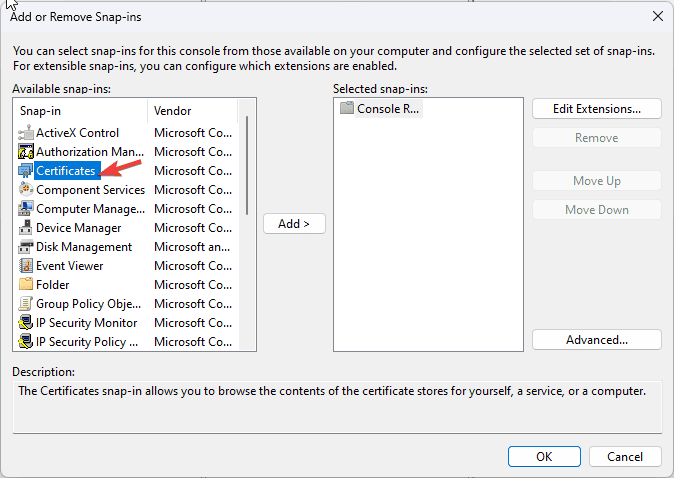
- Under Available snap-ins, double-click Certificates.
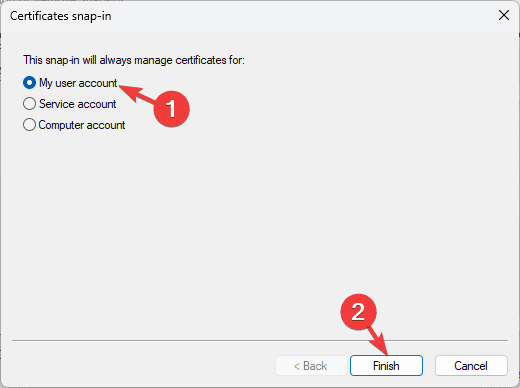
- On the next window, select My user account and click Finish.
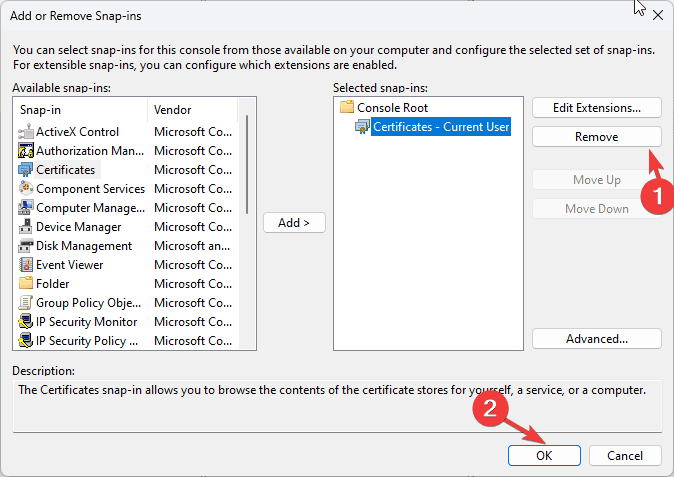
- Under Select snap-ins, select any unwanted certificate, then click Remove.
- Click OK to close the window.
8. Using the Registry Editor
8.1 Add a registry entry
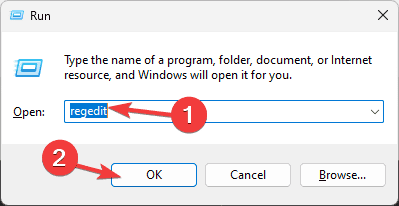
- Press Windows + R to open the Run window.
- Type regedit and click OK to open the Registry Editor.
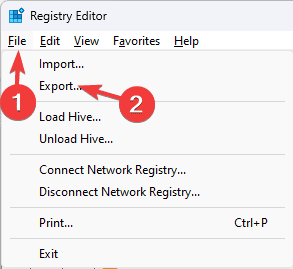
- Before making any changes, you should backup registry entries. Go to File, then click Export. Save the .reg file
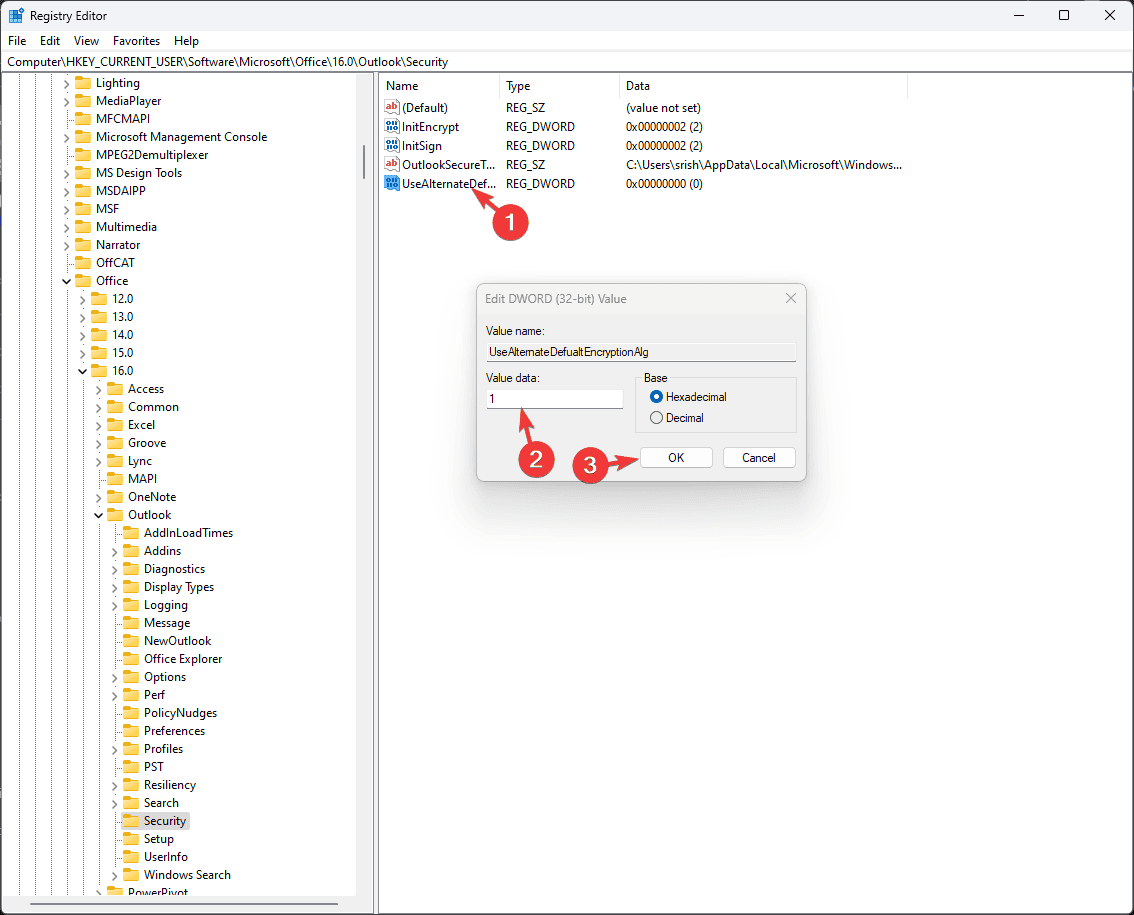
- Navigate to this path:
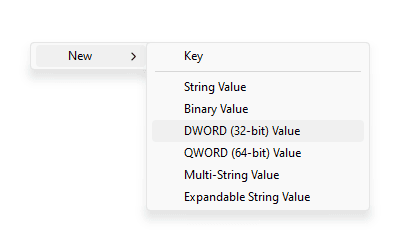
Computer\HKEY_CURRENT_USER\Software\Microsoft\Office\16.0\Outlook\Security - Right-click the right side of the screen, and choose New>DWORD(32-bit) Value.
- Name the newly created DWORD as UseAlternateDefualtEncryptionAlg.
- Double-click it, change the Value data from 0 to 1, then click OK.
- Right-click the right side of the screen again, and choose New>DWORD(32-bit) Value.
- Name the newly created DWORD as DefaultEncryptionAlgOID.
- Double-click it, change the Value data to 1.2.840.113549.3.7, and then click OK.
- Close Registry Editor and reboot your PC.
Enable Encrypt message contents and attachments
Once your computer is up, open Outlook and follow these steps:
- Locate the email that has encrypted content and double-click it to open it in a separate window.
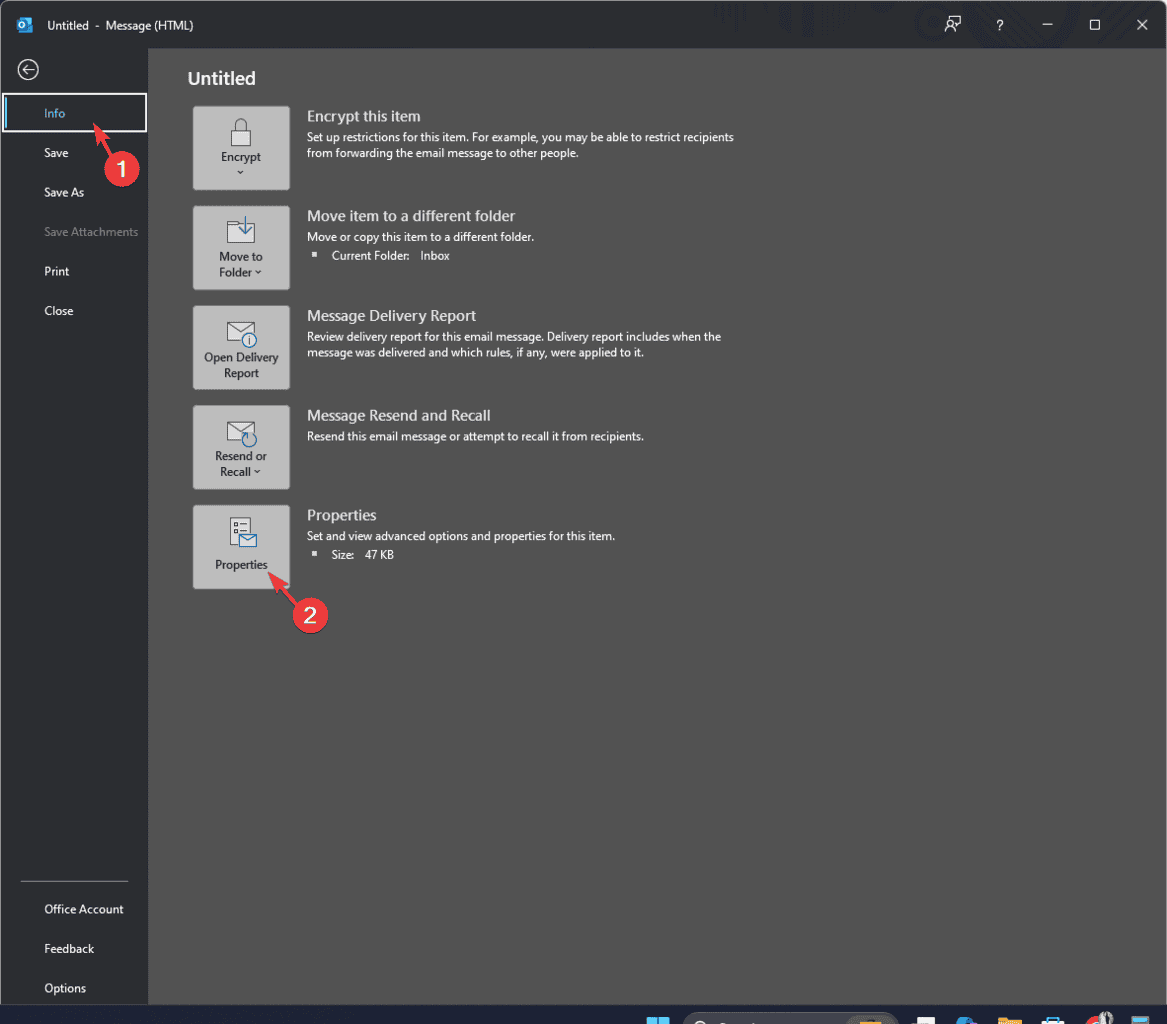
- Go to File.
- From the left pane, select Info, then click Properties.
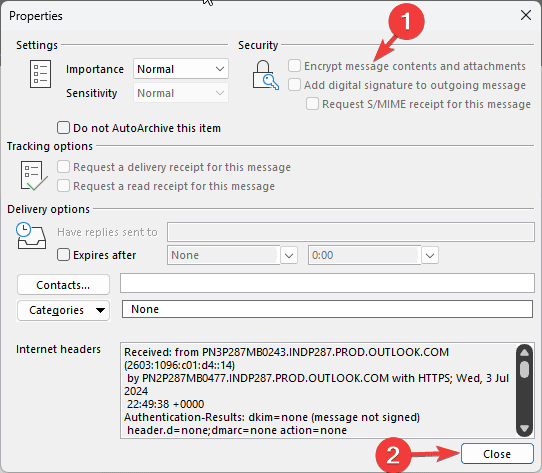
- On the Properties window, remove the checkmark next to Encrypt message contents and attachments.
- Click Close and save the changes if prompted.
To conclude, the Your Digital ID name cannot be found by the underlying security system issue can be resolved quickly by checking the certificates, running Outlook in safe mode, turning the firewall off or changing the Registry Entries.
If you are unable to open Outlook in Windows 11, the problem could be the outdated Outlook app, third-party interference, corrupted Outlook data files, or other issues; read this to learn the solutions.
This isn’t the only common problem and many reported that the Outlook app is not syncing emails at all.
As for other syncing issues, many reported that Outlook Calendar is not syncing while others reported that Teams Calendar is not syncing with Outlook. Luckily, we covered both issues in separate guides.
If you have any suggestions or concerns about this issue on Outlook, feel free to mention them in the comments section below.




User forum
0 messages