VLC Pixelated Video [MKV, AVI, MP4]: 5 Quick Fixes
Get rid of video artifacts once and for all
3 min. read
Updated on
Read our disclosure page to find out how can you help Windows Report sustain the editorial team. Read more
Key notes
- Users have reported that their VLC pixelates their videos.
- Having your VLC playing videos pixelated can ruin a relaxing evening with your family.
- To start fixing this issue, disable hardware-accelerated decoding and follow the next methods.

VLC pixelation issues are coming when using the popular media player.
The video plays perfectly at first, but if you switch to full-screen mode, the video becomes pixelated or gets pixels flashing. This issue occurs even if your video card drivers are up to date.
You’d have thought that the VLC pixelated MP4/MKV is from the video, but it’s not. This is because the video plays fine in full screen on other players, such as Windows Media Player.
The following solutions have fixed the VLC pixelation issues for other users.
How can I fix the VLC pixelated video issue?
1. Fast forward or backward the playback
You can fix VLC pixelation issues by simply jumping a few seconds back or forward.
This solution will not fix the issue permanently, but it will clear the VLC pixelated gray screen for the moment.
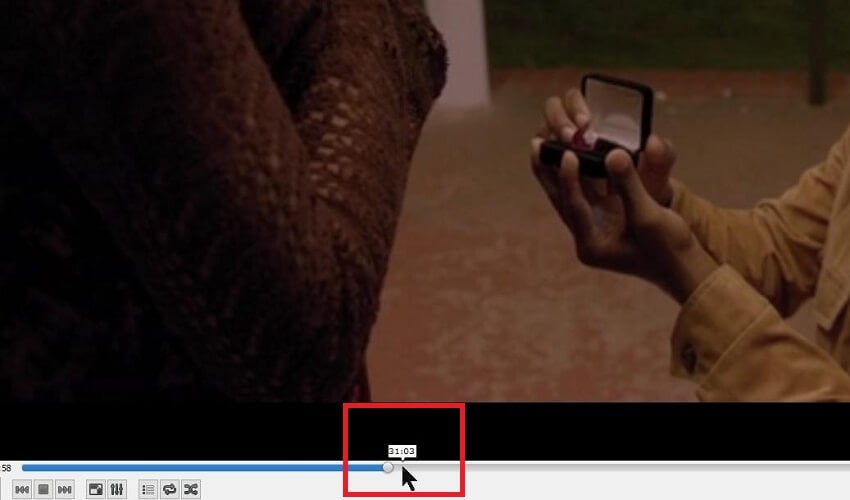
To jump front or back, simply click on the progress bar and dragging the indicator back or front a couple of seconds.
You can also click on the time you want to jump to instead of dragging the indicator to that point.
Alternatively, you can use the Shift + directional keys combination to fast forward or fast backward the playback.
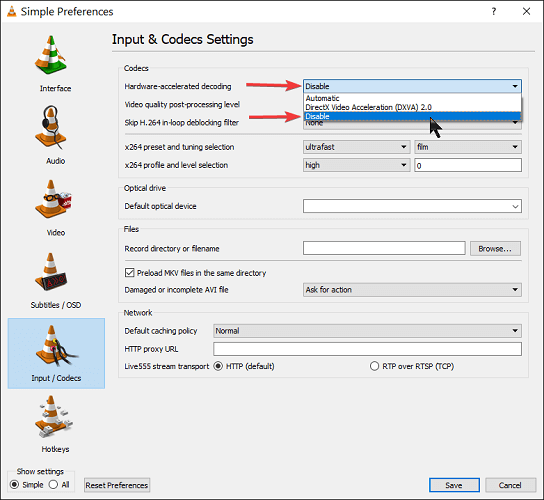
2. Disable hardware-accelerated decoding
- Launch VLC media player.
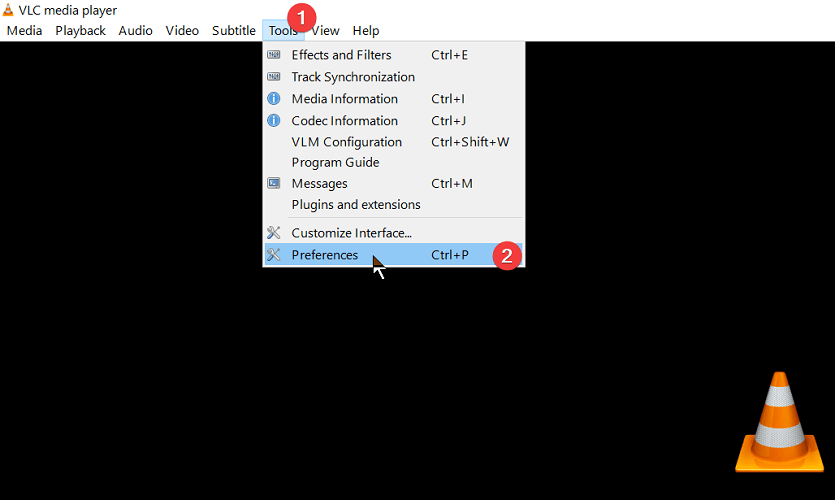
- Click on the Tools menu and select Preferences.
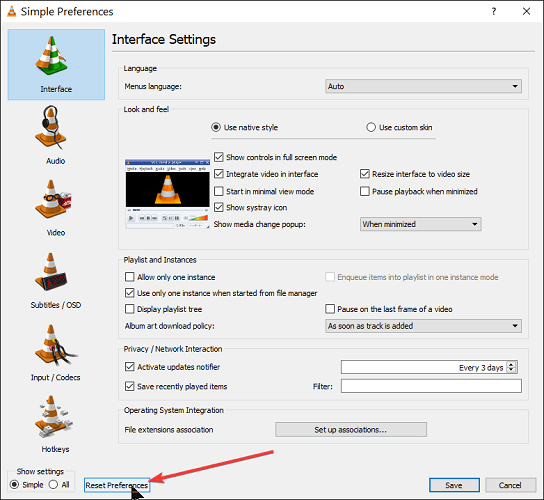
- Next, click on Reset Preferences and hit OK in the dialog box to confirm the action.
- Now, close VLC Media Player and re-open the application.
- Again, click on the Tools menu and go to Preferences.
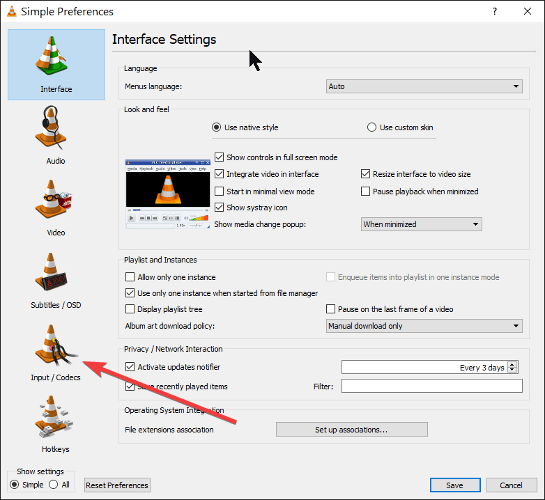
- Click on Input / Codecs.
- Click on the dropdown beside Hardware-accelerated decoding and disable the option.
- Finally, click Save and close the application.
3. Change the VLC buffer settings
- Open VLC Media Player.
- Go to the Tools menu and click on Preferences.
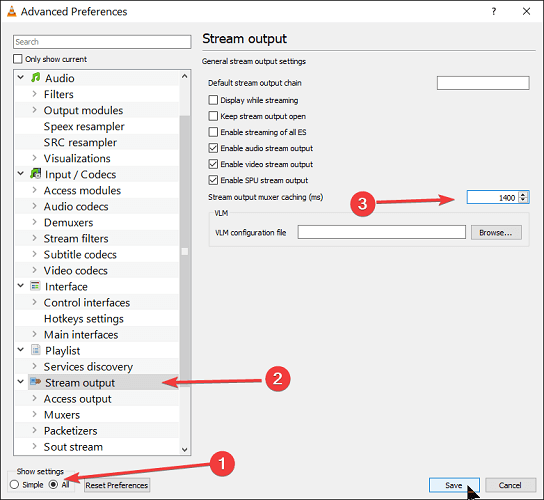
- At the bottom of the screen, select All to reveal additional options.
- Click on Stream Output from the left-hand menu.
- Finally, change the value of the Stream output muxer caching (ms) to 1500 milliseconds.
- Hit the Save button.
4. Enable OpenGL video output
- Launch VPL Media Player.
- Next, open the Tools menu and choose Preferences.
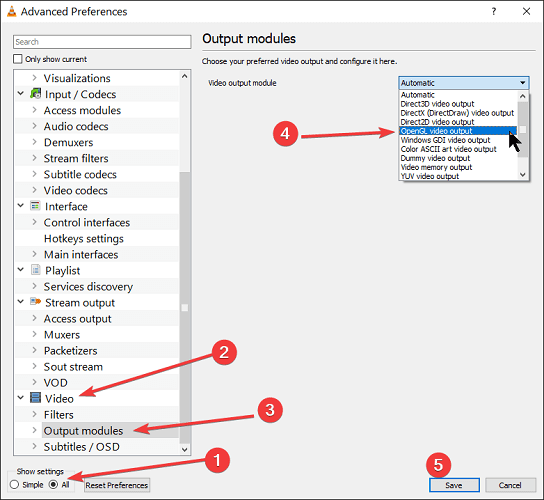
- Click on the All switch at the bottom of the screen to reveal more menu options.
- From the menu, click on Video to expand the options, and select Output modules.
- Change the Video output module option to OpenGL video output.
- Click Save to confirm your changes.
5. Use a different player
If you didn’t manage to fix the pixelation problem in VLC, try reinstalling the app or installing a better video codec pack.
There is also the option of using a different video player altogether and enjoying the video for the time being.
Apart from the VLC pixelation issues, another common problem with this media player is when your videos lag on Windows 10.
There’s no official fix for VLC pixelated videos, but the solutions in this guide will resolve the problem quickly.





User forum
1 messages