Windows 11 on QEMU: How to Install & Run
6 min. read
Updated on
Read our disclosure page to find out how can you help Windows Report sustain the editorial team. Read more
Key notes
- You will need to have a TPM 2.0 chip and Secure Boot before you try to emulate Windows 11 as it will not run otherwise.
- Head to QEMU's download page and install the version you desire after selecting your OP.
- If QEMU is slower than usual, examine your BIOS settings first, and make certain that VT-x is turned on.
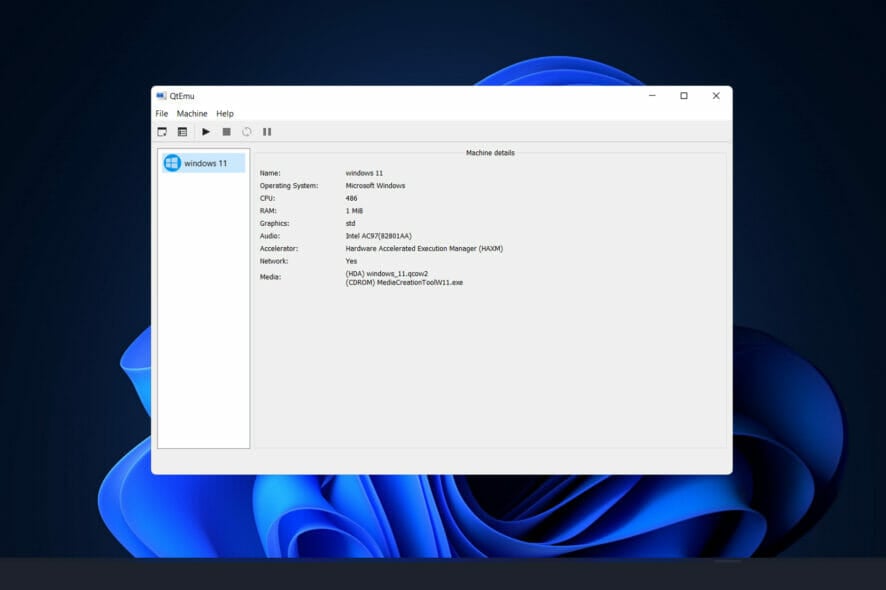
When compared to previous iterations, Windows 11 has more stringent security standards. The use of a TPM 2.0 chip (TPM 2.0 can be enabled in your BIOS if you have current hardware) and Secure Boot are the two primary requirements for it to run in QEMU.
If you wish to take advantage of Windows 11, you can do so by installing it in a virtual machine using virtualization tools such as QEMU on a Linux or Mac computer. This article assumes you’ve already installed QEMU and are familiar with the process of configuring a virtual machine using it.
However, if you haven’t installed it yet, you can head to QEMU’s download page and install the version you desire after selecting your OP.
Follow along as we will first see what the QEMU requirements are then proceed with the Windows 11 installation process.
What are QEMU’s requirements?
Qemu is a hypervisor that conducts hardware virtualization and is available for free and open-source use. QEMU v2.6.0 added the virtual NVDIMM (vNVDIMM) capability, which allows users to emulate a virtual NVDIMM.
The memory type (pmem) is the only one that has been implemented. In terms of feature enhancements, the block window type (blk) is one that should be deployed in the near future. If there are any changes, please refer to the QEMU release notes.
To get TPM 2.0 emulation, you’ll need to have QEMU 4.0 or higher installed on your computer. Other hardware requirements for Windows 11 include 4GB of RAM and a hard drive with a capacity of 64GB.
Unless you match the basic requirements, which include TPM and Secure boot, you will see an error message stating that your PC is unable to run Windows 11.
How can I easily install Windows 11 in QEMU?
1. Use the QTEMU GUI
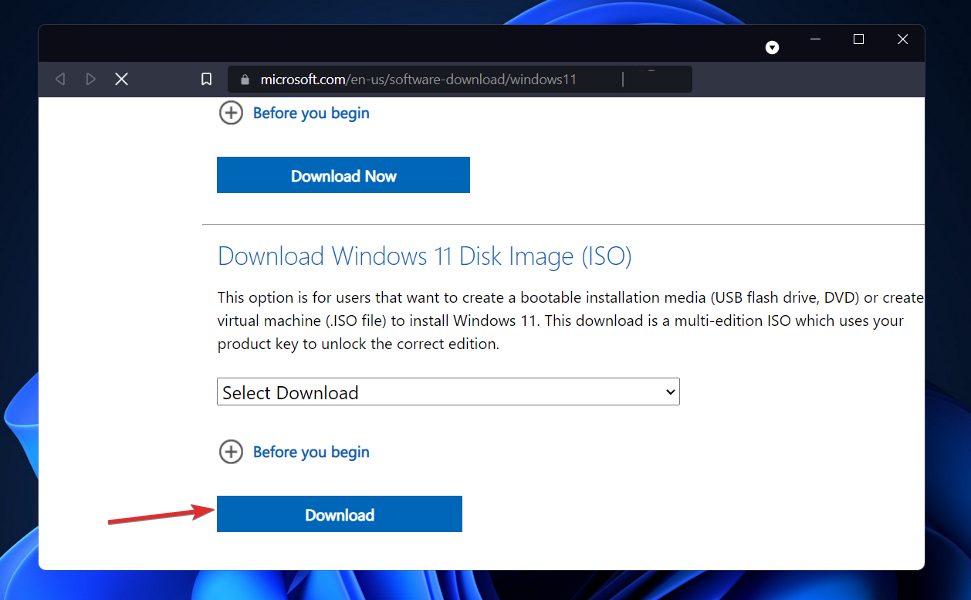
- You’ll need to download the Windows 11 ISO and mount it and go through the setup process. If you are already familiar with the process, head to Microsoft’s website to download the Disk Image ISO.
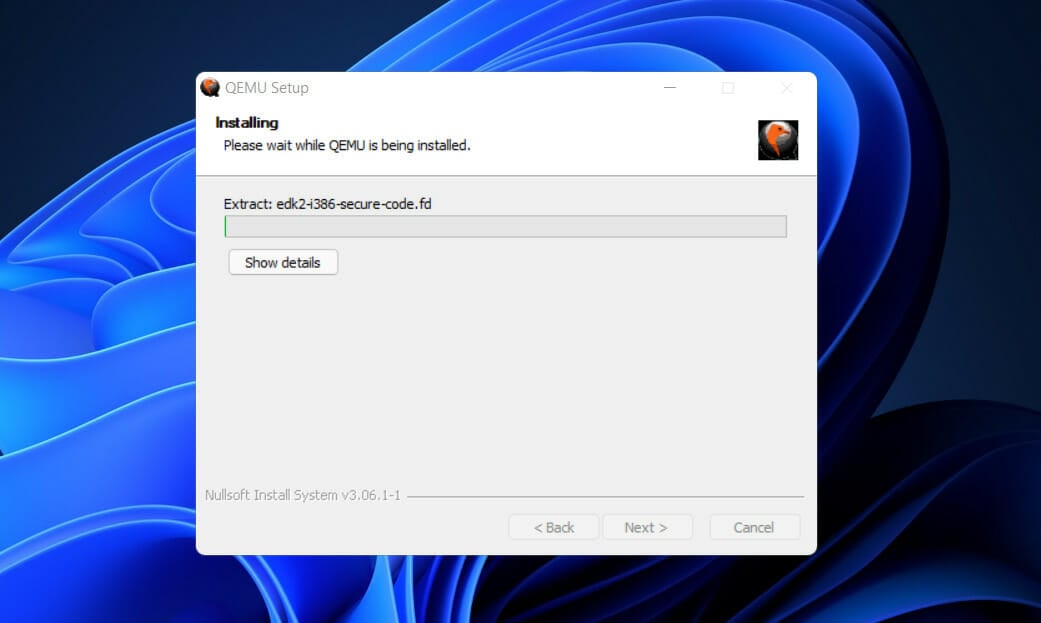
- Install the Qtemu graphical user interface. If you are using Windows 10 to run QEMU, click on the Windows x86_64 installer to download the needed GUI.
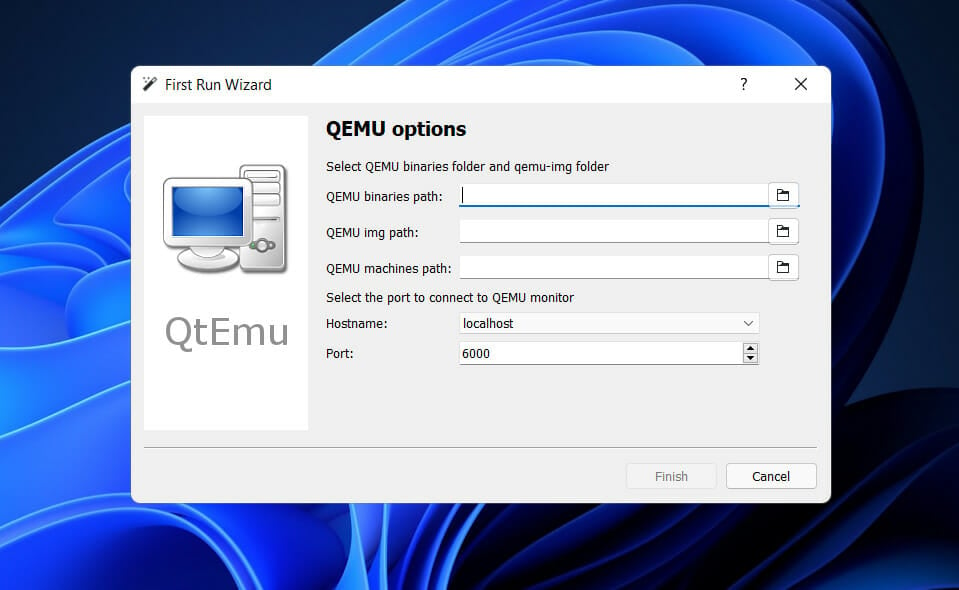
- After the installation of Qtemu run it from the Windows Start menu.
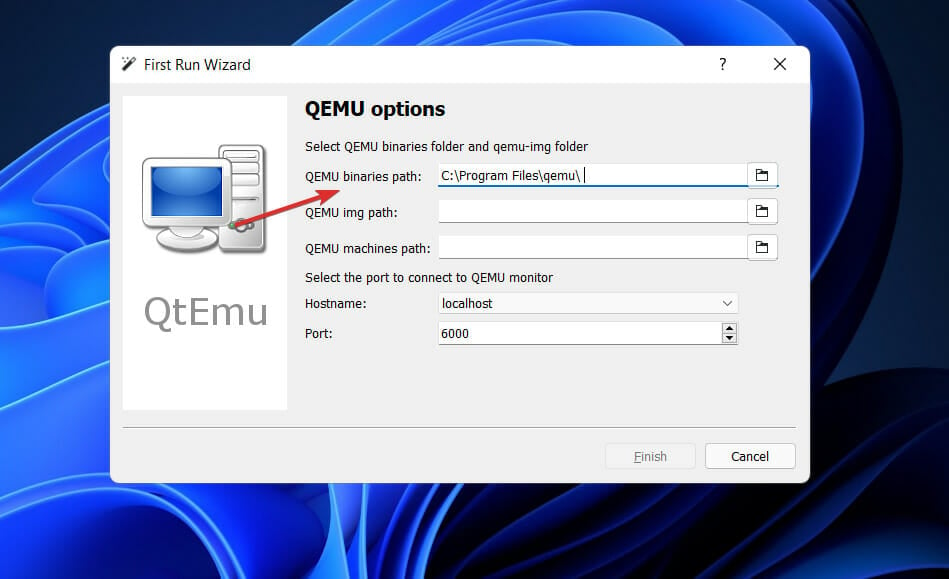
- In the first column QEMU binaries path copy-paste the following command or enter the path where you have installed the QEMU:
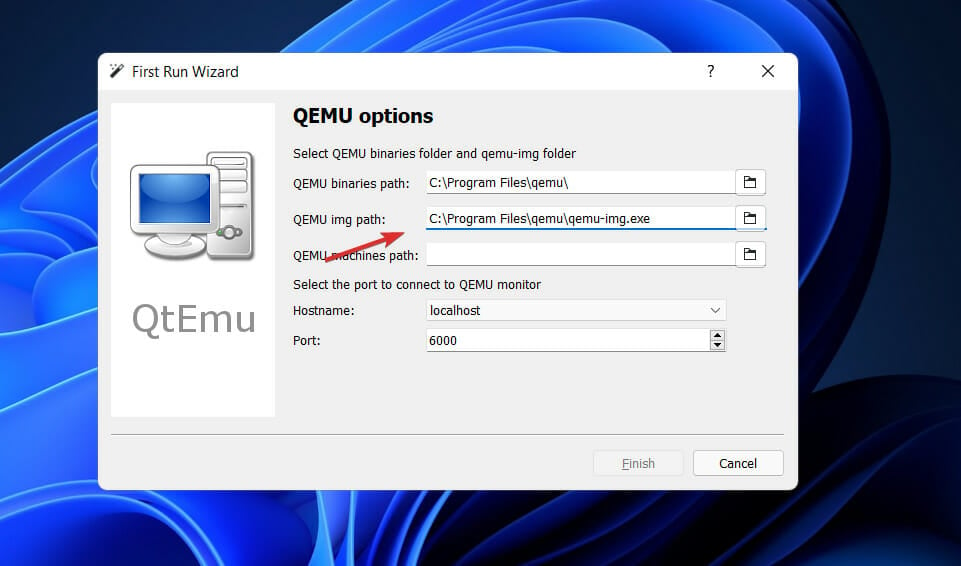
C:\Program Files\qemu\ - For the second column enter the path of the Qemu-img file that is:
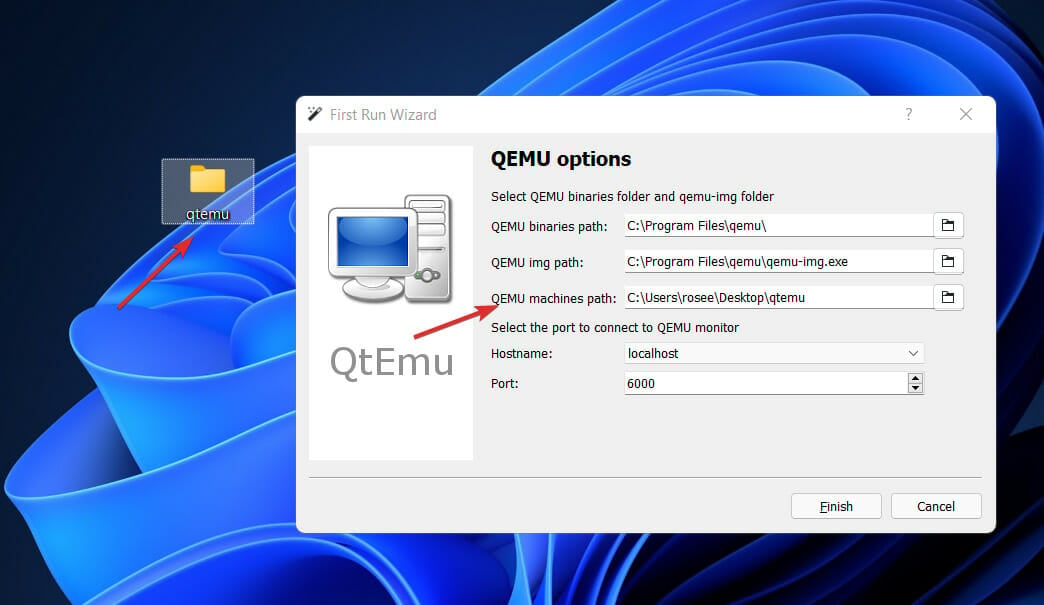
C:\Program Files\qemu\qemu-img.exe - Now create a folder anywhere on your computer where you want to save the virtual machines created by QEMU. Click on the folder icon given in the front of the third column to select that particular folder.
- Now, from Qemu GUI manager Qtemu, simply click on Machine and select New Machine.
- Configure the Virtual Machine hardware, then select the CPU.
- By Default, the HAXM- Hardware Accelerated Execution will be selected in the Qtemu but in case the HAXM is not supported by your system or not available, thus uncheck it and check TCG- Tiny Code Generator.
- Set the amount of RAM you want to assign to your VM.
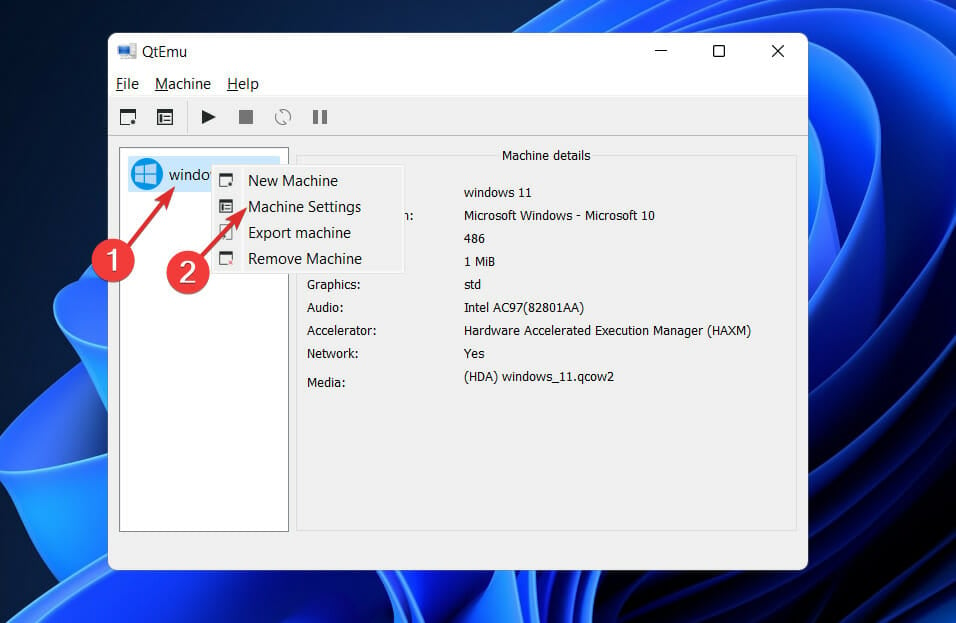
- Right-click on the created VM on the QTEMU interface and select Machine Settings.
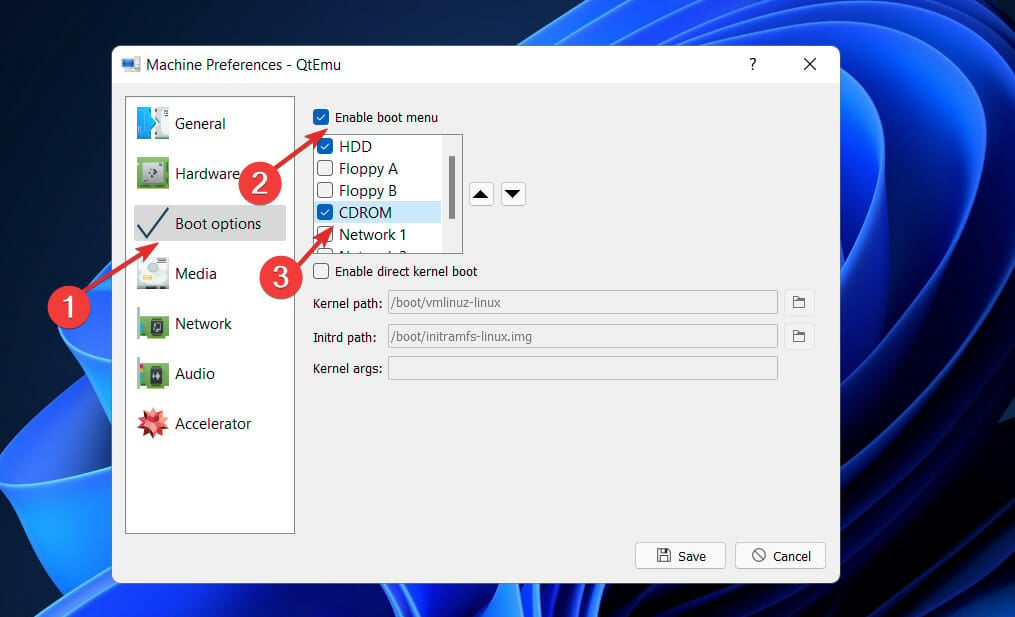
- There select the Boot options from the right-side panel and after that check the Enable boot menu and then the CD ROM option following the Save button.
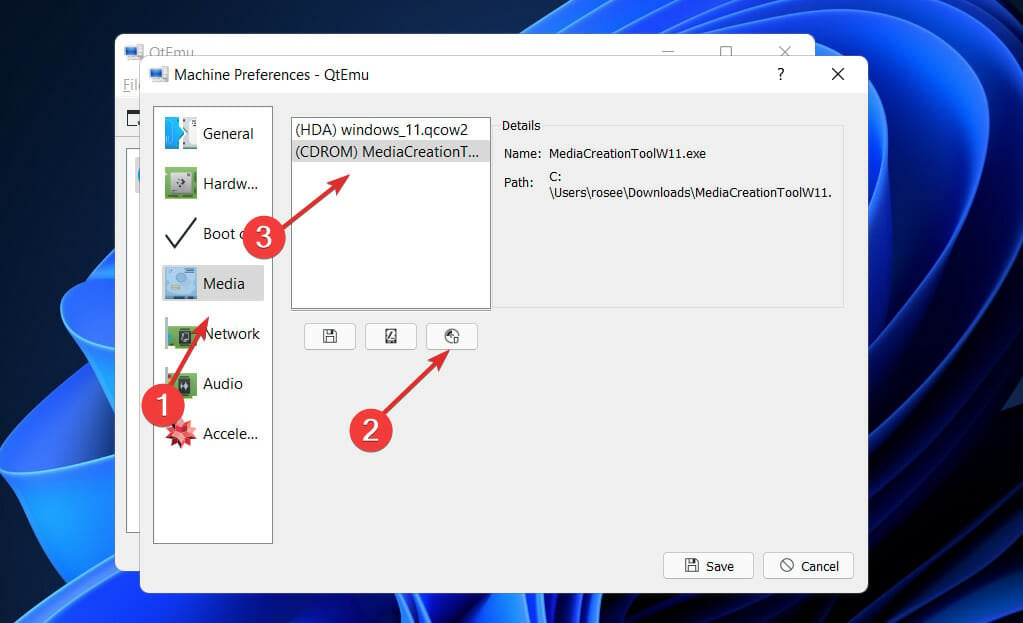
- Under the Machine settings, go to the Media menu and click on the CD icon. This will open the Windows file explorer, navigate to the ISO file of the OS with which you want to boot in QEMU, and click on the Save button.
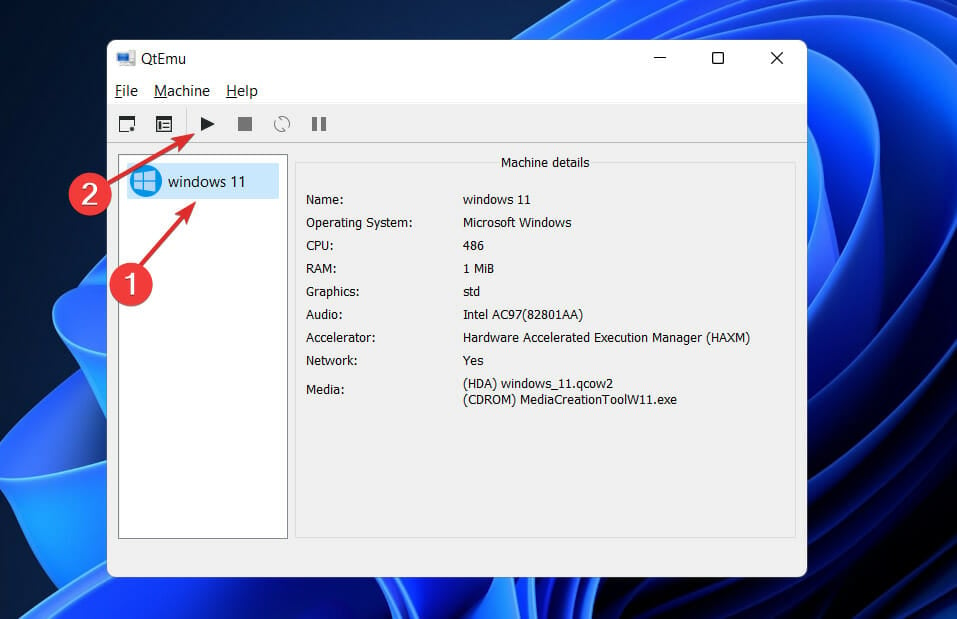
- Now, on the main interface of the Qtemu GUI, select the created VM and click on the Start button. This will open the boot screen.
As we know, the QEMU uses the command line to create virtual machines by default. But it would be not feasible for standard computer users using CLI to manage virtual machines, thus we install another open-source application to provide a Graphical user interface (GUI) to QEMU.
How can I make QEMU run faster?
If you are unfamiliar with the terms virtualization and emulation, you might think that they are interchangeable. However, this is as far from the truth as you could possibly go.
Virtualization is the process of emulating the operation of computer hardware, such as the CPU, CD-ROM, graphics controller, and other components.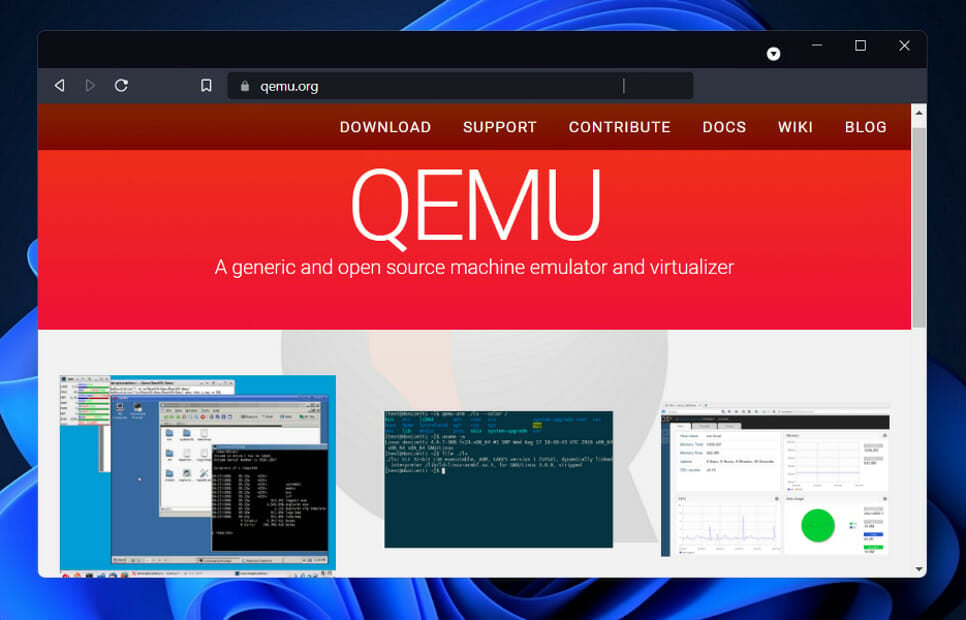
In the case that you are running qemu-system-x64 on an x64-compatible processor, you can take advantage of the hardware virtualization capabilities provided by KVM (hardware virtualization). To make use of KVM, send the command enable-kvm to QEMU.
If you find that QEMU is slower than usual, examine your BIOS settings first, and make certain that VT-x (or Virtualization Technology, depending on your BIOS) is turned on.
Assuming there is also an option for the Execute Disable Bit, make certain that it is also enabled. In the vast majority of circumstances, both options are enabled by default.
Alternatively, if your system is protected against BIOS changes, for example, if you have enabled BitLocker Drive Encryption or any other tamper-resistant method, you may need to take preventive actions to avoid getting locked out after making the aforementioned BIOS settings changes.
To find out more about how to run Windows 11 on VM and test it to the limit, make sure to take a look at the article linked.
Alternatively, if you tried running Windows 11 on Oracle Virtual Box, you should know that you won’t be able to run the operating system on it anymore.
And lastly, if you decided to upgrade your operating system, you can check out our article with a full Windows 10 vs Windows 11 performance comparison and the best features of the latter OS.
Let us know in the comments section below whether the installation process was easy enough and if you have decided to switch to Windows 11 yet. Thanks for reading!



User forum
1 messages