Stereo Mix Not Working on Windows 11? Here's What to do
7 min. read
Updated on
Read our disclosure page to find out how can you help Windows Report sustain the editorial team. Read more
Key notes
- Several users have reported that Stereo Mix is not working on Skype in Windows 11.
- To fix the problem, try running the troubleshooter, updating the sound driver, repairing Skype, amongst other fixes listed below.
- Also, find out some of the best software available in the market for sound enhancement.
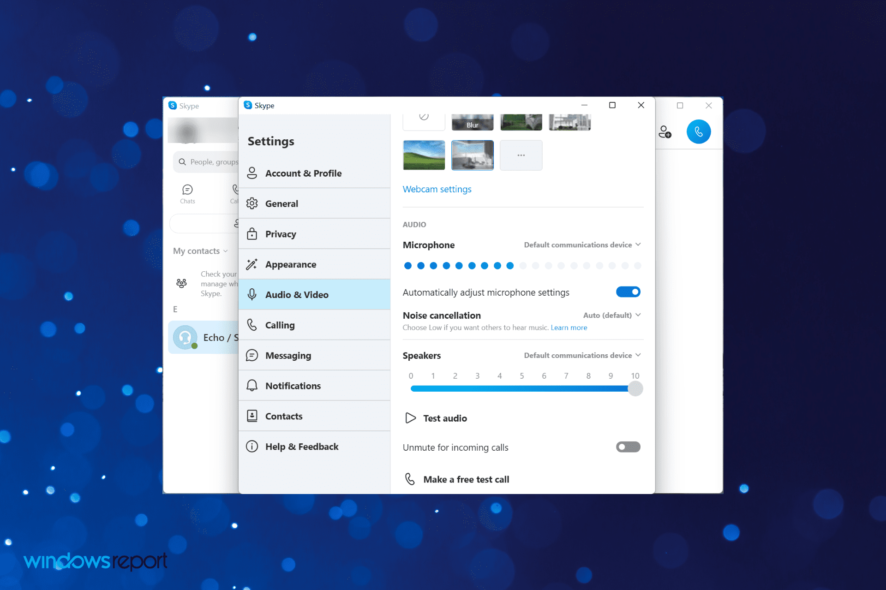
The Stereo Mix has become an essential feature, of late, and it should work fine. However, users have been facing certain problems with it and reported that Stereo Mix is not working on Skype in Windows 11.
Stereo Mix allows you to record the audio output from the computer after combining all available channels. For those using it with Skype, the problem arises when they want others to listen to the audio output of their computer.
In the following sections, we will walk you through the most effective methods to get Stereo Mix working on Skype in Windows 11.
Why is the stereo mix not working on Skype in Windows?
The problems with Stereo Mix in Skype could arise due to several reasons, both pertaining to the connected audio device and software issues. We have listed them all below:
- Problems with the audio device
- Misconfigured settings
- Outdated audio drivers
With a basic understanding of the underlying issues, you are now in a far better position to proceed to troubleshoot. Let’s now head to the methods to get Stereo Mix working in Skype in Windows 11.
What do I do if the stereo mix is not working on Skype?
1. Check the connected device
The very first thing you must check when Stereo Mix is not working on Skype is whether the connected devices are working properly.
To do this, disconnect both the microphone and speaker if you are using external ones. Now check for any damage to cables or the port they are plugged into. If none are found, reconnect and check if Stereo Mix starts working in Skype.
Also, you can connect the same set of peripherals to another system and check if Skype works perfectly there. If that’s the case, the problem lies with the app or misconfigured settings, and you can proceed to the other fixes listed below.
2. Run the built-in audio troubleshooter
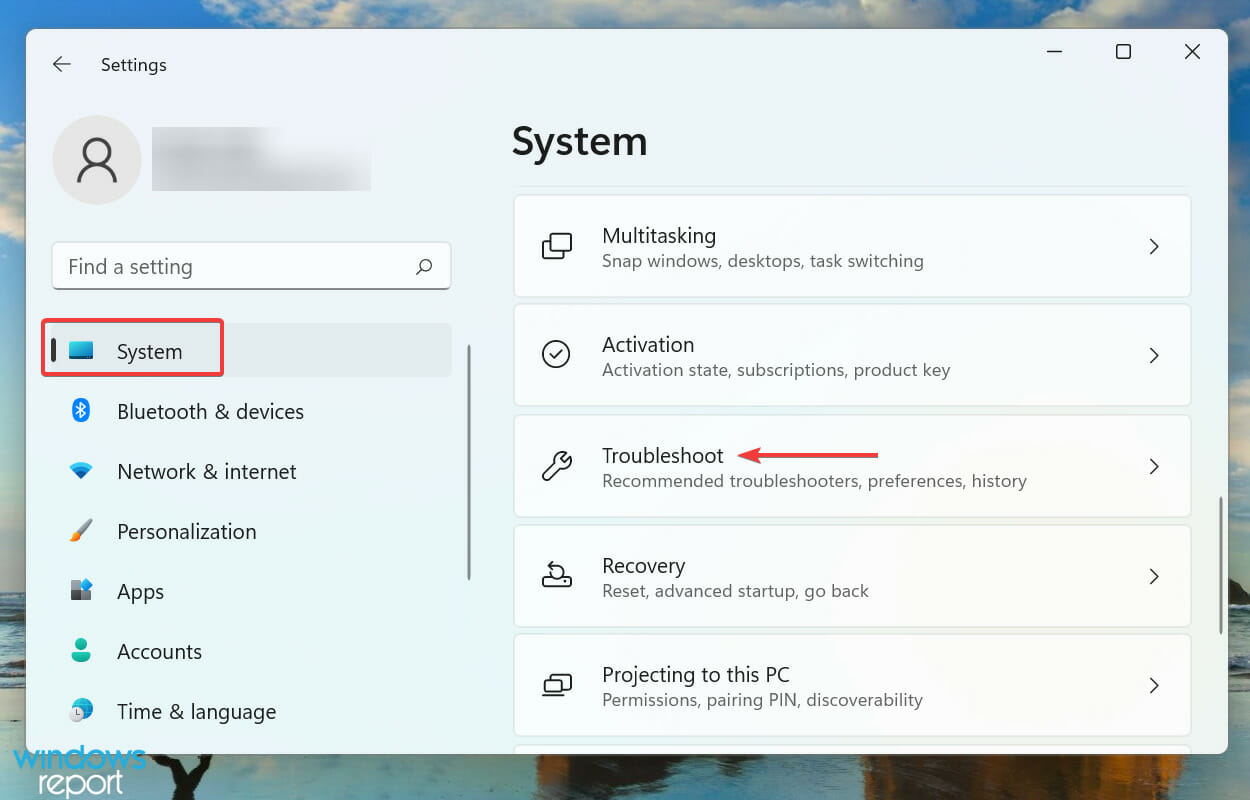
- Press Windows + I to launch the Settings app, and select Troubleshoot from the options listed on the right in the System tab.
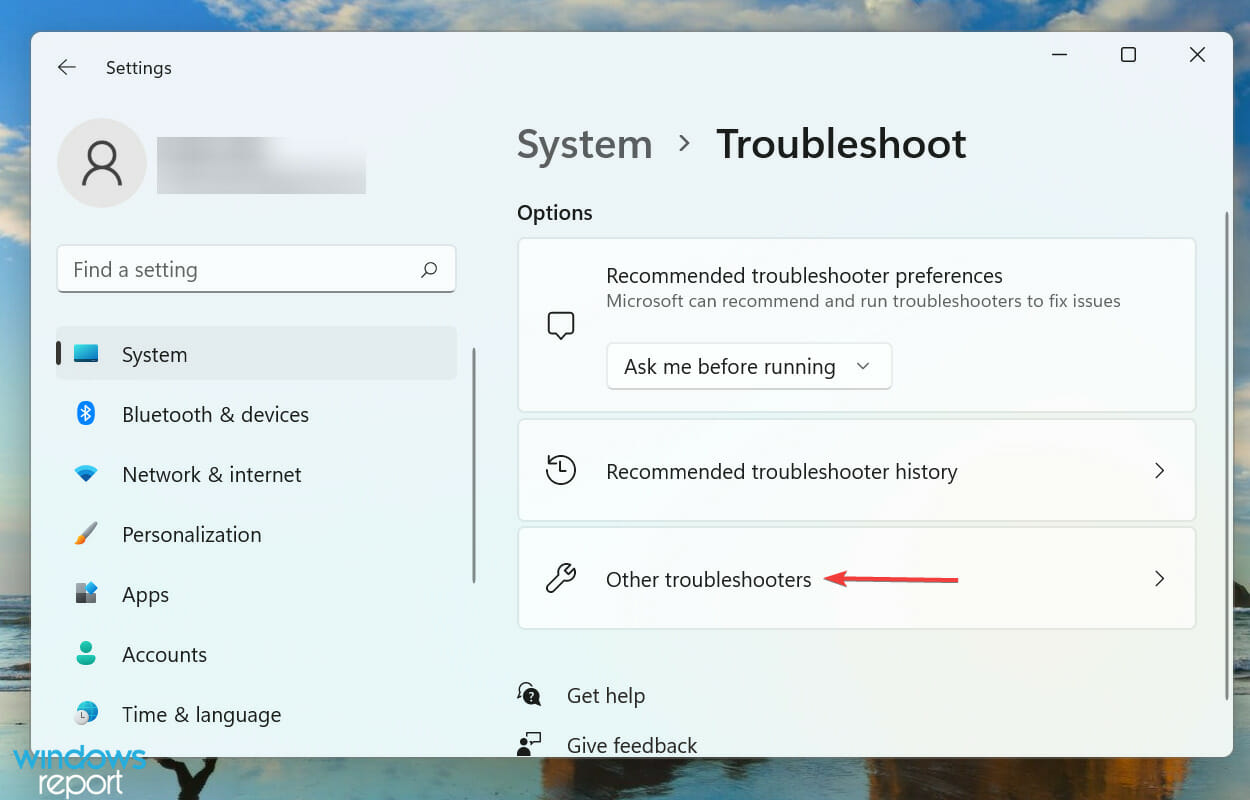
- Click on Other troubleshooters.
- Locate the Playing Audio troubleshooter and click on the Run button next to it.
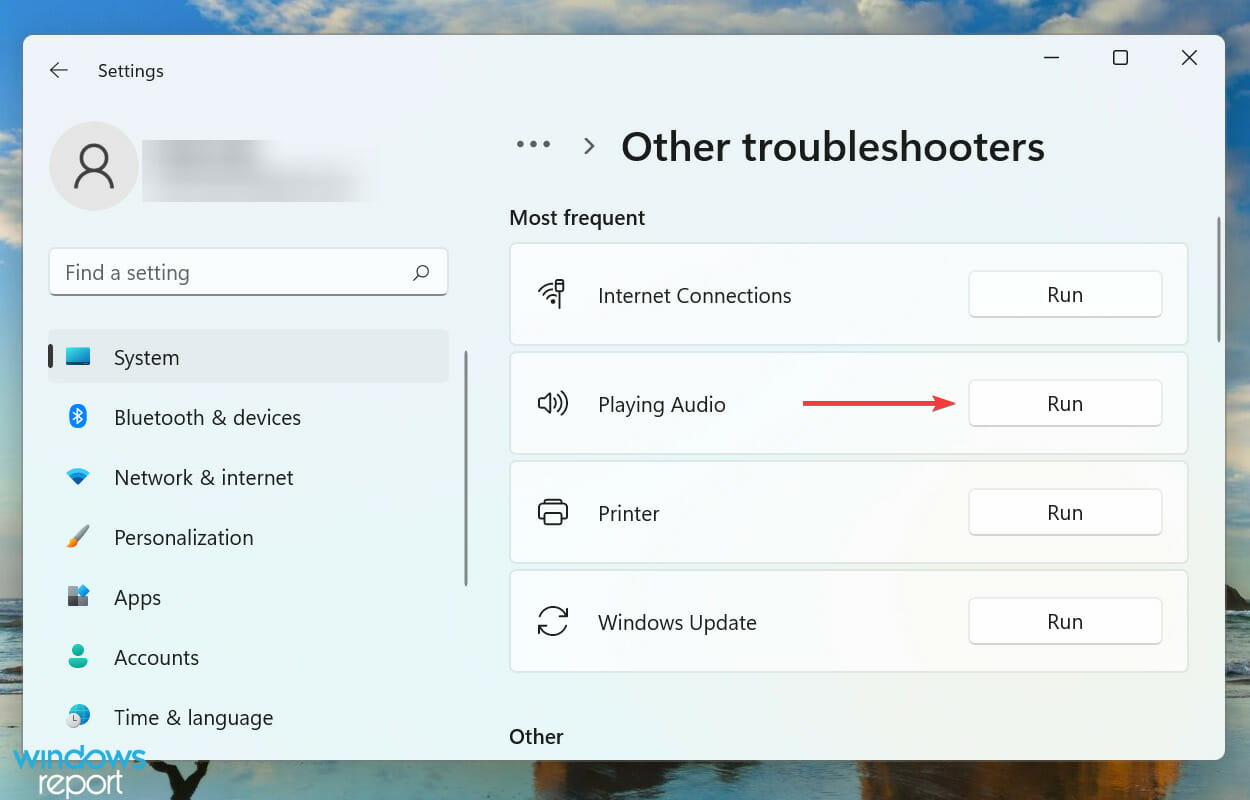
- Choose the appropriate response, if and when prompted, and follow the on-screen instructions to complete the process.
Whenever you encounter an issue in Windows, your primary approach should be to look for a relevant built-in troubleshooter. Microsoft offers these to help users easily diagnose and eliminate problems affecting the performance.
3. Enable Stereo Mix
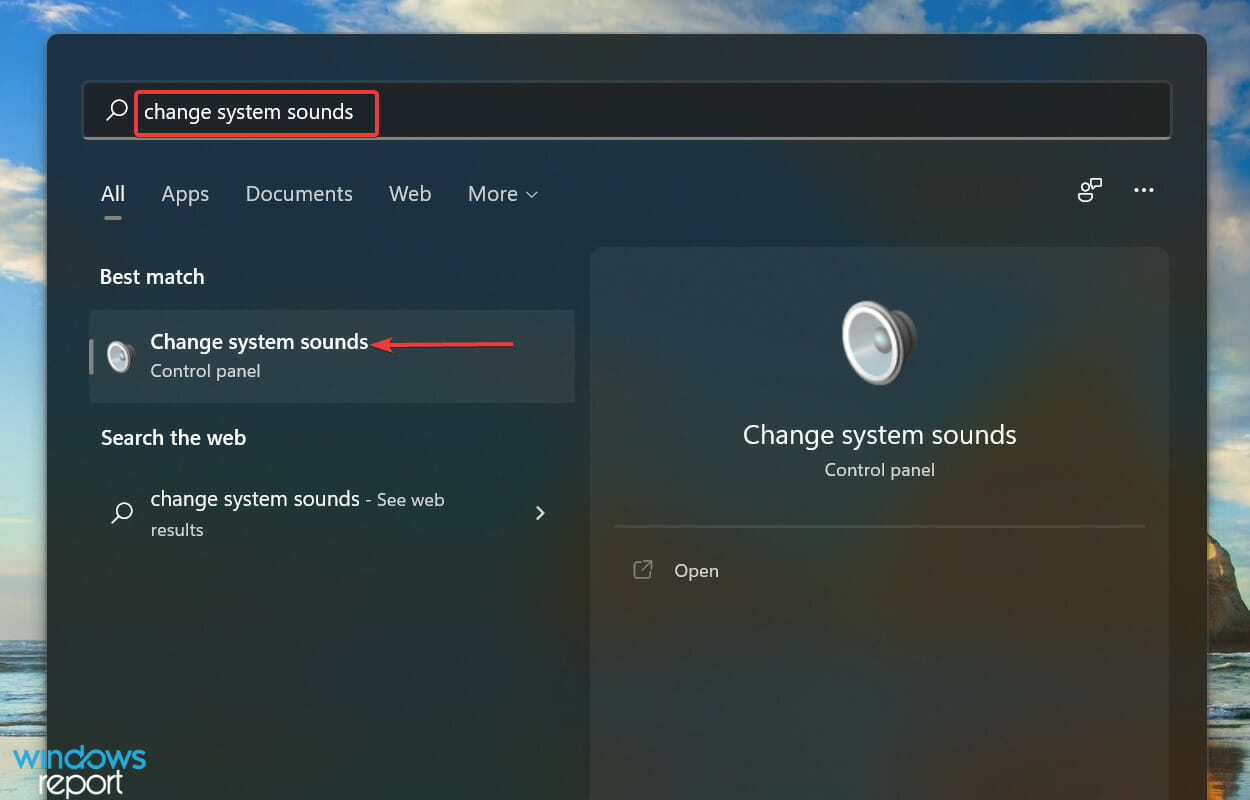
- Press Windows + S to launch the Search menu, enter Change system sounds in the text field at the top, and click on the relevant search result that appears.
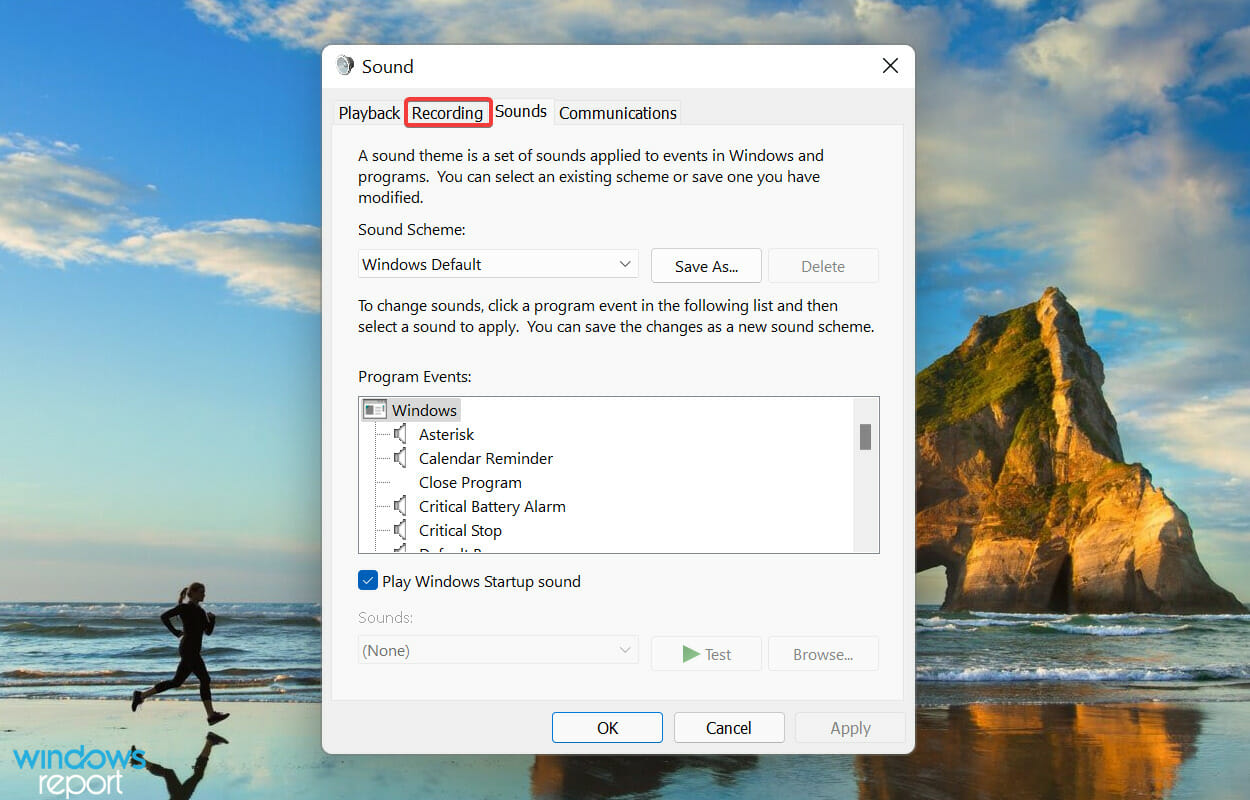
- Go to the Recording tab.
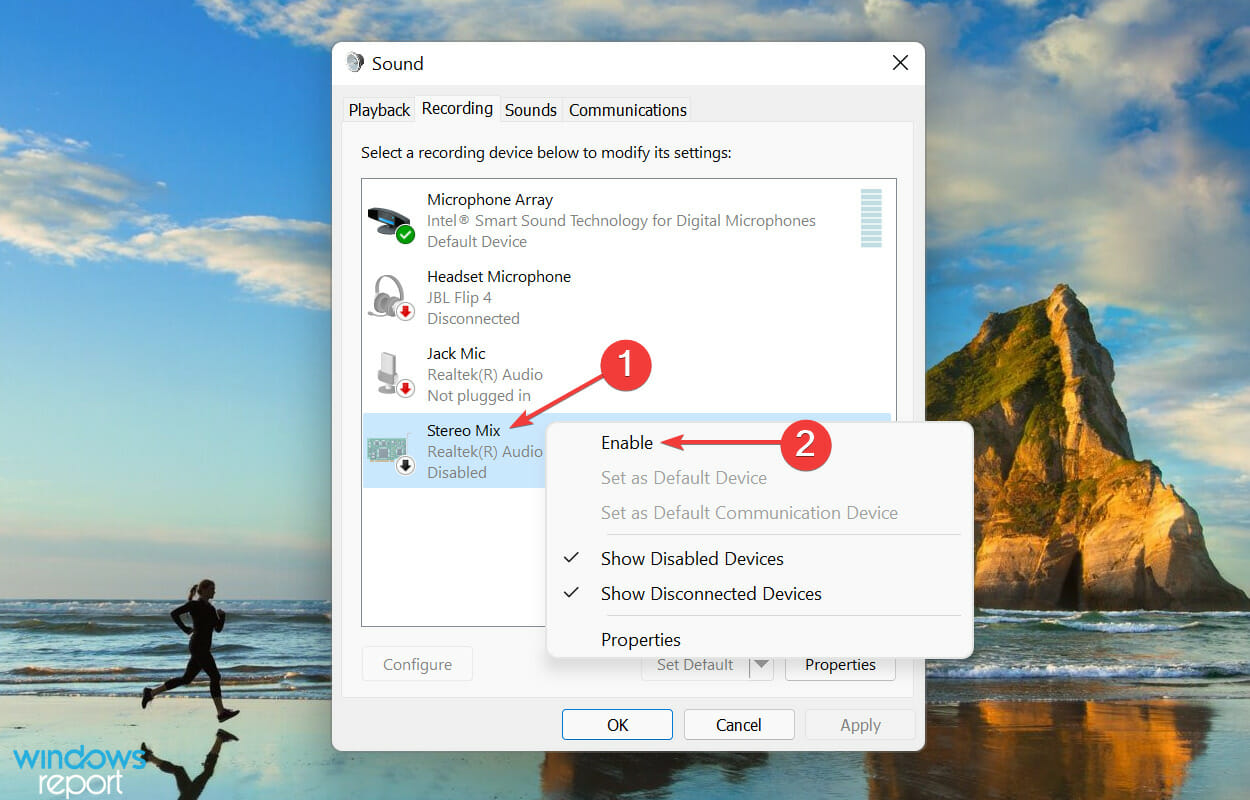
- Next, right-click on the Stereo Mix entry and select Enable from the context menu.
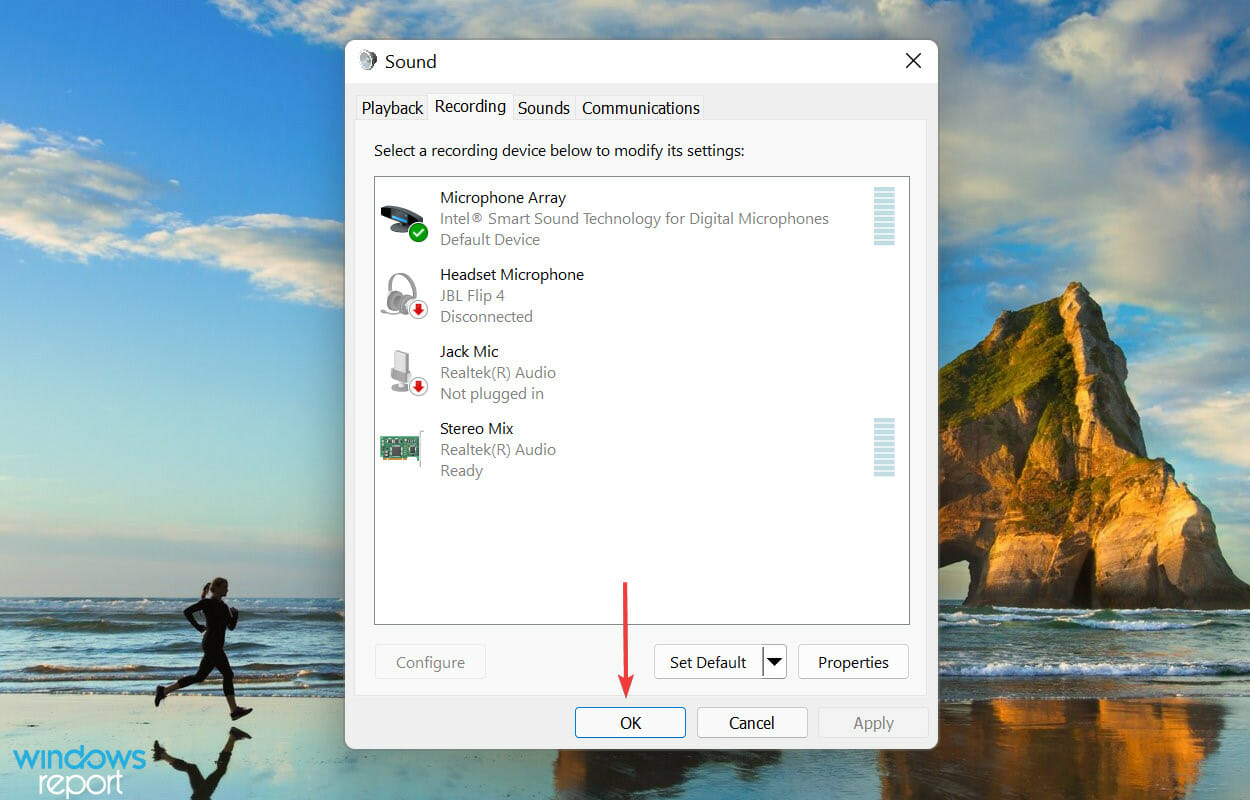
- Click on OK to save the changes and close the window.
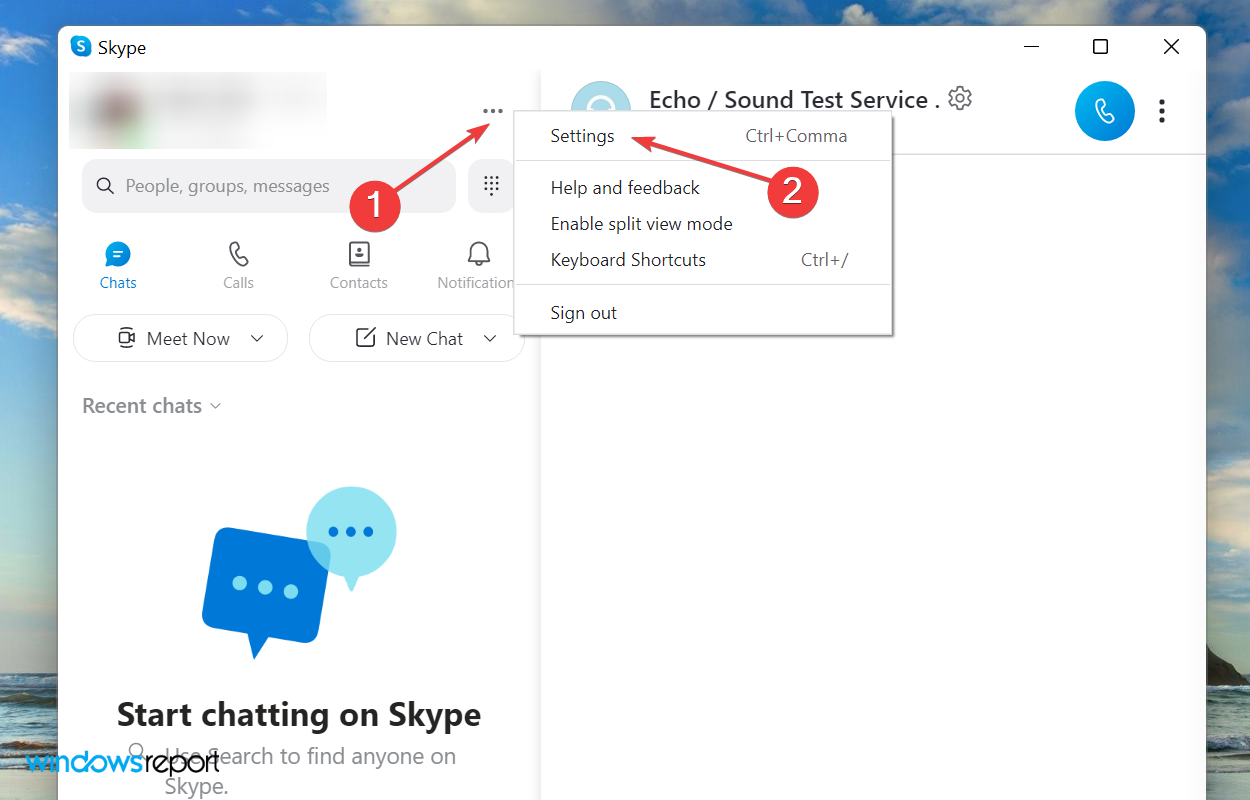
- Now, launch the Skype app, click on the ellipsis at the top, and select Settings from the context menu.
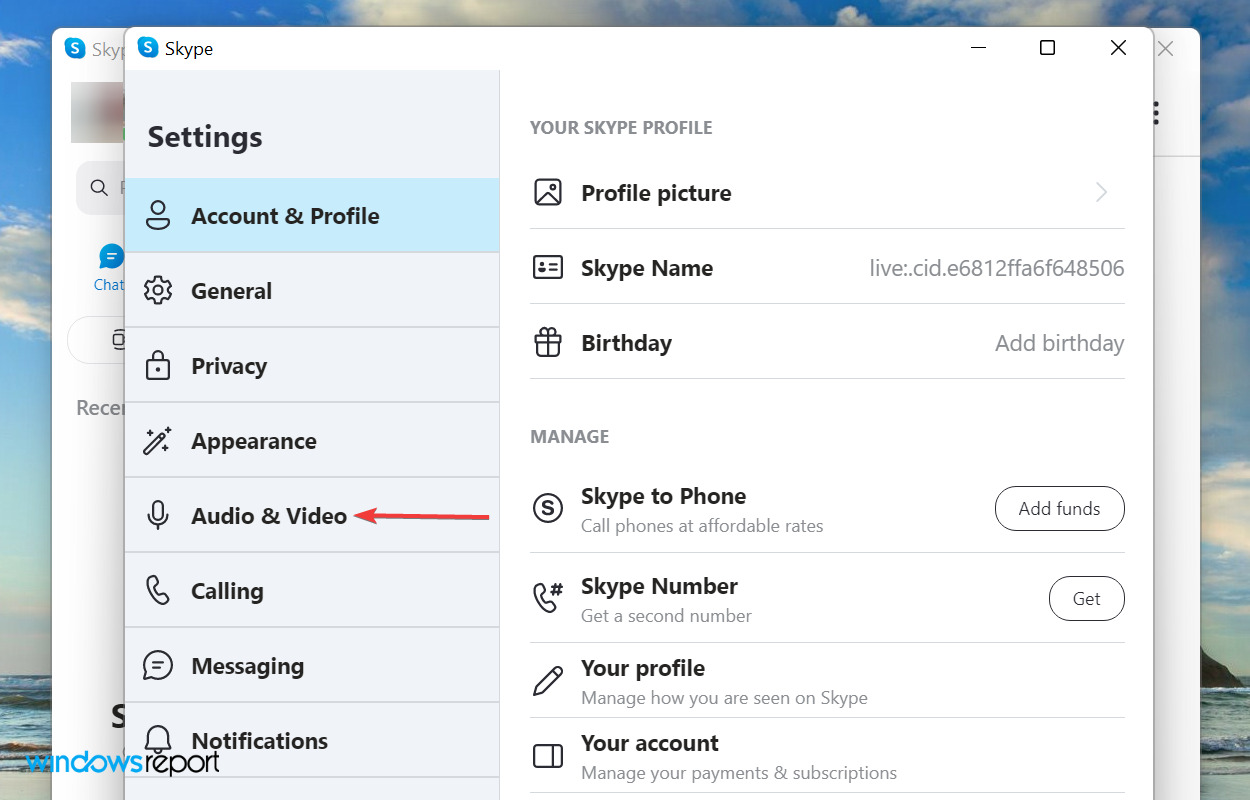
- Navigate to the Audio & Video tab from the navigation pane on the left.
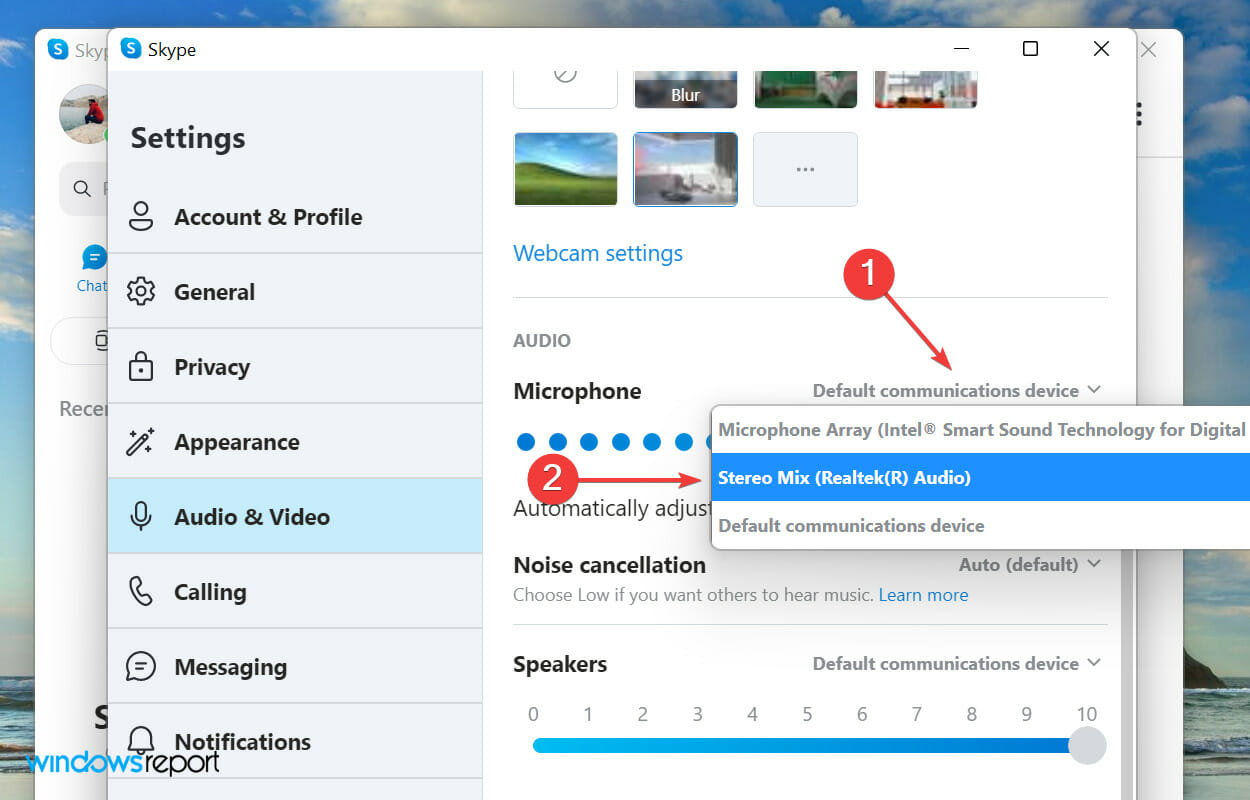
- Click on the dropdown menu next to Microphone and select Stereo Mix from the list of options.
4. Update sound card driver
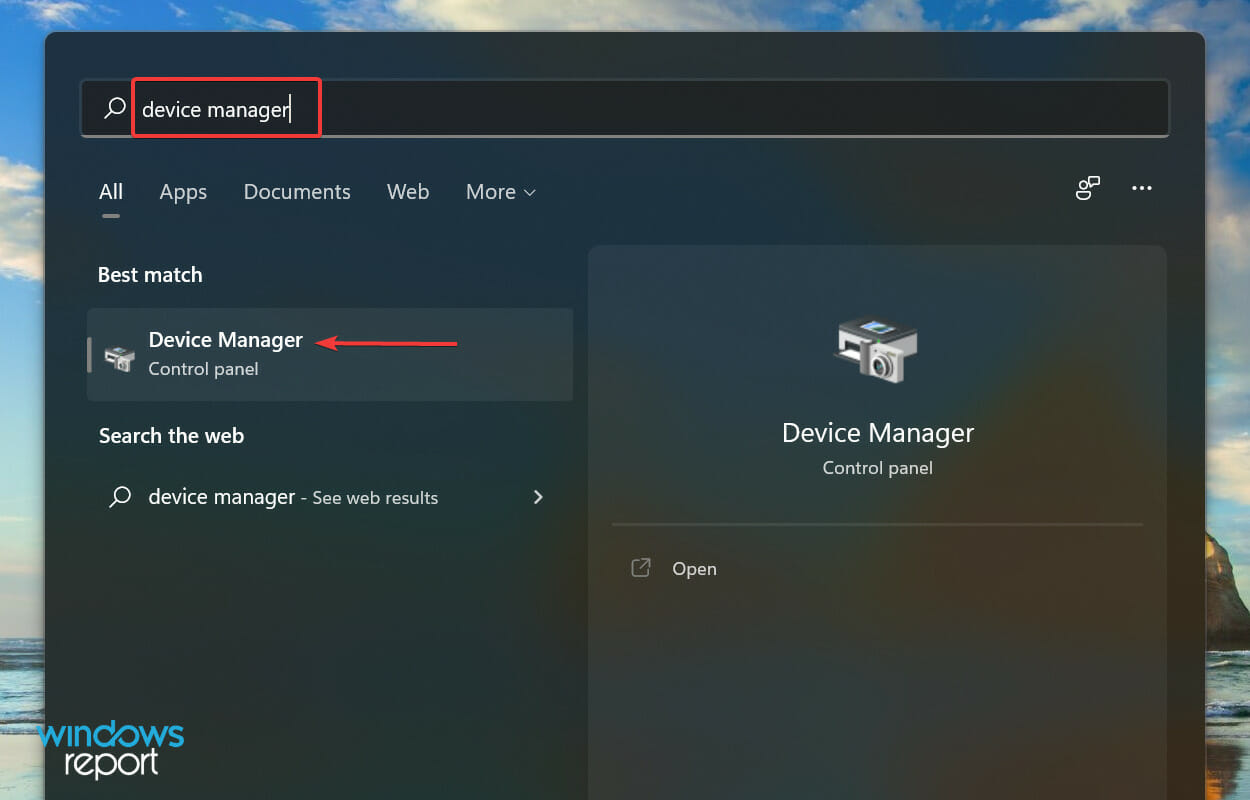
- Press Windows + S to launch the Search menu, enter Device Manager in the text field, and click on the relevant search result that appears.
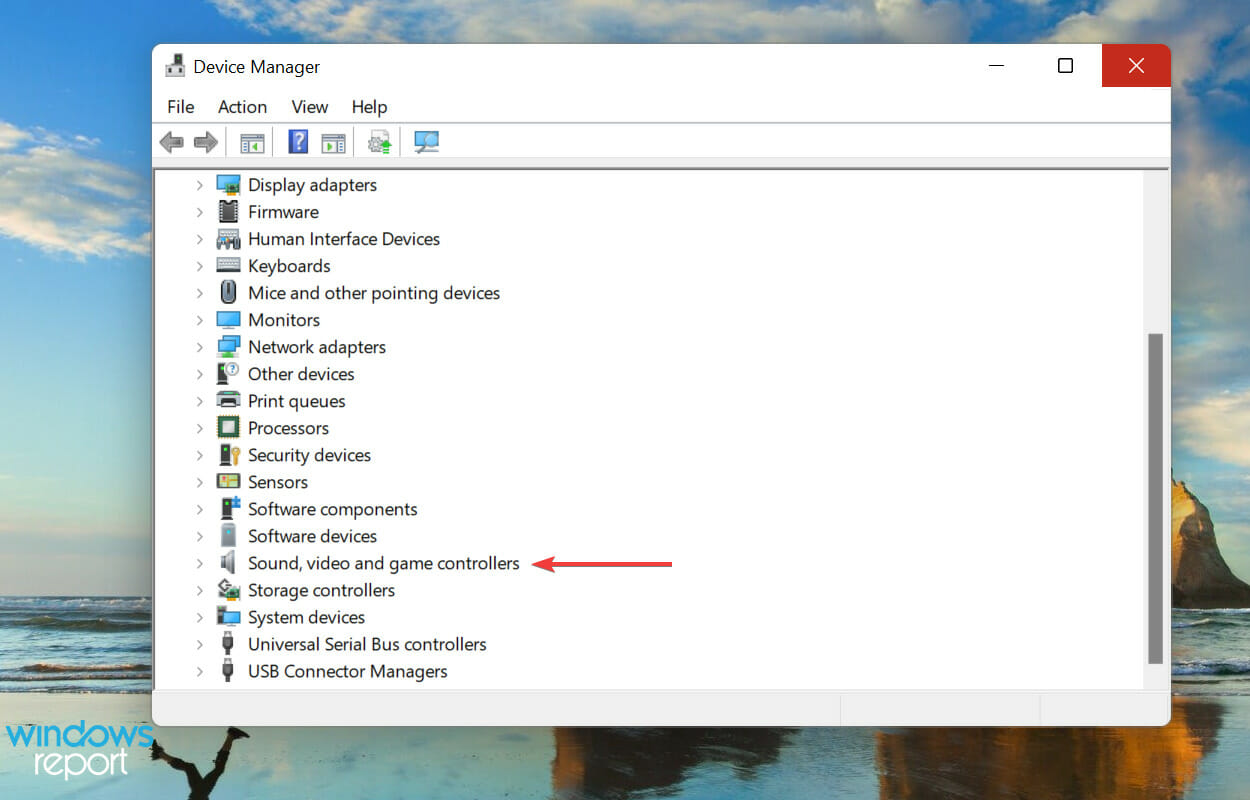
- Locate and double-click on Sounds, video and game controllers entry to expand and view the devices listed under it.
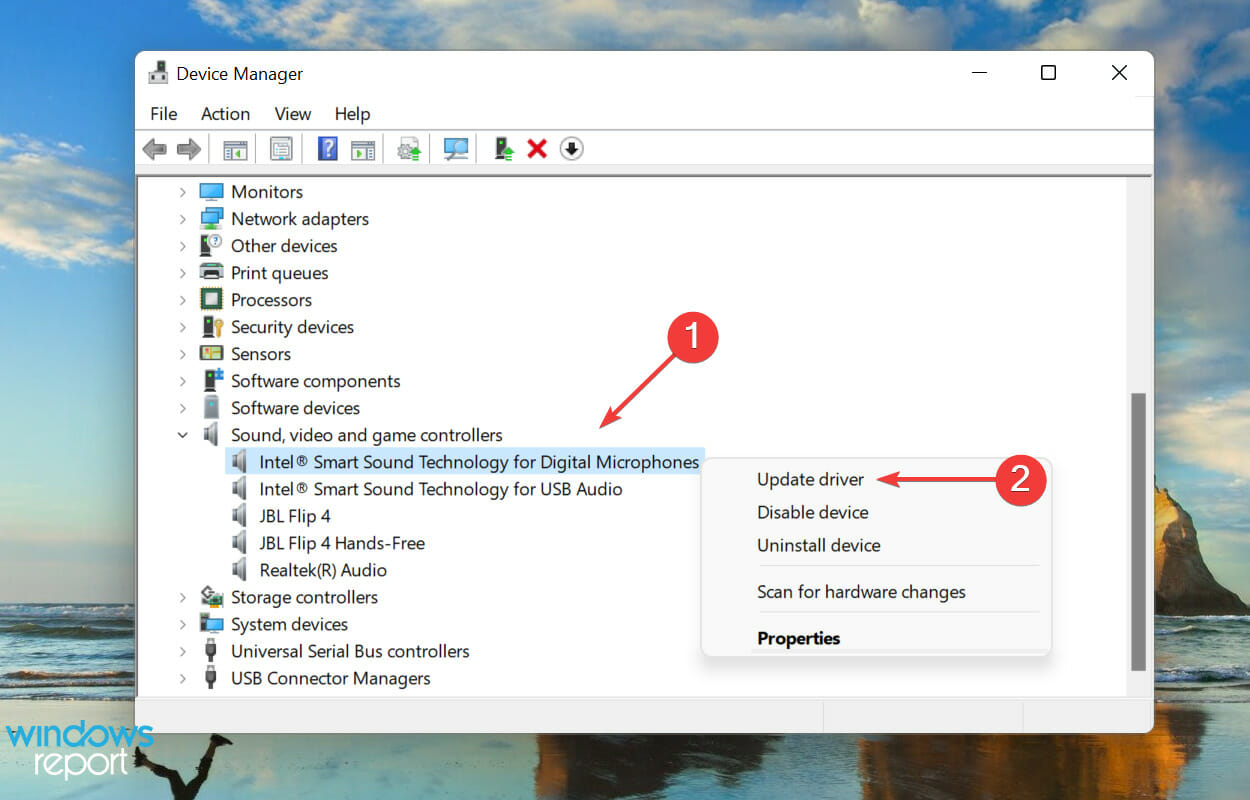
- Right-click on the audio device and select Update driver from the context menu.
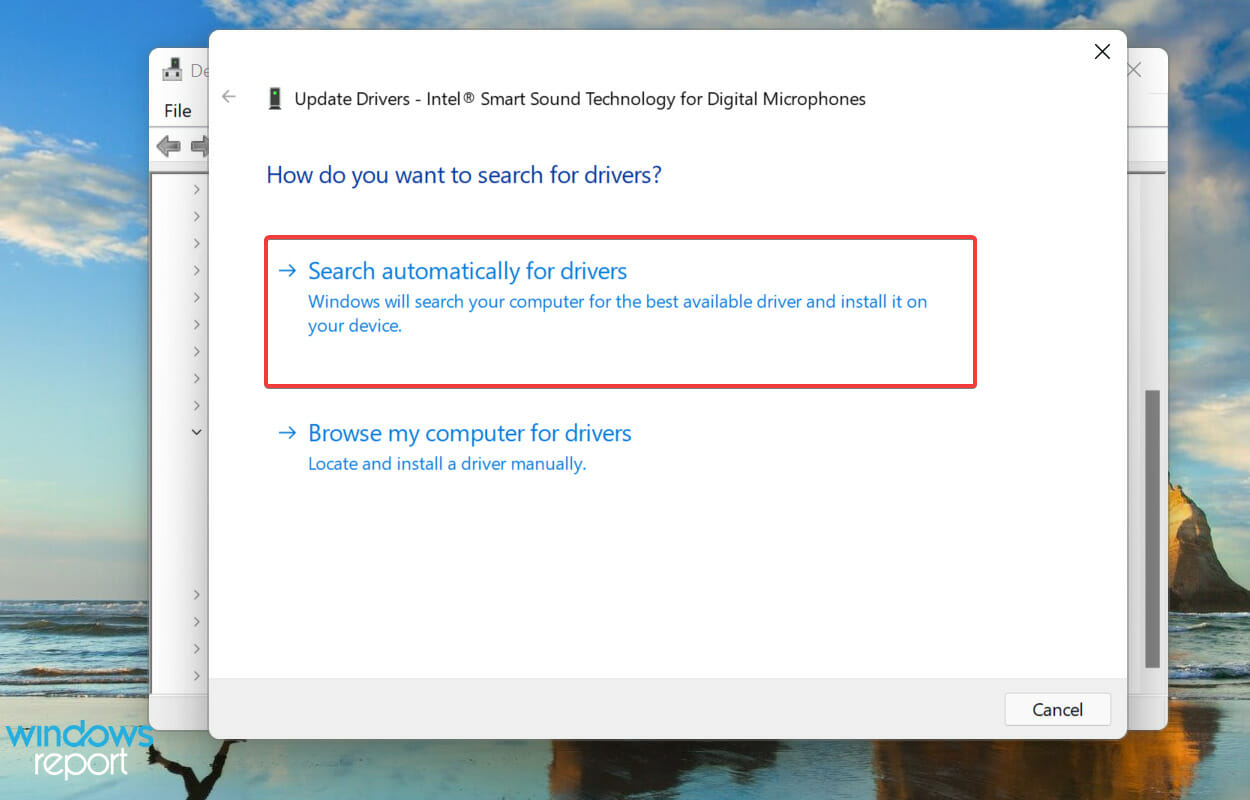
- Next, select Search automatically for drivers from the options listed in the Update Drivers window.
- Wait for Windows to find the best available version on the system and install it.
Drivers help relay commands between the OS and the hardware. Updating the drivers ensures the best performance along with the introduction of new features added in the subsequent versions.
The Device Manager method listed above only scans the storage drive for the driver and not the web, thus acting as an offline update. This reduces the chance of finding a newer version.
If you are unable to get the latest version this way, try checking for driver updates in Windows Update or manually download and install it from the manufacturer’s website.
In case that feels like too much trouble, you can always use a reliable and effective third-party app for the job. We recommend using Outbyte Driver Updater, a dedicated tool that checks all available sources for the latest version and keeps the installed drivers up-to-date.
After updating the sound card driver, check if the Stereo Mix not working problem in Skype is fixed.
5. Set speakers as the default device
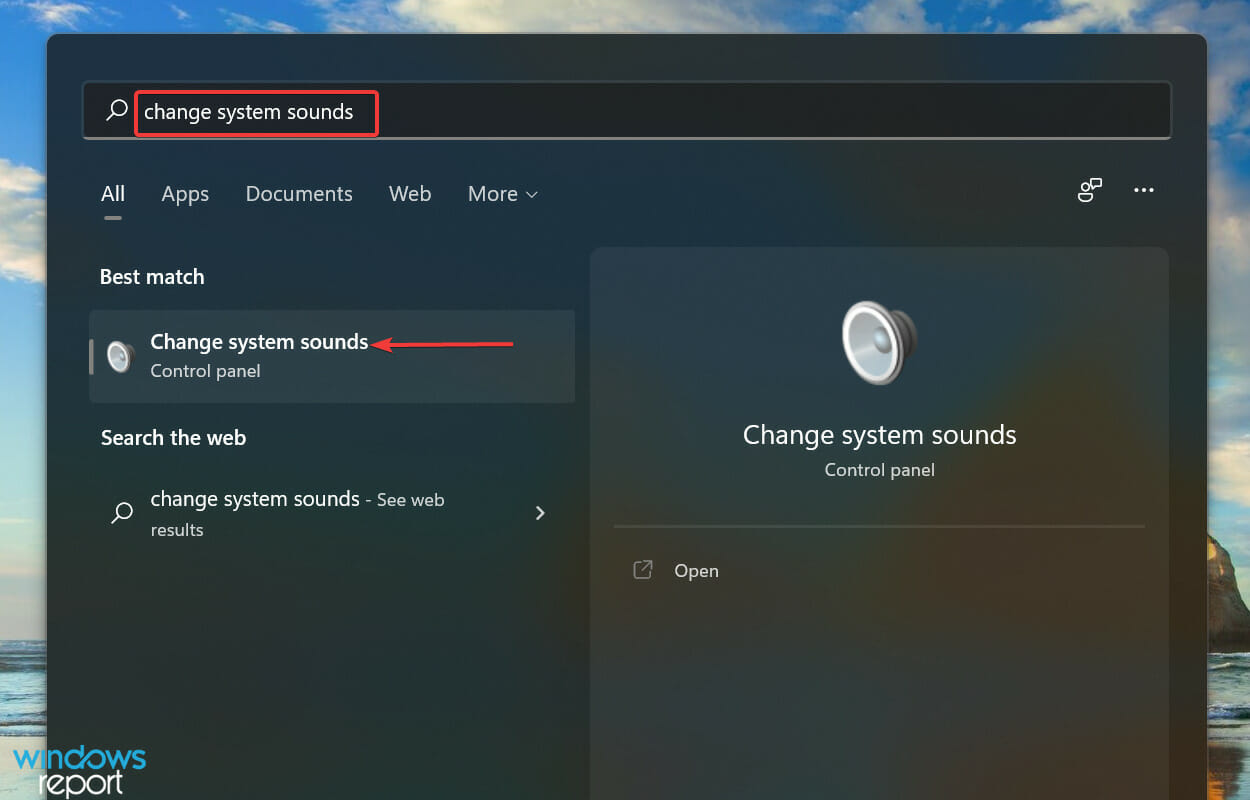
- Press Windows + S to launch the Search menu, enter Change system sounds in the text field, and click on the relevant search result.
- Go to the Playback tab.
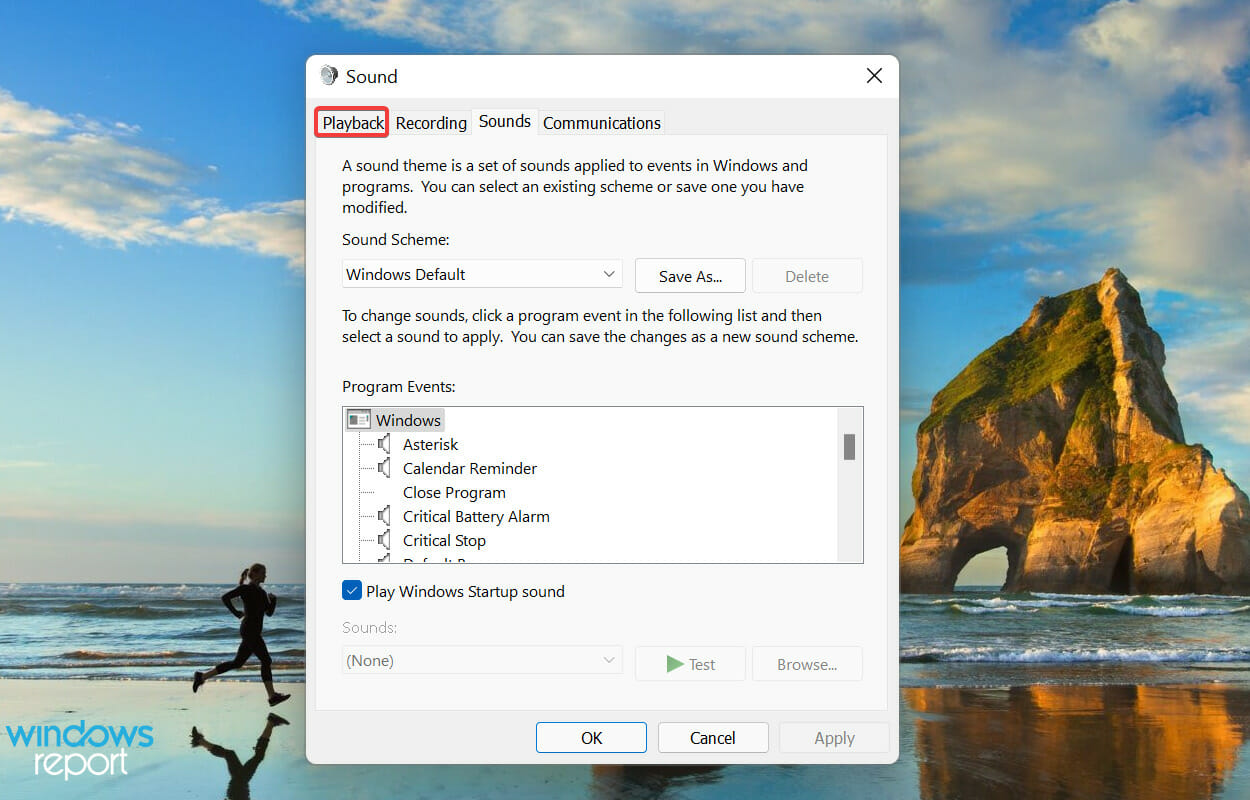
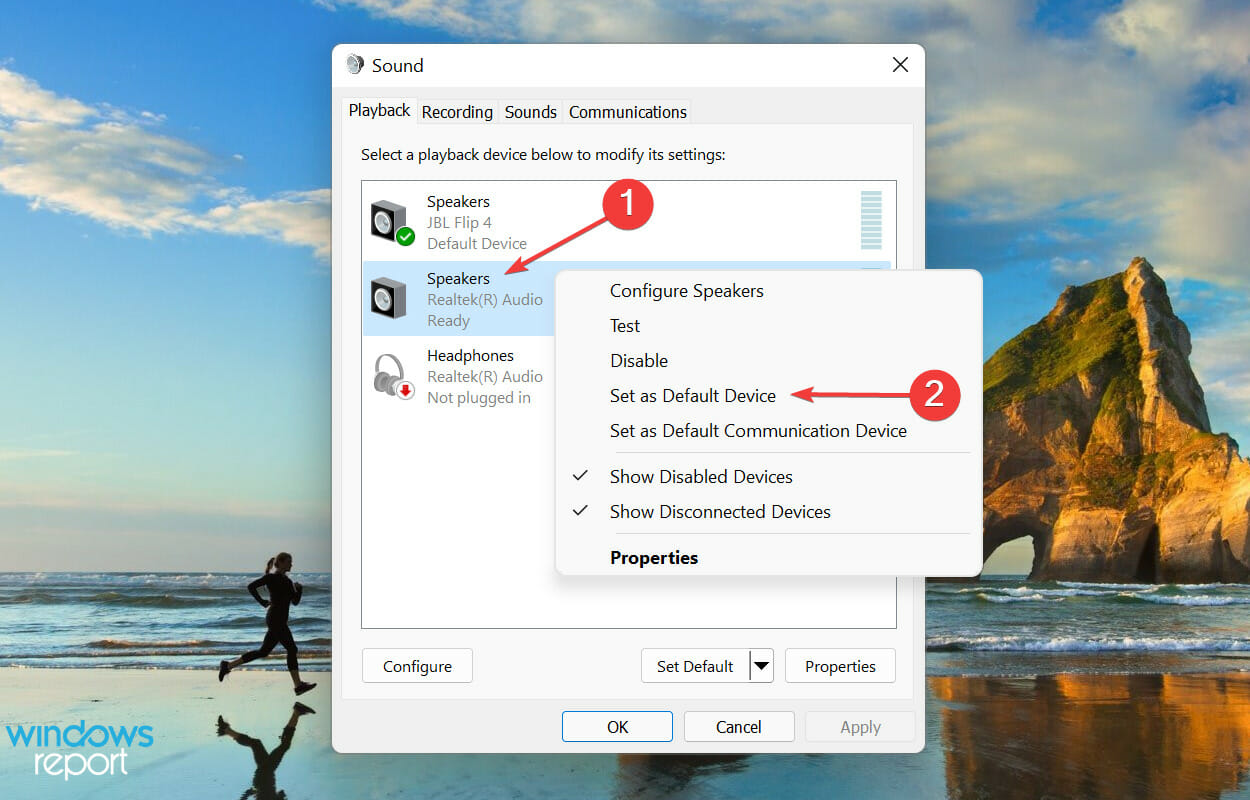
- Right-click on the desired speaker, and select Set as Default Device from the context menu.
- Click on OK at the bottom to save the changes.
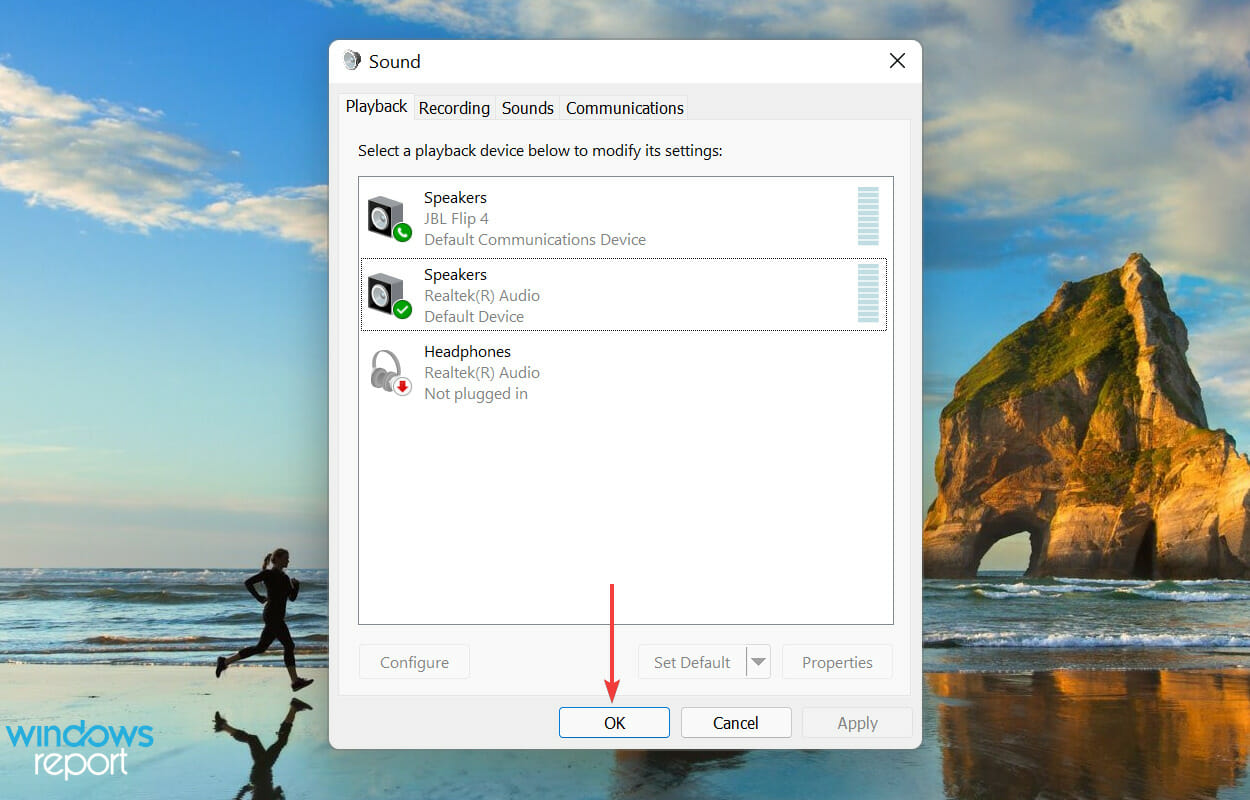
If the wrong speakers have been set as the default playback device, you are bound to encounter problems with the Stereo Mix in Skype. Therefore, make the necessary corrections and check if the issue is eliminated. If not head to the next fix.
6. Check if the audio device is muted
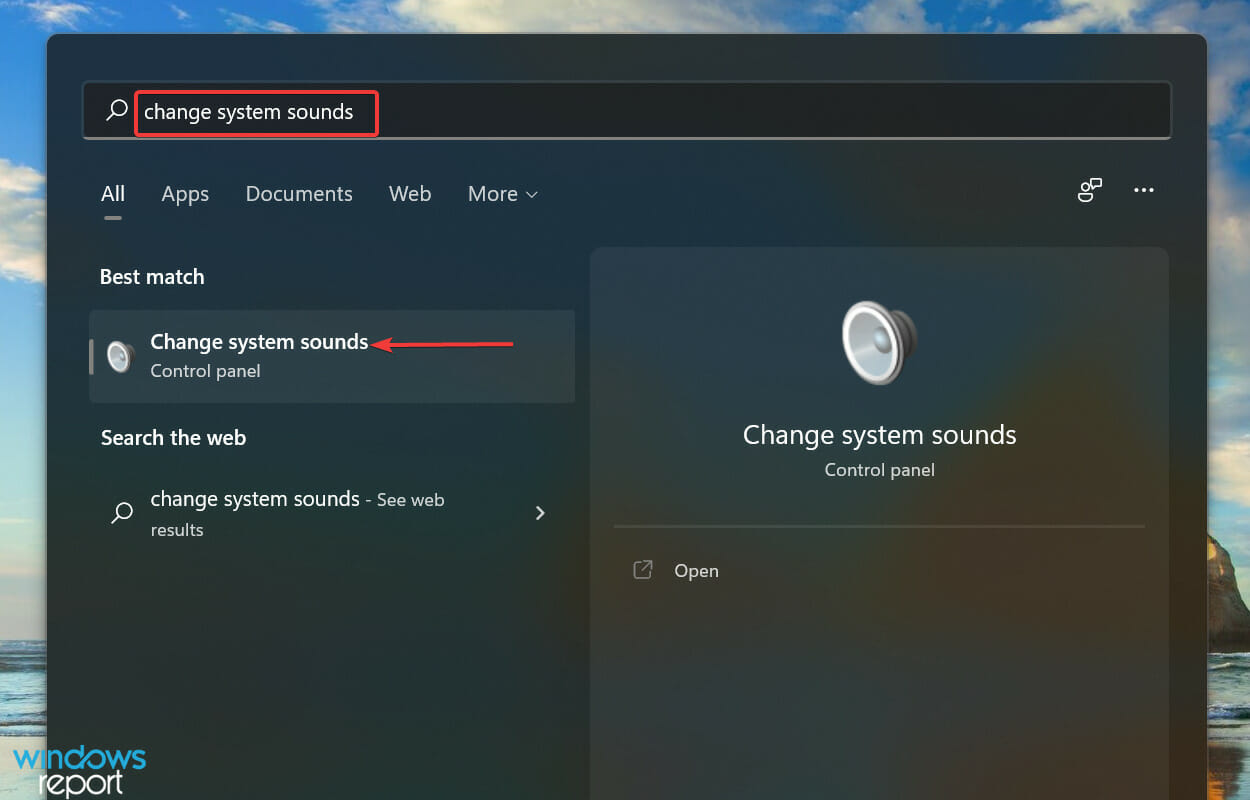
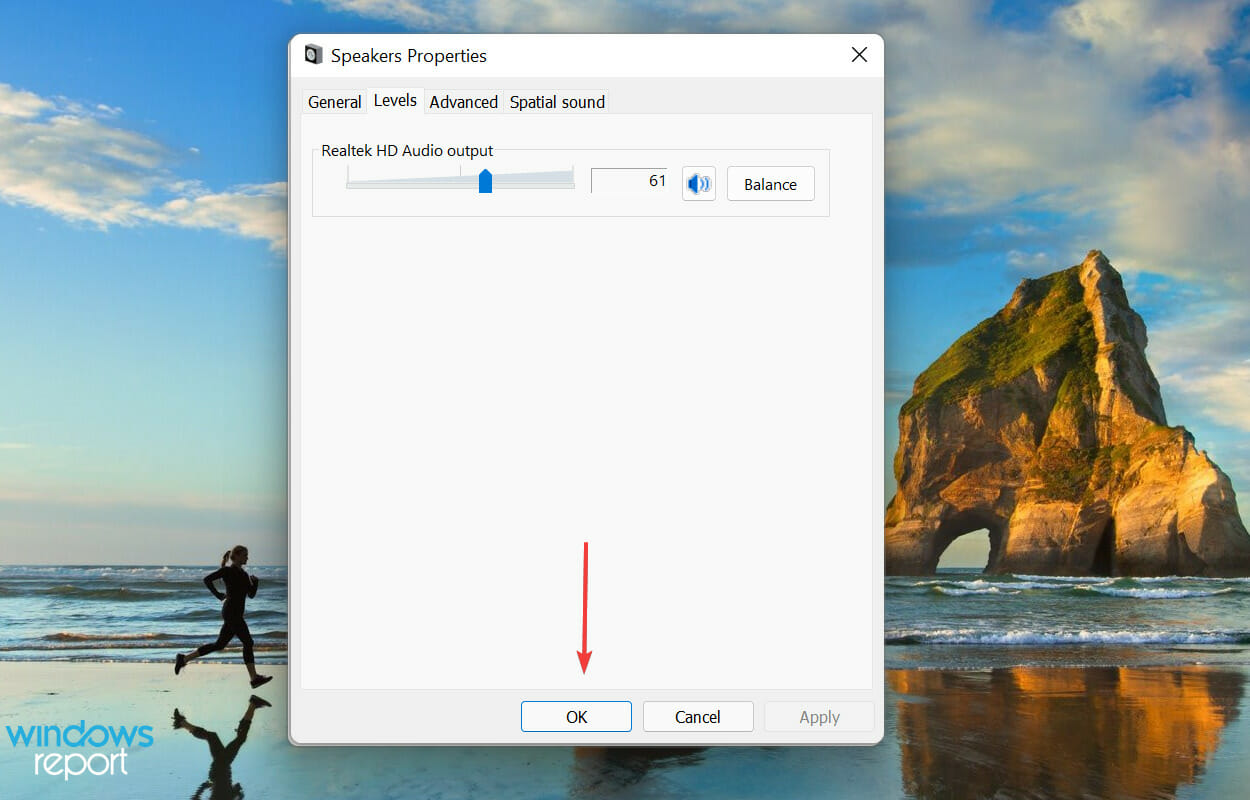
- Press Windows + S to launch the Search menu, enter Change system sounds in the text field at the top, and click on the relevant search result that appears.
- Navigate to the Playback tab.
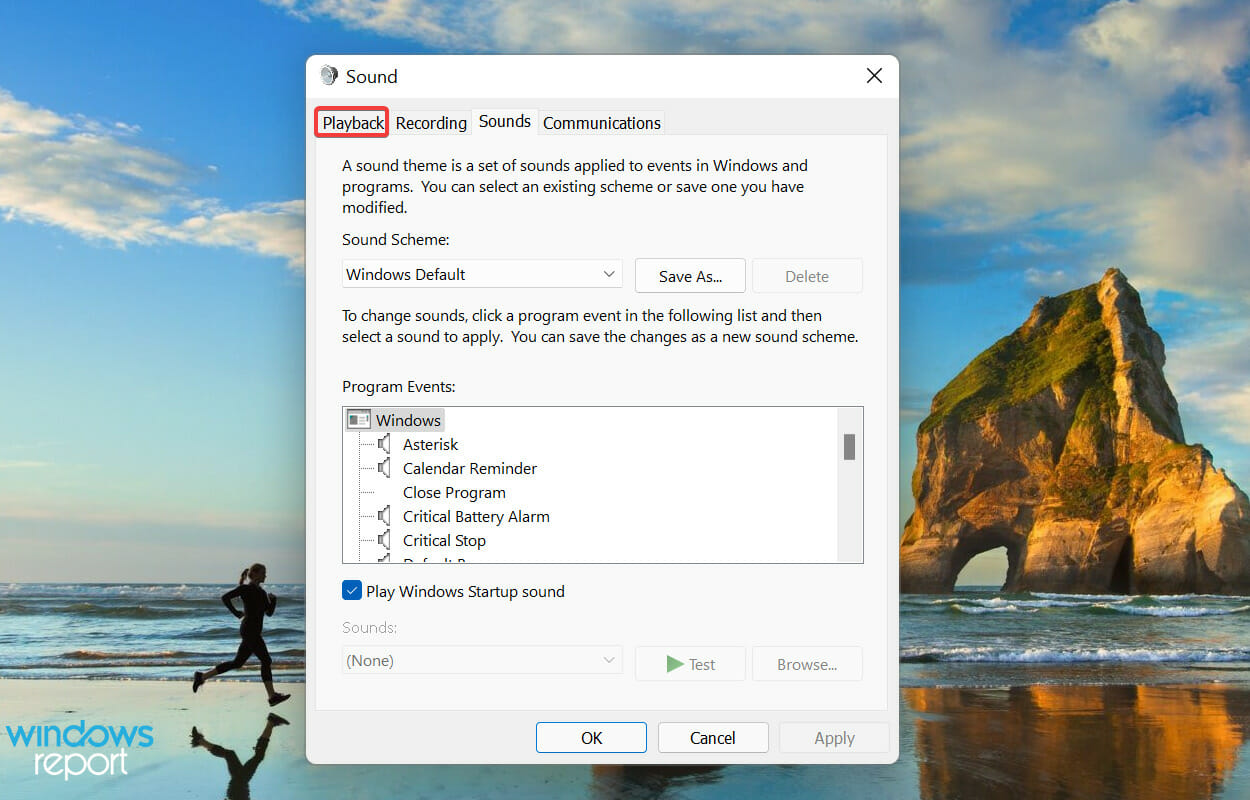
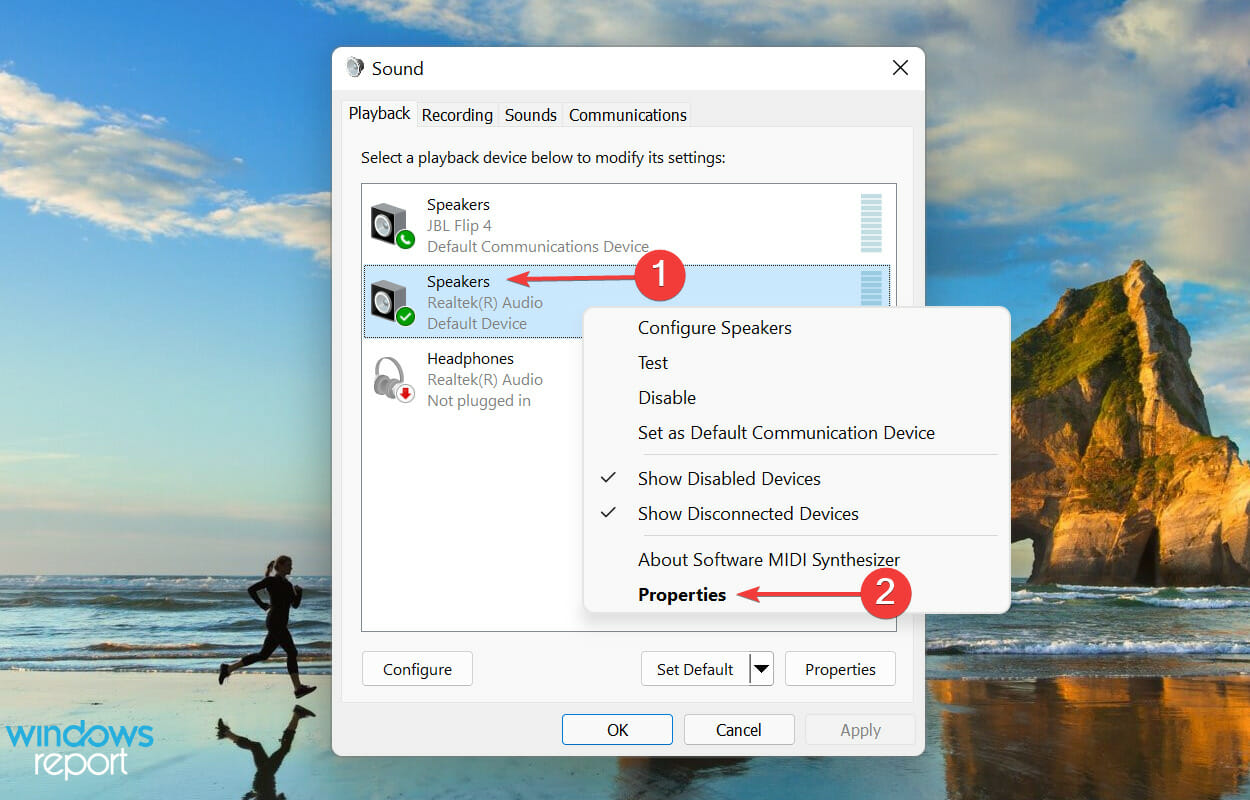
- Right-click on the default speaker and select Properties from the context menu.
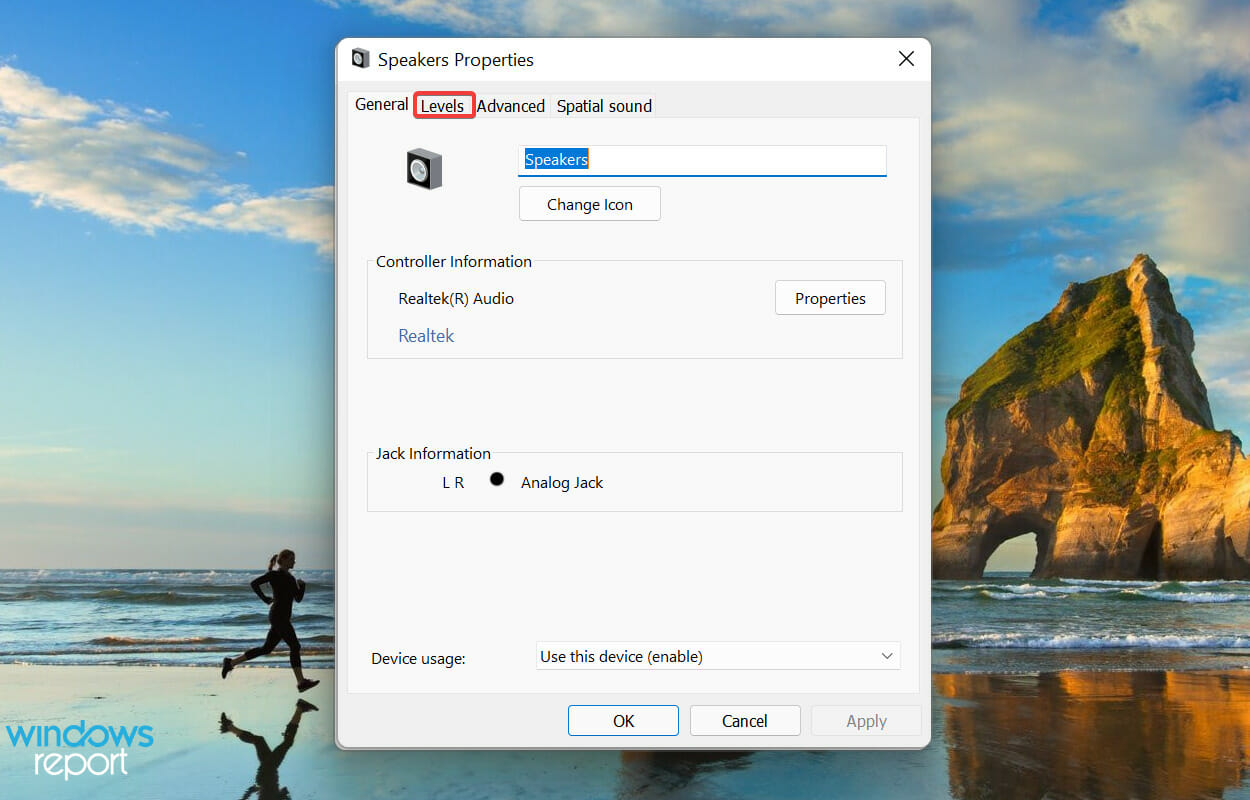
- Go to the Levels tab from the top.
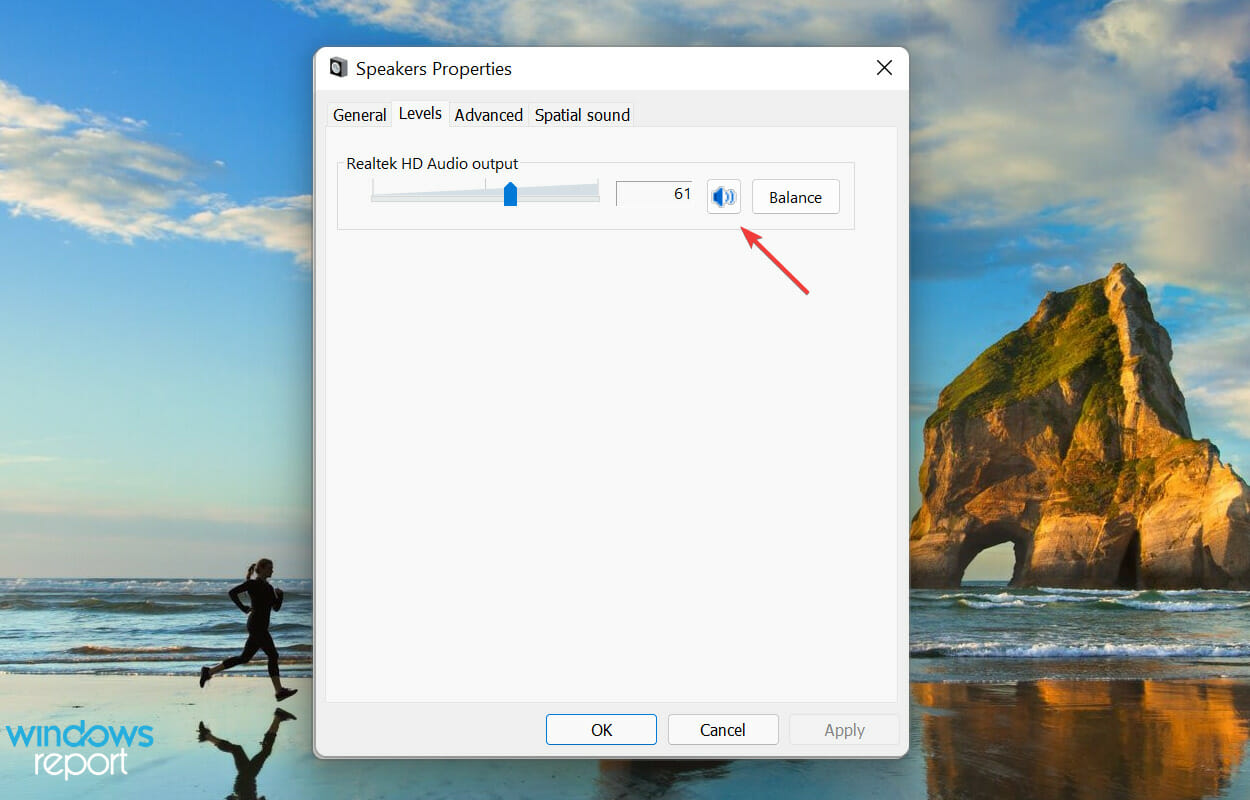
- Check if the output is muted, and click on the Mute icon to unmute it.
- Click OK at the bottom to save the changes.
7. Repair/reset the Skype app
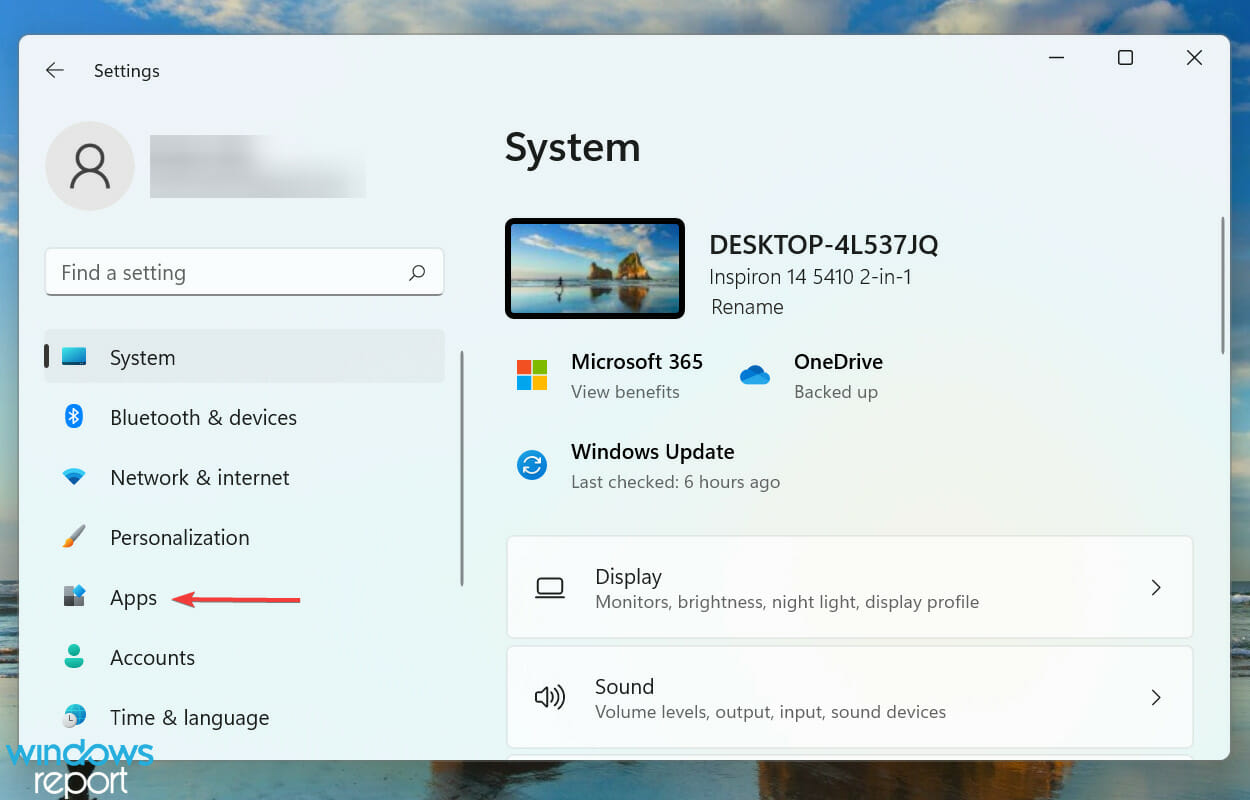
- Press Windows + I to launch the Settings app, and select Apps from the tabs listed in the navigation pane on the left.
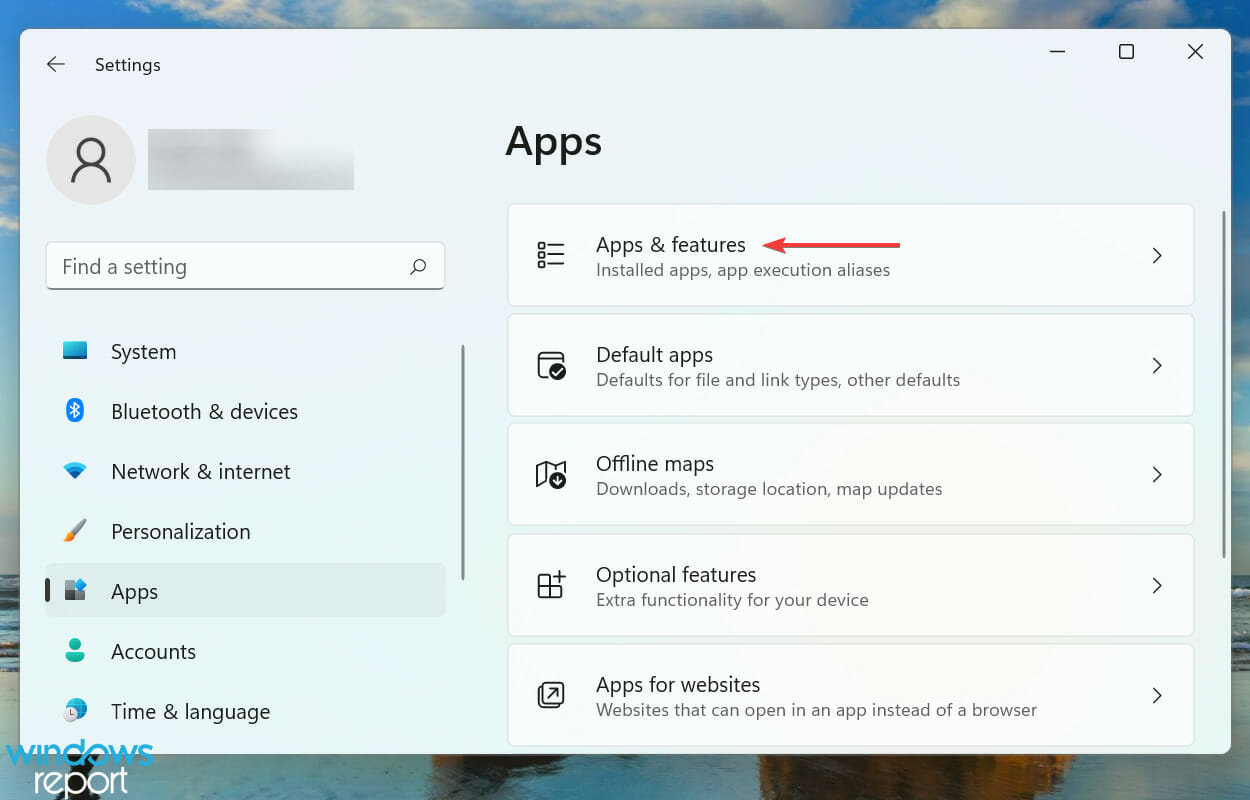
- Next, click on Apps & features on the right.
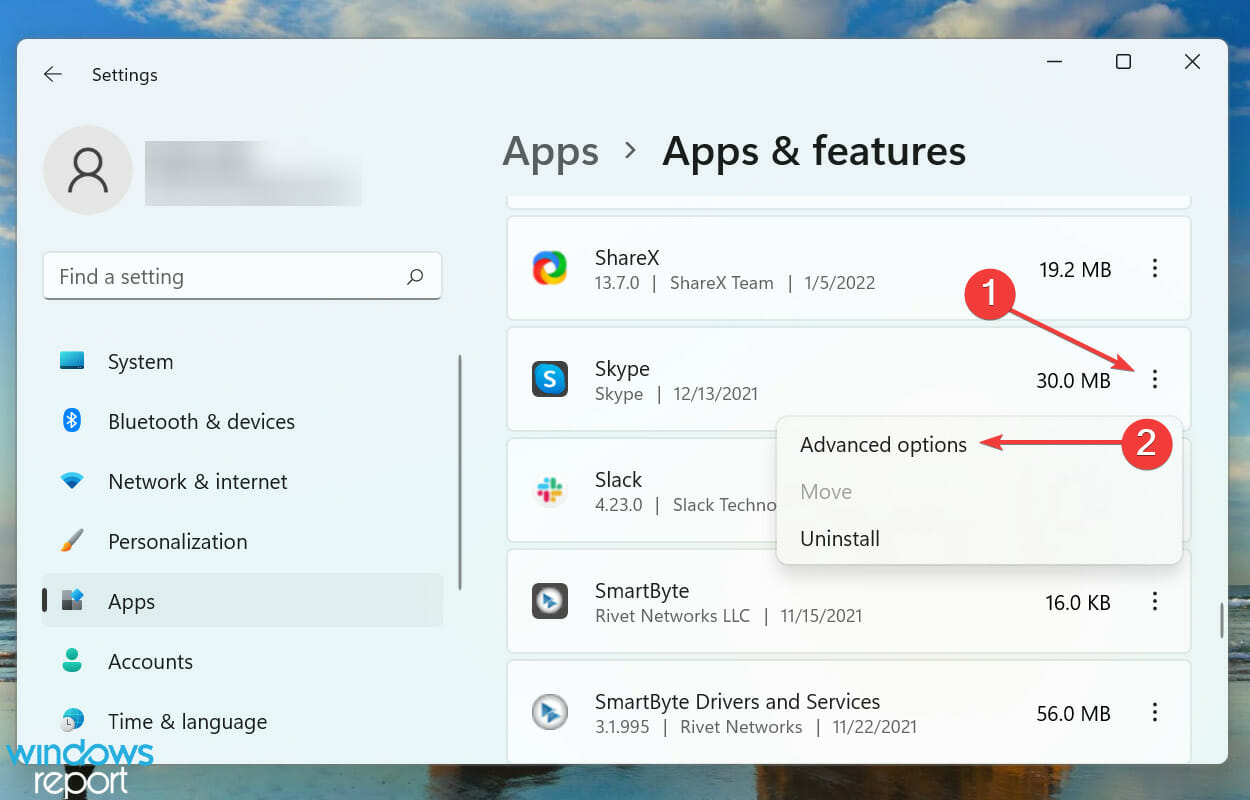
- Locate the Skype app, click on the ellipsis next to it, and select Advanced options from the menu.
- Click on the Repair button and wait for the process to complete.
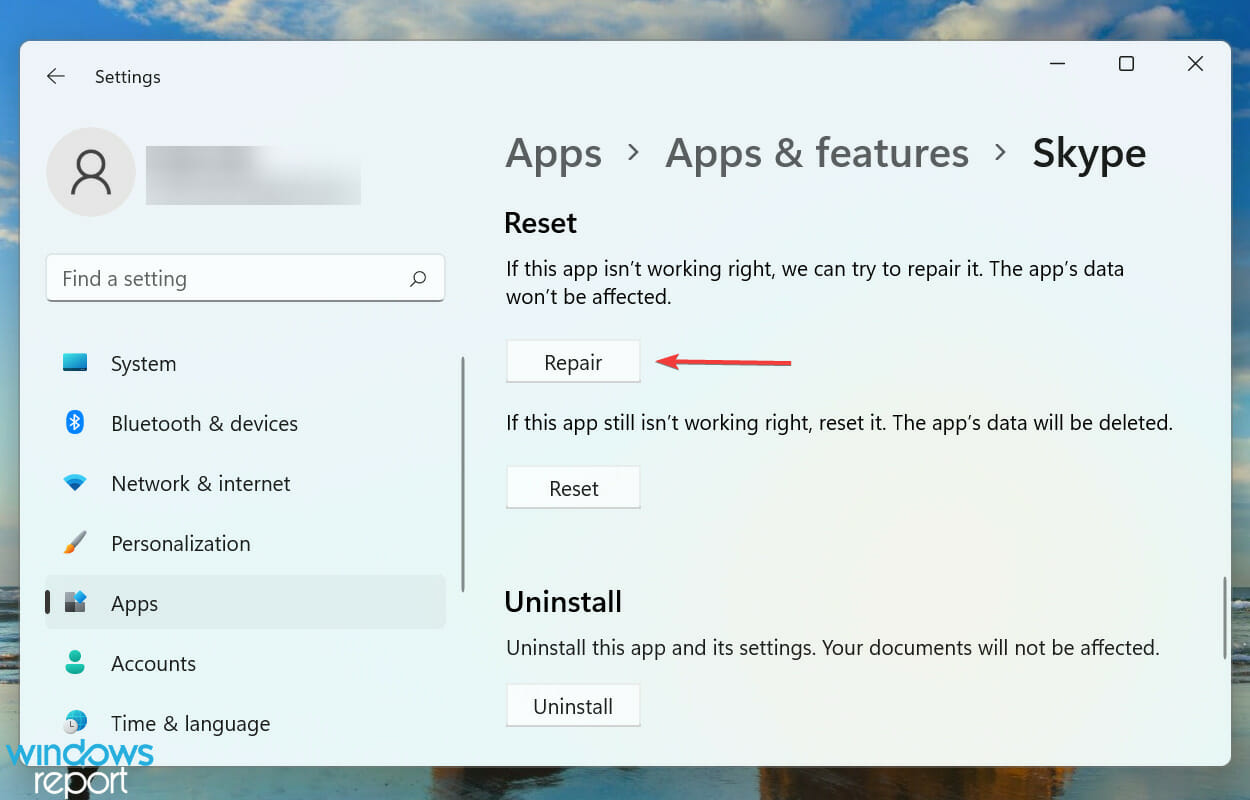
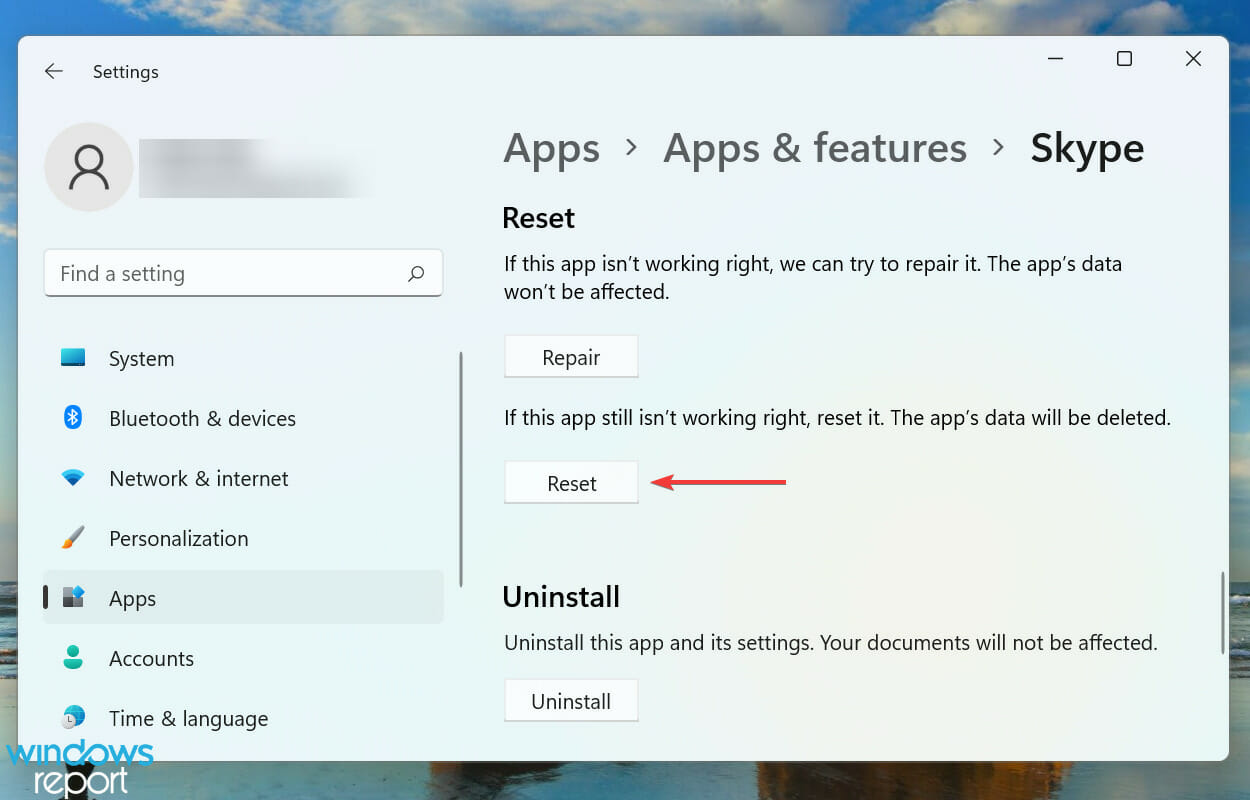
- Now check if the problem is fixed. If not, click on the Reset button.
- Again, click on Reset in the prompt that appears.
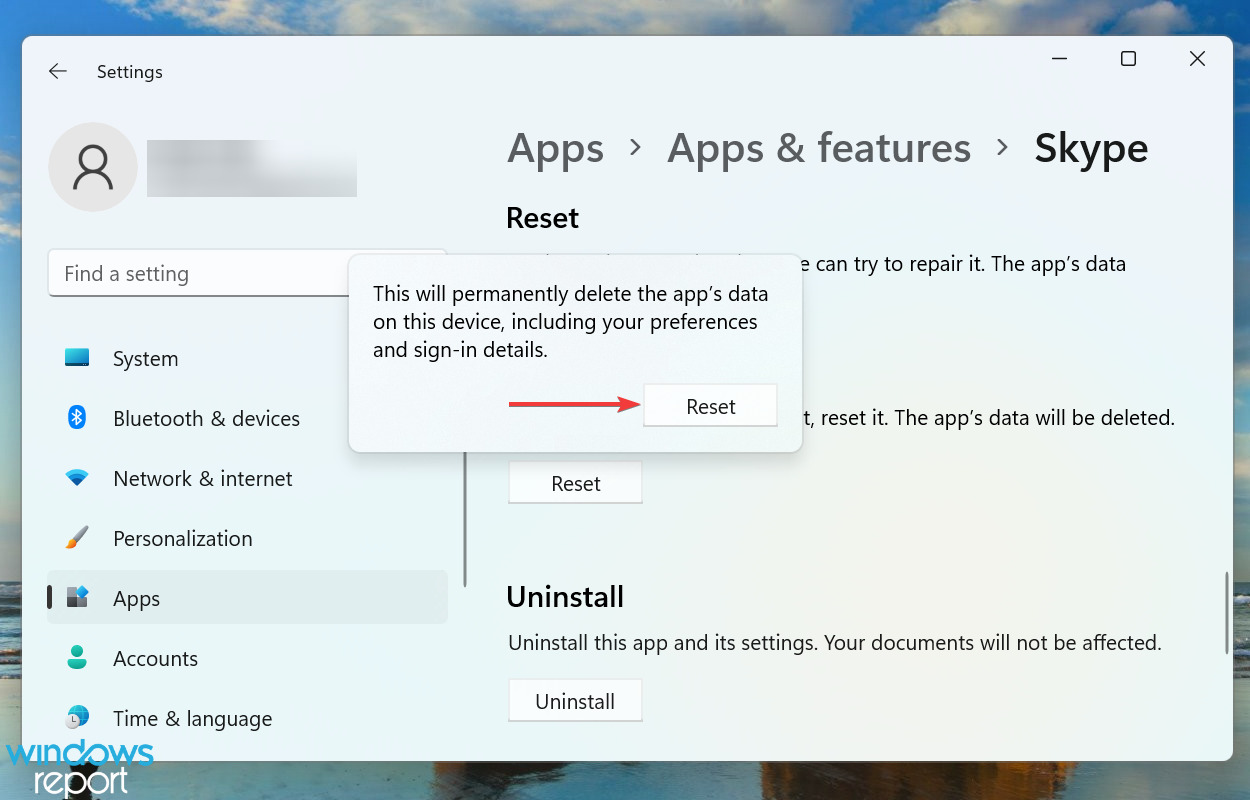
If the above methods haven’t yet worked, it’s likely that the issue lies with the Skype app itself. In which case, it’s best that you first try to repair it, and if that doesn’t help, reset the app.
Repairing the app identifies problematic files and replaces them, verifies the Registry entries, and checks the installation files without affecting the cache or configured settings.
On the other hand, resetting the app will remove everything and will take it to a state similar to when you first installed it.
What are some good software tools for audio enhancement in Windows 11?
A simple Google search would show hundreds of different software, with each claiming to outperform the other. This often confuses users and they are unable to choose the right one.
If you are looking for surround sound software, check our curated list of the best ones in the market. In case you are just looking for audio enhancers, here are the ones you should grab right away. Users trying to find an audio recording software can check out this list.
By the time you reach this section of the article, the Stereo Mix should be working on Skype and you know a lot of software that could be used both for audio enhancement and recording.
In case there’s no sound output on your Windows 11 PC, learn how to fix the problem.
Tell us which fix worked for you in the comments section below.







User forum
0 messages