Fix: Files Getting Deleted Automatically on Windows 11
Our experts recommend running System Restore in Safe Mode
5 min. read
Updated on
Read our disclosure page to find out how can you help Windows Report sustain the editorial team. Read more
Key notes
- Storage Sense is a new Windows feature that scans and removes old and temporary files.
- Windows 11 can automatically delete files older than 30-60 days.
- One of the recommendations includes running a CHKDSK scan. Don’t hesitate in trying the steps mentioned below.
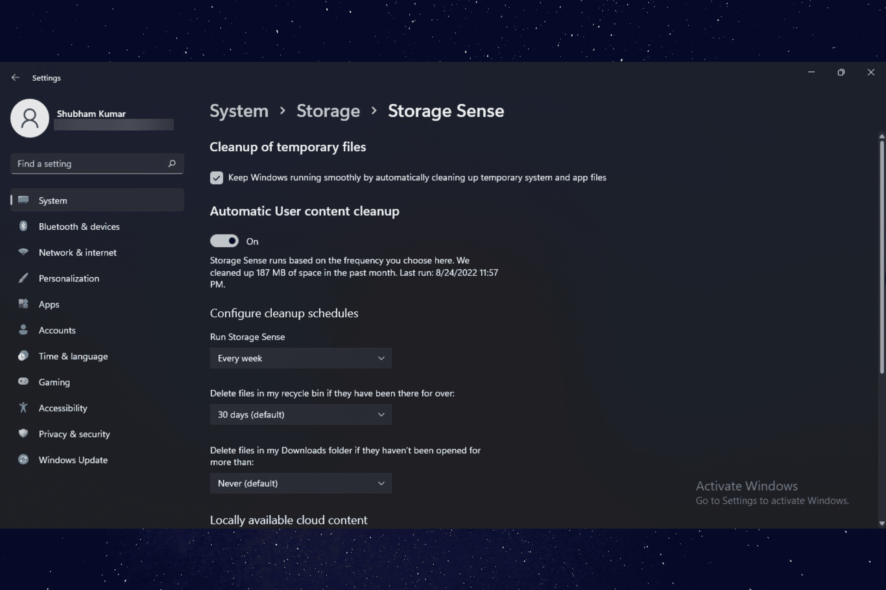
Windows 11 has some fantastic features, one of them being automatic storage detection. This feature is designed to reduce storage usage and keep your system safe.
But as we know, the OS is prone to bugs and errors; there have been some incidents where the system starts deleting files without the user’s knowledge. This could be frustrating as sometimes it may delete an important presentation or file.
However, any Windows error can be fixed by following some troubleshooting methods. If you’re also facing this error, keep reading this post to learn how you can fix it.
Why are my files getting deleted automatically?
Storage Sense is a new Windows feature that scans and removes old and temporary files. For example, it will delete all unused and obsolete files when your device runs low on disk space.
For instance, Windows 11 can automatically delete files older than 30-60 days from Recycle Bin and deletes temporary files per the requirement.
Some common reasons why Windows 11 automatically deleting files errors might occur on your device are:
- Corrupt system files
- Issues with the hard drive
- Pending system updates
- Third-party application
How do I stop Windows 11 from automatically deleting files?
1. Run DISM Scan
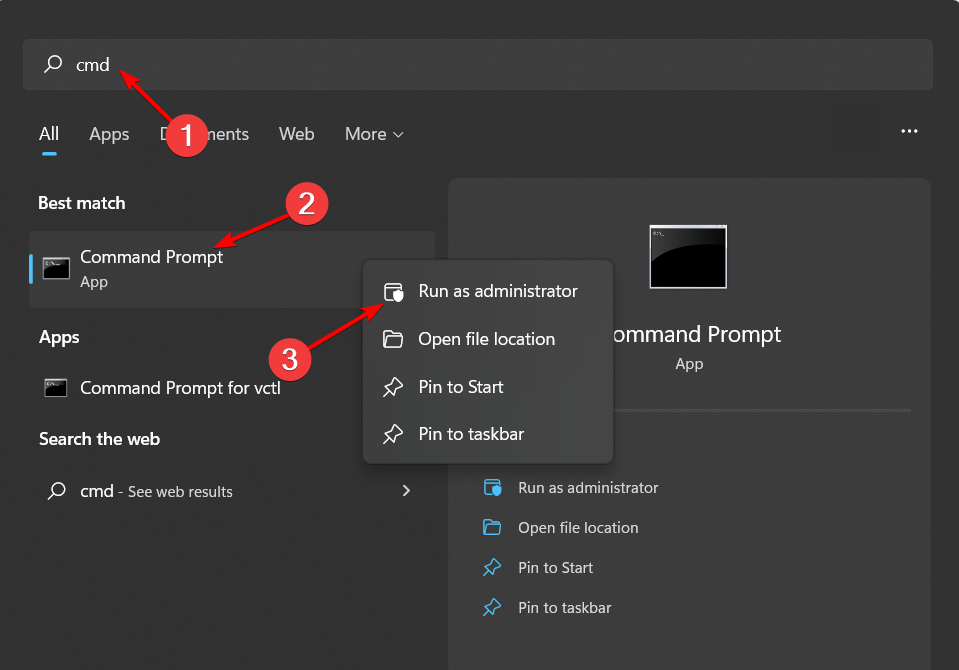
- Click on Start and search for Command Prompt.
- Click on Run as Administrator.
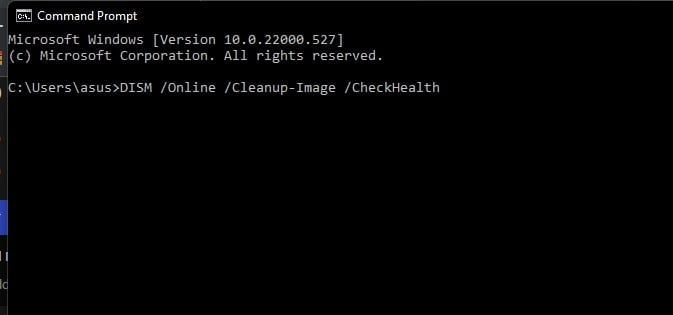
- Type the following command one by one and press Enter:
DISM /Online /Cleanup-Image /CheckHealthDISM /Online /Cleanup-Image /ScanHealthDISM /Online /Cleanup-Image /RestoreHealth - Restart your device and check if the error message still appears.
System image corruptions are also known to cause Windows 11 to automatically delete files. Running a DISM Scan will find and repair system image corruptions.
Windows and other critical issues may occur if your Windows operating system becomes corrupted. Opening programs becomes slower and response times increase. If you are running multiple applications, you may experience crashes and freezes. There can be numerous causes for this problem, including excessive startup entries, registry entries, hardware or RAM decline, fragmented files, and so on.
2. Run CHKDSK Scan
- Click on Start, search for Command Prompt, and select Run as Administrator.
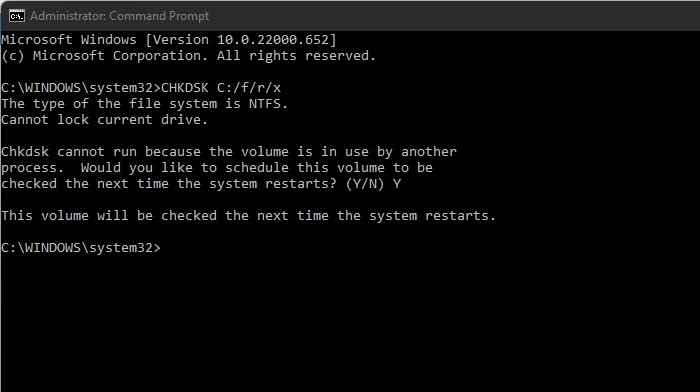
- Type the following command and press Enter:
CHKDSK C:/f/r/x - The command won’t start running as your device’s root drive is already in use. Instead, it will ask you to begin scanning when you restart your PC.
- Type Y, press Enter, and then reboot Windows.
CHKDSK is a Windows program that checks and resolves system problems. For example, it verifies that the file’s size, location, and other details match the data on the hard disk. It also checks to see if any areas of the hard disk are corrupted, which might be the source of the problem.
3. Clean boot your PC
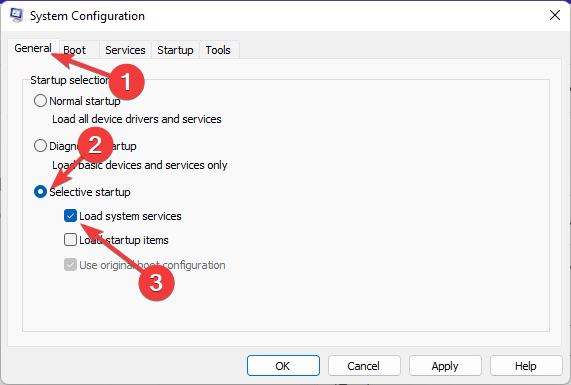
- Click on Start, search for system configuration and open it from the search results.
- Navigate to the General tab and check the Selective Startup and Load System Services options.
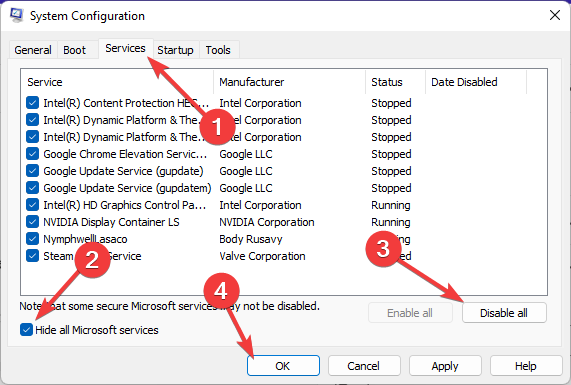
- Now navigate to the Services tab and check the option Hide all Microsoft services.
- Now click on Disable all at the bottom right corner and click on OK to save the changes.
Windows will start with a minimum set of required drivers and programs by performing a clean boot. In addition, it will ensure that a third-party or background program is causing Windows 11 automatically delete files.
Many users have also complained about Netio.sys BSOD Windows 10. If you’re among those, read our post to fix it.
4. Run System Restore in Safe Mode
- Long press the Power button until the Automatic Repair message appears.
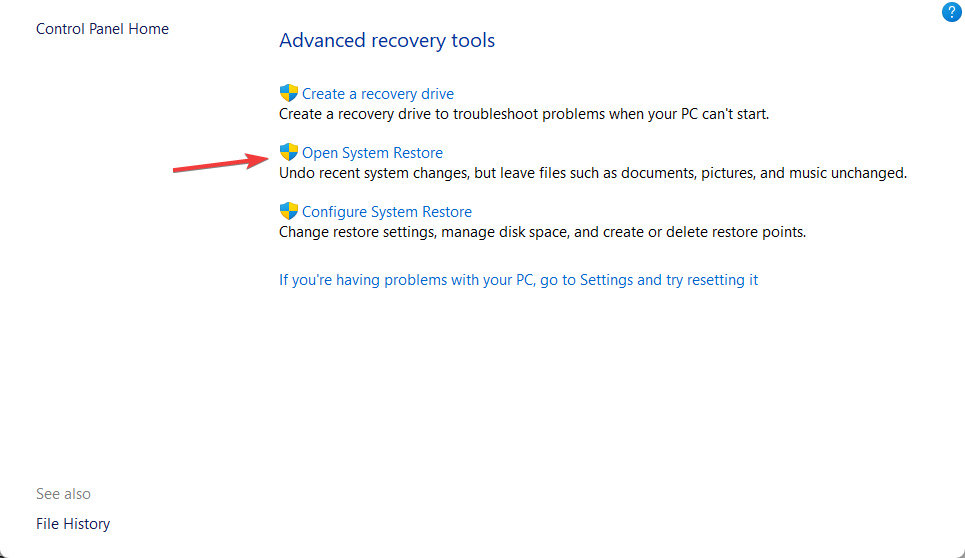
- Navigate to Troubleshoot, followed by Advanced options, and select Open System Restore.
- Now, select your username and enter your password.
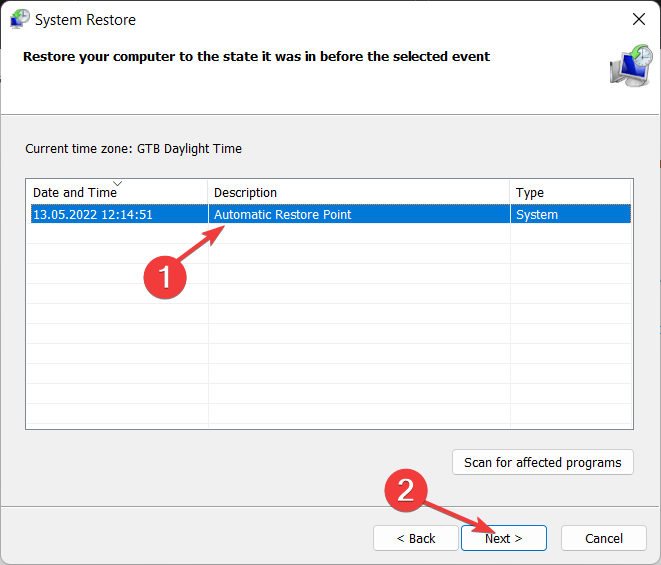
- Click on Next, and select a restore point before the Netio.sys BSoD error started.
- Now follow the instructions on the screen to restore your PC.
Changing your computer’s settings or switching on a function can be why Windows deleting files automatically virus occurs. You’ll have to restore these settings to default to fix files getting deleted automatically when clicked.
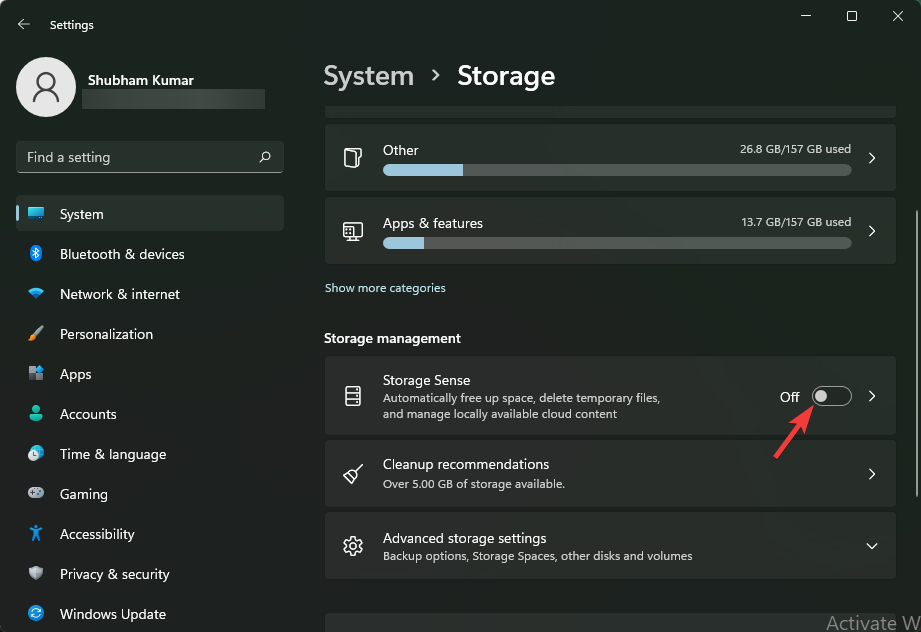
5. Disable Storage Sense
- Press Windows + I to open Settings.
- Navigate to System and select Storage.
- Click on the Toggle Switch to turn off Storage Sense.
If none of the abovementioned steps solved your problem, disable Storage Sense. Sometimes there is a problem with Windows core files that you cannot verify manually. Once you’ve disabled the feature, check if Windows 11 automatically deleting files is fixed.
How do I prevent accidental deletion in Windows?
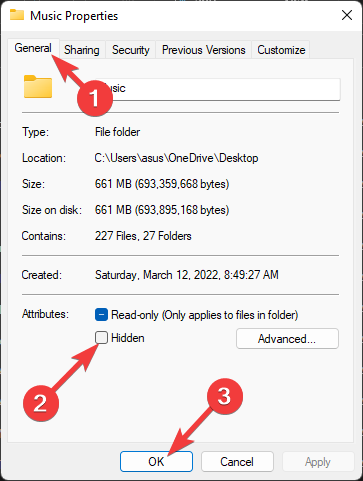
- Right-click on the file or folder you want to hide and click on Properties.
- In the Properties window, navigate to the General tab.
- Select Hidden and click on OK.
You can protect your files and folders by hiding them. By doing so, the hidden files won’t be accessible unless you hide them. This ensures the file doesn’t get deleted by mistake.
This was how you could fix Windows 11 automatically deleting files. We hope that the steps mentioned above were able to help you.
If you still have any issues, feel free to comment below.


User forum
0 messages