5 Ways to Fix AcroCEF.exe Application Error on Windows 10
Updating the Adobe software usually fixes this issue
![]() 3 min. read
3 min. read
![]() Updated on
Updated on
Share this article
Improve this guide
Read our disclosure page to find out how can you help Windows Report sustain the editorial team. Read more
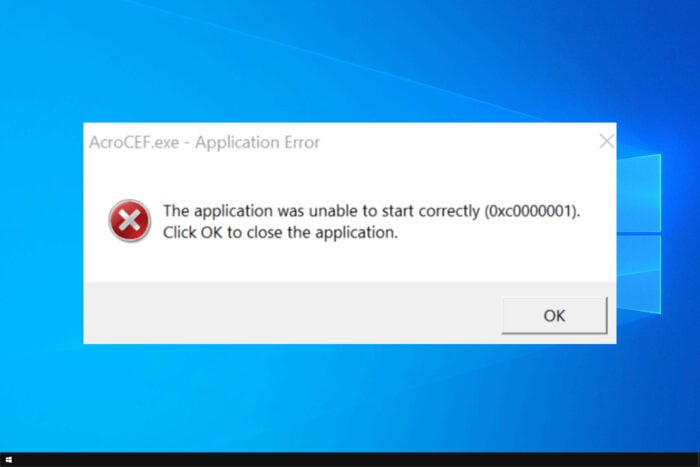
Many reported AcroCEF.exe application error in Windows 10 whenever opening a file. This can be a tedious error, but there are ways to fix it.
What does AcroCEF.exe do?
This executable handles several network integrations, such as Adobe Cloud storage, Fill and Sign, Send for e-signature and more.
How do I fix the AcroCEF.exe application error on Windows 10?
Before we try anything else, make sure you have the latest version of Adobe Reader installed. You can also try restarting the application and closing all AcroCEF/RdrCEF processes in Task Manager.
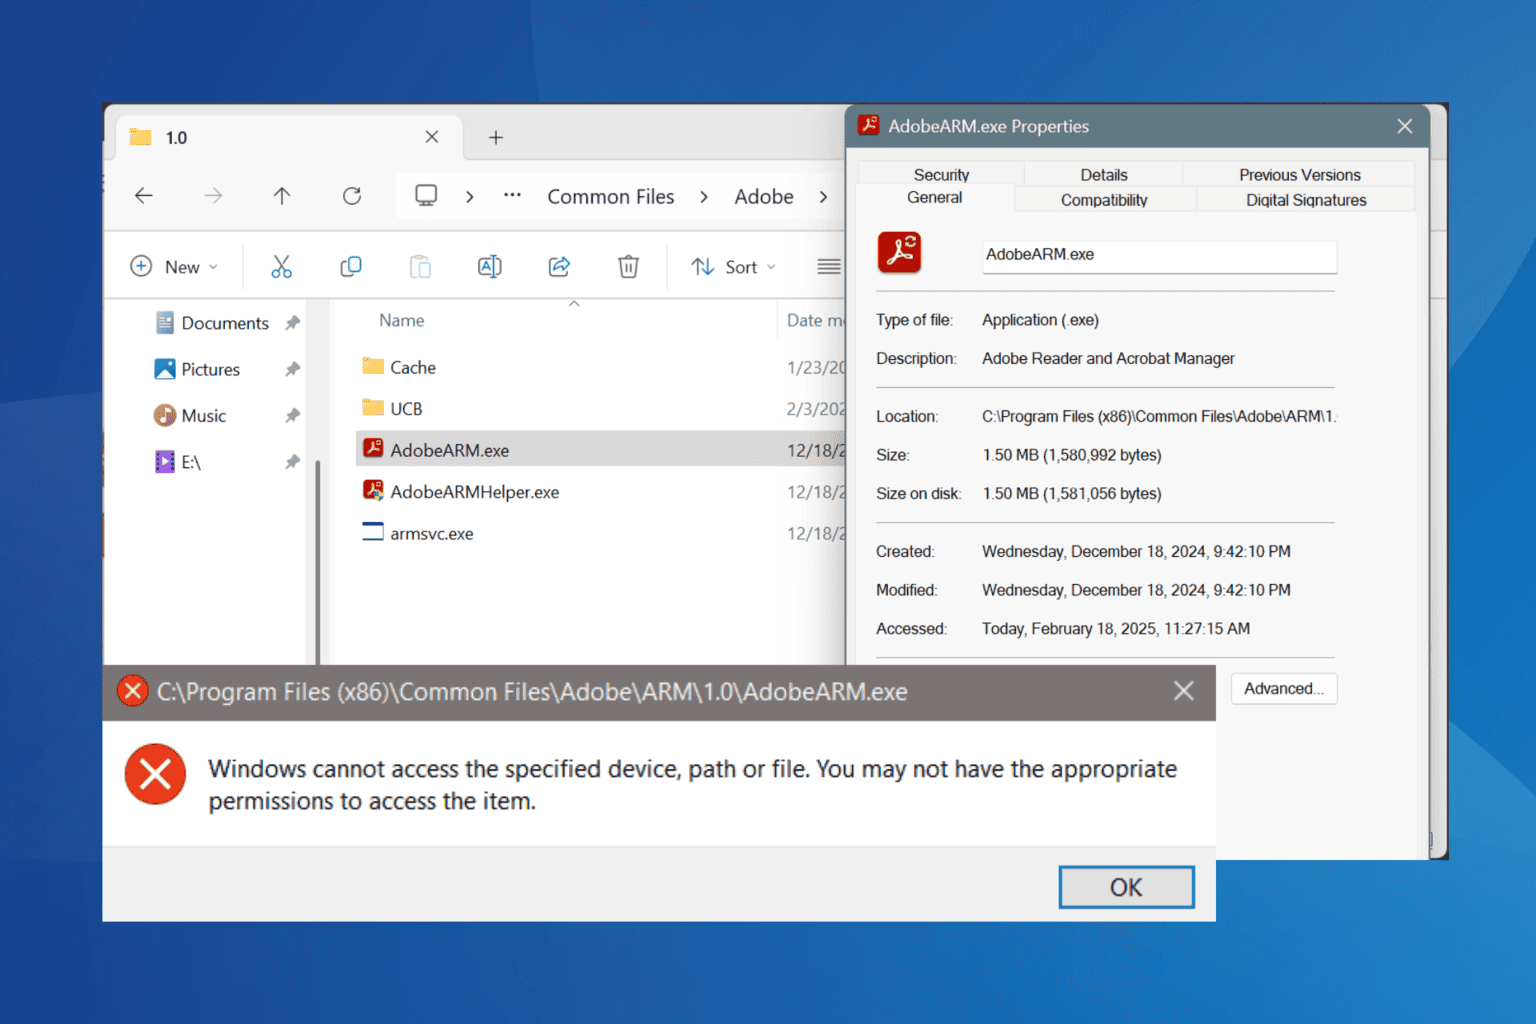
1. Rename or delete the file
- Open File Explorer and navigate to
C:\Program Files\Adobe\Acrobat Reader DC\Reader\AcroCEF - In there, locate acrocef.exe and rdrservicesupdater.exe.
- Change their file names to acrocefDisabled.exe and rdrservicesupdaterDisabled.exe.
2. Update your drivers
Issues with drivers can sometimes cause AcroCEF.exe application error in Windows 10, so ensure that all your drivers are up to date.
You can do this by manually updating individual drivers, but this can be a tedious process. Instead, why not use software such as GetMyDrivers that can automatically update all your drivers with just a few clicks?

GetMyDrivers
Updating your drivers was never easier, and with GetMyDrivers it just takes a few clicks to do it.3. Edit the registry
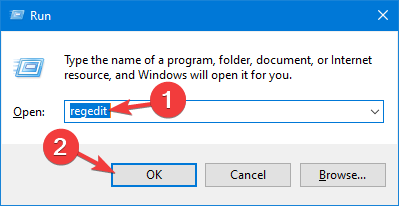
- Press the Windows key + R and enter regedit.

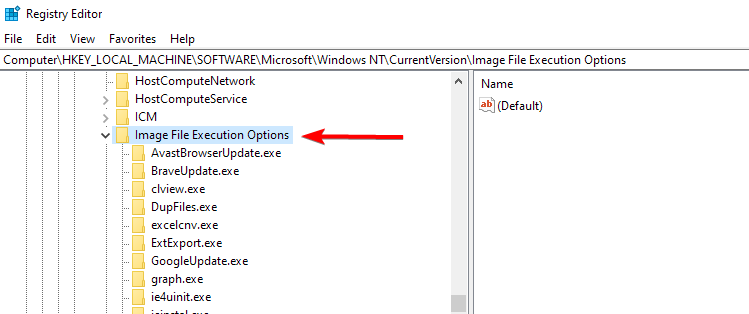
- Navigate to
HKEY_LOCAL_MACHINE\SOFTWARE\Microsoft\Windows NT\CurrentVersion\Image File Execution Options\
- Expand File Execution Options. Look for AcroCEF.exe and RdrCEF.exe.
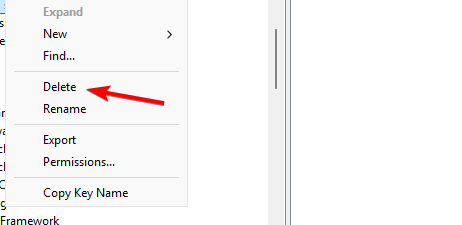
- Right-click each of them and choose Delete.

4. Make sure that Adobe Folder is added to the exclusion list
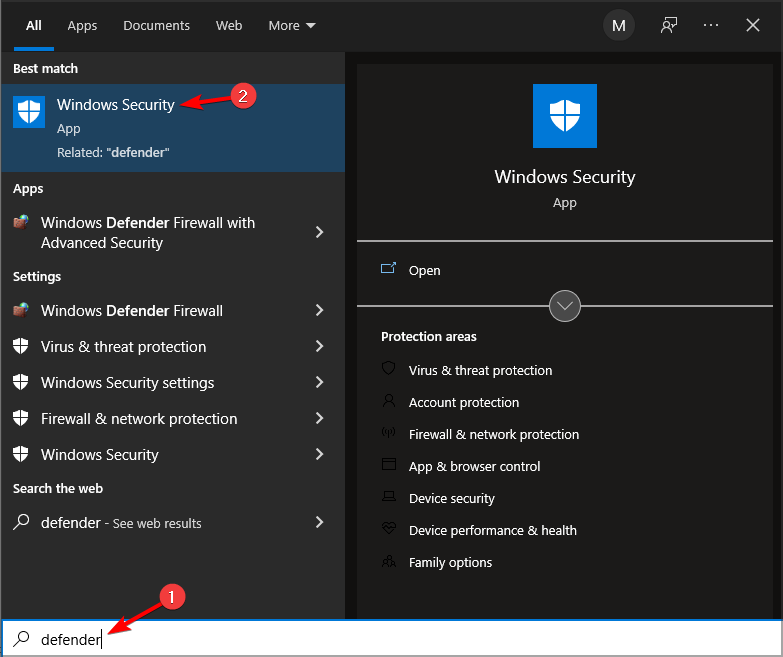
- Press Windows key + S and type defender. Choose Windows Security.

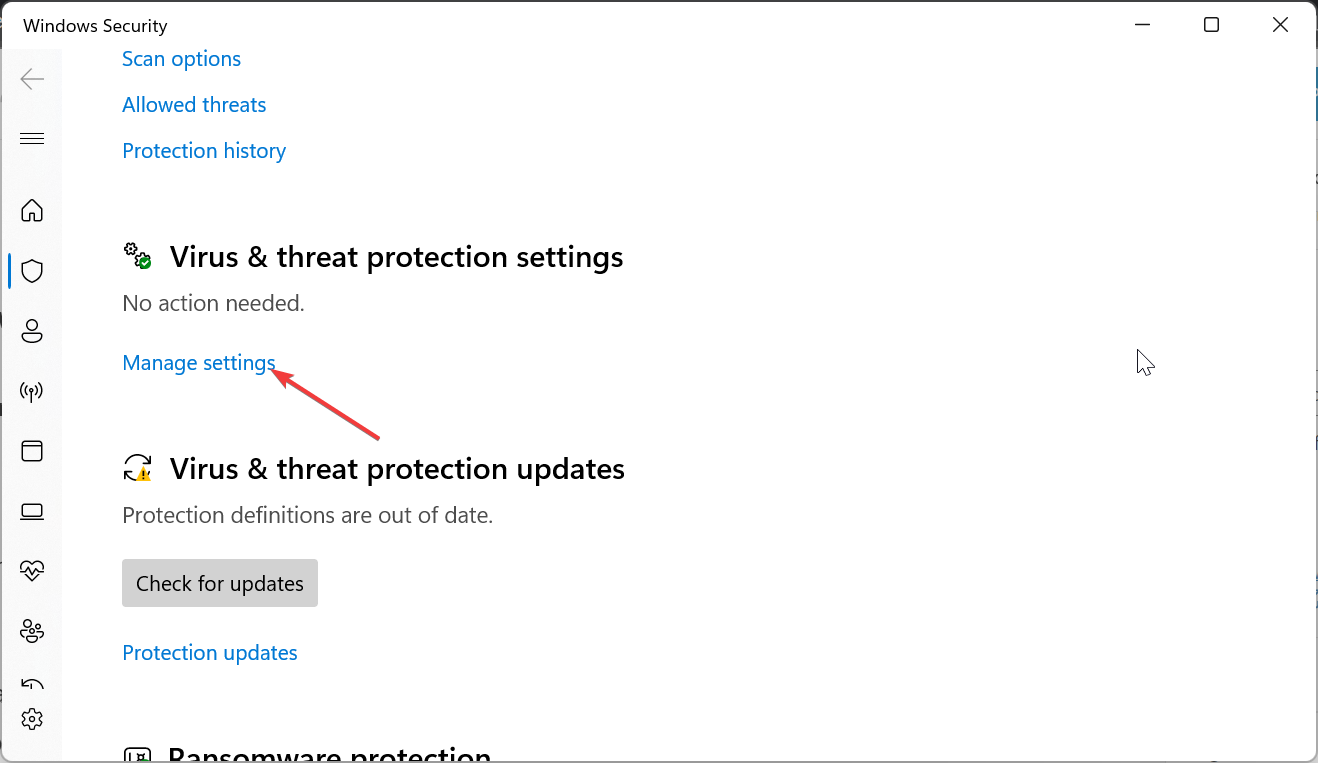
- In the left pane, select Virus & threat protection. In the right pane, choose Manage settings in Virus & threat protection settings.

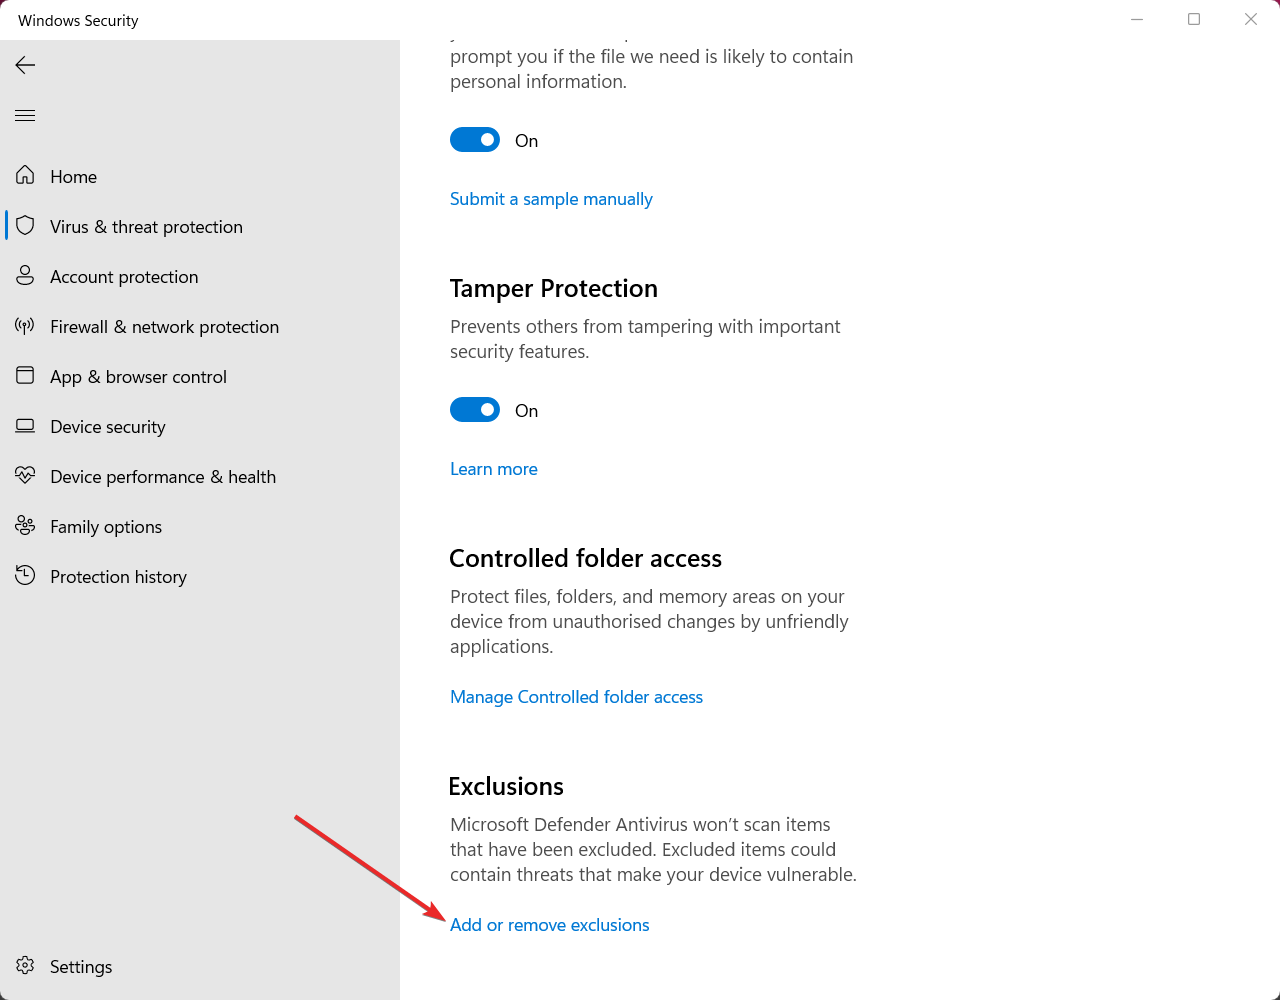
- Scroll down to Exclusions and click on Add or remove exclusions.

- Click on Add an exclusion and choose Folder.

- Add the following folders to the list of exclusions:
C:\Program Files\Adobe\Acrobat\
C:\Program Files\Adobe\Acrobat Reader\

If you’re using a third-party antivirus software, the steps might be a bit different.
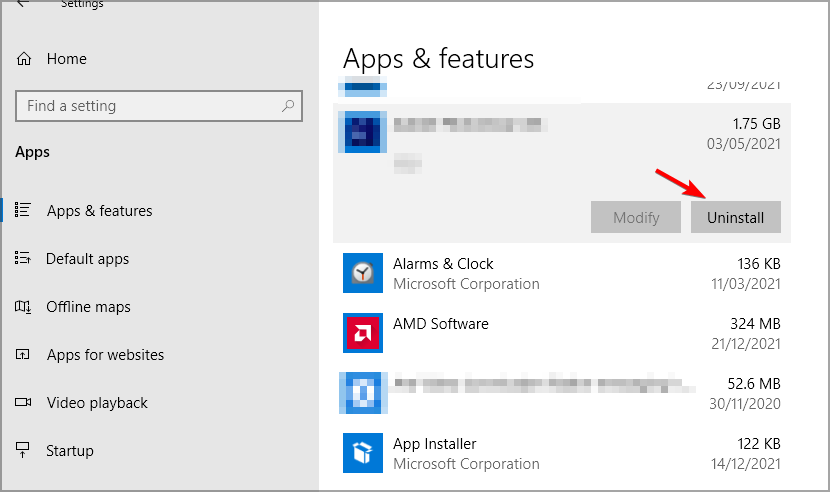
5. Reinstall the software
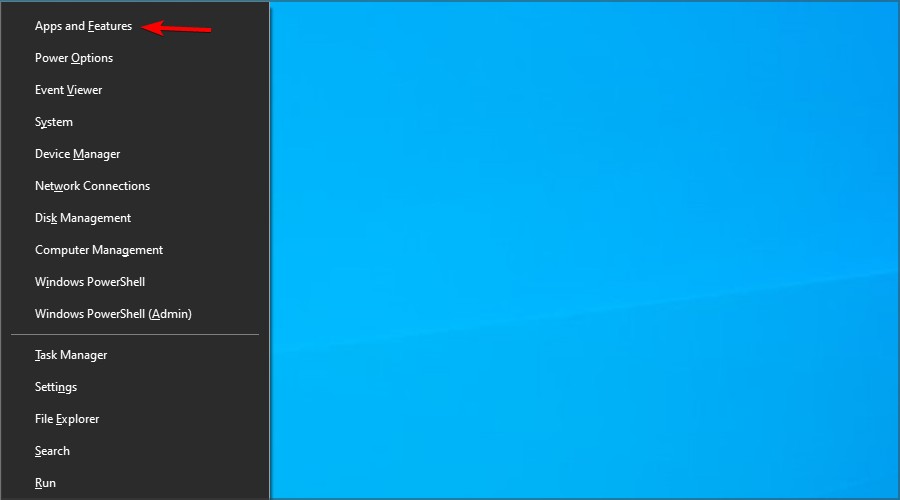
- Press the Windows key + X and choose Apps and features.

- Locate Acrobat on the list and choose Uninstall.

- After the software is removed, install the latest version.
AcroCEF.exe application error in Windows 10 can be quite tiresome, but usually, the application update fixes it.
This error is rather similar to the RdrCEF.exe application error that we covered earlier, so don’t miss it. This isn’t the only problem you can encounter, and many reported Adobe CEF Helper.exe high CPU usage.


User forum
0 messages