AirPods Won't Connect to PC: 10 Valuable Methods to Fix it
7 min. read
Updated on
Read our disclosure page to find out how can you help Windows Report sustain the editorial team. Read more
Key notes
- AirPods won't connect to PCs because of power plan configurations, specific Windows 10 features, and even buggy system updates.
- Some users have been able to fix Bluetooth connection issues for AirPods by editing the registry.
- Specific Windows 10 troubleshooters can also come in handy when AirPods don’t connect to PCs.
Apple AirPods are Bluetooth earbuds you can utilize with Windows 10 PCs. However, users have reported on Microsoft’s forum that they can’t connect paired AirPods with Windows 10.
When they try to connect them, the AirPods don’t connect or disconnect very quickly.
One user said this:
I haven’t had any problems connecting to my work laptop ever since I got my AirPods at Christmas. But starting this week, they won’t stay connected anymore. I can pair them up and see them on my PC, but when I click connect, it goes Connecting, Connected, and back to Paired all within 10 seconds, and then stays disconnected.
How come my paired AirPods won’t connect to the PC?
There are a few potential reasons (causes) for paired AirPods devices not connecting with Windows PCs. First, the issue can arise because of specific enabled Windows 10 features. For example, the Swift Pair and Fast Startup features are two that can generate Bluetooth device connection issues.
Some users have cited power settings as another factor behind AirPods not connecting with PCs. Those users have been able to resolve the issue by changing their PCs’ power options in Windows 10. Alternatively, disabling network adapter power management can also fix this issue.
Buggy Windows updates can also cause paired AirPods to stop connecting with PCs. It has been confirmed that Windows updates for Edge can cause the issue. Some users have said they’ve needed to roll back (remove) new updates that generated the problem.
Or there might be some issue with your PC’s Bluetooth adapter driver. For example, connectivity issues might arise if your PC’s installed Bluetooth driver is old, missing, or faulty. Updating your PC’s Bluetooth adapter driver might fix such issues.
As there are varied causes for AirPods not connecting with Windows 10 PCs, there are numerous potential fixes. So if you need to fix a paired AirPods device not connecting with a Windows 10 PC, give these possible resolutions a try.
How can I fix paired Airpods that won’t connect to a PC?
1. Run the Bluetooth troubleshooter
- Click the Windows 10 Start button and select Settings on the menu.
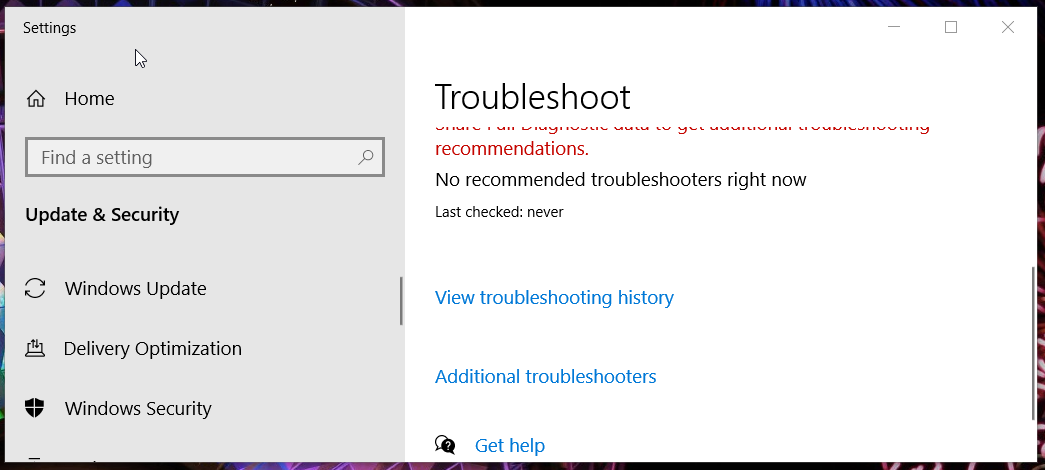
- Select Update & Security and the Troubleshoot tab.
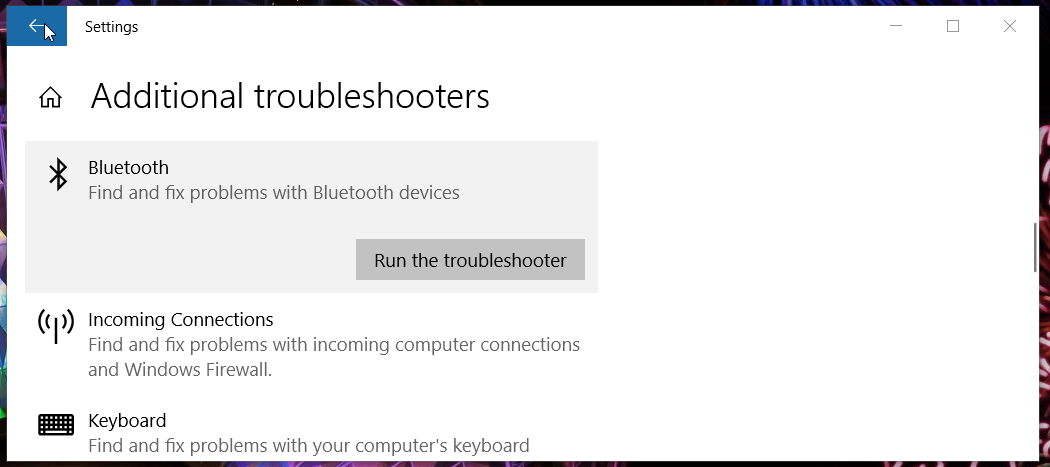
- Click Additional troubleshooters in Settings to bring up the window shown directly below.
- Select the Bluetooth troubleshooter listed there.
- Press the Run the troubleshooter button to launch the Bluetooth troubleshooter. Then let that troubleshooter weave its magic.
 NOTE
NOTE
2. Restart the Bluetooth service
- Bring up Type here to search by pressing its Windows + S hotkey.
- Enter the search keyword Bluetooth in the text box.
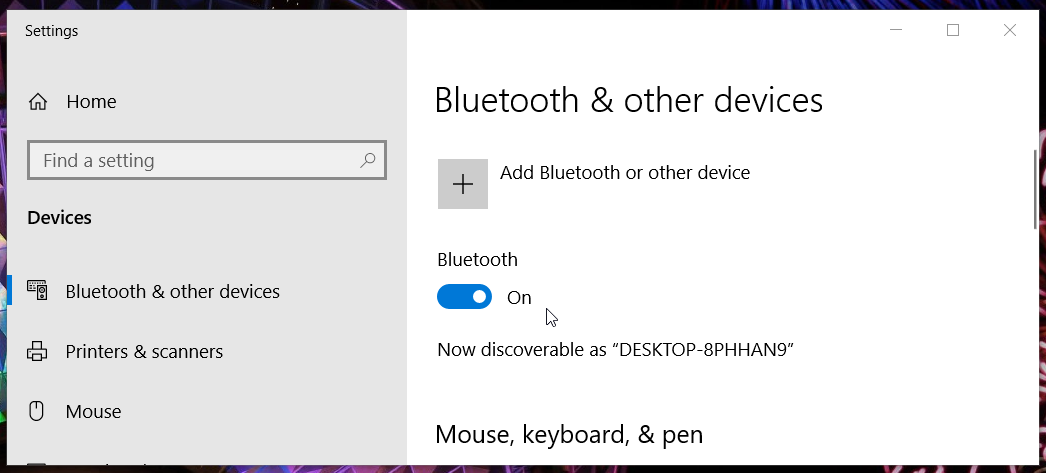
- Click Bluetooth and other devices in the search results to open the options in the snapshot directly below.
- Click the Bluetooth option to turn it off, and wait and minute or two.
- Then click the Bluetooth setting again to turn it back on.
 NOTE
NOTE
3. Select your AirPods to be the default playback device
- Right-click the speaker icon in the system tray to select the Sounds option.
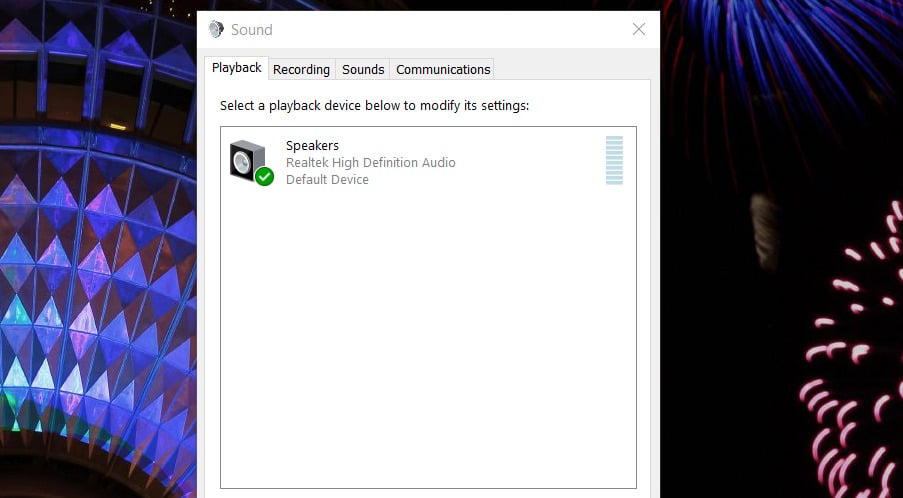
- Then select the Playback tab shown directly below.
- Right-click your AirPods headphones and select the Set as Default Device option.
- Press the Apply button.
- Click OK to close the Sound window.
4. Disable Bluetooth on mobile devices
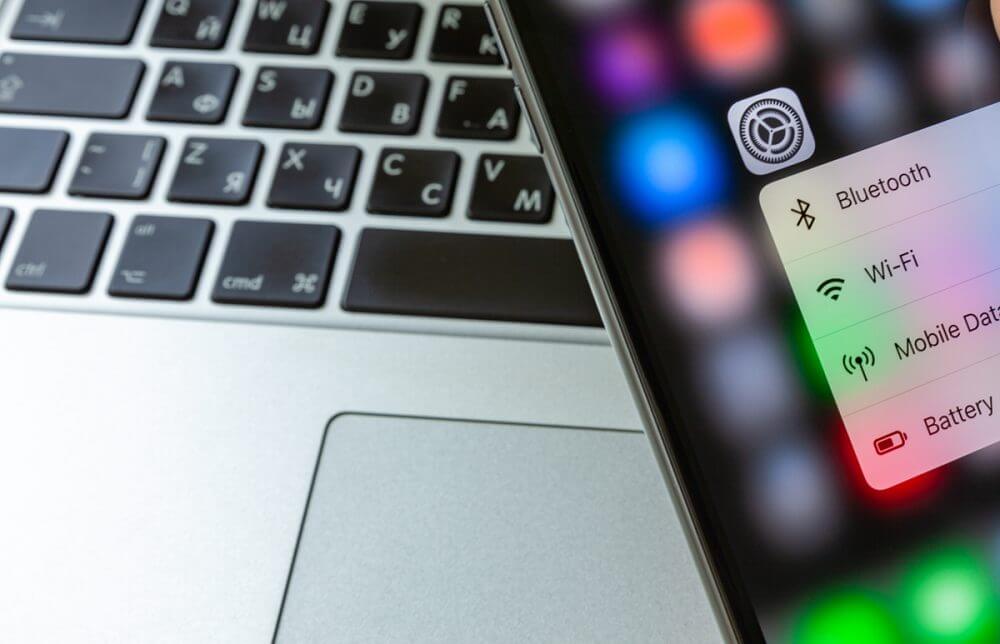
Disabling conflicting Bluetooth mobile devices might also help some users resolve the issue. To do so on an Apple iOS phone or tablet, tap Bluetooth in Settings and toggle off the Bluetooth option.
On an Android mobile, swipe down from the top of the screen to tap the Bluetooth button.
5. Disable the Swift Pair Feature
- First, press the Windows key + I at the same time.
- Click Devices to open a Bluetooth & other devices tab.
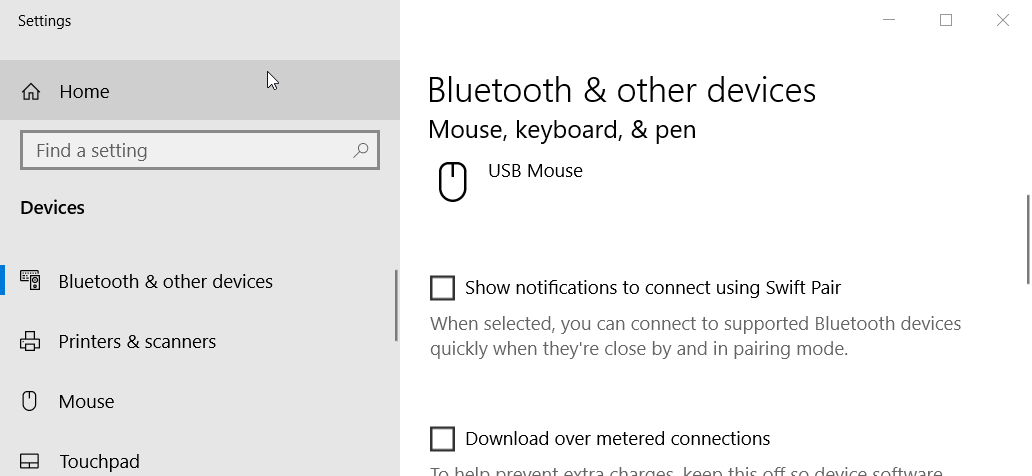
- Scroll down that tab to the Swift Pair option shown directly below.
- Deselect the Show notifications to connect using Swift Pair checkbox if it’s selected.
6. Select a balanced power plan
- First, click the search box (or its magnifying glass icon) on the taskbar.
- Next, enter the keyword power & sleep in the search box.
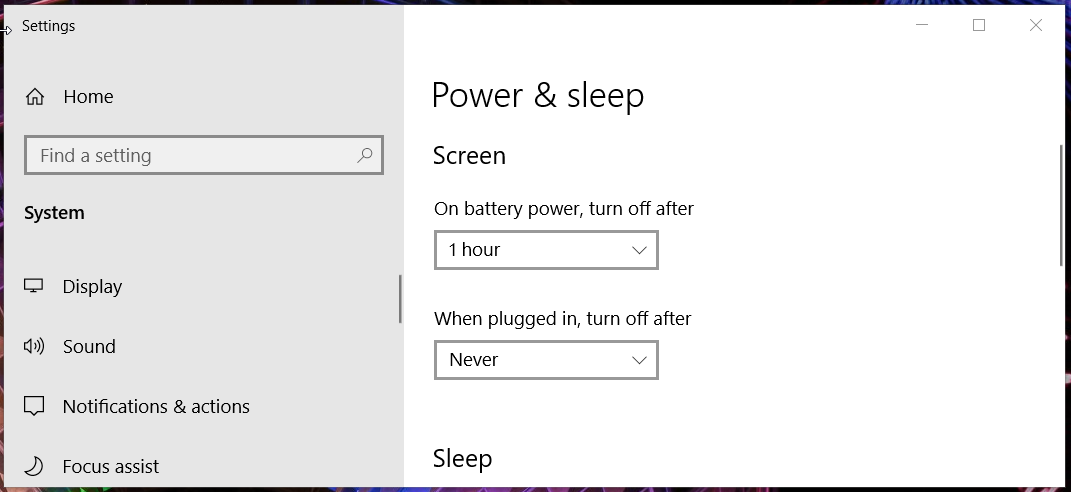
- Now click Power & sleep settings to open the options shown directly below.
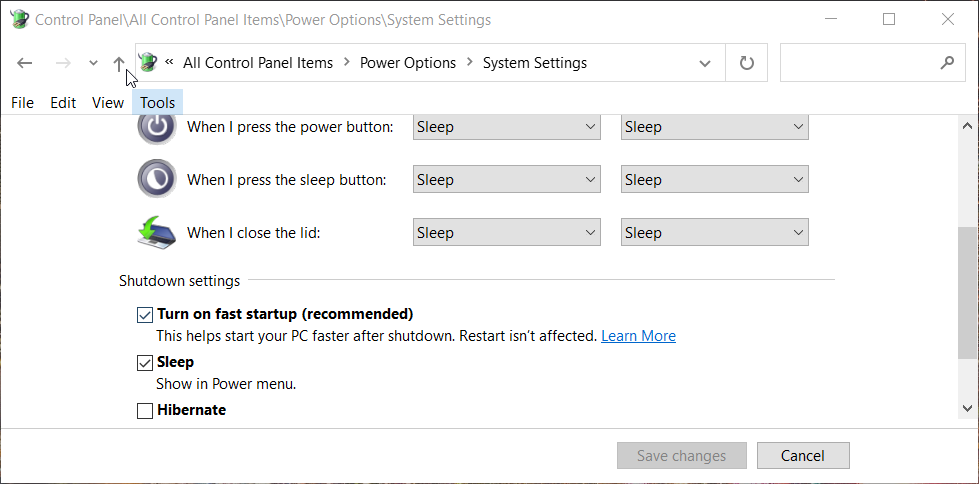
- Click Additional power settings to open the Control Panel applet in the screenshot below.
- If your PC is configured to a power saver or high-performance custom plan, select the Balanced (recommended) plan there.
 NOTE
NOTE
It’s also recommended that you deselect (disable) the Turn on fast startup option via the Power Options applet.
To do so, click Choose what the power buttons do in Power Options. Then click Change settings that are currently unavailable, and deselect the Turn on fast startup checkbox.
7. Update your PC’s Bluetooth driver
- Press the Windows + X keys simultaneously, and select Device Manager on the menu that opens.
- Next, double-click Bluetooth to extend that category.
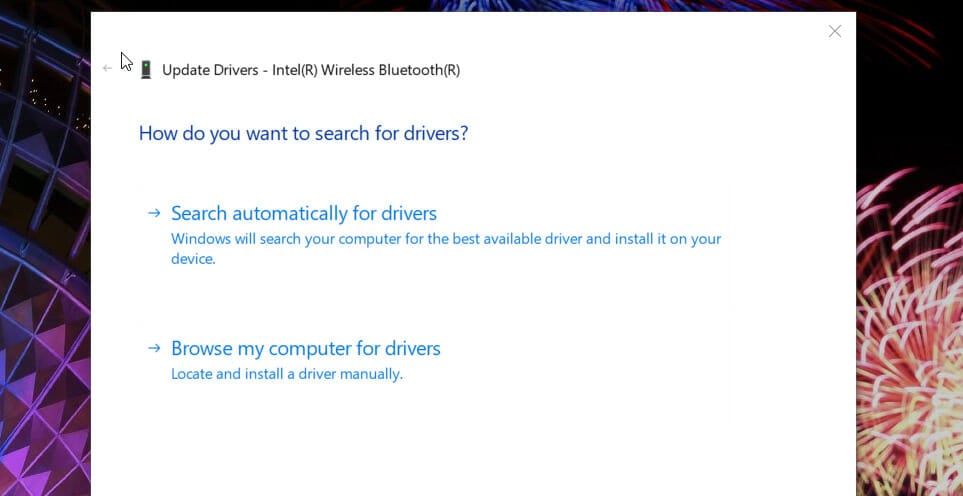
- Right-click your PC’s Bluetooth adapter to select an Update driver option.
- Click Search automatically for drivers within the Update drivers utility.
Note: There might still be a newer update driver available even if the Update Driver tool determines the best one for your PC is installed. So, you might need to scan your PC with third-party driver updater software like Outbyte Driver Updater. That utility will list all devices on your PC with outdated drivers.
8. Remove any greyed-out Bluetooth devices
- Open Device Manager’s window as outlined in the previous resolution.
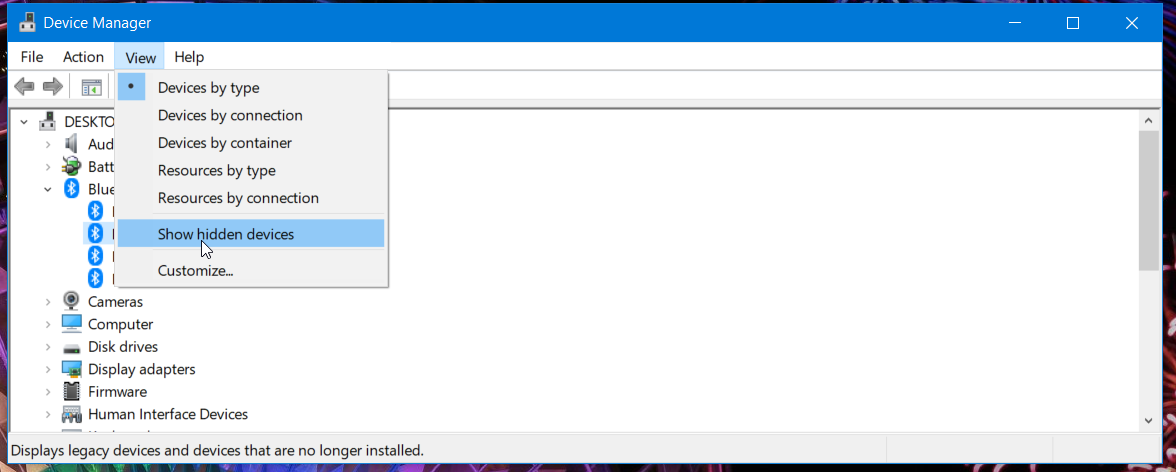
- Click the View menu.
- Select the Show hidden devices option.
- Double-click Bluetooth to expand the category.
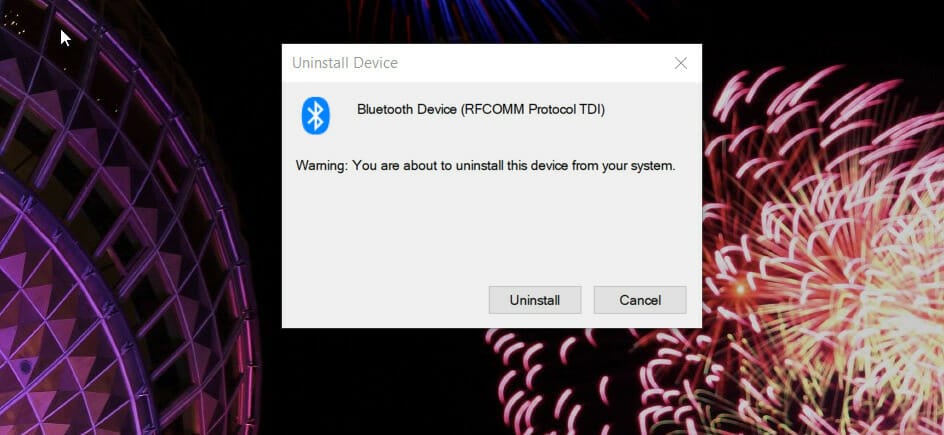
- Right-click greyed-out devices listed there to select Uninstall device.
- Click Uninstall on confirmation prompts.
Note: It’s also recommended to uninstall multiple instances of AirPods devices listed within the Bluetooth category, whether greyed out or not.
9. Edit the registry
 NOTE
NOTE
- Bring up Windows 10’s search utility.
- Type Registry Editor in the search box.
- Click the Run as administrator option for the Registry Editor search result.
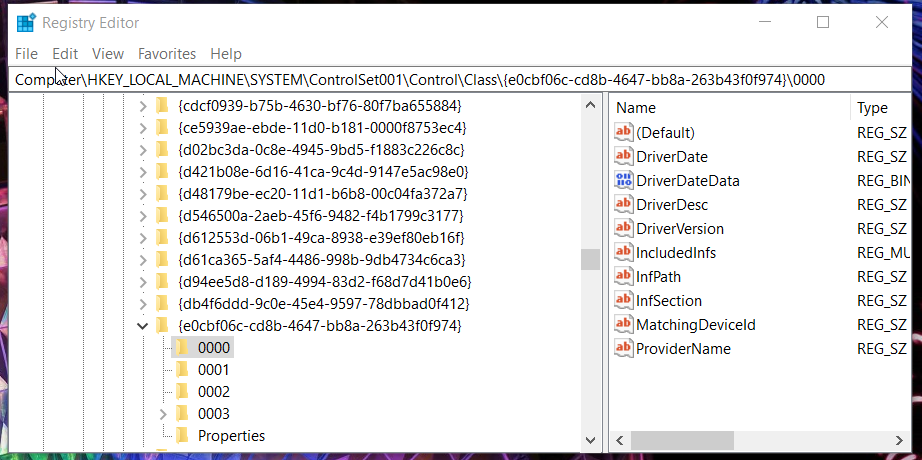
- Now open this key within the Registry Editor window:
Computer\HKEY_LOCAL_MACHINE\SYSTEM\ControlSet001\Control\Class\{e0cbf06c-cd8b-4647-bb8a-263b43f0f974}\0000 - Select the 0000 registry key.
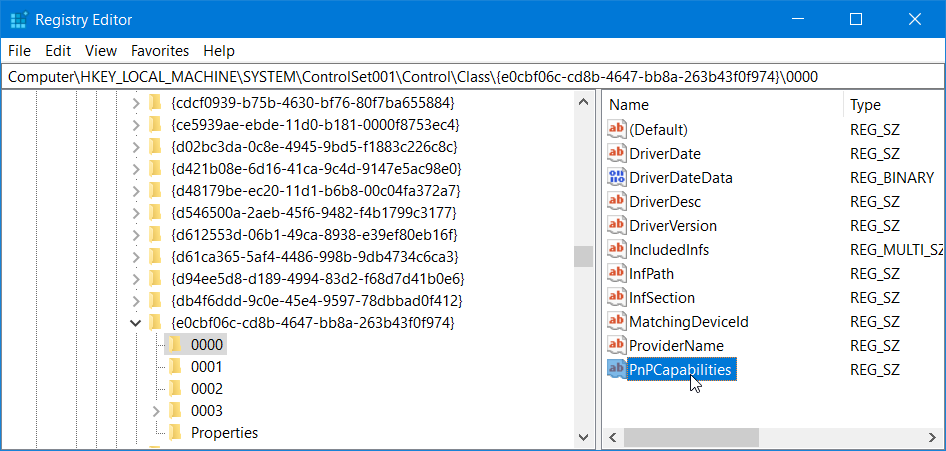
- Right-click a space on the right side of the Registry Editor window to select New > String Value.
- Enter PnPCapabilities as the new string’s title, and press the Return key.
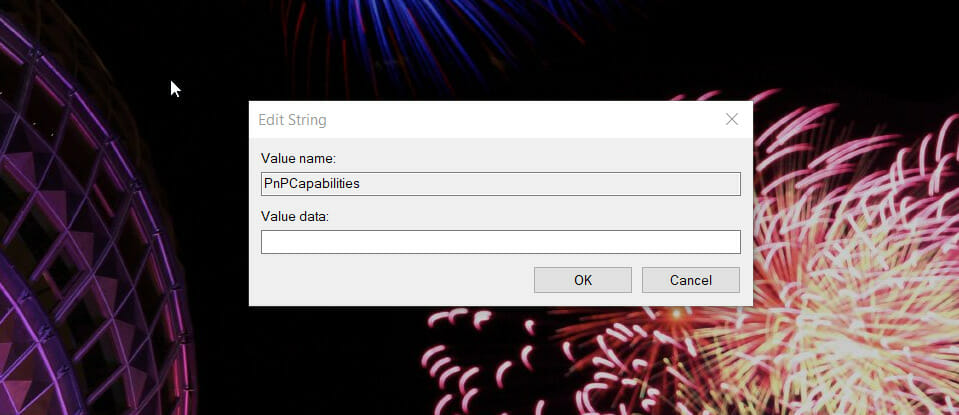
- Double-click the PnPCapabilities string to open the window shown directly below.
- Then input 24 within the Value data box.
- Click OK to exit the Edit String window.
- After that, click Power and Restart on the Start menu.
10. Uninstall recent Windows 10 updates
- Press the Windows keyboard key and S to bring up the search text box.
- Type update within the search text box.
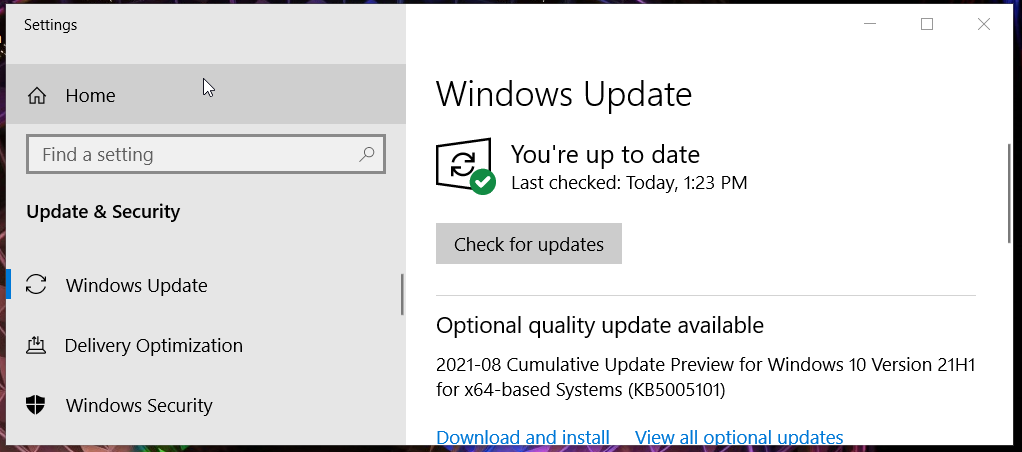
- Next, click the Check for updates to the Windows Update tab.
- Select View update history to open a list of updates.
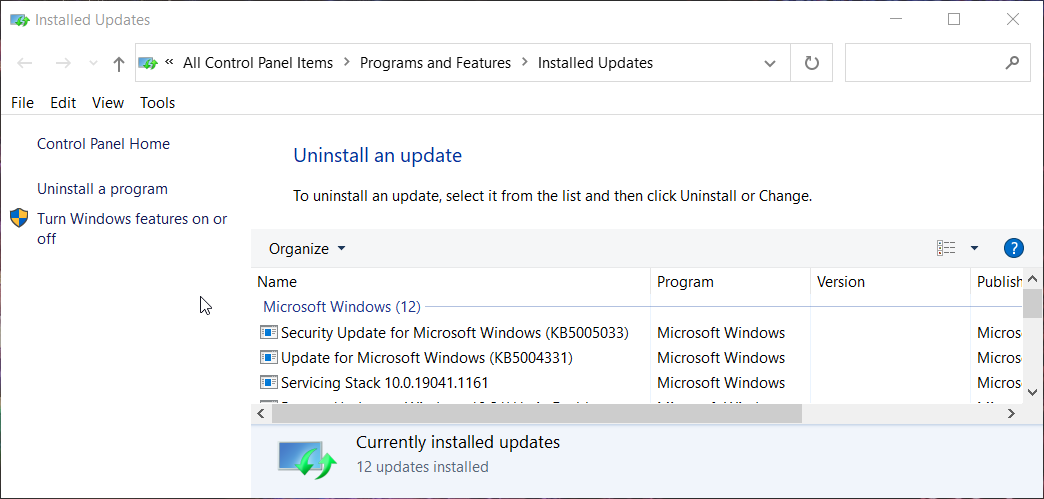
- Then click the Uninstall updates option.
- Select Windows 10’s most recent update, and click the Uninstall option for it.
- Press the Yes button to confirm.
Who to contact for more potential fixes
Microsoft’s support service is the best to contact about Windows 10 issues. You can reach that service by clicking Get support on the Contact Microsoft Support page.
Enter a description in the text box, and click the Get Help button. Then you can press a Contact Support button.
Alternatively, you can ask the Microsoft community instead. To do so, click Ask a question on the Windows forum. Then you can post a question about the issue you need to fix on that forum.
Those are some of the resolutions users have confirmed can fix paired AirPods not connecting with Windows 10 PCs. So, there’s a good chance those fixes will resolve that issue for most users.



User forum
0 messages