Fix: This App Package Is Not Supported for Installation
Installing apps from third-party sources can cause this error
Key notes
- Installing msixbundle, Appx, and AppxBundle packages will give you this error.
- Avoid this message by using Microsoft Powershell and App Installer to install applications.

This app package is not supported for installation by app installer because it uses certain restricted capabilities error will prevent you from installing apps from the Microsoft Store, but you can fix it with these steps.
Why am I getting the App package not supported error?
This can happen if you’re installing apps from third-party sources, or if the Store isn’t supporting the installer. Restricted installed capabilities can also cause this issue, as well as not using the Developer Mode.
How can I fix this app package is not supported for installation by app installer?
1. Enable Developer Mode
- Use the Windows + I shortcut to launch the Settings app.
- Go to Privacy & Security tab from the left sidebar and click the For developers option.

- Toggle On the switch for Developer Mode.

2. Install app packages using Windows PowerShell
- Press Windows + S to open Windows Search, type powershell in the search bar, and click Run as Administrator.

- Press the Yes button on the User Action Control window.
- Type or copy-paste the following command into the PowerShell window (Replace the X:\Path\to\File.Appx string with the actual path of the app package on your system):
Add-AppxPackage -Path X:\Path\to\File.Appx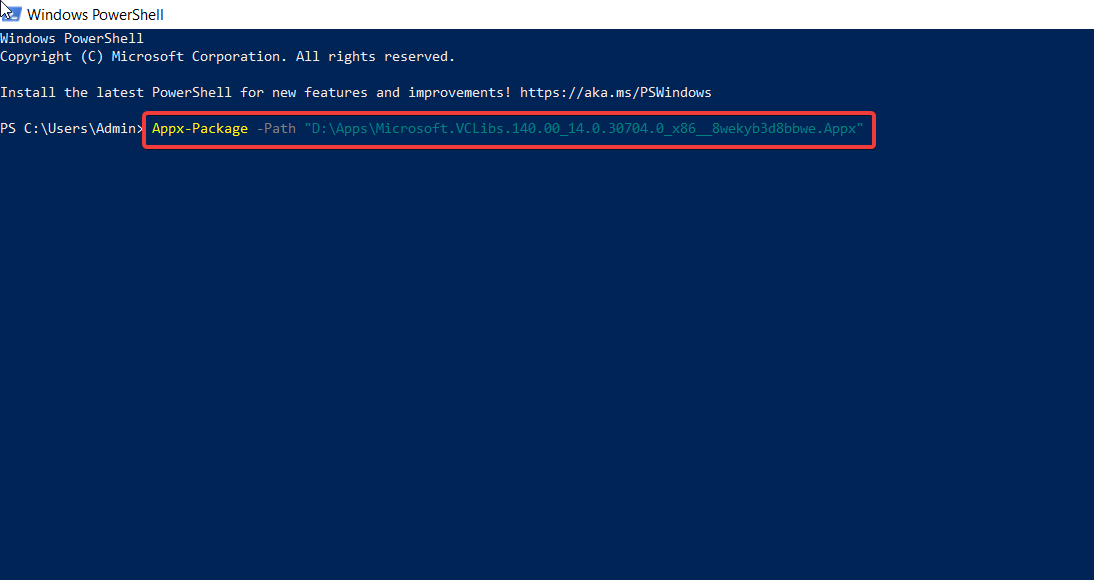
- Press the Enter key to initiate the package installation.
3. Use the App Installer
 NOTE
NOTE
- Launch Microsoft Store from the pinned apps in the Start menu and search for App Installer.

- Press the Install to Download button.
- Launch the File Explorer using Windows + E shortcut, navigate to the location of the .appx or .msixbundle package, and double-click one of them to launch the App Installer.

- Finally, press the Install button located on the button right of the App Installer dialog box.

Wait until the App Installer discovers and downloads the essential dependency packages and the main app package. After the installation is successful, the app will automatically launch on your PC.
These workarounds will help you get past the This app package is not supported for installation by app installer because it uses certain restricted capabilities error.
As you can see, this error appears when you try to install MSIXBundles on Windows, and while doing that, you can also get App you are trying to install is not Microsoft verified error.
While you are here, you may want to know how to fix the This Installation Package Could not be Opened error using some simple methods.
If you have any other questions or solutions for this issue, feel free to use the comments section below.
Read our disclosure page to find out how can you help Windows Report sustain the editorial team. Read more


Improve this guide


User forum
0 messages