How to Use Ashampoo Photo Optimizer App to Improve Your Images
A must-have tool for all photography enthusiast
5 min. read
Updated on
Read our disclosure page to find out how can you help Windows Report sustain the editorial team. Read more
Key notes
- Ashampoo Photo Optimizer 9 has a user-friendly interface and comes with advanced photo editing qualities.
- This guide will cover the best features, and instructions to use this photo editing software.
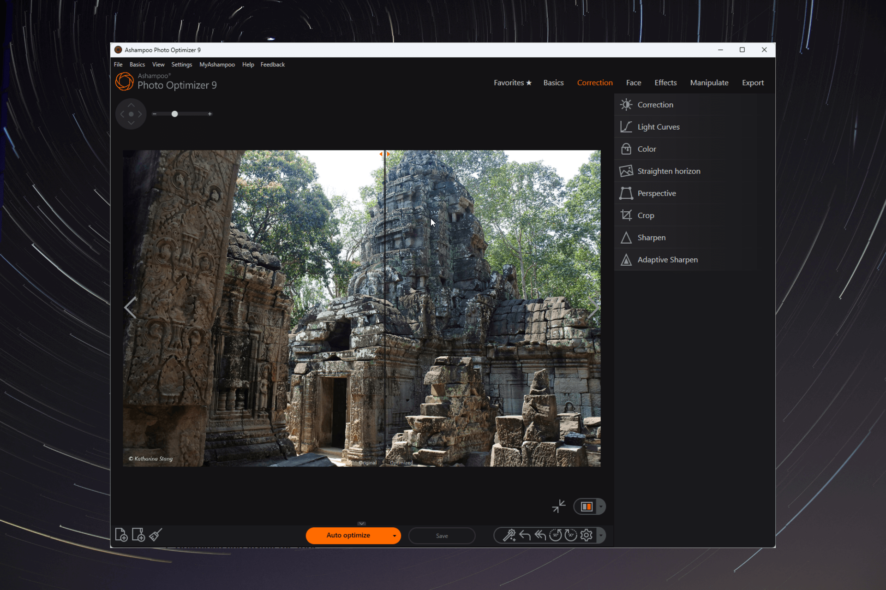
If you are looking to enhance your pictures and make them truly stand out, you need an image optimizer. Its powerful features and an easy-to-use interface can help you achieve stunning results.
Here we are talking about one such tool Ashampoo Photo Optimizer, which can help you unleash your creativity and bring out the best in your images.
What are the benefits of using Ashampoo Photo Optimizer?
Ashampoo Photo Optimizer is a versatile photo editing software that offers a wide range of features to help you bring out the full potential of an image.
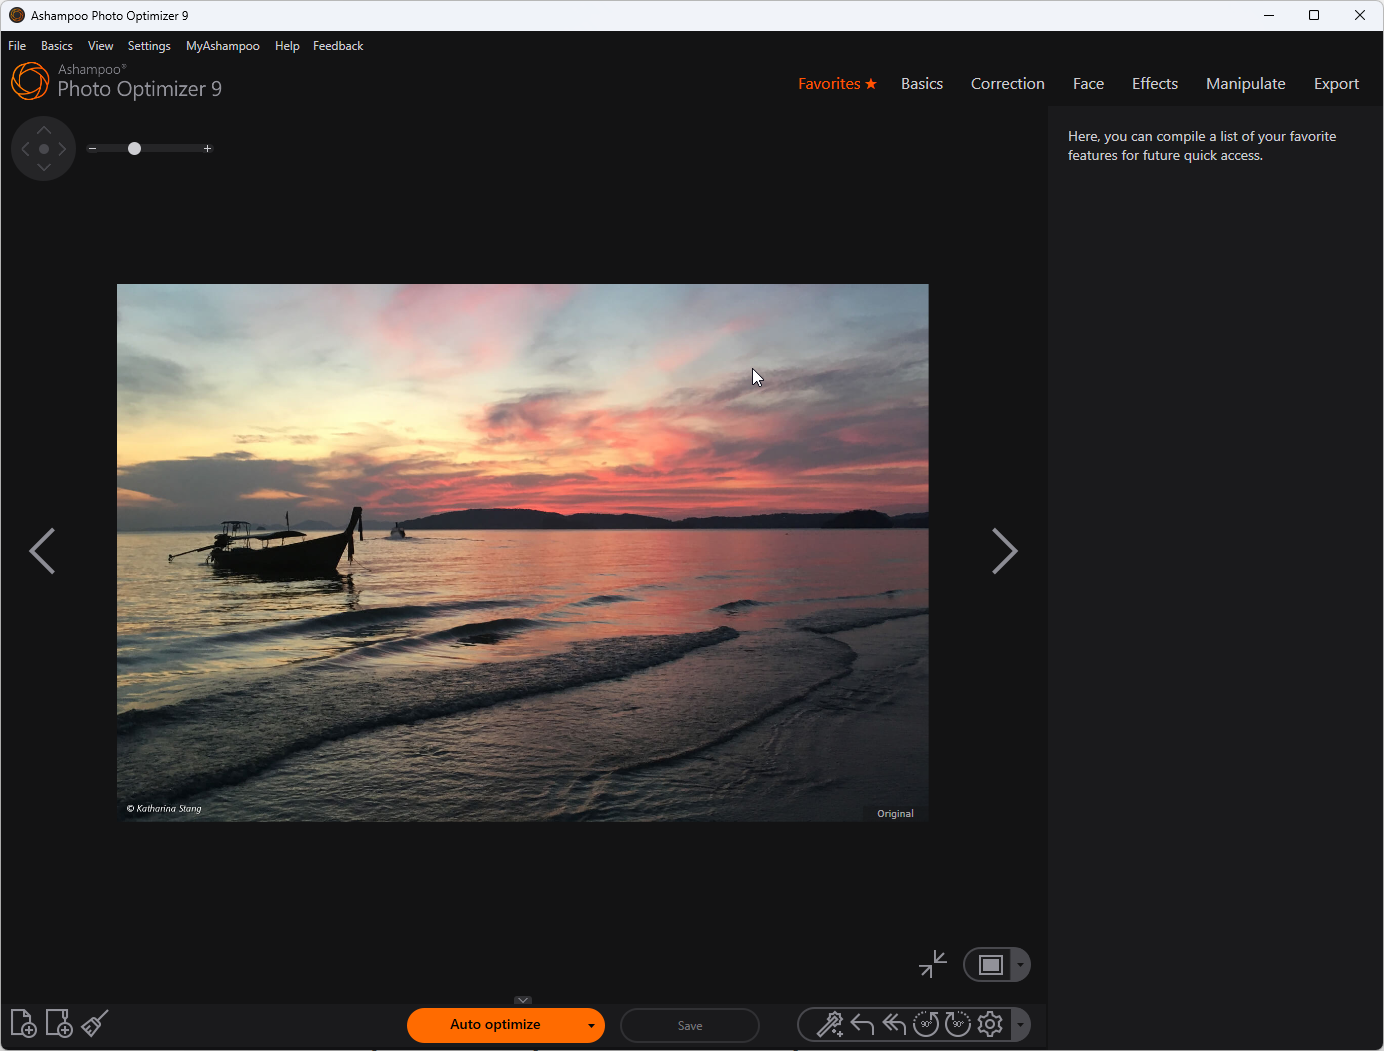
Here’s how this photo editor can enhance your photographs:
- Auto optimization automatically analyzes and enhances your pictures in a single click. This feature is helpful for beginners and a quick way to improve image quality without manual editing.
- Manual photo editing – The software gives you complete control over the editing process. You can adjust brightness, contrast, color saturation, sharpness, & more to fine-tune a photograph to your liking.
- Batch processing – It allows processing multiple images at once by applying the same optimization settings in a few clicks, thereby saving time and effort.
- Advanced editing– The addition of tools to reduce digital noise, fix red eyes in portraits, whiten teeth, and remove stains & other impurities make this program a must-have for photo editing.
Now that you know how it can help you, let us see how it works!
How do I use Ashampoo Photo Optimizer to edit images?
1. Download and install the tool
- Download Ashampoo Photo Optimizer from the official site.
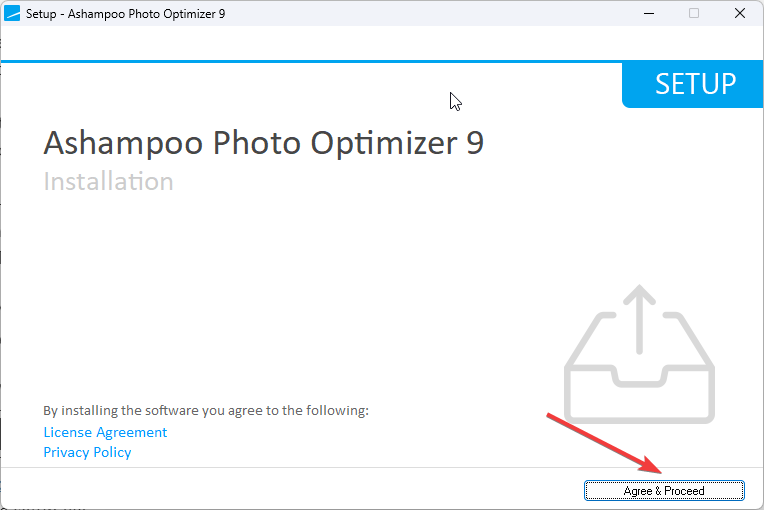
- Double-click the setup file on the Setup wizard, and click Agree & Proceed.
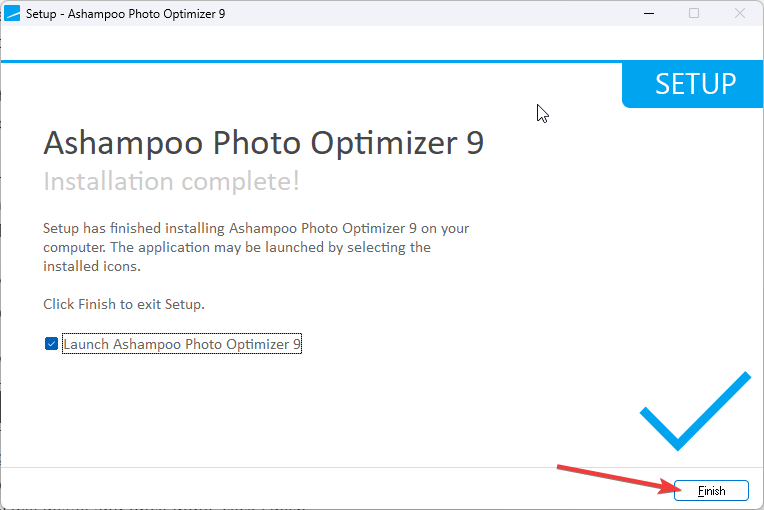
- Click Next. The tool will install, and once done, click Finish.
2. Optimize your images
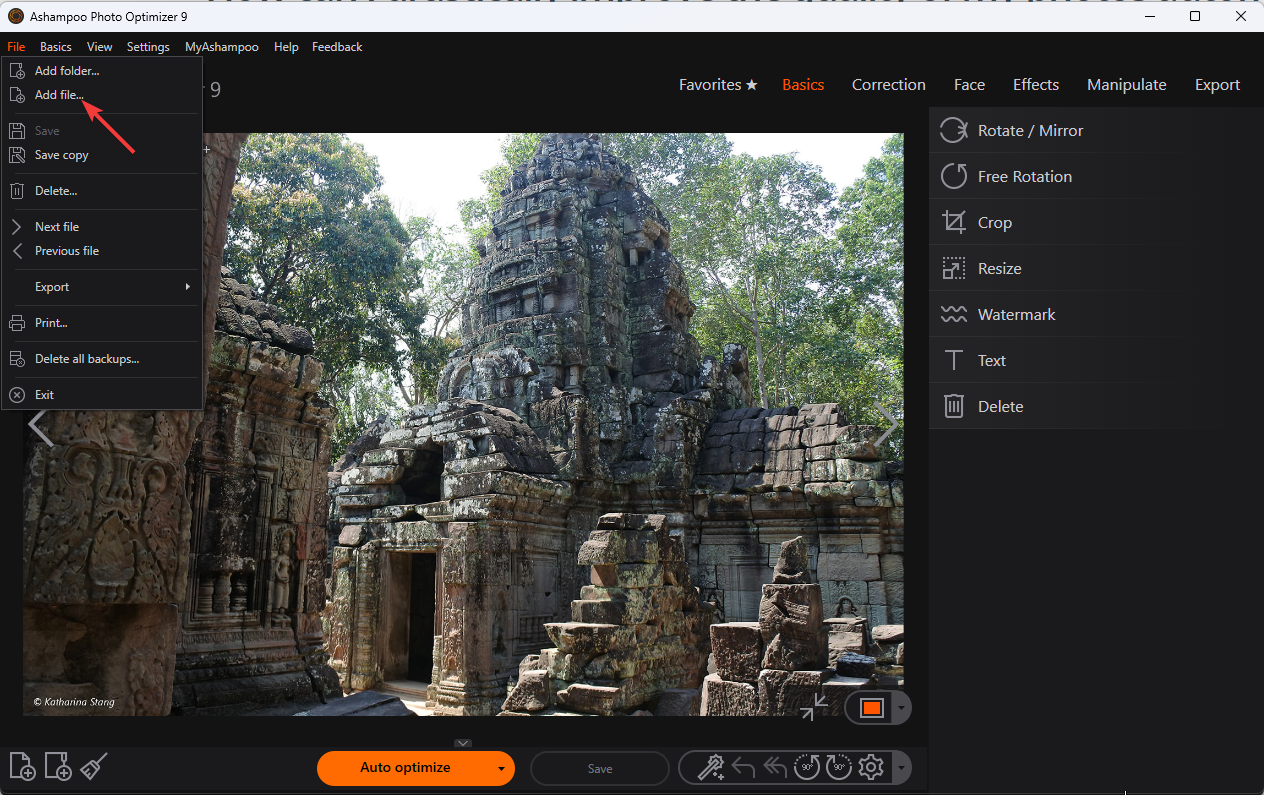
- On the home screen, click File, then select Add file to add a single picture or Add folder button to add a folder.
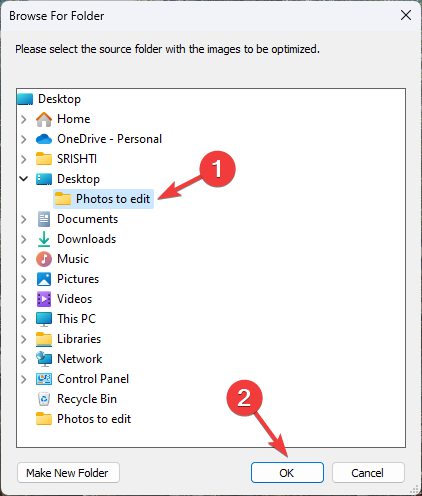
- Now locate the photos with the images and click OK. Repeat the same process if you want to add more folders.
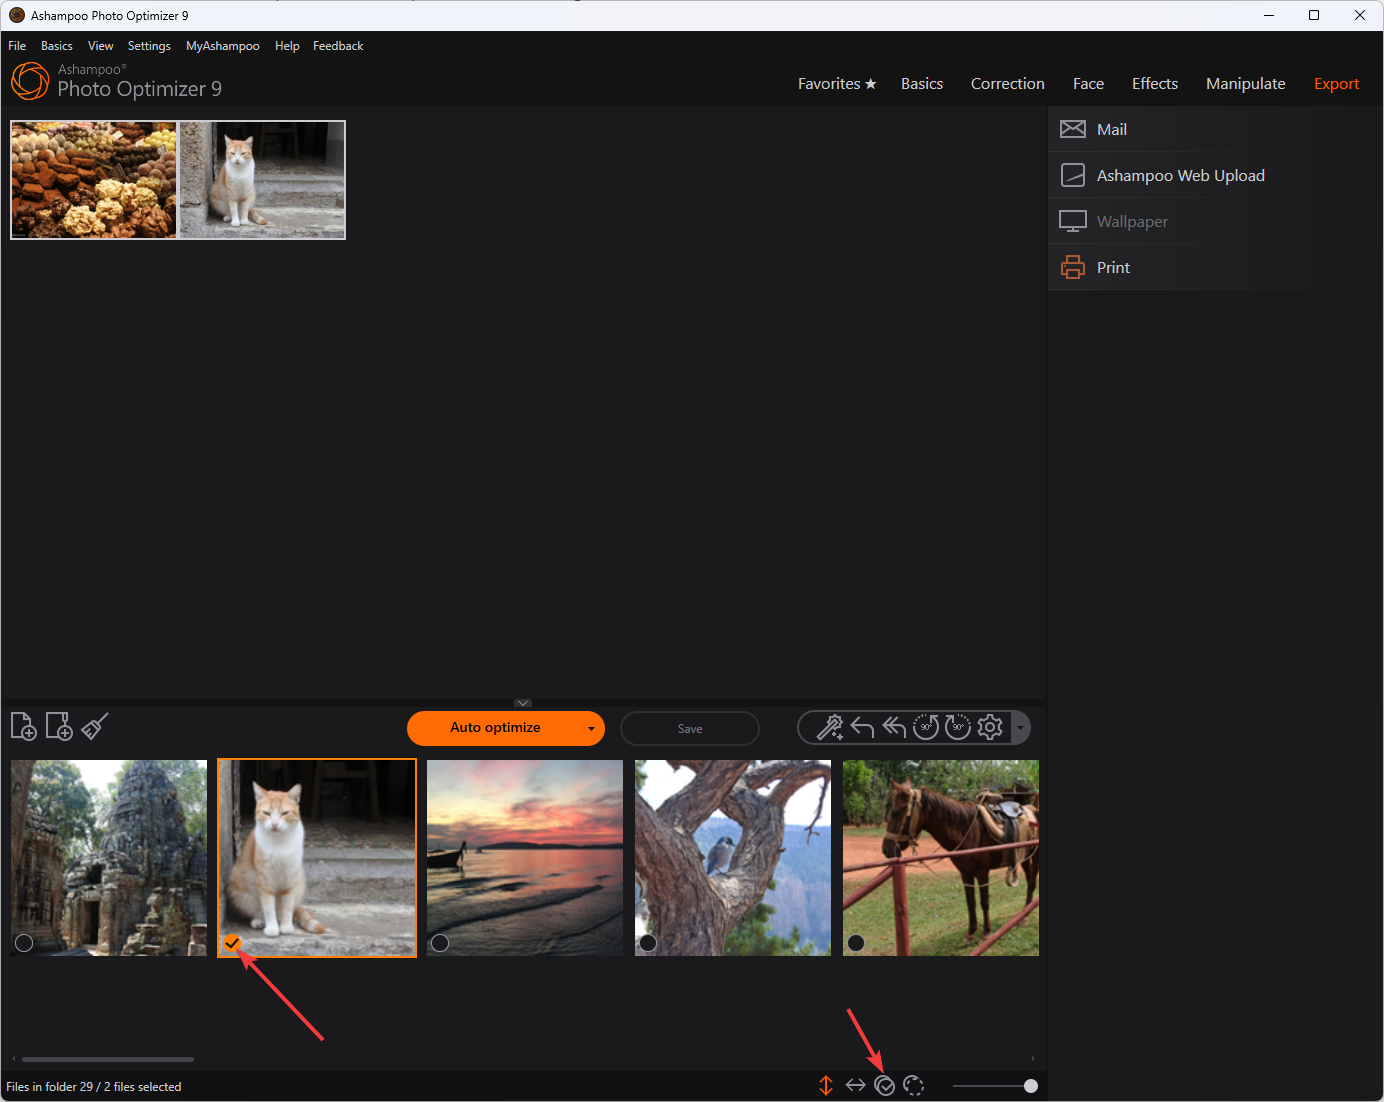
- Click the Double-sided arrow to see all photos. Select an individual picture by clicking on them or all by clicking the Select all button.
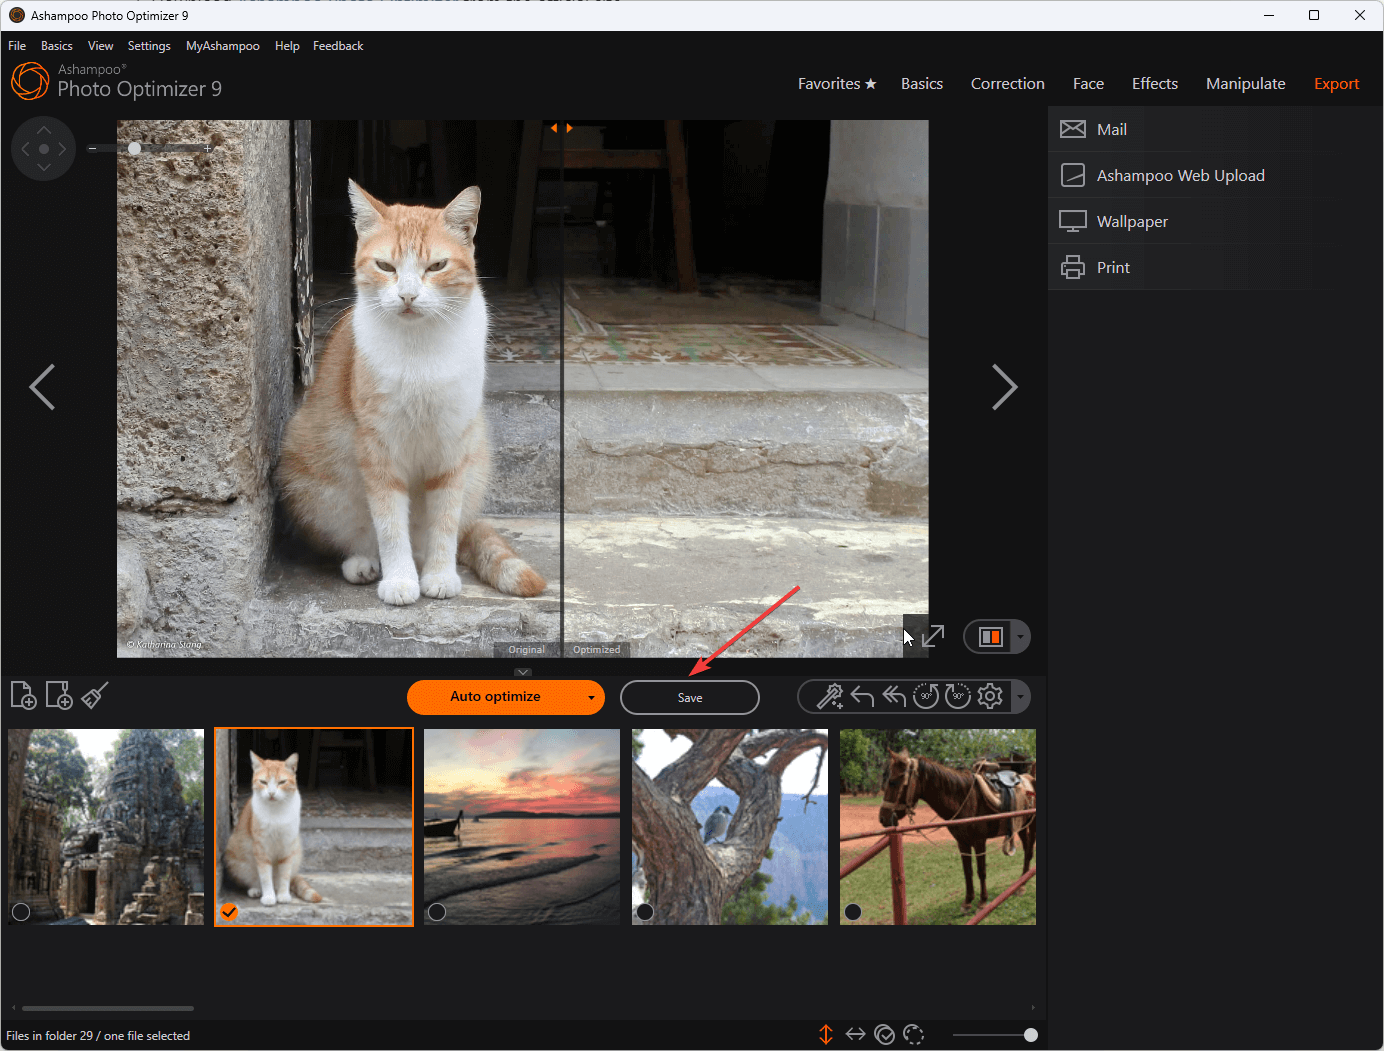
- Click Auto optimize.
- Click Yes to confirm the choice. The optimization process can take a few minutes.
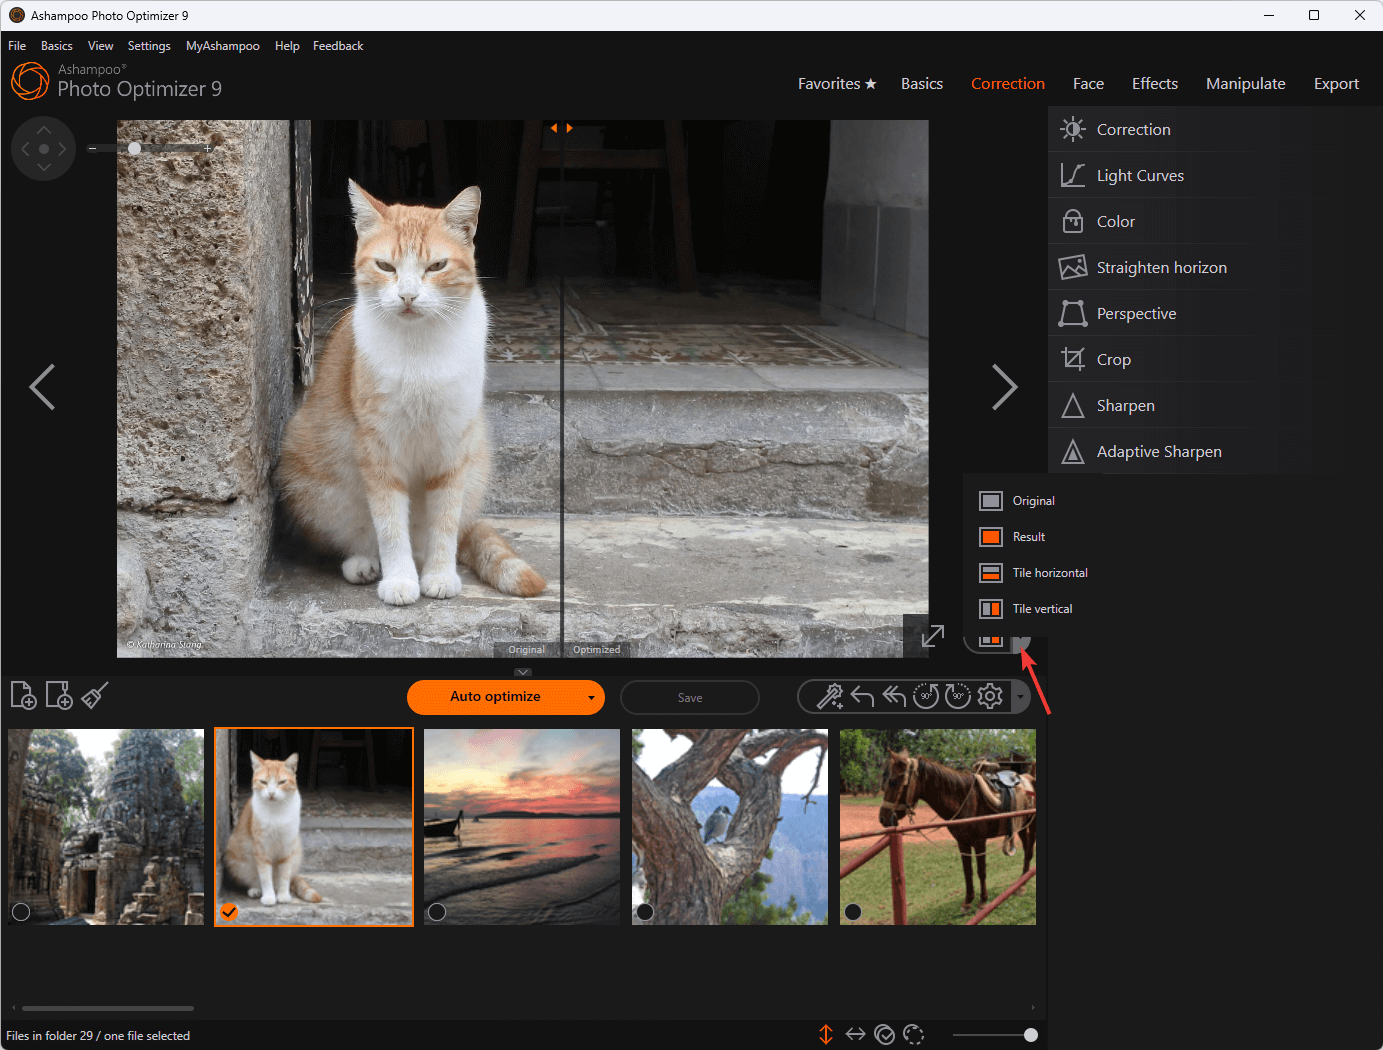
- Once optimized, click on the button on the right side of the image to choose from Original, Result, Tile horizontal, and Tile vertical to view the image.
- Click Save.
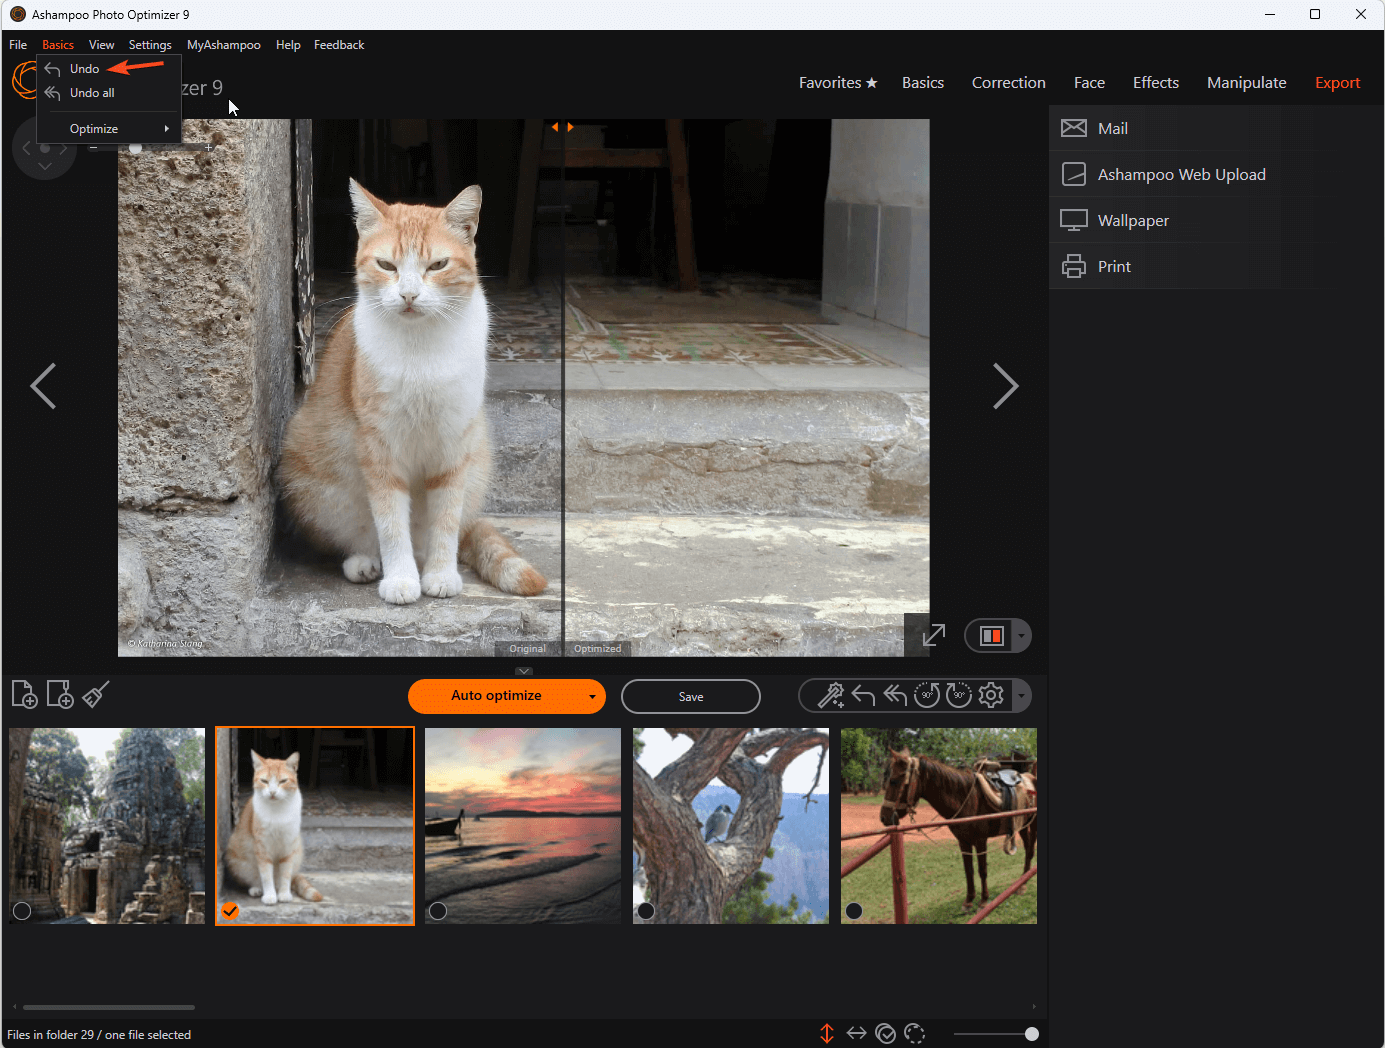
- The photos are saved on your computer in the Ashampoo folder. If you don’t like the changes, go to Basics, then click Undo to revert the changes.
3. Edit the images manually
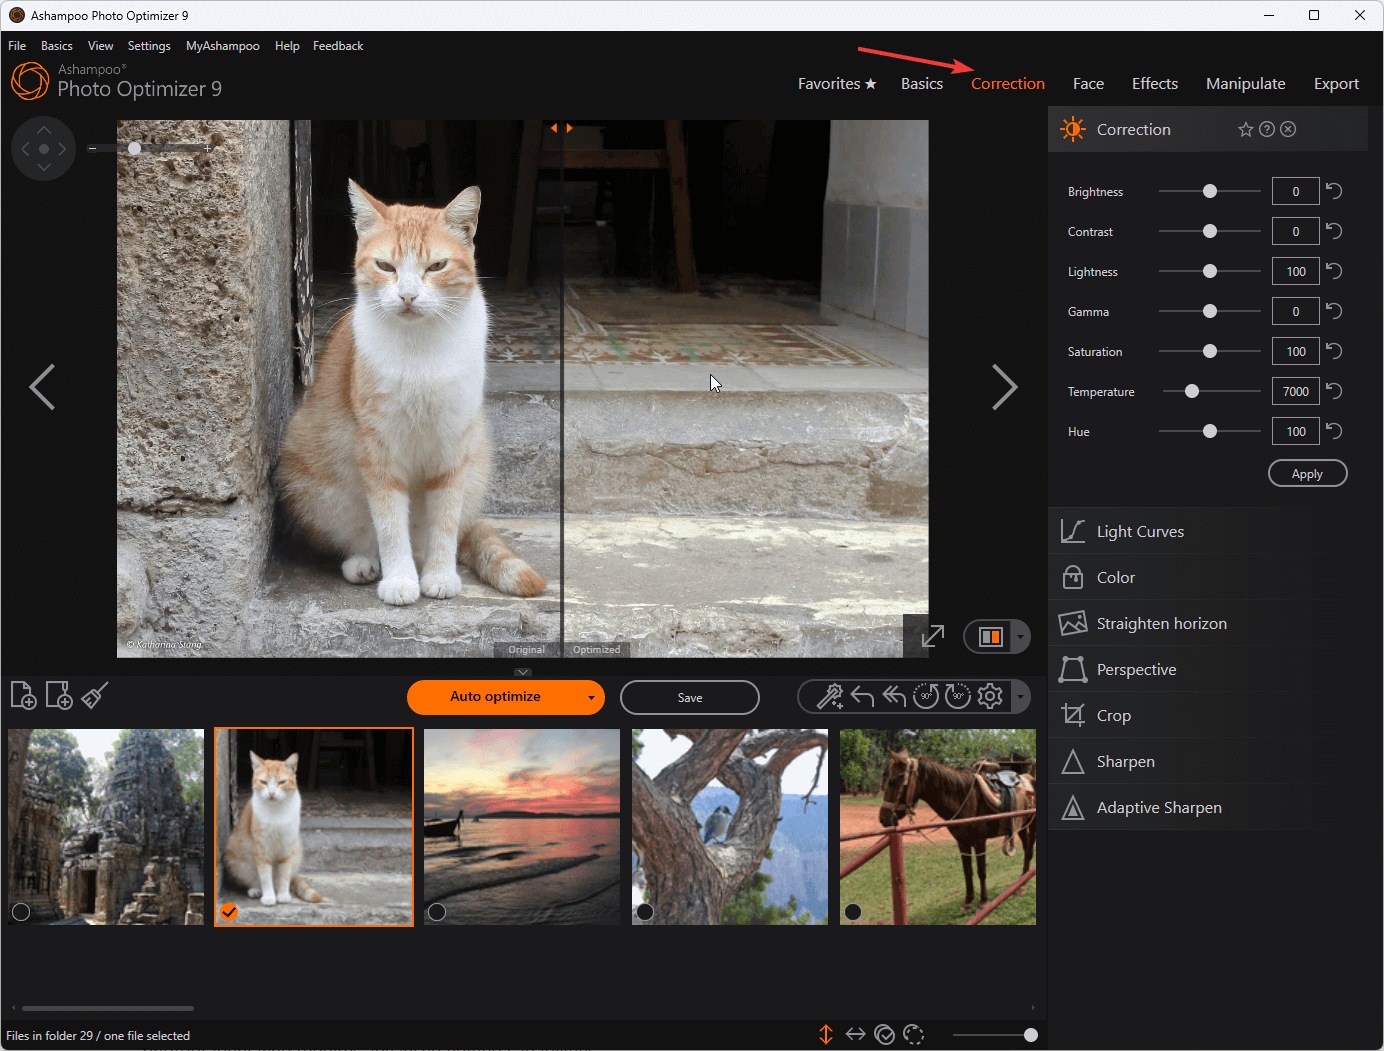
- To edit photos manually, use the options available in the top right corner of the tool. The options are:
- Favorites – Save favorite features for easy access
- Basics – Rotate/Mirror, Free Rotation, Drop, Resize, Watermark, Text & Delete
- Correction – Correction, Light Curves, Color, Straighten horizon, Perspective, Crop, Sharpen, & Adaptive Sharpen
- Face – Remove Red Eyes, Whiten Teeth, & Remove Spots
- Effects – Image Age, Image overlay, Frame, Emboss, Shade, Blue Shift, Oilpaint, Charcoal, Sketch, Posterize, Solarize, Threshold, &Adaptive Threshold
- Manipulate – Clone Area, Blur, Motion Blur, Adaptive Blue, Noise, Median, Spread, Shear, Wave, Swirl, Implode/Explode
- Export – Mail, Ashampoo Web Upload, Wallpaper & Print.
- Once you have made the changes, click Yes on the Save changes window to confirm the changes.
This is how you can manually edit the photos.
Right now, Ashampoo has an incredible limited offer for Photo Optimizer: you can get the tool for $25 instead of $40. Hit the link below to benefit from this opportunity!

Ashampoo Photo Optimizer
Transforms your photos from ordinary to extraordinary in a few simple steps.What are the best features of Ashampoo Photo Optimizer?
Ashampoo Photo Optimizer is a comprehensive editing tool that offers advanced functionalities to create breathtaking images. Some of the key features of the software are:
- Perspective correction – This image optimization tool comes with a perspective correction tool that can fix distorted lines and help you achieve a visually pleasing composition.
- RAW image support – It supports RAW image files, which is a useful feature for a professional photographer who requires advanced editing capabilities.
- Backup and restore – The software allows you to create backups of your original photos before making edits, ensuring you can always revert to the original version.
- Preview option – You can compare the original image to the optimized one in real time to observe the differences, and it helps you make informed decisions during the editing process.
- Easy sharing – You can upload the optimized images on social media platforms, send them via email, set them as wallpaper, and more.
Ashampoo Photo Optimizer is the go-to choice for transforming photos into stunning masterpieces. While using the tool, we observed that it was light on system resources, efficient, & responsive, and we were able to optimize the images without any problems.
Have you tried Ashampoo Photo Optimizer? If so, tell us all about your experience in the comments section below.




User forum
0 messages