How to Backup Windows Server & Restore Data
Learn to use the Backup feature on your Windows Server
4 min. read
Updated on
Read our disclosure page to find out how can you help Windows Report sustain the editorial team. Read more
Key notes
- More and more Windows users are interested in having a backup for their Windows Server.
- You can find here the right steps to create a backup for your Windows Server.
- If you have a version of Windows Server 2016, you can decide on your preferred backup plan.
- Even the early versions of Servers are not forgotten, and you can find the right information below.

If you want to back up your Windows Server machine, you found the perfect step-by-step guide to successfully do so.
This guide will be useful to you no matter what Windows Server version you are using, be it 2008, 2012, 2016 or 2019.
Do I need to backup my Windows Server?
Having a backup for your Windows server is extremely important. Doing this allows you to protect the entire set of data stored on your server without worrying about losing it.
Data loss can be extremely difficult to deal with if you don’t have a backup and can occur due to an error, power shortage, or even a third-party attack.
In some other cases, your data can become corrupted, and having a restore point can save you days of work.
In this how-to article, we will discuss the best way to go about backing up your data, and it will be presented to you in a step-by-step fashion. Read on to find out more.
How can I create a Windows Server backup?
1. Windows Server 2019
- Installation:
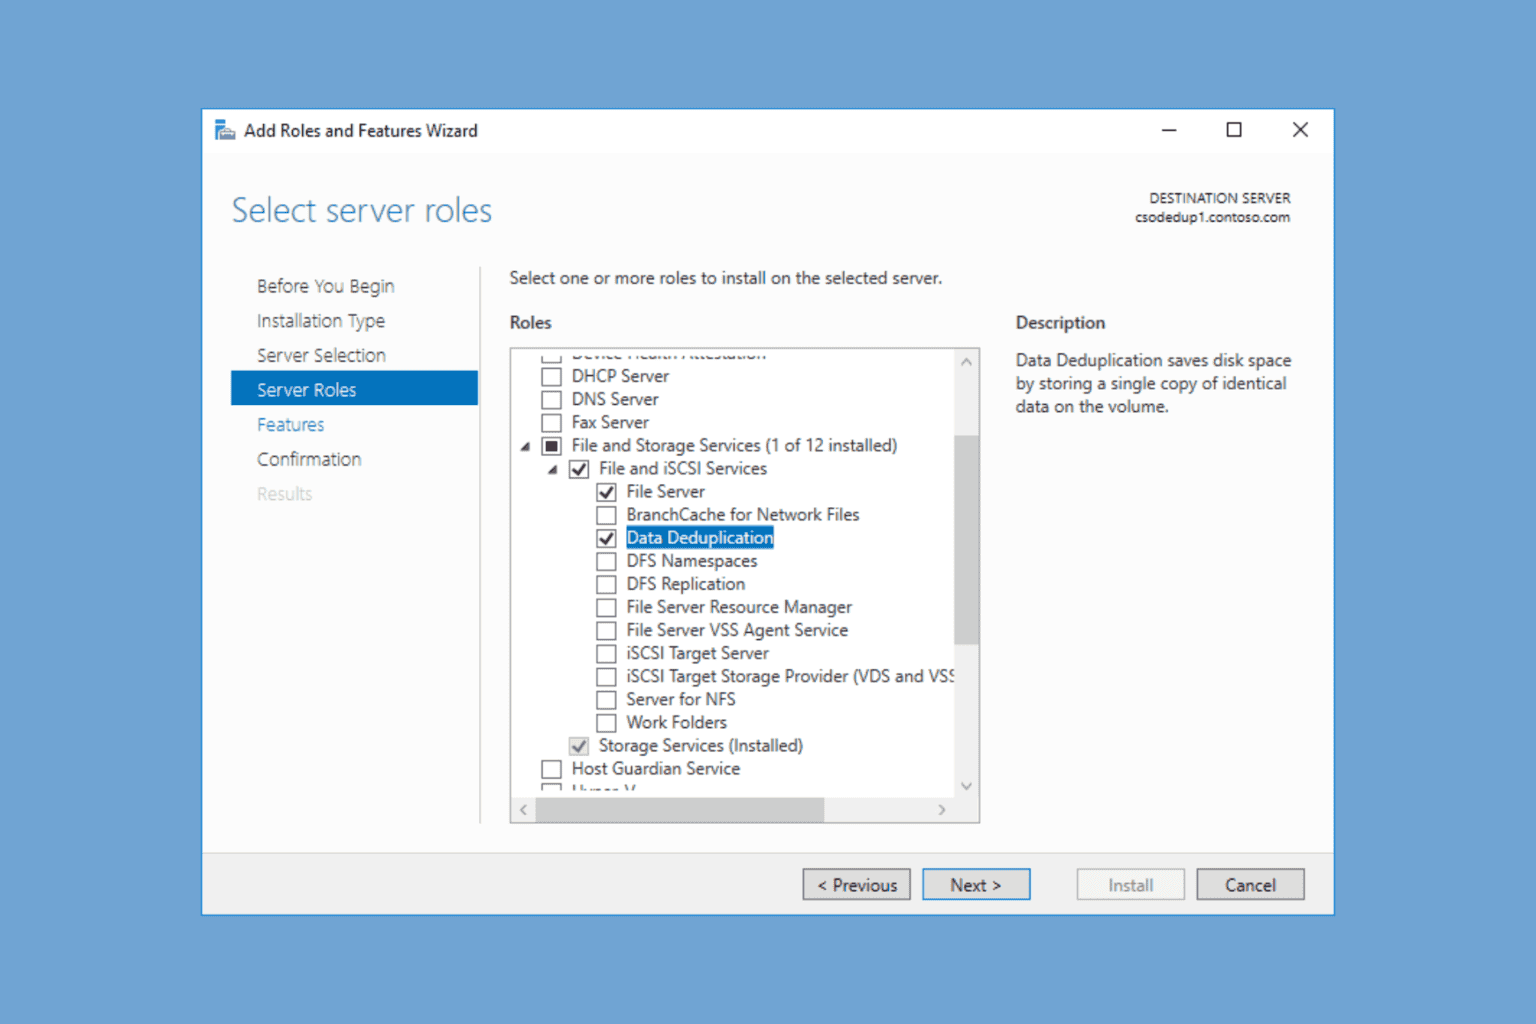
- Open Server Manager, and select Add roles and features.
- In the Before you begin window, click Next.
- Choose the Role-based or feature-based installation, and click Next.
- Under Select destination server, choose your server, and click Next.
- In the Select server roles window, hit Next.
- Under Select features, choose Windows Server Backup and press Next.
- In the Confirm installation sections window, click on Install, and finally Close.
- How to use:
1. Open Server Manager.
2. Launch the Backup utility.
3. Go to the Action tab.
4. Click on Backup Once.
5. Follow the on-screen instructions to complete the process.
Creating a Windows Server 2019 backup is simple and can be done in a few clicks via the built-in Server Manager tool on your device.
2. Windows Server 2016
- Installation:
- Open Server Manager, and click Add roles and features.
- Click the Next button after reading the Before you begin page.
- Choose the Role-based or feature-based installation option.
- Select the server you want to back up, and click Next.
- Choose the server roles from the list by ticking the boxes.
- Inside the Features list, select Windows Server Backup by ticking the box.
- Click Install to start the installation process.
- How to use:
Once the Windows Server Backup feature installation is finished, you can already create a backup plan. First, you need to decide on your favorite plan, and just follow the on-screen steps.
3. Windows Server 2012
- Installation:
- Open your Server Manager.
- From the menu on the right of your screen, click Manage, and select Add roles and functionalities.
- Choose the Install based on a role of functionality option, and click Next.
- Select which server you want your backup function to be installed to, and click Next.
- Select Windows Server Backup from the list, and select Next.
- Check the box next to Automatically restart the destination server if necessary, click Yes, and choose Install.
- How to use:
After the installation process has been completed, you can open the Server Manager, and launch the backup utility. This tool will allow you to create backups, manage, and restore files as you desire.
4. Windows Server 2008
- Installation:
- Open Server Manager.
- Choose the Features option from the left menu.
- Click Add features, to open the Select Features page.
- Expand the Windows Server Backup Features option.
- Click the box next to Windows Server Backup.
- Select Install to start the installation process.
- How to use:
- Open Server Manager.
- Launch the Backup utility.
- Click Create new backup, and follow the on-screen instructions to complete the process.
Also, if your Windows Server is not booting up, you should take a closer look at our comprehensive guide and follow the recommended steps to fix it.
We hope this guide has been useful for your situation, and that you can now successfully create backups for your servers.
Please feel free to let us know if this helped you, or if you have any suggestions. You can do that by using the comment section below.

User forum
0 messages