Black Theme in Office 2016: How to Enable it
Enable dark theme in Office 2016 by modifying few settings
Key notes
- Some users prefer to use black theme in Office 2016, since it's easier on their eyes.
- Enabling this feature requires you to change a couple of settings in your app.
Many users prefer to use dark themes on their software, and many are wondering how to enable Office 2016 black theme on their PC.
This is fairly simple to do, and it requires you to change a couple of settings. Speaking of which, Windows 10 dark theme can be easily enabled, so you might want to try that as well.
Without further ado, let’s see how we can enable the dark theme in your Office software.
How can I turn on black theme in Office 2016?
1. Change application options
- Launch the Office program you want to enable the black theme for.
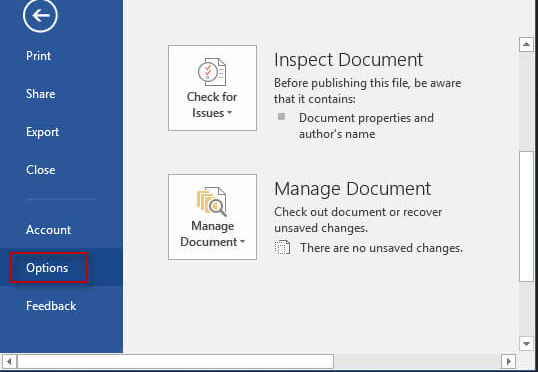
- Go to the File and select Options.
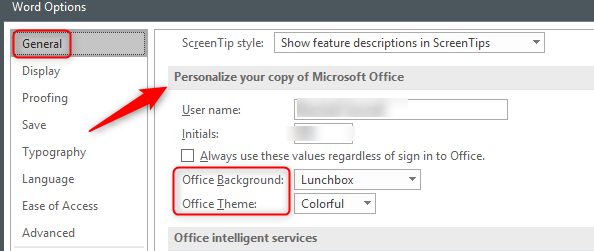
- Go to Personalize your copy of Microsoft Office section.
- Select Black in the drop-down menu and click on OK.
2. Change Office Theme setting
- Launch any Office program.
- Go to the File menu, and select Account.
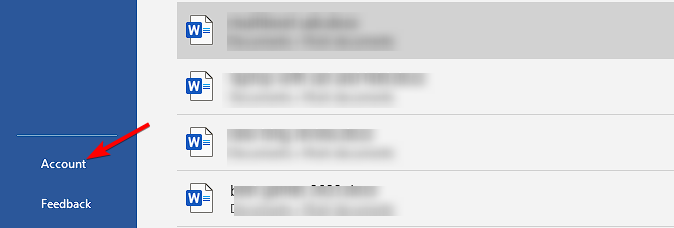
- Go to Office Theme and select Black in the drop-down menu
- The Black theme is now enabled for all your Office programs.
The three other themes, Colorful, Dark Grey and White are still available in Office 2016, and you can enable them at any time.
As you can see, enabling the dark theme is pretty simple in Office 2016. Now that you know how to do it, perhaps you would be interested in a guide that shows you how to remove recommended documents in Office?
Have you already tried out the dark theme in Windows 10? Tell us more about your experience in the comment section below.
Read our disclosure page to find out how can you help Windows Report sustain the editorial team. Read more


Improve this guide


User forum
0 messages