Can't Delete MountUUP Folder? Here's How to Force Erase It
Use DISM commands or Advanced Startup options to remove it
Key notes
- The MountUUP folder is created on your computer after you download and mount an Insider Preview Build of Windows.
- This guide will cover all the available methods to delete this protected folder and free disk space.

MountUUP folder typically takes 10-15 GB of storage space on your drive. It could take more space on your machine if there is a download glitch.
If the folder takes more space than it should, it is safe to delete it and retrieve space. However, if you can’t delete the MountUUP folder, we can help!
We will discuss the safest and simplest ways to delete the folder in no time. Let’s get started!
What should I do if I can’t delete the MountUUP Folder?
1. Use the Command Prompt to force delete
- Press Windows + I to open Settings.
- Go to System, then click Recovery.

- Locate Advanced startup and click Restart now.

- Windows will restart to show you Advanced startup options. On the Choose an option screen, select Troubleshoot.

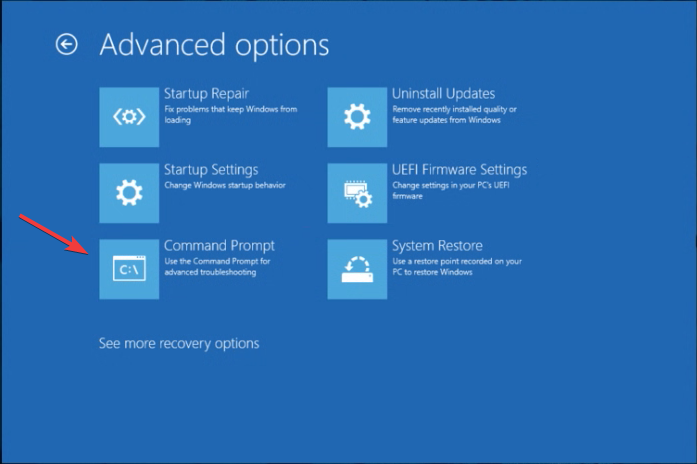
- Next select Advanced options on the Troubleshoot screen.

- On the next screen, click Command Prompt.
- Type the following commands individually to locate the MountUUP folder, and press Enter after every command. The drive letters you see here are different from the ones you see in Windows Explorer:
dir C:dir D:dir E: - After locating the drive that contains the folder, copy and paste the following command to forcefully delete the folder and press Enter:
rd mountuup /s /q - Wait till the commands execute, then close the Command Prompt and restart your computer.
2. Take Ownership of the folder
- Locate the MountUUP folder, select, and right-click it. Choose Properties from the context menu.

- On the Properties window, go to the Security tab and click the Advanced button.

- Now on the next screen, click Change and click Yes on the UAC prompt.

- On the Select User or Group window, select Advanced.

- Click the Find Now window.
- From the Search results field, double-click Administrators and click OK.

- Now click OK on Select User or Group window to confirm the changes.

- On Advanced Security Settings for the MountUUP folder, place a checkmark next to Replace owner or subcontainers and objects.

- Click Apply and then click OK when prompted.
- Again on the MountUUP Properties window, go to the Security tab, and select Advanced.
- On the Advanced Security Settings window, verify if the Administrator has Full control.

- Once checked, close the window and reboot your computer to save the changes.
3. Run the DISM command to dismount the existing Windows image
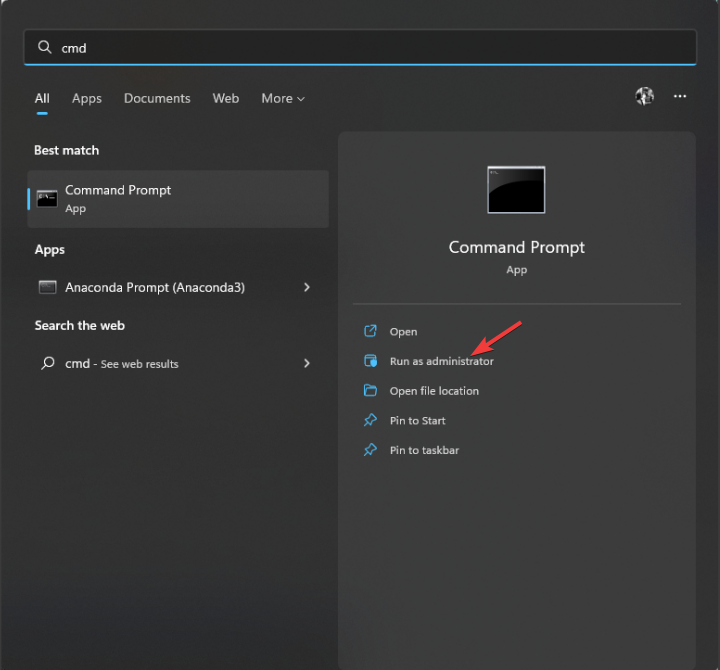
- Press the Windows key, type CMD, and click Run as Administrator.
- Type the following command to locate the mounted image and press Enter:
dism /get-mountedwiminfo - Copy and paste the following command with the drive letter of the mounted image and press Enter:
dism /unmount-image /mountdir: "c:\mountuup" /discard - Once the command is executed, close the Command Prompt window. Now the directory c:\mountuup is empty; you can remove the folder.
4. Delete the folder in Safe mode /clean boot environment
4.1 Run computer in safe mode
- Press Windows + I to open Settings.
- Go to System, then click Recovery.
- Now locate Advanced startup, and click Restart now.
- Select Troubleshoot on the next screen.
- Next, on the Troubleshoot screen, select Advanced options.
- Now on the Advanced options screen, select Startup Settings.

- Select Safe mode with networking from the list or press F5 to select it.

- Windows will now restart in safe mode. You can now locate and delete the folder.
4.2 Run the computer in a clean boot environment
- Press Windows + R to open the Run dialog box.

- Type msconfig and click OK to open the System Configuration.
- Go to the Services tab, place a checkmark next to Hide all Microsoft services, and click Disable all.

- Switch to the Startup tab, and click Open Task Manager.

- On Task Manager, locate all the Enabled items, right-click them one by one and select Disable. Close Task Manager.

- Return to the System Configuration window, and click Apply, then OK.

- Click Restart to complete the process.

5. Unmount the .WIM or .VHD files
- Press the Windows key, type CMD, and click Run as administrator.
- Type the following command to unmount the .VHD and .WIM files and press Enter:
dism /cleanup-wim
- Once the command is executed, locate the MountUUP folder and delete it.
6. Remove the MountUUP folder from the Protected Folders list
- Press the Windows key, type Windows Security, and click Open.

- Click Virus & threat protection from the left pane.
- Navigate to Ransomware protection and click Manage ransomware protection.

- On the Ransomware protection page, click Protection folders.

- Locate and click the MountUUP folder, and select Remove.

- On the Remove protection from folder dialog box, click OK to confirm your choice.

So, these are the methods you need to follow to fix the cant delete the MountUUP folder on Windows 10. If you have questions about the issue, please mention them in the comments below.
Read our disclosure page to find out how can you help Windows Report sustain the editorial team. Read more


Improve this guide


User forum
0 messages