Fix: Can't Open AsIO3.sys On Windows
First, uninstall the unwanted apps
5 min. read
Updated on
Read our disclosure page to find out how can you help Windows Report sustain the editorial team Read more
Key notes
- To fix the can’t open AsIO3.sys on your PC, run SFC & DISM scans, set AsusCertService to Automatic, update drivers, or take full access to the AsIO3.sys file.
- Keep reading to learn the detailed steps.

If you are stuck with Can’t open AsIO3.sys failed with error code 5: Access is denied on your computer when trying to install or uninstall software related to ASUS; this guide can help!
What causes the can’t open AsIO3.sys issue? It could occur due to malware infection, corrupt hard drives, outdated device drivers, bad Windows security updates or registry issues on your PC.
How can I fix the Can’t open AsIO3.sys issue?
Before proceeding with any steps to get rid of the pop-up, go through the following preliminary checks:
- Reboot your computer, ensure your Windows is updated to the latest version, and then run a deep scan using an antimalware tool.
- Uninstall any unwanted apps on your computer.
1 Change the startup type for AsusCertService
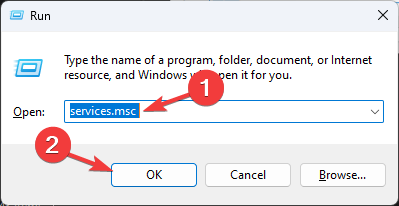
- Press Windows + R to open the Run dialog box.
- Type services.msc and click OK to open the Services app.
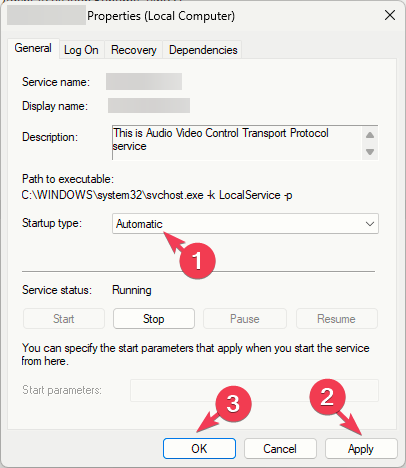
- Locate AsusCertService, right-click the services and choose Properties.
- Go to Startup type, then select Automatic from the drop-down menu.
- Click Apply and OK to save the changes.
2. Run SFC & DISM scans
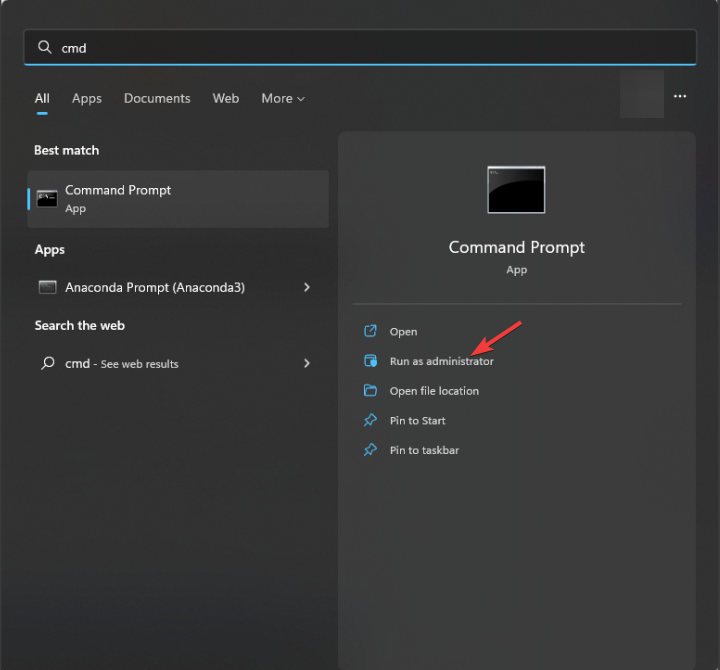
- Press the Windows key, type cmd in the search box and click Run as administrator.
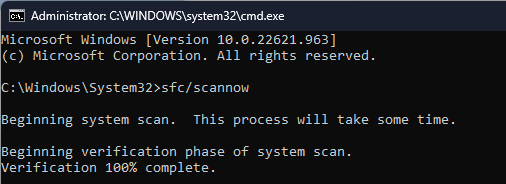
- Type the following command to repair system files and press Enter:
sfc/scannow - Copy & paste the following to restore Windows system image files and hit Enter:
DISM /Online /Cleanup-Image /RestoreHealth - Reboot your PC to save the changes.
Repairing system files can help you fix the Afd.sys, a blue screen error, which is usually caused by a corrupted Ancillary Function driver. You can also use automatic repair tools to prevent other issues from occurring.
3. Clear the registry entries
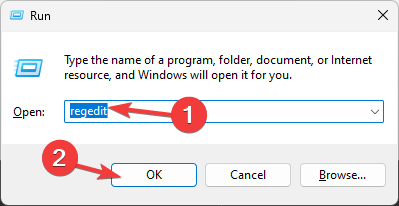
- Press Windows + R to open the Run window.
- Type regedit and click OK to open the Registry Editor.
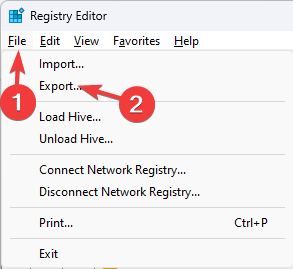
- First, take a backup of registry files. To do that, go to File, then select Export. Save the .reg file in an accessible location.
- Navigate to this path:
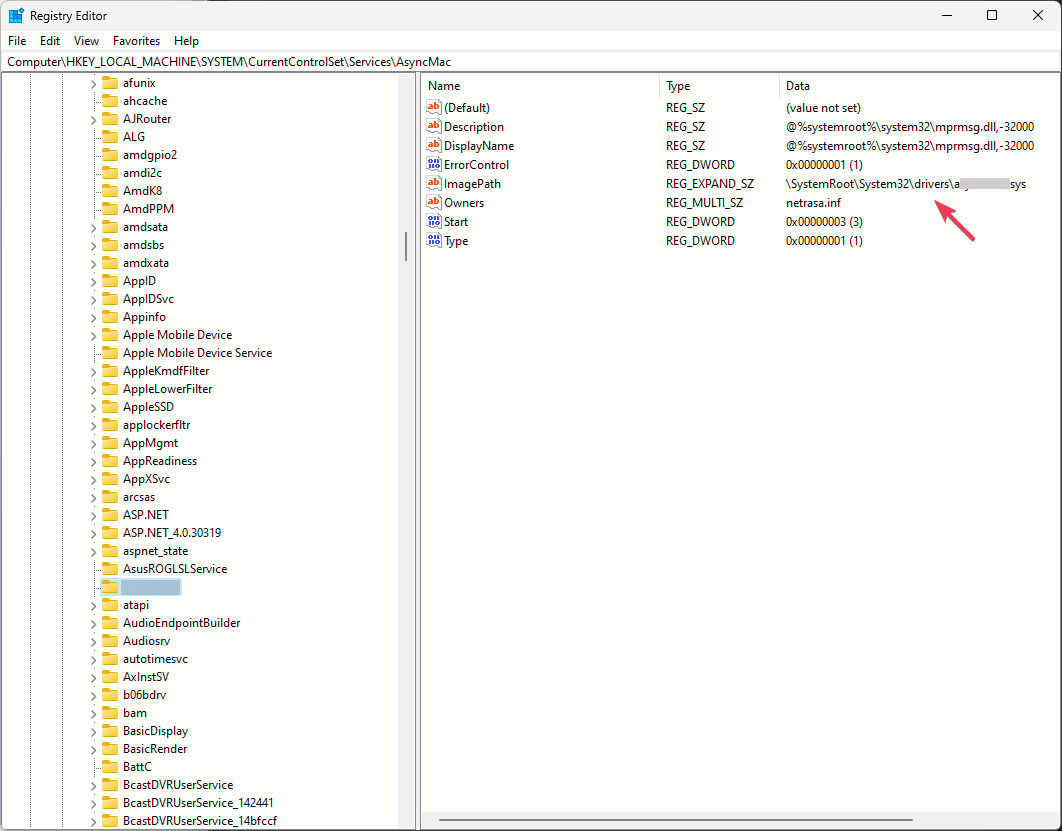
Computer\HKEY_LOCAL_MACHINE\SYSTEM\CurrentControlSet\Services\ - Look for folders like Asusgio2 and Asusgio3 in the left side pane.
- Select Asusgio2, on the right side of the window, locate [ImagePath] and note down the path mentioned next to it.
- Once you have noted the path, right-click Asusgio2 and Asusgio3, one by one and select Delete.
- Now go to the path you noted, locate the AsIO2.sys and AsIO3.sys files, select them and click the Delete icon from the menu.
- Restart your computer to let the changes take effect.
4. Reinstall the Armoury Crate software
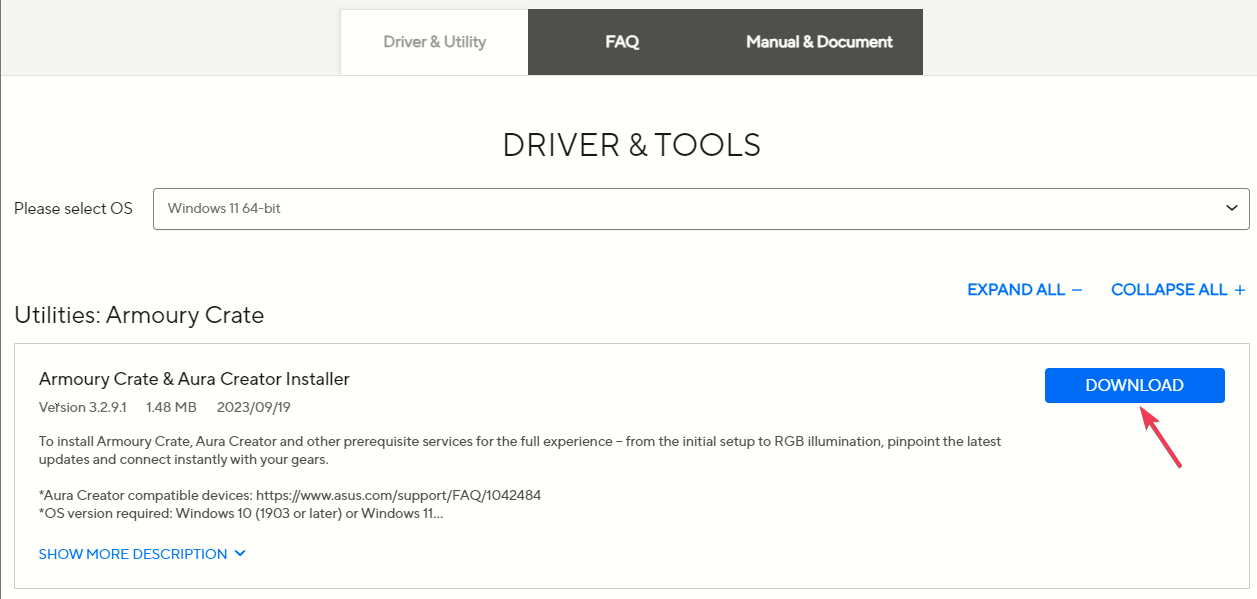
- Visit the Armoury Crate support website.
- Click Download.
- Press Windows + E to open the File Explorer window.
- Locate the downloaded folder, locate the Armoury Crate Uninstall Tool.exe file, double-click, and select Run.
- The uninstallation process will start, and once done, reboot your computer.
- Once the system restarts, rerun the installer file to reinstall the app.
Uninstalling Armoury Crate can help you fix other issues like portcls.sys; read this guide to learn more about it.
5. Update the Universal ASIO drivers
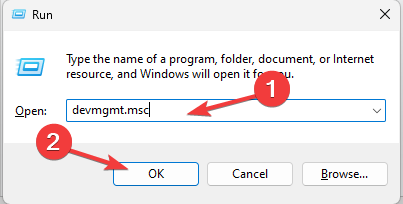
- Press Windows + R to open the Run window.
- Type devmgmt.msc and click OK to open the Device Manager app.
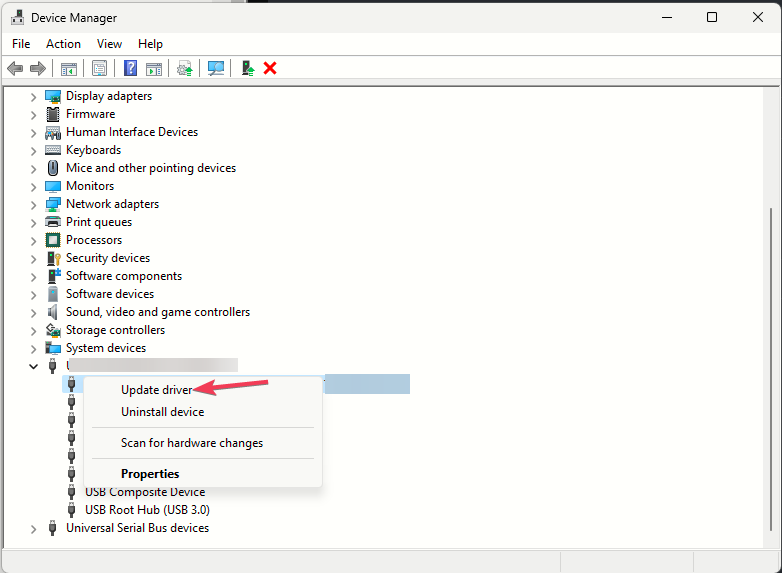
- Expand Universal ASIO Driver, right-click on Universal ASIO Driver and select Update driver.
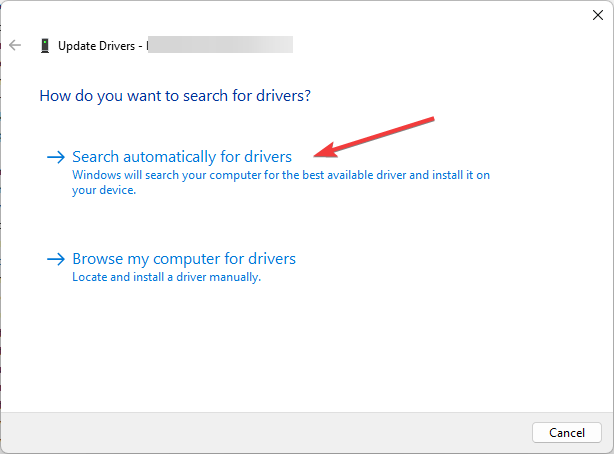
- Click Search automatically for drivers.
- Follow the on-screen instructions to complete the process.
You can also carefully check other categories on the Device Manager app for a yellow triangle with an exclamation point and update the drivers using the steps mentioned.
6. Grant full permission for AsIO.sys
- Ensure you are logged in with an administrator account, then press Windows + E to open the File Explorer window.
- Go to this path:
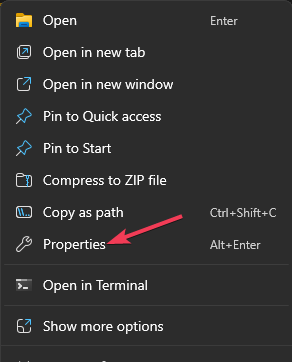
C:\Windows\SysWOW64\drivers\AsIO.sys - Right-click AsIO.sys and select Properties.
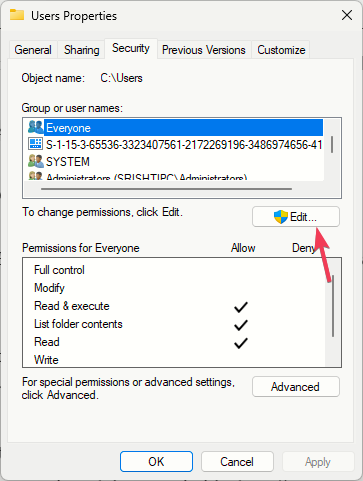
- Go to the Security tab and click the Edit button.
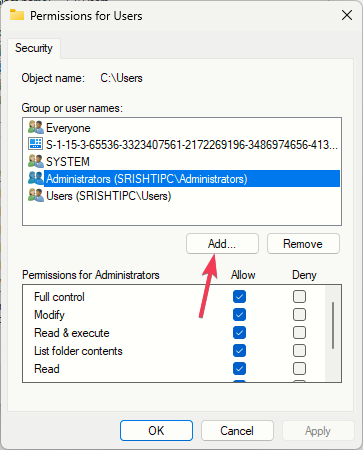
- Choose the username and click Add.
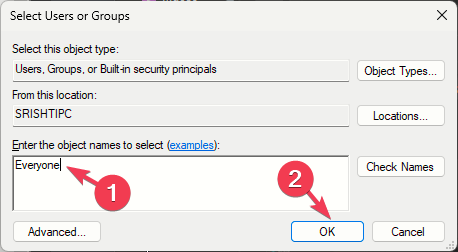
- In the Select Users or Groups window, type Everyone in the box next to Enter the object names to select (examples), and click OK.
- Click Apply.
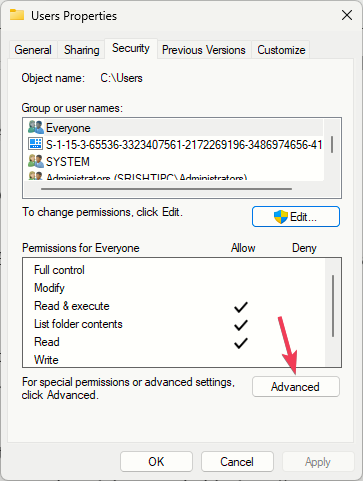
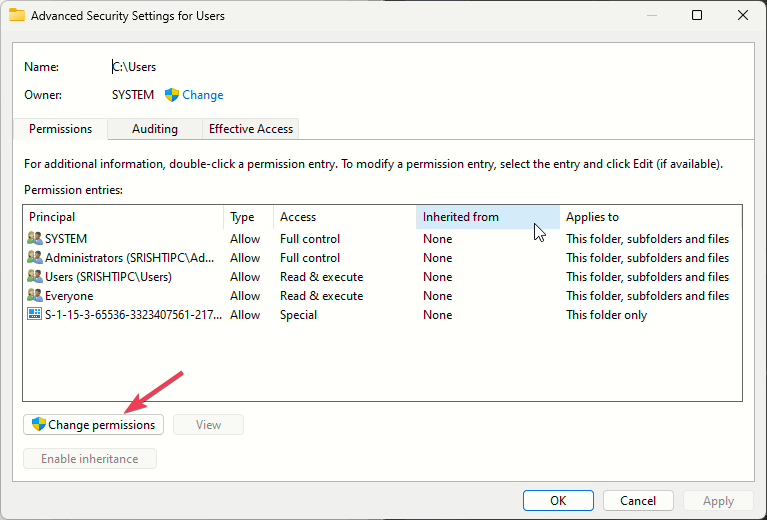
- Go to the Folder’s Properties window again, go to the Security tab, and click the Advanced button.
- Select Permissions, and click the Change Permissions button.
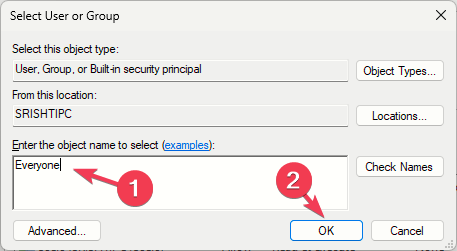
- Click Change.
- In the Enter the object name to select field, type Everyone and click OK.
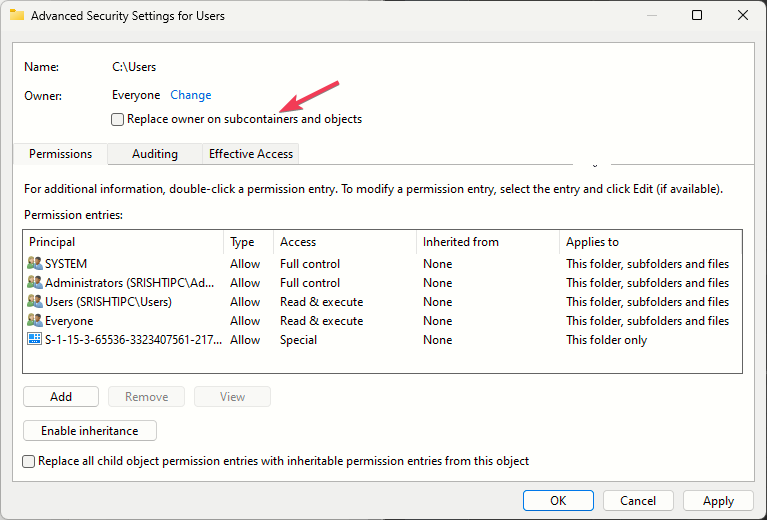
- Place a checkmark next to the Replace owner on subcontainers and objects option.
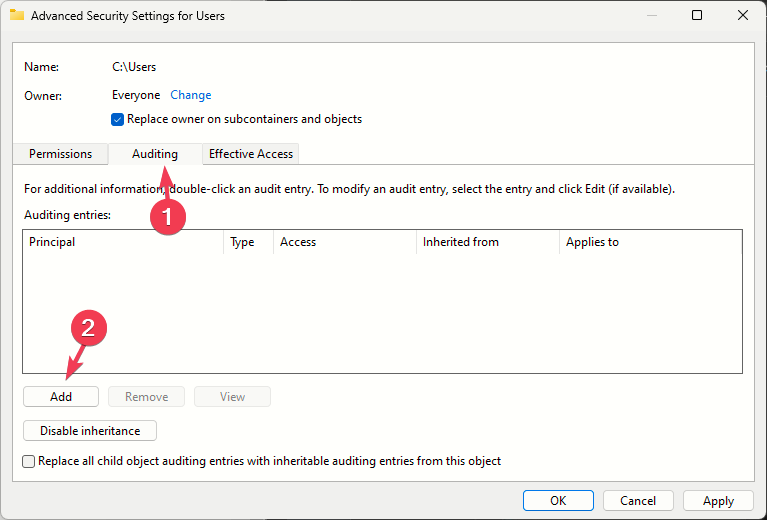
- Go to Auditing, click Add.
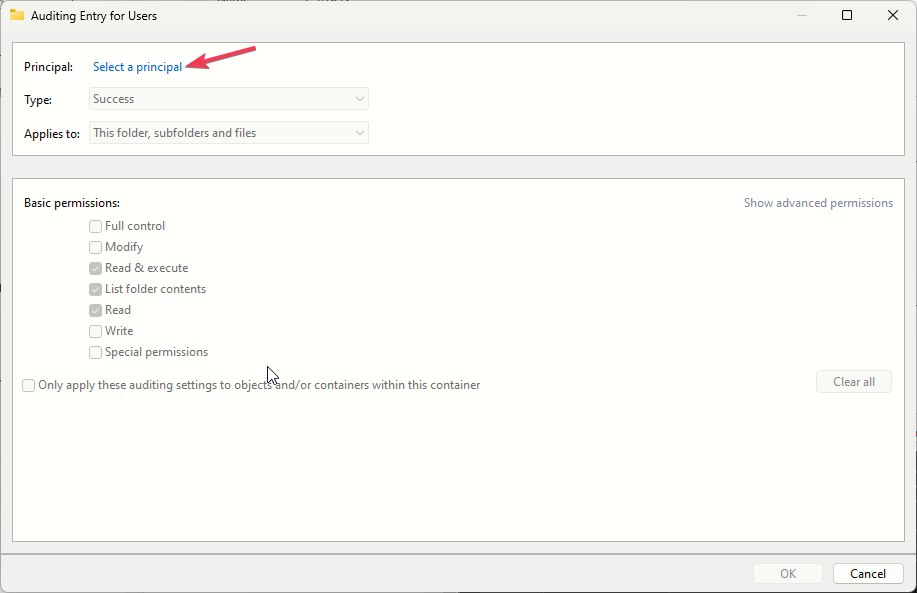
- Click Select a principal, type Everyone in the following box, and select OK.
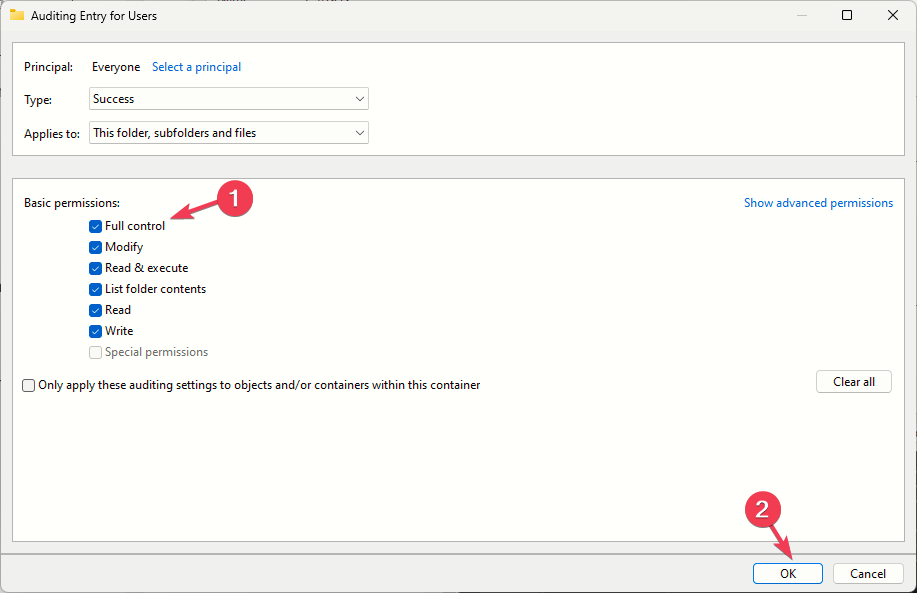
- Select Full control and click OK.
- Click Apply to save the changes, then reboot your PC and check if the issue persists.
7. Perform a system restore
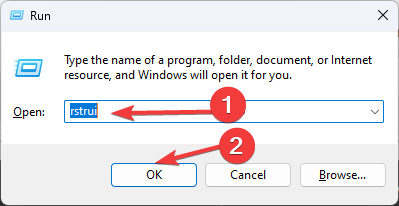
- Press Windows + R to open the Run dialog box.
- Type rstrui and click OK to open the System Restore window.
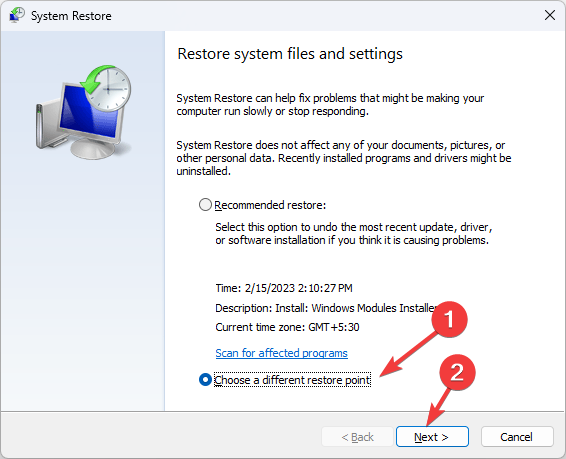
- Select the Choose a different restore point option and click Next.
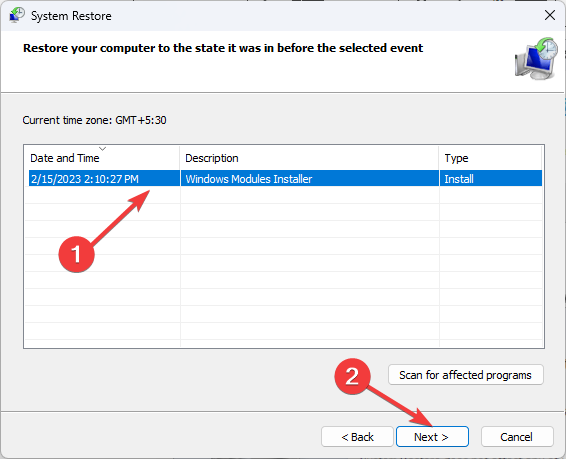
- Choose the restore point from the list and click Next.
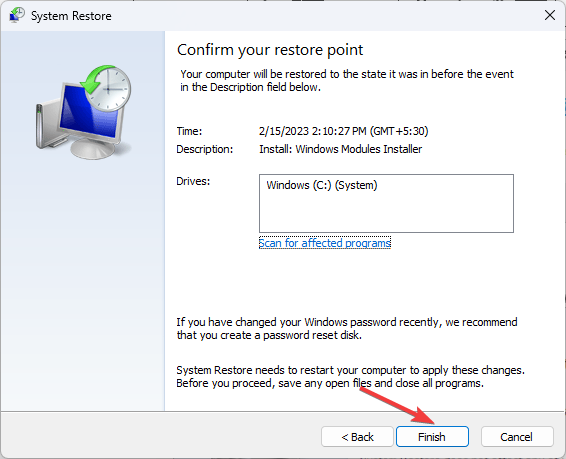
- Select Finish.
Windows will restart and restore your computer to the selected version. If you get System Restore doesn’t complete successfully message, read this guide to learn the reasons & solutions.
In conclusion, to fix the can’t open AsIO3.sys message, you need to change the startup type of the AsusCertService service, run SFC & DISM scans, reinstall Armoury Crate, or update device drivers.
If you have any questions or suggestions about the subject, feel free to mention them in the comments section below.

