How to Fix the Specified CGI Application Encountered an Error
3 min. read
Updated on
Read our disclosure page to find out how can you help Windows Report sustain the editorial team Read more
Key notes
- If it takes too long for a request to load, it will prompt the specified CGI application to encounter an error.
- Missing IISintegration on the web host builder can also cause this error to occur.
- Modifying the Azure configuration settings might also be a helpful alternative.
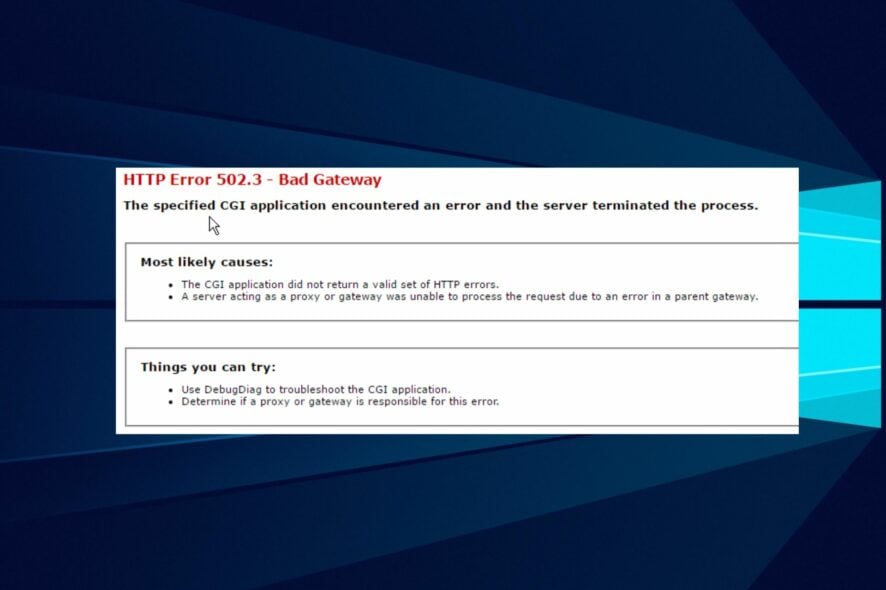
A prominent Azure error is the specified CGI application encountered a mistake, and the server terminated the process.
However, this is known as a timeout error. It means that the ASP.NET that is hosting the app has stopped responding.
When the Azure web app takes so long to load, you can get the azure app service CGI error. Complaints from some users show that the azure app can suddenly crash and respond with an error message.
Hosting Net Core on Azure is easy, but some issues plague it. However, the most common issue is with the versions, so you must keep it updated. This can help with the specified CGI application encountered an error problem.
What is the CGI application error?
This error can occur due to different circumstances. The CGI application error occurs when the CGI script does not get a response quickly enough from the web engine. The error pops up if you load the command for too long on the web browser with no response.
Also, the CGI application error can occur due to missing UseIISIntegration in the startup code of the web host builder. The need for IISIntegration is because Azure web apps run on it. However, a missing Azure app service certificate can trigger the Azure app service CGI error.
How can I fix the specified CGI application that encountered an error?
1. Configure an Auto-heal option
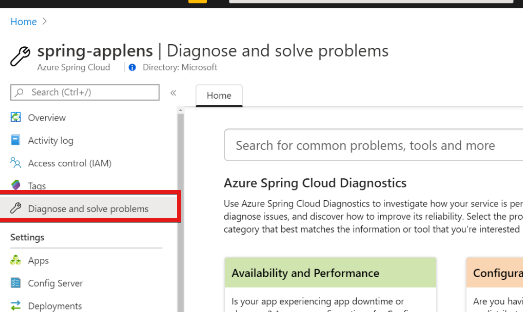
- Go to Azure’s main portal and select the particular app service.
- Click on the search bar for the Diagnose and solve problems option.
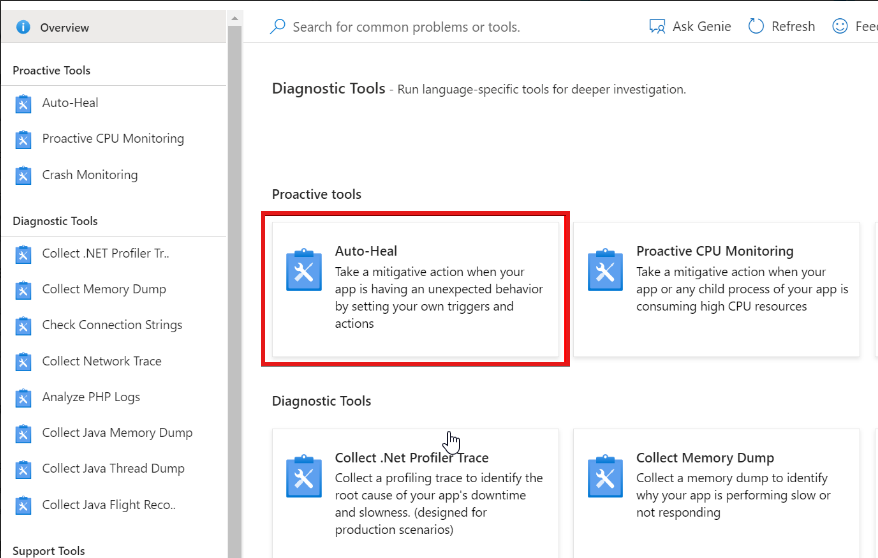
- Click the Diagnostic tools option and select the Auto-Heal option and custom auto-heal rules.
- Save the configuration and restart your app.
Configuring Auto-heal will help it collect data and trace where the error is. This will, however, support the auto-heal fix of the issue.
2. UseIISIntegration() on the WebHostBuilder
Because Azure web apps operate on IISIntegration, it is necessary to include it in the web host builder. Include the code below:
public static void Main(string[] args)
{
var host = new WebHostBuilder()
.UseContentRoot(Directory.GetCurrentDirectory())
.UseKestrel()
.UseIISIntegration() // Necessary for Azure.
.UseStartup<Program>()
.Build();
host.Run();
}
Also, using another browser can help decipher what the issue is. For example, browsers with the TLS/SSL certificates like Google Chrome can be an excellent alternative.
Try if “the specified CGI application encountered an error and the server terminated the process in Chrome pops up. Feel free to check our page for more intriguing details about the Azure web app errors.

