How to Change Windows 10 Network to Private
A comprehensive guide on configuring new network settings
Key notes
- Users are looking for a way to change their network settings from public to private.
- A private network is secure and ensures your privacy.
- We will show you how to change to a private network on Wi-Fi and wired connections.
If you’ve ever spent hours waiting in an airport and your only method of passing time is using your laptop, you understand how important it is to have a private network.
Even though that is the case, sometimes computers will randomly assign public network configurations to your home network.
This will stop you from gaining access to your printers, or even browsing the internet.
For the reasons mentioned above, in today’s how-to guide we will discuss the fastest method to change your network settings to private.
Read on to find out more details and solutions on how to change network settings from private to public.
How can I change the network from public to private on Windows 10?
1. Press the Windows Key to open the Start Menu, type settings and click on the result.
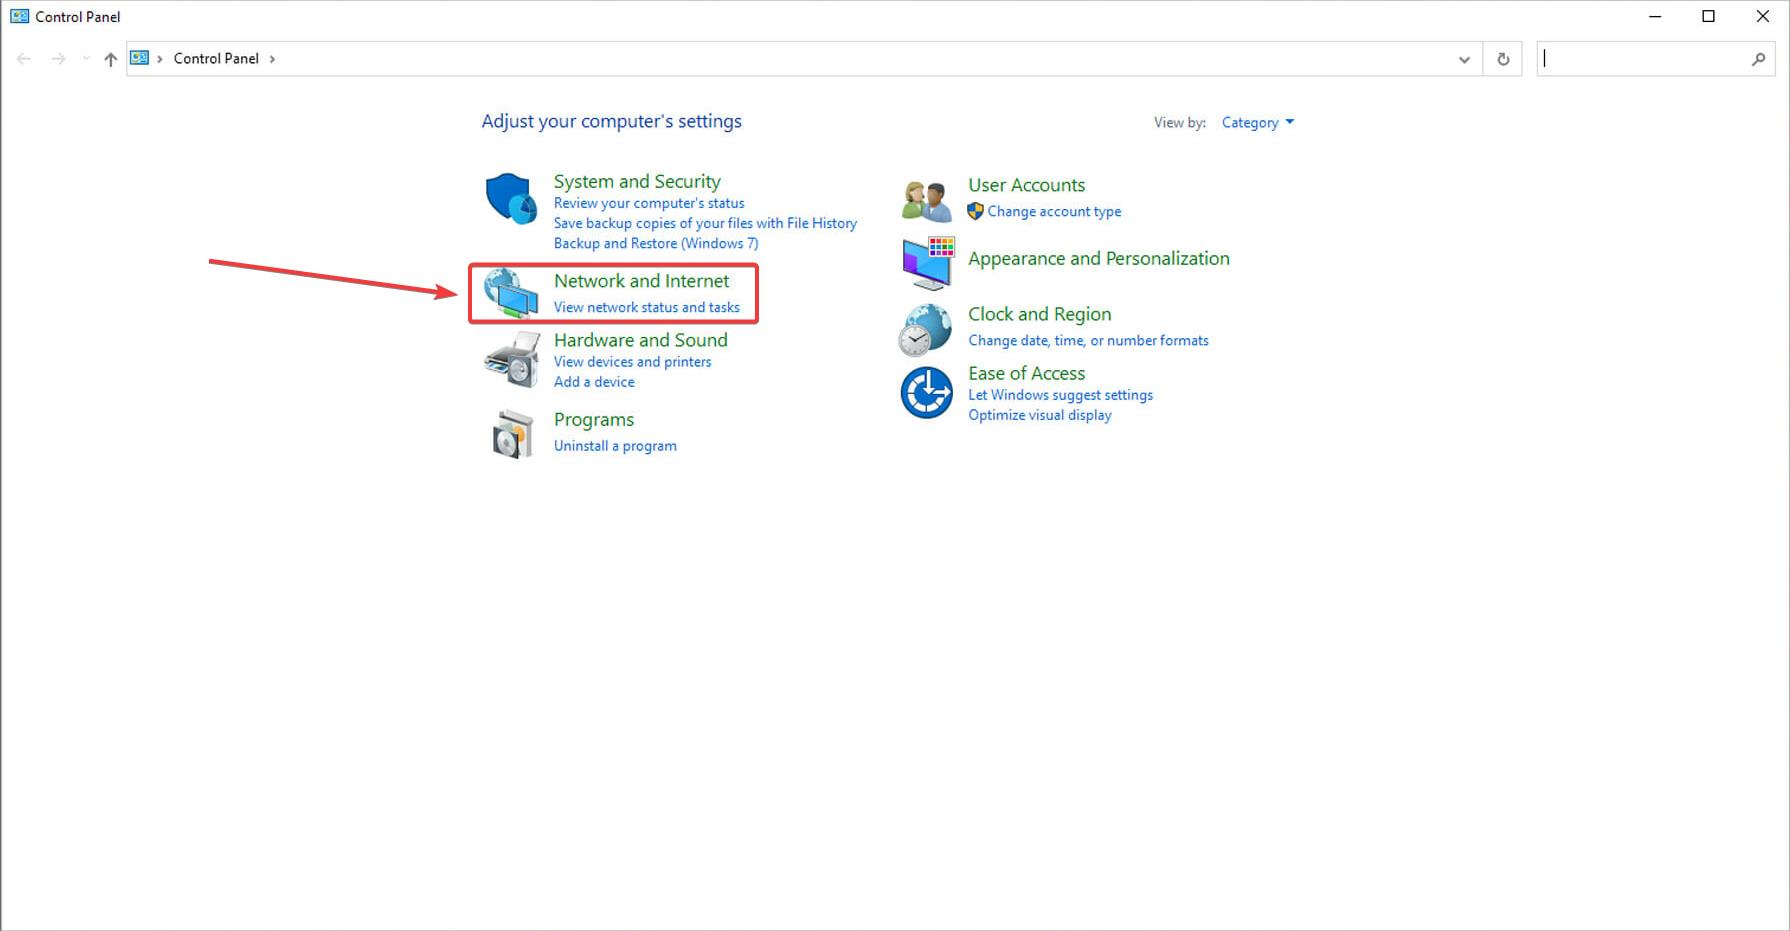
2. Select Network and Internet from the options.
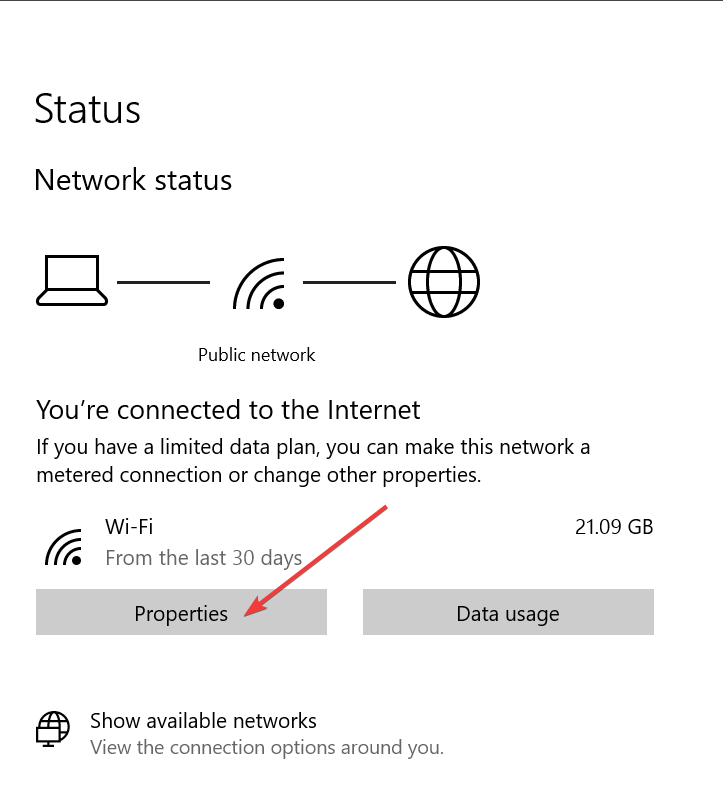
3. A menu will pop up showing you the available wired network/networks, and it’s/their status. Click the Properties link found under the name and status of your Wi-Fi network.
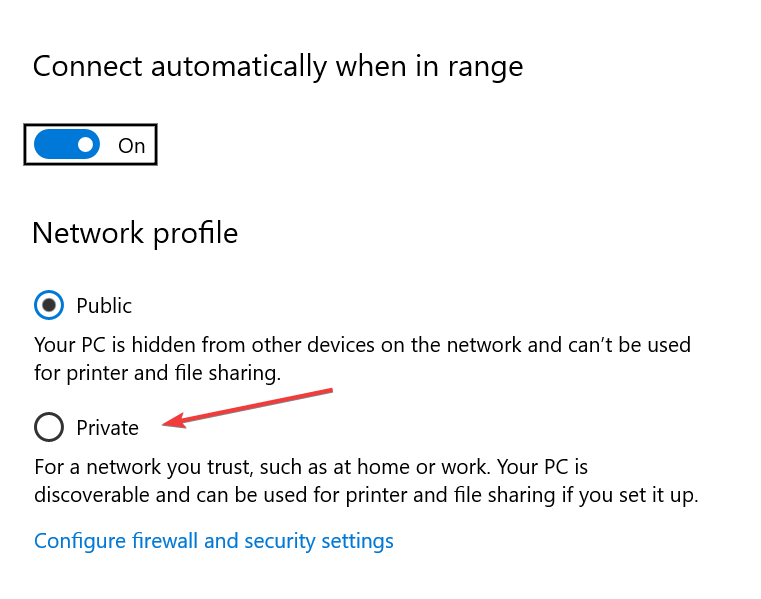
4. Under the Network profile section inside the newly opened window, tick the box next to the option Private.
This will set your Wi-Fi network settings to private. Now let’s find out how to set your wired connections to private as well.
5. Open the Network & Internet settings.
6. Click on Properties for your wired network.
7. Under the section Network profile, tick the box next to Private.
It is very easy to change your network settings on your Windows 10 PC from public to private via built-in tools.
However, you should know that the process for changing them is different based on whether you have a Wi-Fi or a wired internet connection. We will start with the guide for changing Wi-Fi settings to private.
Enabling this setting will allow your PC to recognize the network as safe, so it will not stop you from sharing your connection, connecting to the internet, or being able to print documents using your printer.
In today’s short how-to article we discussed the best methods to follow in order to change your computer’s network settings to Private.
We hope this guide managed to make you understand how this process needs to be carried out.
Please feel free to let us know if this guide has proven useful. You can contact us by leaving a comment in the section found below this article.
Read our disclosure page to find out how can you help Windows Report sustain the editorial team. Read more


Improve this guide


User forum
0 messages