How to Change Time on Windows 11 [Manually]
4 min. read
Updated on
Read our disclosure page to find out how can you help Windows Report sustain the editorial team Read more
Key notes
- Adjusting the date and time is not much different from the way things work in Windows 10.
- You can still rely on the good old Control Panel or on the familiar Settings App.
- The novelty comes from the brand-new Widgets panel where you can tweak date, time, date formats, and more.
With Windows 11 in the spotlight, it’s only natural to have questions. As far as we see it, the more, the merrier! One particular topic that users raised was how to change time on Windows 11.
Despite its massive overhaul, this OS is still based on the same familiar, and dare we say coherent infrastructure we all got to know and love in Windows 10.
Therefore, adjusting the time parameter is rather intuitive and very similar to the good old Windows 10. So, without further ado, let’s dive in and see what needs to be done to change the time on Windows 11.
How do I change the time on Windows 11?
1. Change time settings via the Control Panel
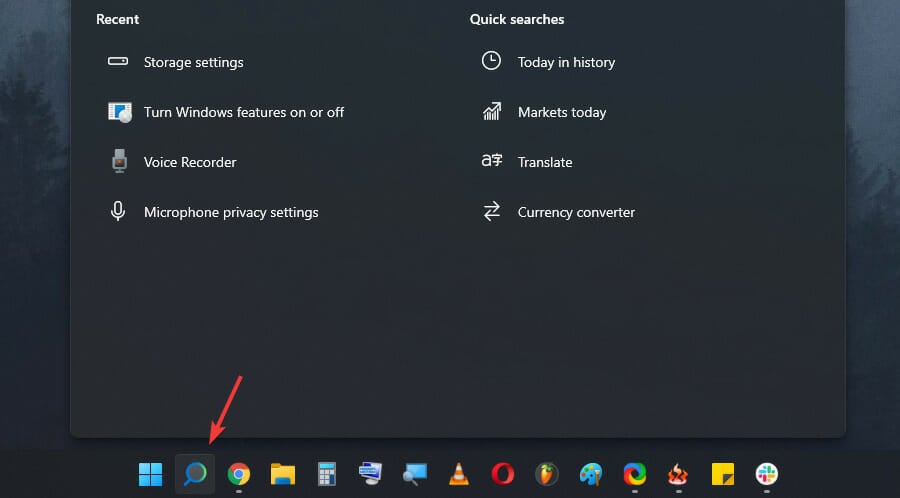
- Click the Search button on the taskbar.
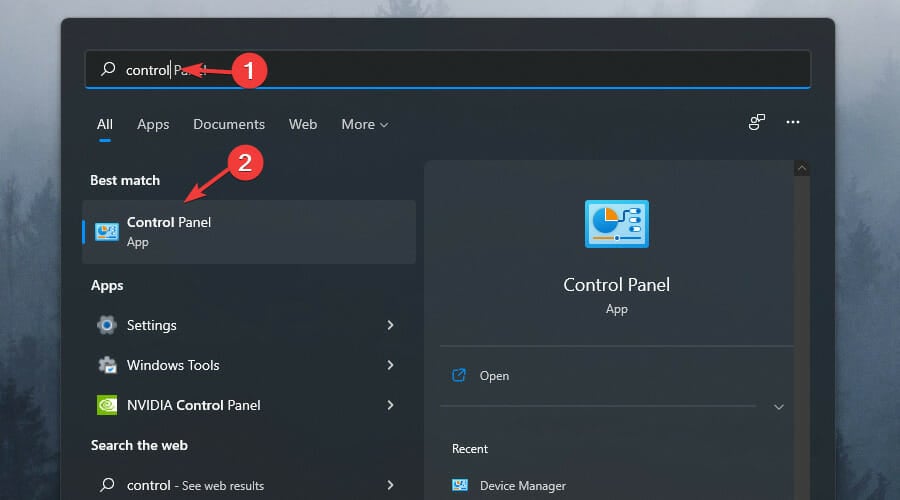
- Type control and choose Control Panel from the list of results.
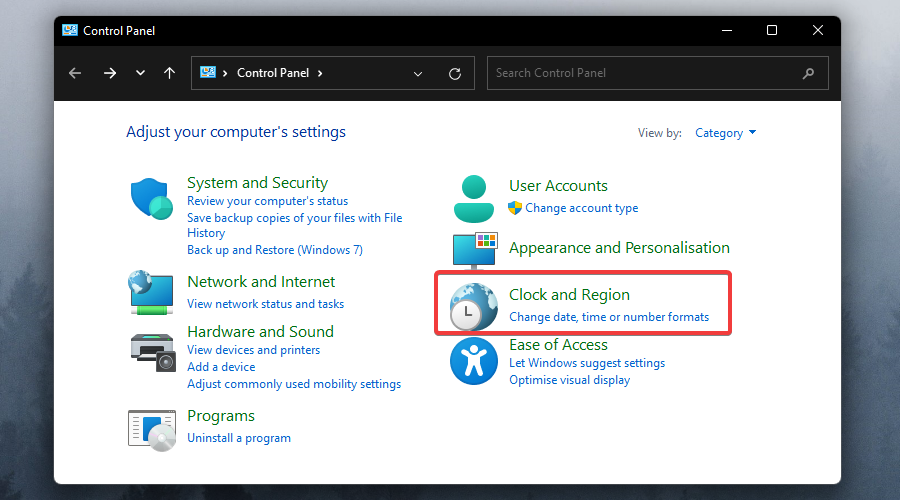
- Then, click on the Clock and Region option.
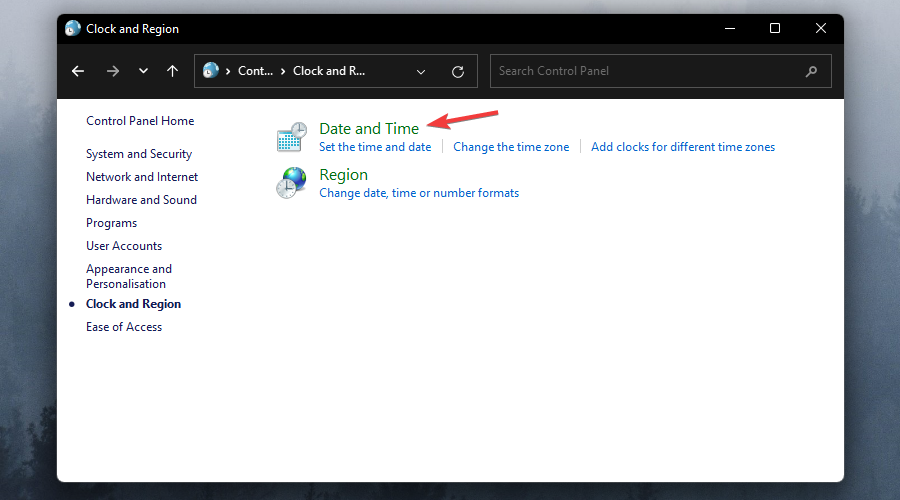
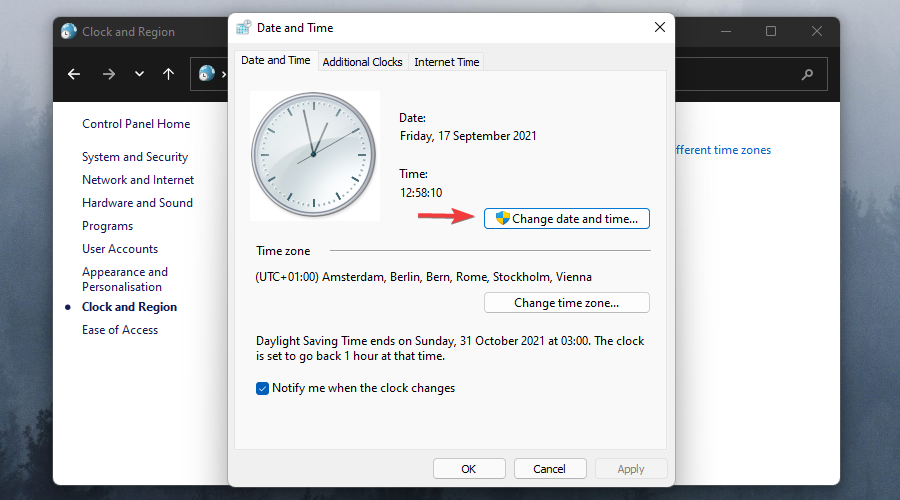
- Select Date and Time.
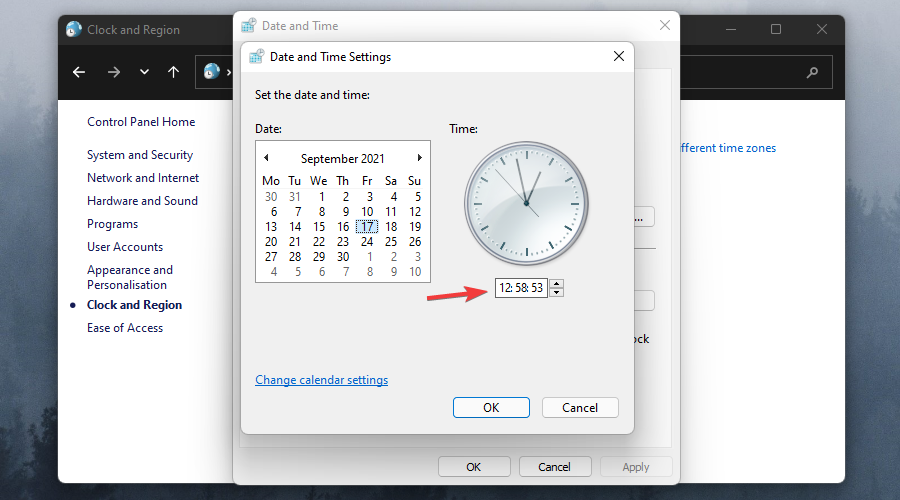
- Click on the Change date, time.. button.
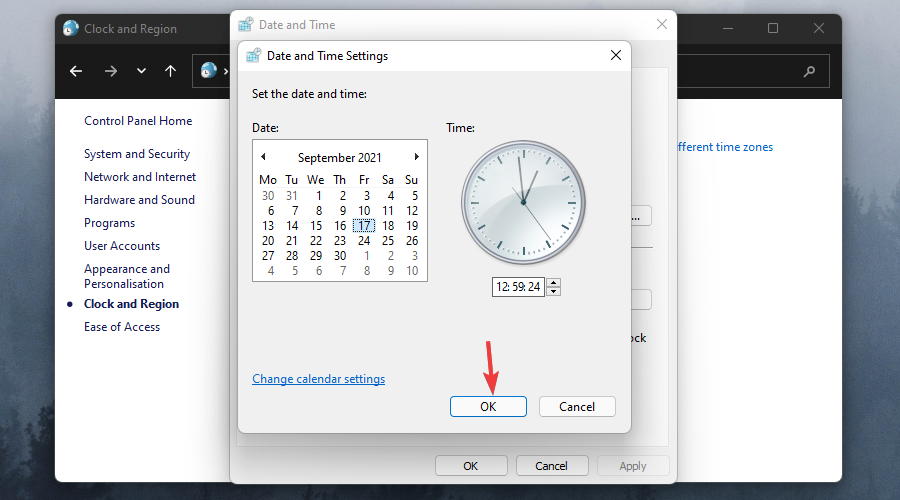
- You will now be able to adjust this parameter as per your liking.
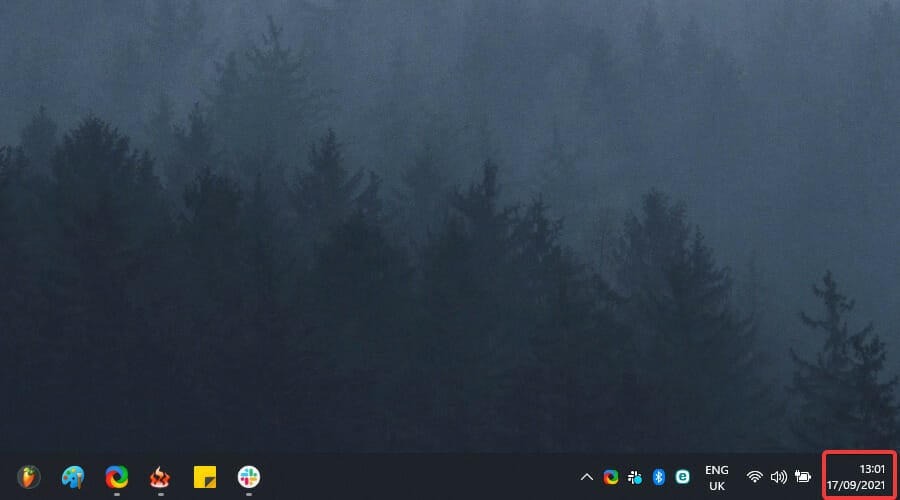
- Finally, don’t forget to hit the OK button once you’re done in order to confirm and apply the modifications.
This is the conventional way to change time on Windows 11. As you can see, the procedure is as intuitive and straightforward as always and it works pretty much the same way as for Windows 10.
Now, we all know that evolution works in mysterious ways – to a certain extent – and as a direct consequence, the Redmond giant decided to ditch quite a few features deemed unworthy for the new operating system.
As you can see, the Control Panel is still going strong and you can rely on it for many years to come. Unless a brand-new, breakthrough comes along and Microsoft decides to shake our worlds from the ground, that is.
2. Explore the Widgets Panel
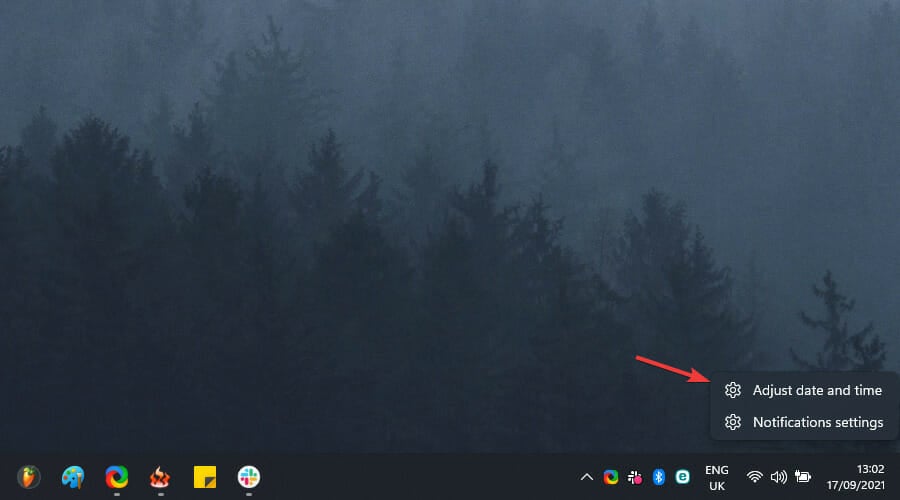
- Right-click on the Time and Date widget on the taskbar of your Windows 11 desktop.
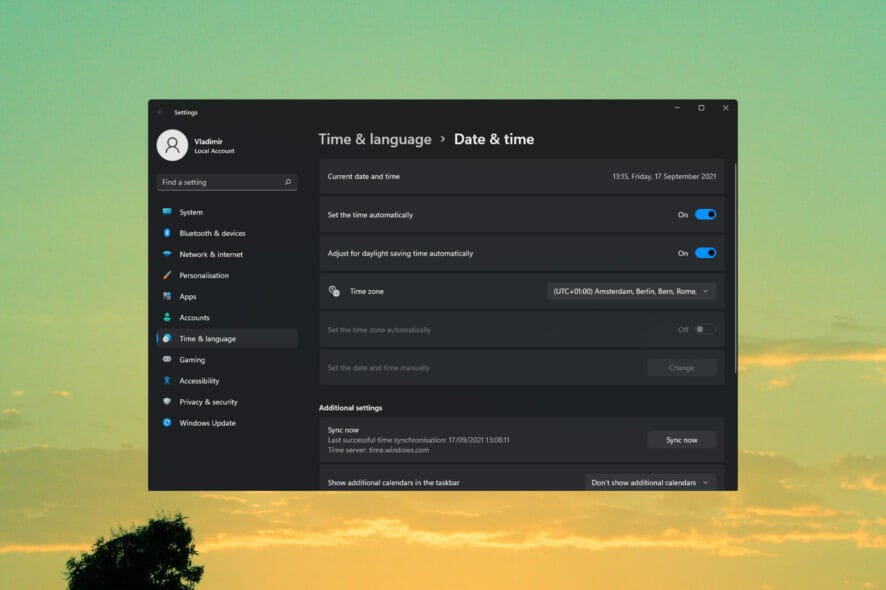
- From the list, choose Adjust date/time, which will take you to a familiar Date and Time settings screen.
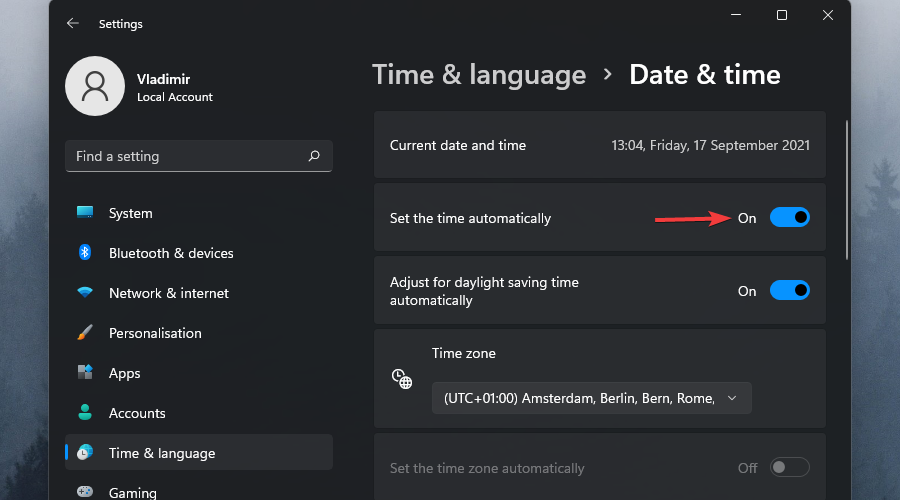
- Now, make sure you toggle the Set time automatically option to off.
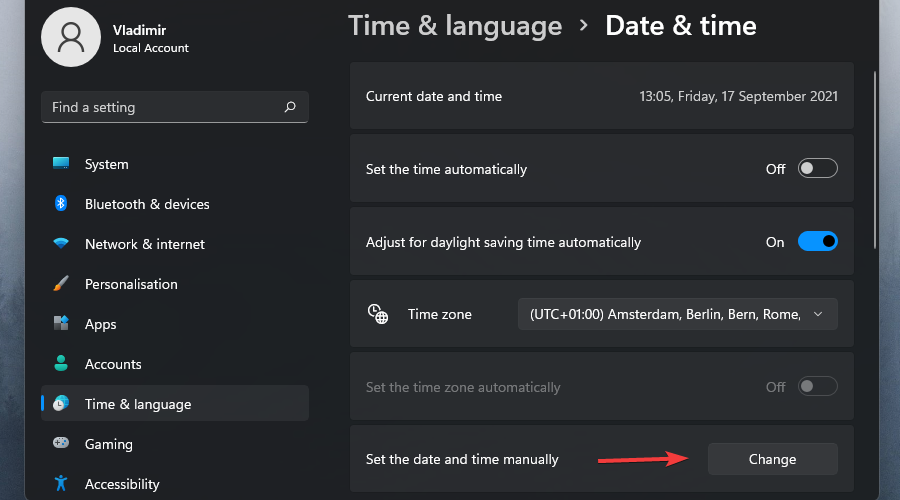
- The next step is to click the Change button under the Set date and time manually section.
- Here, you can make all the modifications you want.
- As always, don’t forget to hit the Change button to validate your custom settings.
Easy, right? Here’s one more thing that might also interest you when you want to change time on Windows 11: formats.
Let’s say you’re not happy with a particular format or even with the calendar settings on your brand new operating system.
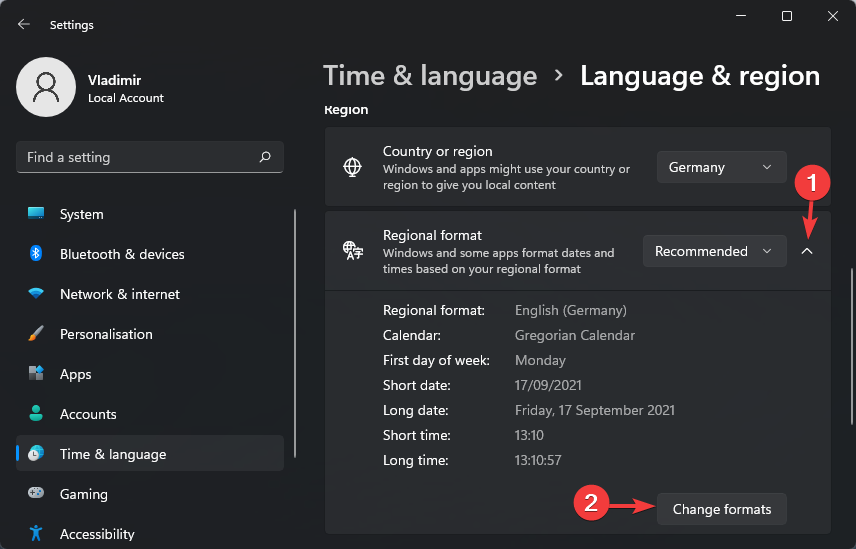
You can also set this parameter to reflect your style and needs, from the Date, Time, and Regional Formatting screen, located in the same widget.
Check out these quick steps to do just that:
- Open the Time and Date widget and click the Adjust date/time option, as shown above.
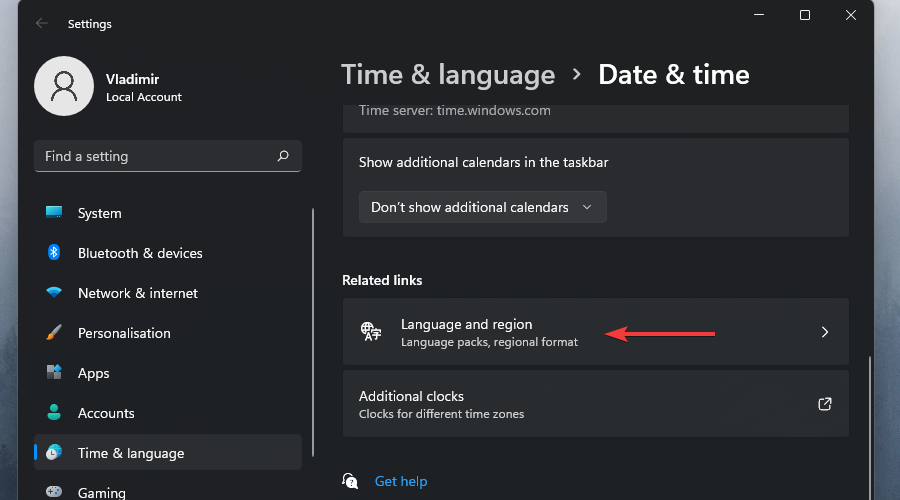
- Click the Language and region option.
- Select drop-down from the Regional format option, and click Change formats.
The new OS does not just bring new functionalities to the table. While some features did not make the cut, others are restored to former glory. Such is the case of widgets that made a powerful comeback in the new Windows 11.
The Widgets feature, now replacing the old live Tiles, is rather privileged and enjoys a dedicated panel, along with numerous customization options.
As you can see, the steps are pretty similar to the way things work in Windows 10. Speaking of which, you might want to check out this comprehensive Windows 10 and Windows 11 parallel.
But what we would love is to have your insights on this topic. So, feel free to reach in the comments section below and share your thoughts with us.

