How to Change Windows Live Mail Settings with Ease
Here's how you can change the Windows Live Mail settings
Key notes
- Windows Live Mail is not too complicated but some of our readers asked for instructions on its settings.
- In this guide, we explain how to change Windows Live Mail folder location, mail view, font color, account from POP3 to IMAP, and more.

Windows Live Mail is a popular email client before Microsoft replaced it with the new Mail app. That said, the app is still popular among Windows users with many new users trying it as well.
If you are new to Windows Live Mail, you may want to make a few changes to the default app settings to tune it as per your preference.
In this article, we show you how to change Windows Live Mails settings to change the folder location, mail view, font color, account from POP3 to IMAP, change the mail notification sound, themes, and the display name.
How do I change Windows Live Mail settings in Windows?
1. Change Windows Live Mail folder location
- Launch Windows Live Mail.
- Press the ALT key to bring up the Menubar.
- Click on Options and select Tools.
- In the 2011 version of Live Mail, go to File > Options > Mail.
- Open the Advanced tab.
- Click on the Maintenance button.
- Again click on the Store Folder button.
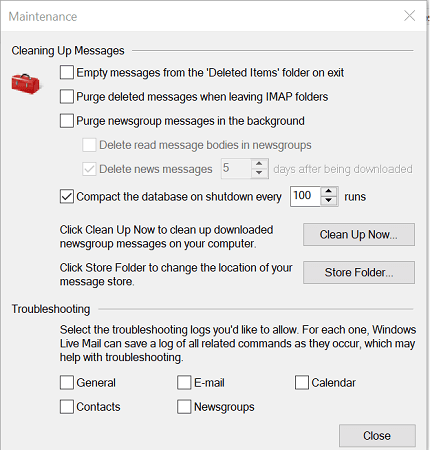
- Click the Change button and select the folder where you want to save your email messages.
- Click OK to save the changes.
- Restart Windows Live Mail to apply changes.
2. Change Windows Live Mail view
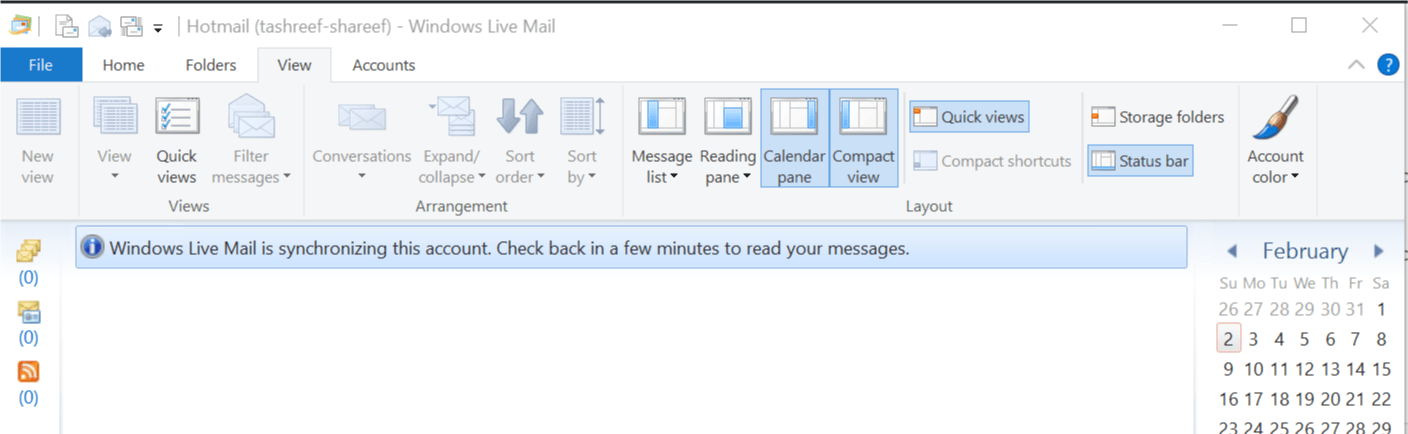
- Start Windows Live Mail.
- Open the View tab and select Compact View.
- To add the folders to Compact view do the following:
In Regular View: When you are in regular view, right-click on any folder/subfolders and select Add to compact view.
In Compact view: When you are in the compact view, click the + icon and click on Add to compact view option. Select the item you want to access from the view tab and click OK to save the changes.
3. Change Windows Live Mail font color
- Launch Windows Live Mail.
- Click on File and select Options > Mail.
- In the Options window, open the Compose tab.
- Under the Compose section, click on the Font Settings button.
- On the Font window, you can select the font and font size.
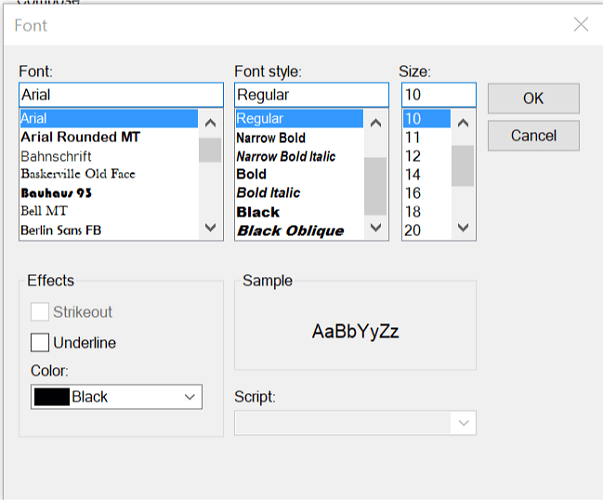
- Under Color, click the drop-down menu to select the font color you want to apply to Windows Live Mail.
- Click Apply and OK to save the changes.
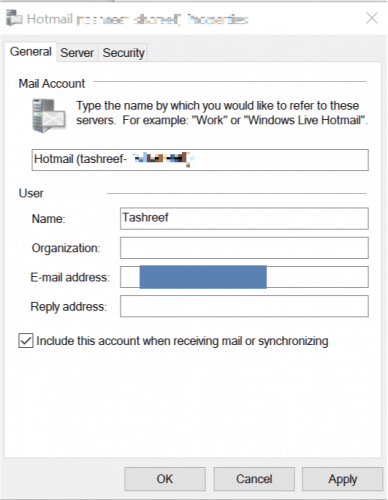
4. Change Windows Live Mail account from POP3 to IMAP
- Start Windows Live Mail.
- Right-click on your account from the left pane.
- Select Properties.
- Open the Advanced tab.
- Here change the STMP, IMPA or POP ports in this section. You can also specify the SSL settings.
- In the Properties window, open the Server tab.
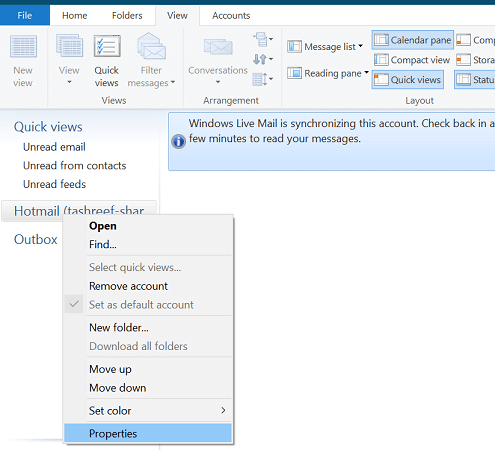
- Enter your Outgoing server needs authentication.
- Also, change your IMAP and SMTP server addresses from the Server tab.
- Click Apply and OK to save the changes.
5. Change Windows Live Mail notifications sound
- Exit Windows Live Mail if running.
- Press Windows key + R to open Run.
- Type control and click OK to open Control Panel.
- Click on Hardware and Sound.
- Under the Sound section, click on the Change system sound option.
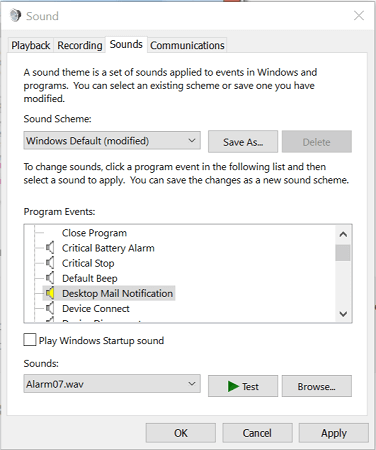
- Under Program Events, select Windows and click on Desktop Mail Notification.
- Click the Browse button.
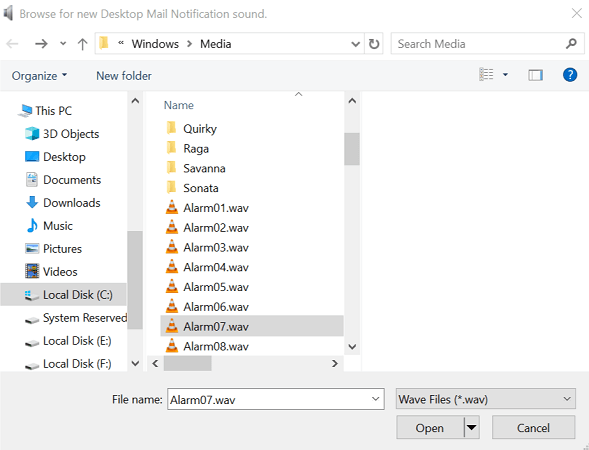
- In the Media window, scroll down and select one of the pre-downloaded sounds.
- Click Open.
- Click the Test button to hear the sound.
- Click Apply and OK to save the changes.
Apply sound to Windows Live Mail
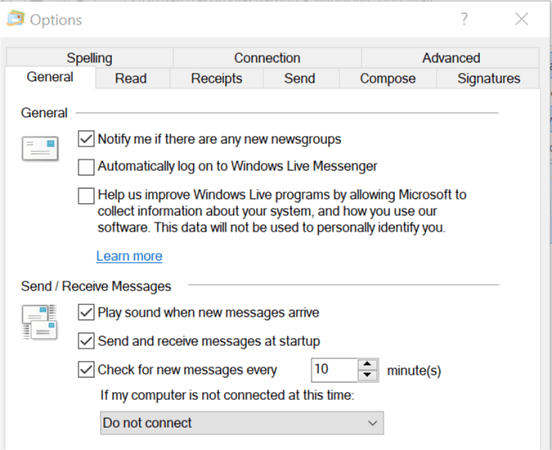
- Open Windows Live Mail.
- Click File > Options > Mail.
- Open the General tab.
- Under Send / Receive Messages check Play sound when new messages arrive box.
- Click Apply and OK to save the changes.
6. How to change Windows Live Mail themes
- Windows Live Mail does not support changing themes. So any theme that you apply to your desktop will be applied to Windows Live Mail as well.
- To change the theme on your desktop, follow these steps.
- Click on Start and select Settings.
- Open Personalization.
- Click on the Themes tab in the left pane.
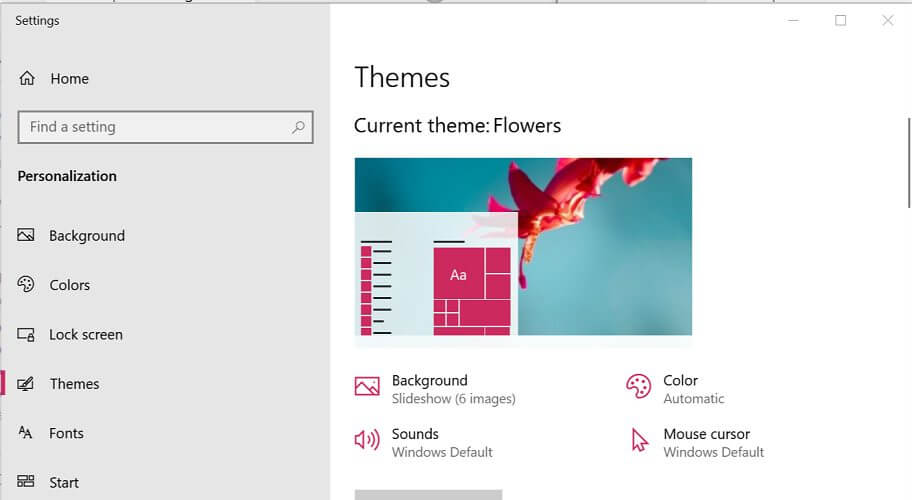
- Scroll down to the Change themes section and select one of the default themes.
- If you want to customize your theme, click on the Use custom themes button.
- Now you can modify the Background, Sounds, Color and Mouse cursor properties as per your preference.
If you’re having trouble opening the Setting app, take a look at this article to solve the issue.
7. Change Windows Live Mail display name
- Open Windows Live Mail.
- On Windows Live Mail go to Tools > Accounts.
In Windows Live Mail 2012 go to File > Options > Mails. - In the Account window, click the Properties button.
- In Windows Live Mail, under User Information, enter your name in the Name field.
In Windows Live 2012, in the Accounts window, select your Email account and click the Properties button. - Under User, enter your name in the Name field.
- Click Apply and OK to save the changes.
Depending on whether you are using Windows Live Mail 2011/2012 or older version, some settings may vary. In this article, we have tried to cover all the basic settings that a new user would like to change on the Windows Live Mail client.
If you need help modifying other settings, leave a comment, and we will update the article with the necessary steps.
Read our disclosure page to find out how can you help Windows Report sustain the editorial team. Read more


Improve this guide


User forum
2 messages