Fix: CHKDSK is Not Available for RAW Drives Error
Try formatting the disk before using CHKDSK
Key notes
- The CHKDSK is not available for RAW drives error shows up when the disk drive is in an incompatible format.
- Formatting the disk drive and changing the file system to NTFS or FAT32 will resolve the issue.
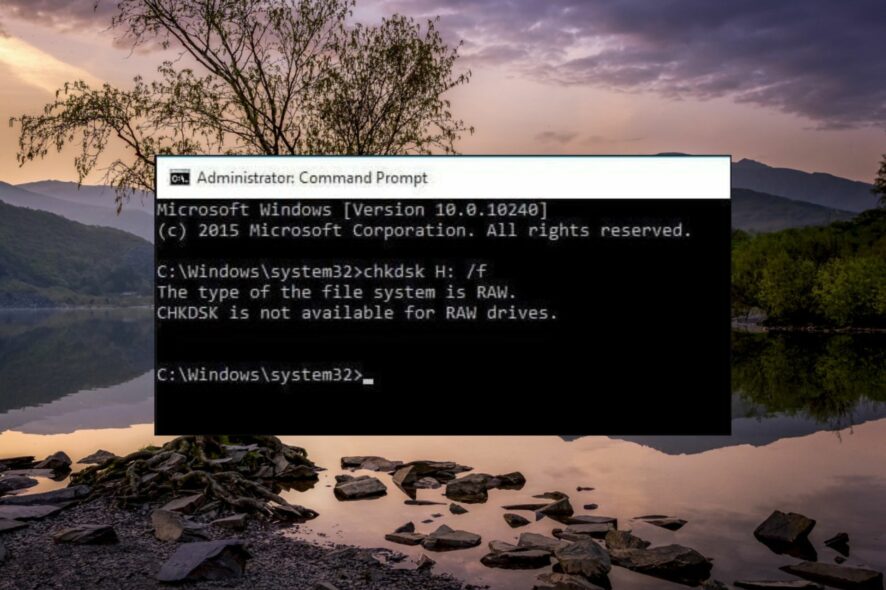
CHKDSK is a handy system utility of the Windows ecosystem known to resolve several disk errors with minimum effort. However, some of our readers received the message The type of the file system is RAW. CHKDSK is not available for RAW drives when using the CHKDSK command on the drive.
In case you are facing the same issue, go through this guide to discover effective solutions to fix the problem.
Why is CHKDSK not available for RAW drives?
CHKDSK is a well-known inbuilt Windows utility that fails to use fix hard drive errors on FAT32 or NTFS file systems. Hence, if the file system is in a format that cannot be recognized by Windows, the OS will consider it to be a RAW file and the in-built command like CHKDSK will not be available. Apart from this, there can be several other reasons for the problem:
- Your hard drive has suffered a physical damage
- There is some issue with the file format
- Windows is unable to read or access the file system and its contents
Now that have a clear idea of why the CHKDSK is not available for raw drives error shows up, let’s proceed towards the effective solutions.
What do I do if CHKDSK is not available for RAW drives?
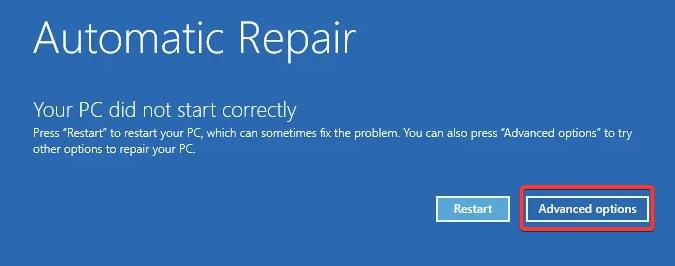
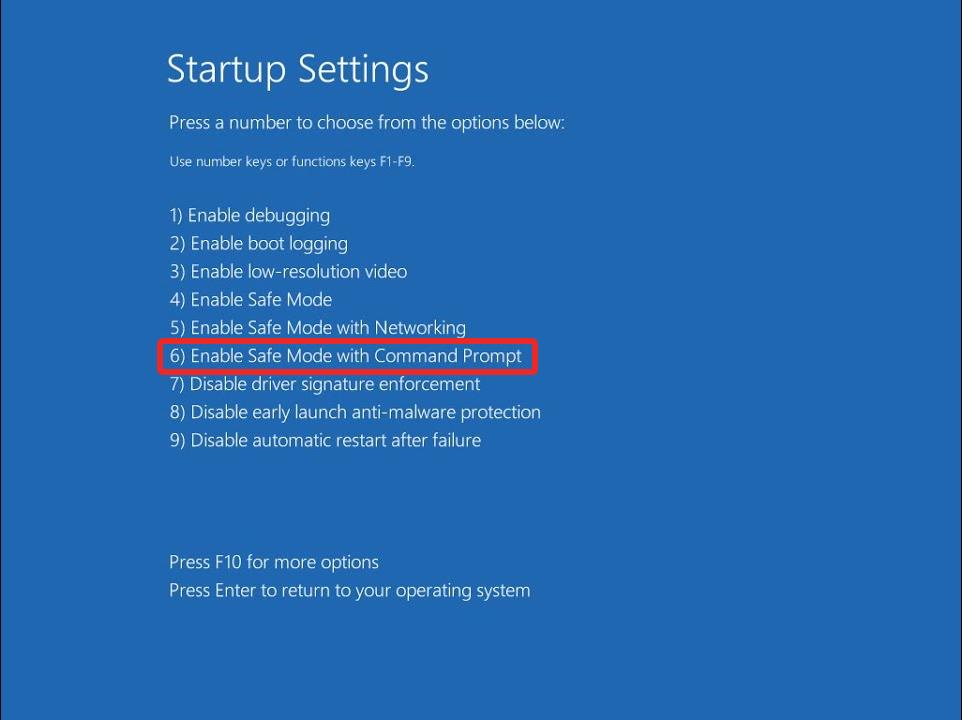
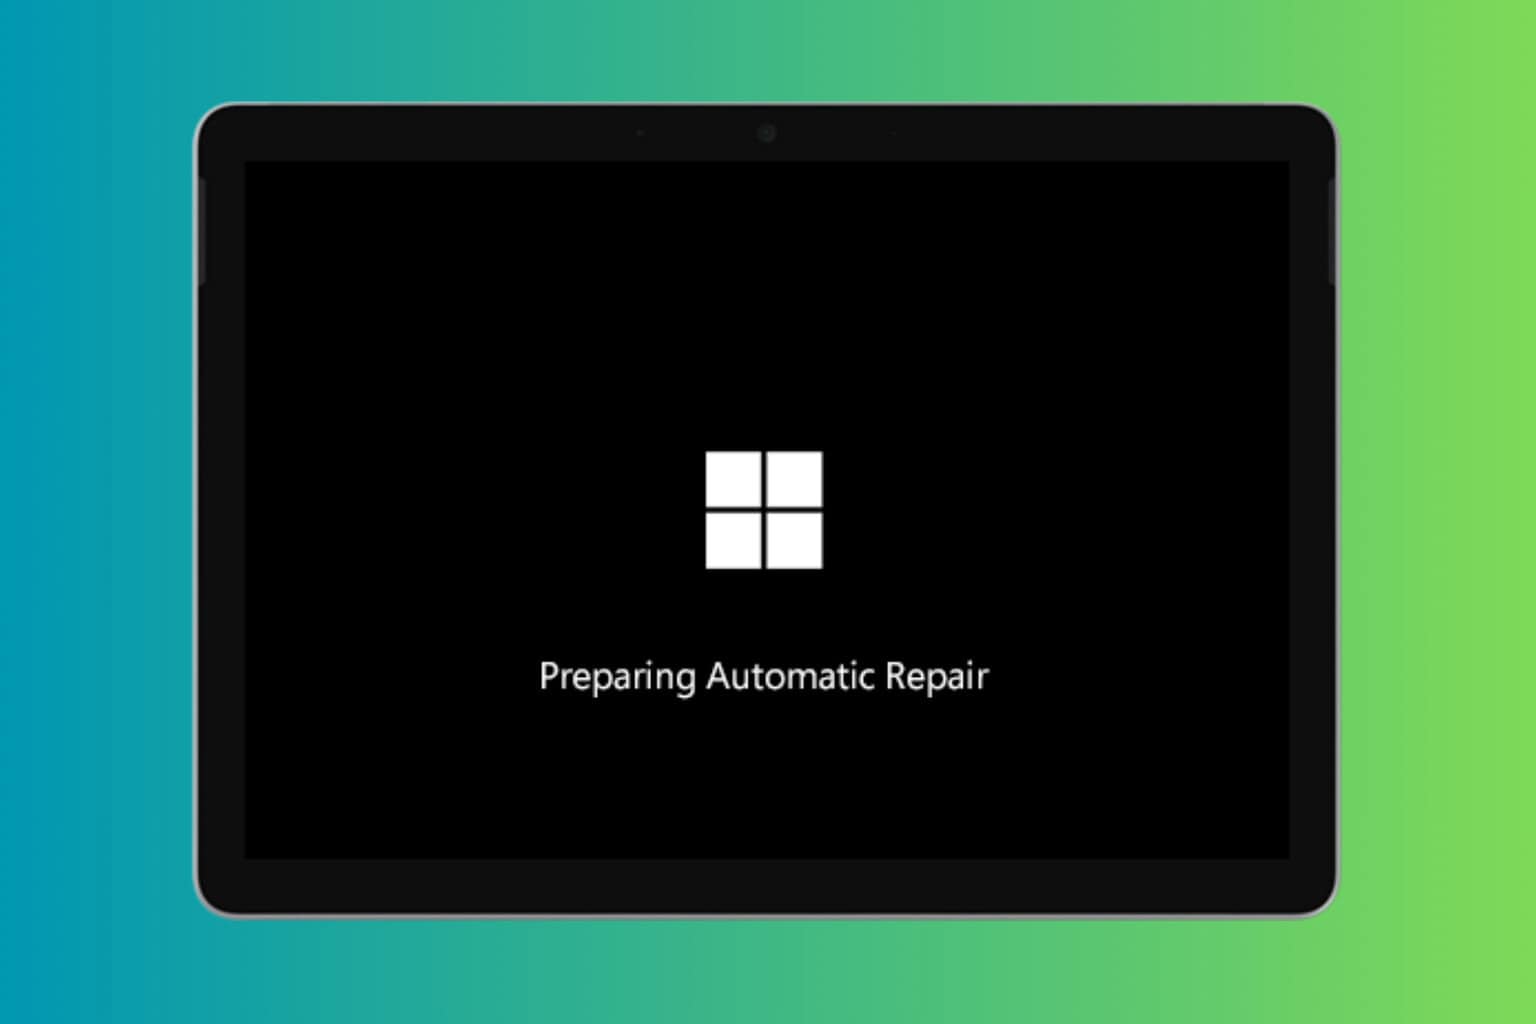
1. Boot your PC in Safe Mode
- Shut down your PC completely by pressing the Power button for a few seconds.
- Press the Power button to reboot and long press the button to restart your computer. Repeat these steps until you access the Automatic Repair screen.
- Start the automatic repair process by pressing the Advanced options button.
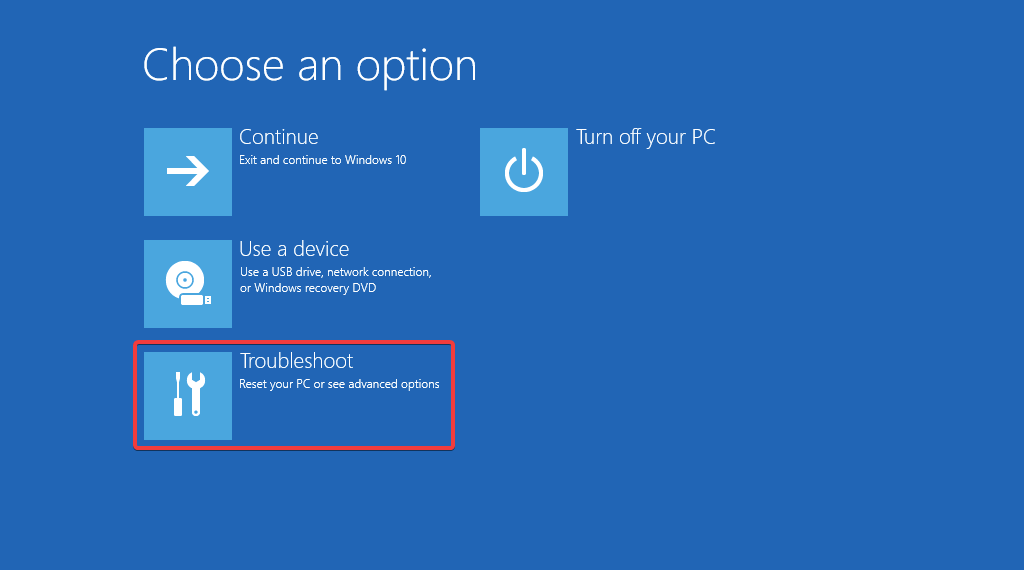
- Select Troubleshoot option from the next screen.
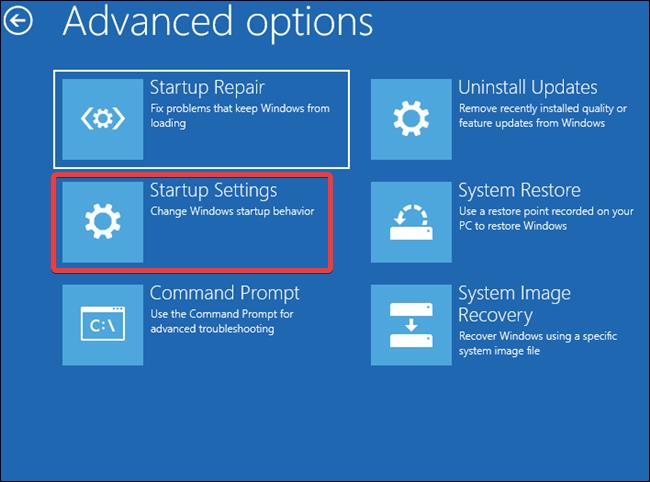
- Go to Advanced options.
- Select Startup settings from the Advanced options window.
- Press the F8 key to choose Safe Mode with Command Prompt from the list of safe mode variants.
In the Safe mode, your computer will function in a basic state with only essential drivers, folders, and apps. Now that there is no interference from the third-party services, execute the CHKDSK command once again.
If the command does not work, proceed to the next method.
2. Check and repair the RAW drive
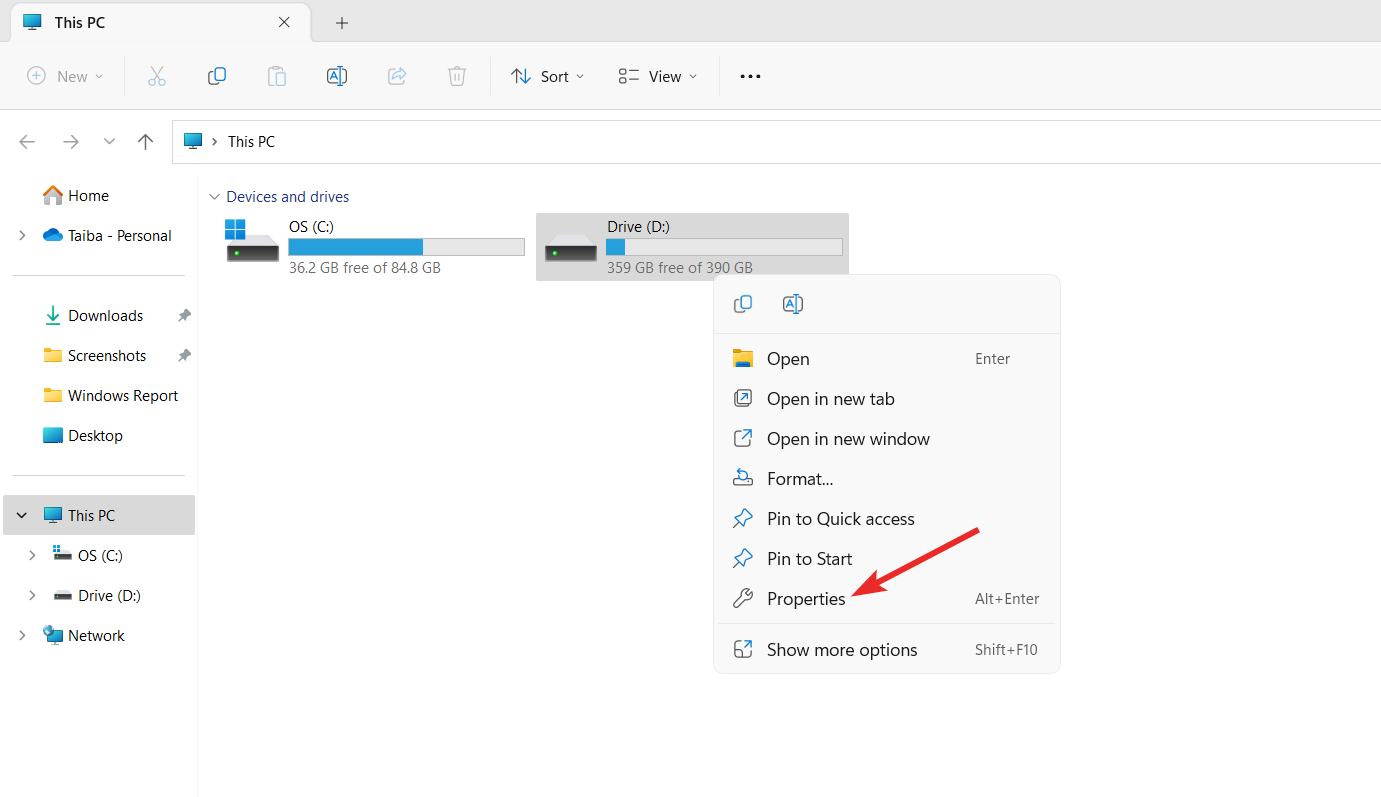
- Connect the external hard drive to your PC.
- Launch the File Explorer using the Windows + E shortcut and select This PC from the left navigation pane.
- Right-click the external hard drive and choose Properties from the context menu.
- Switch to the Tools tab of the Properties window and press the Check button located under the Error Checking section.
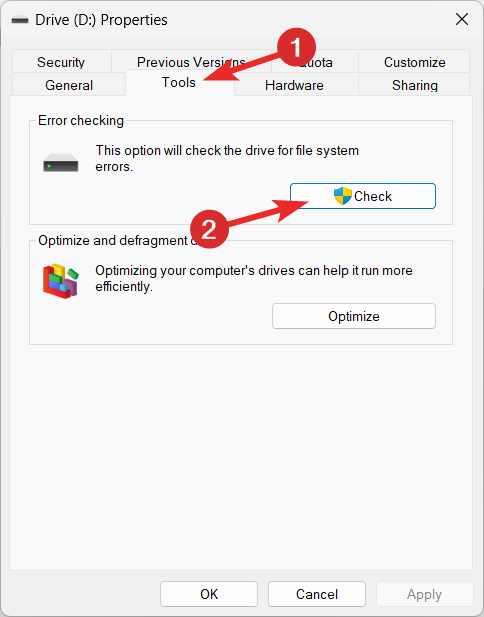
- If prompted, type the administrative credentials and wait until the Windows operating system repair the drive with RAW status.
If the CHKDSK command fails to work, you can use the Check tool, another error-fixing utility of Windows to fix the issue with the RAW drive.
3. Format the disk drive
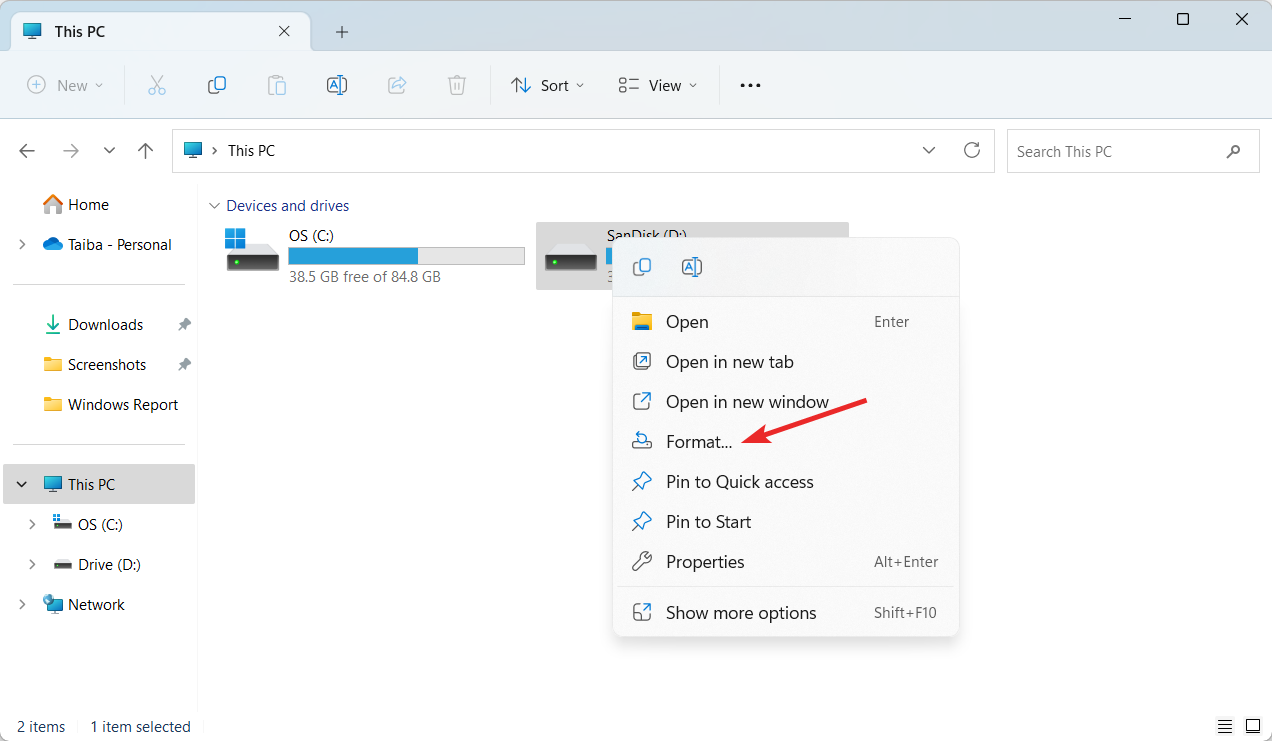
- Connect the external hard drive to the computer and wait for it to get detected by the PC.
- Bring up the File Explorer window using the Windows + E shortcut and select the external hard drive.
- Right-click the external hard drive and choose Format from the list of options in the context menu.
- A format drive window will open on the screen. Select NTFS in the File system drop-down and press the Start menu to format the hard drive.
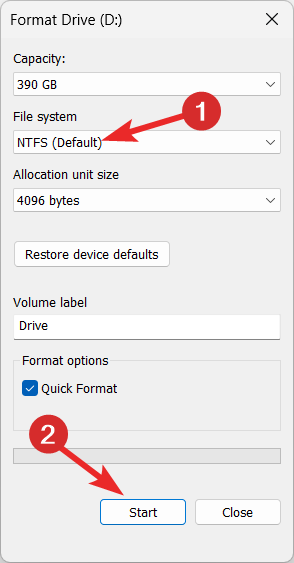
Formatting the external drive with an unsupported file system will convert it to a compatible file system such as NTFS.
You should remember that formatting the drive will delete all the contents stored on it.
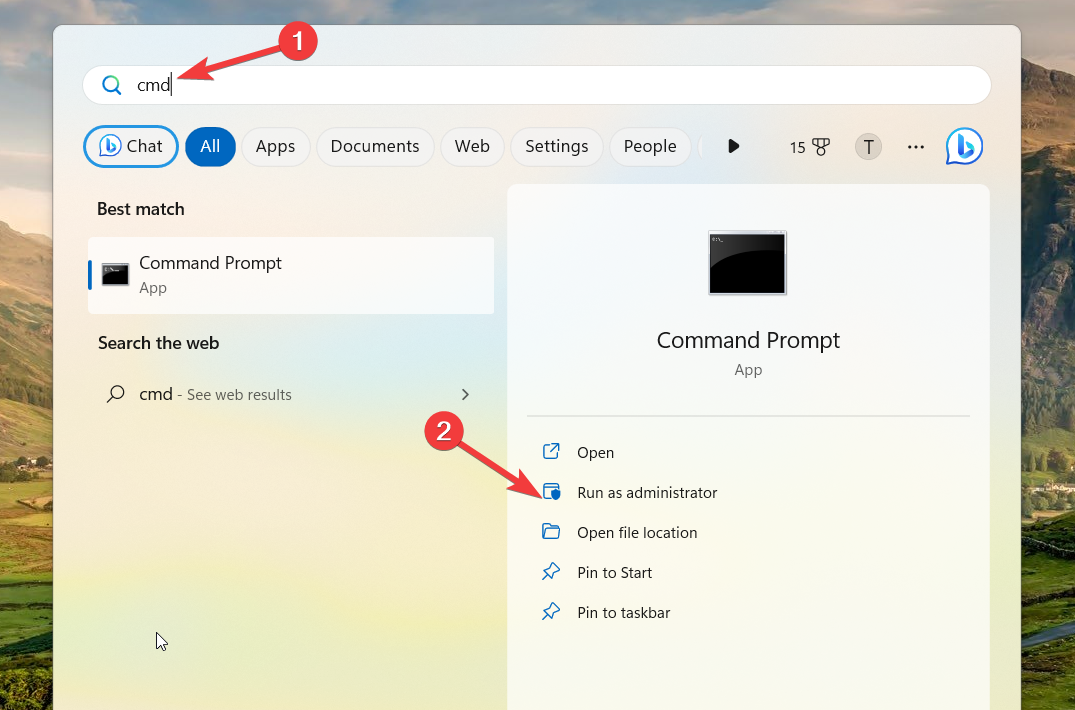
4. Repair the RAW drive using the diskpart command
- Press the Windows key to bring up the Start menu, type cmd in the search bar on top, and choose Run as administrator from the search result.
- Now type or paste the following command in the command prompt to launch the disk utility tool.
Diskpart - Next, execute the following command to see if the list of disk drives currently connected to your PC aligns with their identifiers.
List disk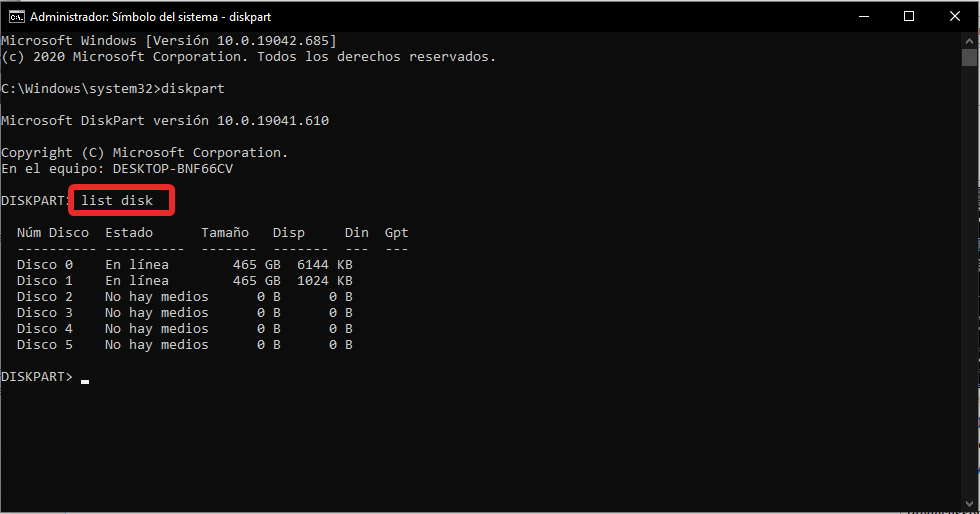
- Note down the name of the RAW disk drive and type or paste the following command to select the problematic disk. Replace N with the number representing your disk:
select disk N - Execute the following command to remove the write-protected attribute of the file:
attributes disk clear read only - Next, delete all the disk drive data by executing the following command:
clean - Now you need to create a primary partition of the disk using this command:
create partition primary - Finally, execute the following command to format the hard disk and convert it to a compatible file system:
format fs=ntfs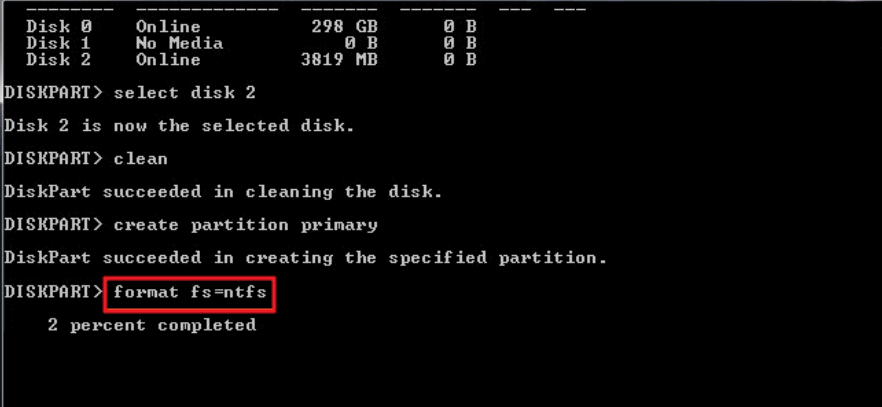
If the CHKDSK command is not available for the RAW hard drive, you can use the disk part utility command to repair and format the hard drive to the required file system.
That’s all about this guide! Hopefully, you were able to repair the RAW hard disk such that the CHKDSK command is now available for the drive.
You might also be interested in what to do if you can’t create a new partition in Windows.
In case you have any queries or suggestions for us, do let us know in the comments section.
Read our disclosure page to find out how can you help Windows Report sustain the editorial team. Read more


Improve this guide


User forum
1 messages