Clear & Delete Windows Update Cache/ History: 5 Ways
Clear up update cache and free up disk space

Here’s how you can delete Windows update cache so you can free up space on your PC. While keeping the update cache can help you identify and troubleshoot various errors, if it gets cluttered, you can clean it up. Info about an update you did 6 months ago is most likely irrelevant.
So let’s see how to locate and delete those files.
You can locate all Windows Update files in the following directory: C:\Windows\SoftwareDistribution\Download
How do I clear the Windows Update cache?
1. Use Disk Cleanup
- Click the File Explorer icon on your taskbar to open the app.
- Right-click the Local Disk (C) and select Properties from the drop-down.
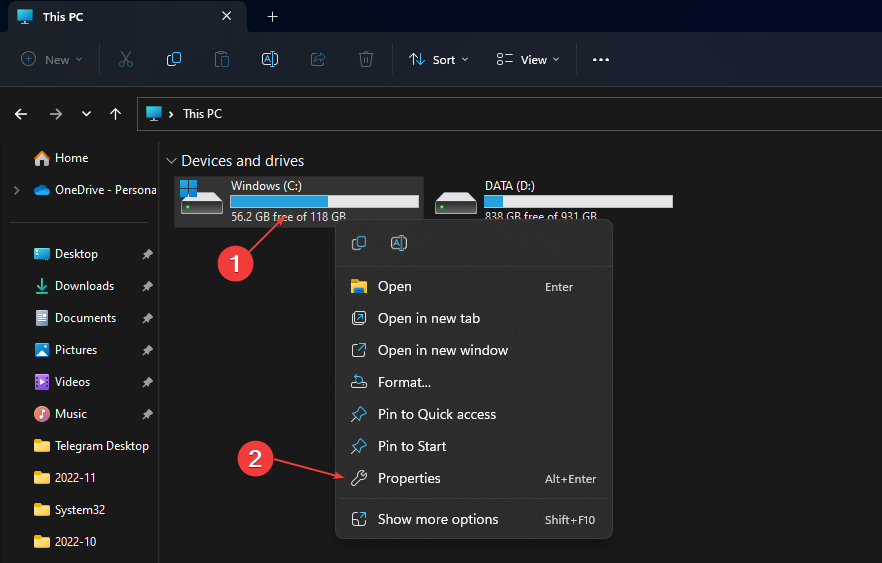
- Click on Disk Clean-up, then click the Cleanup system files button.
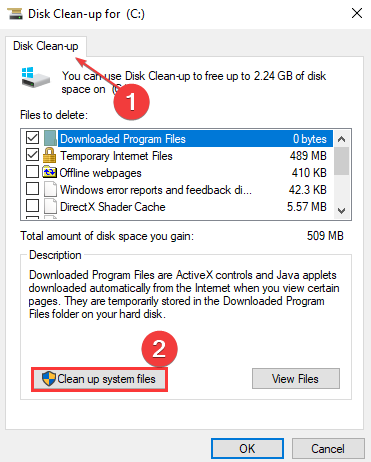
- Check the boxes for Windows upgrade log files and Temporary Windows Installation files, then click OK.
To learn more, we have a great guide on how to use Disk Cleanup on Windows 11, so be sure to check it out.
2. Manually delete Windows update folders
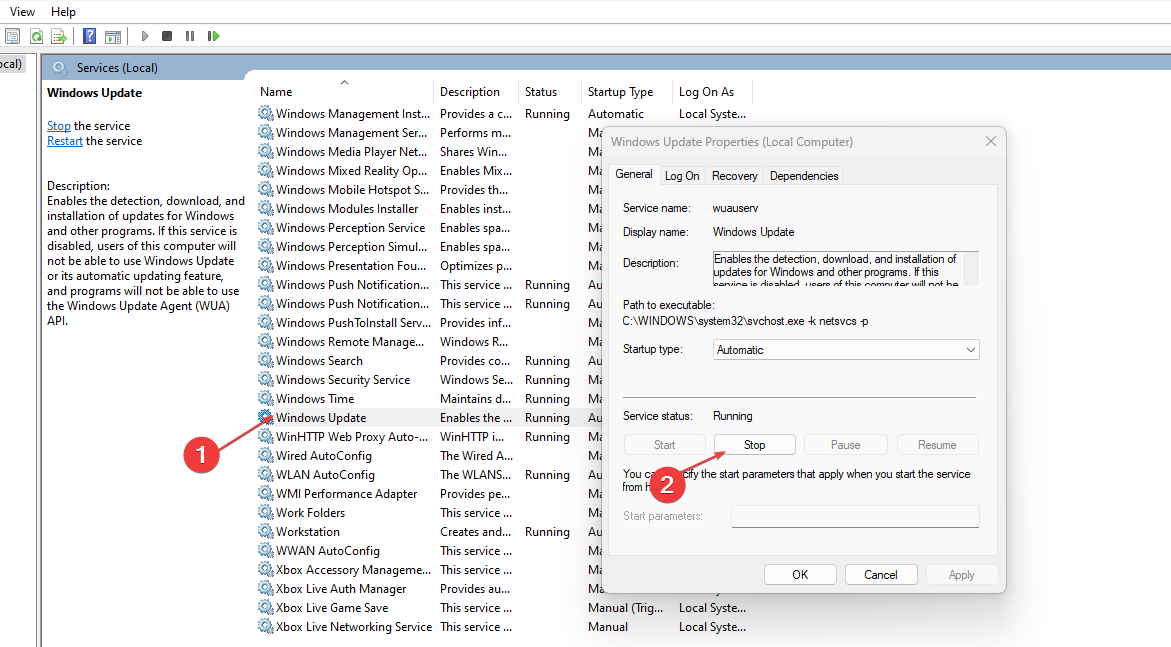
- Press Windows + R key to open the Run dialogue box, type services.msc, and click OK to open Services.
- Double-click Windows Update and select Stop.
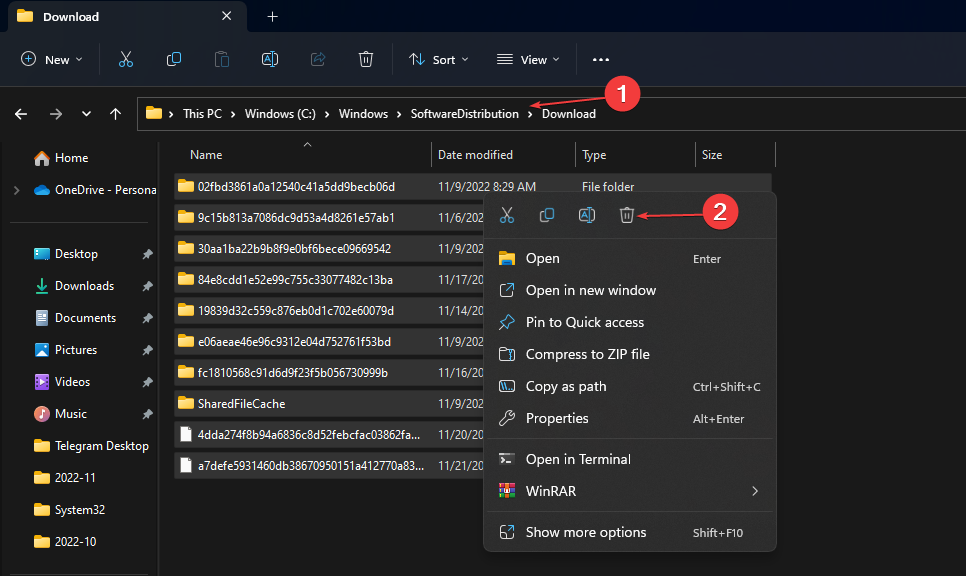
- Open the File Explorer, and navigate using this:
C:\Windows\SoftwareDistribution\Download folder - Press Ctrl + A to highlight every file, right-click and select delete.
- Press Windows + R key, and type services.msc, then press Enter.
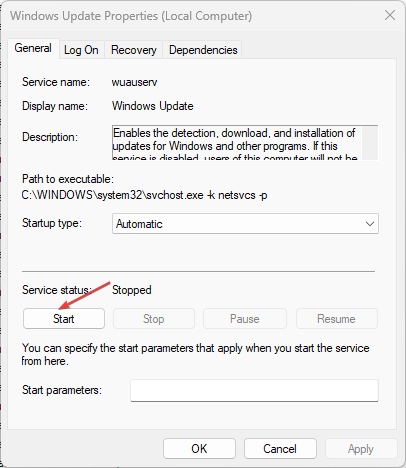
- Find and double-click on Windows Update, then click Start.
Disabling Windows Update services before clearing the distribution directory will fully clear the cache without any issues.
3. Clear Windows Update cache via Command Prompt
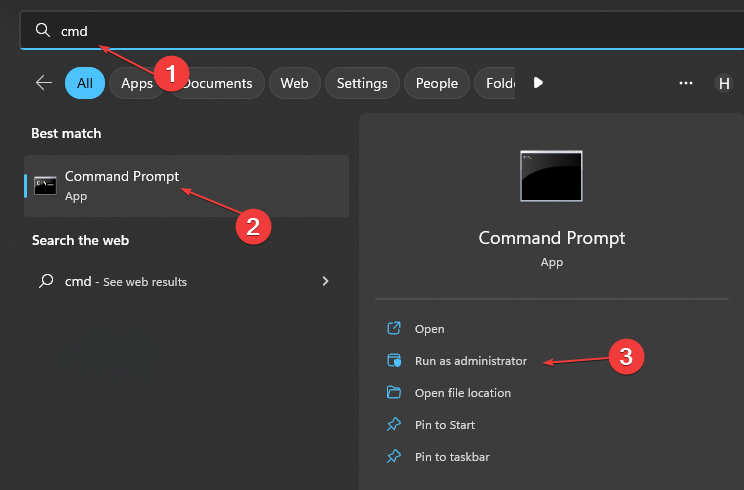
- Left-click the Start button, type cmd in the search space, and select Run as Administrator.
- Type the following, then press Enter:
net stop wuauserv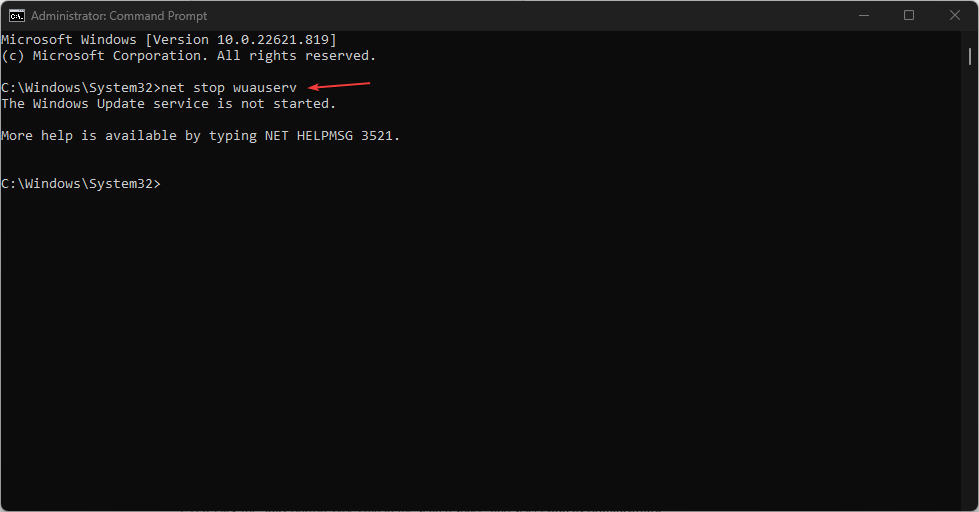
- Type the following commands and press Enter after each:
C:cd %Windir%\SoftwareDistributiondel /f /s /q Download
These commands will delete the cache files on your PC.
4. Reset Windows Update cache
- Left-click the Start button, type cmd in the search space, and select Run as Administrator.
- Type the following commands and press Enter:
net stop wuauservnet stop cryptSvcnet stop bitsnet stop msiserver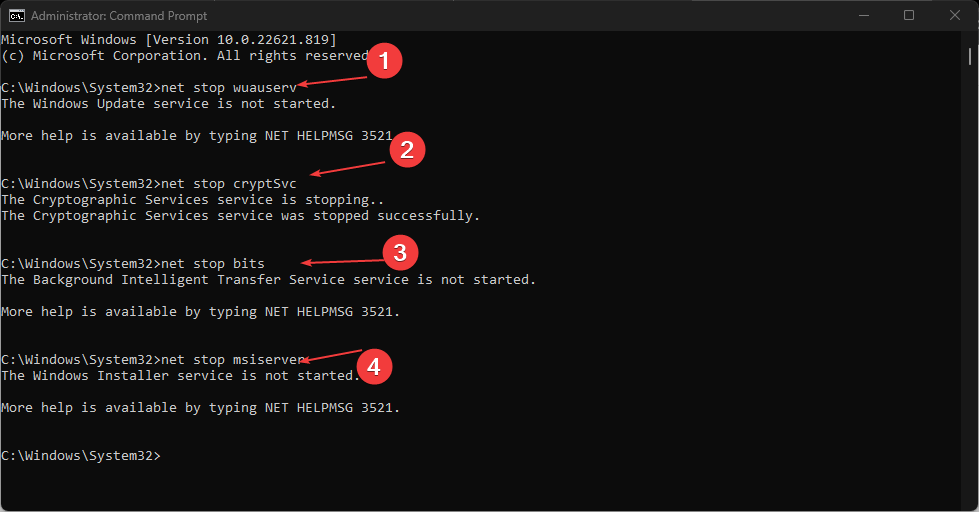
- Run the following command one after the other:
ren C:\Windows\SoftwareDistribution SoftwareDistribution.oldren C:\Windows\System32\catroot2 Catroot2.old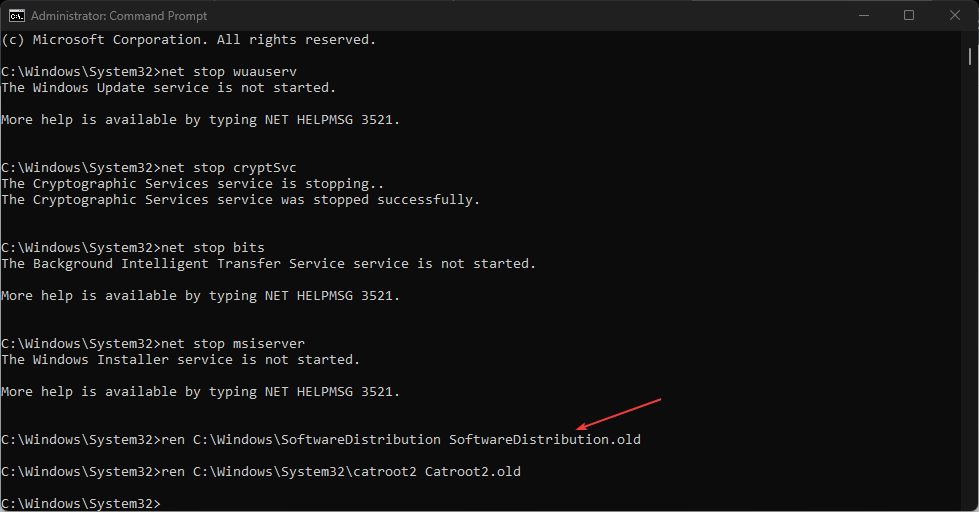
- Type the following commands and press Enter after each one:
net start wuauservnet start cryptSvcnet start bitsnet start msiserver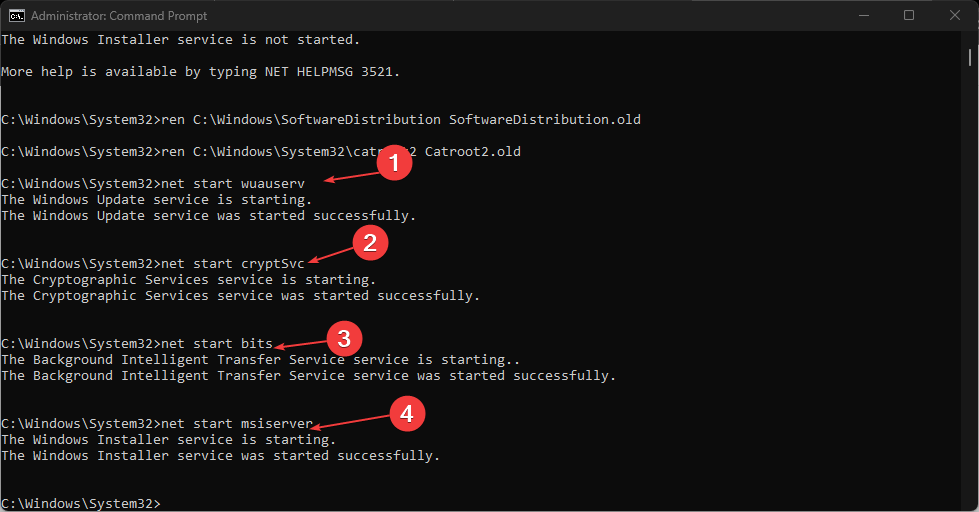
- Close the Command Prompt and restart your computer.
Resetting the relevant service can also clear the previous update cache from your computer.
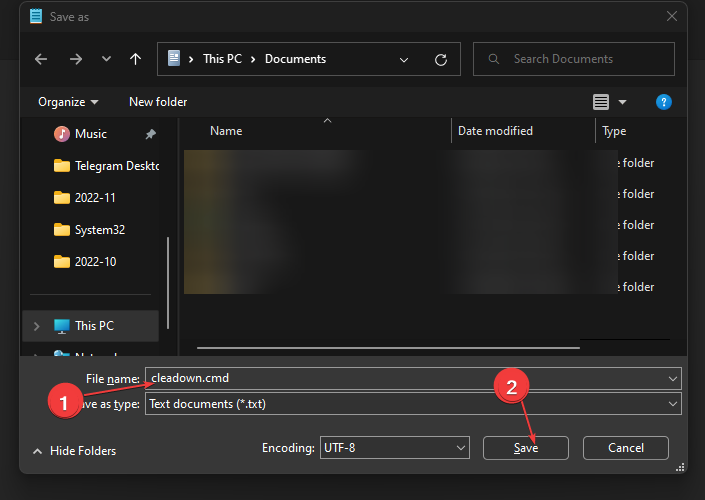
5. Clear Windows Update cache via script
- Press the Windows + R key to open the Run window, type notepad and click OK.
- Copy and paste the following codes:
@Echo Onnet stop wuauservcd %Windir%\SoftwareDistributiondel /f /s /q Downloadpause - Save the file as Cleardown.cmd on your computer.
- Right-click the Cleardown.cmd file and select Run as administrator.
In conclusion, our readers may be interested in our article about fixing a damaged Microsoft Store cache that may affect their PCs.
Moreover, do check out our article on clearing caches on Windows 11. Also, you can check how to fix the Cache Manager error on Windows 10/11.
Learn how to enhance your gaming on Xbox Series X by following our tips on Clearing Cache on Xbox Series X.
Please leave your questions and suggestions regarding how to clear the Windows Update cache in the comments section below.
Read our disclosure page to find out how can you help Windows Report sustain the editorial team. Read more


Improve this guide


User forum
0 messages