Clipchamp Review: How Good is Microsoft's Video Editor?
Key notes
- Clipchamp is Microsoft's new successor to its famous Windows Movie Maker app from years past.
- The app is a great video editor for first-timer and very user friendly.
- Unfortunately, it's limited in what it can do as it caps resolution off at 1080p.

On March 9, Microsoft began to roll out the latest build for the Dev Channel of the Windows 11 Insider Program: Build 22572. In the update, some features and updates were released like the new Microsoft Defender Preview.
Microsoft Defender Preview is a standalone app that serves as a central hub for the Windows Security system. Some new features have been added to Windows 11, the most notable of which is Clipchamp.
Clipchamp is the new video editing app for Windows 11 that Microsoft says has a focus on “making video creation easy, fast, and fun.” It comes equipped with a lot of the basic tools a video editor requires like trimming and splitting.
It also has professional-level features like transitions and animated text. Clipchamp also has a webcam and screen recording functionality.
The app also comes with a video timeline, which is new to Windows video editors and functionality usually reserved for professional-grade editing apps. Clipchamp has access to a massive stock library filled with over a million assets.
These assets include royalty-free videos, audio files, and images. The app has a text-to-speech generator powered by Microsoft Azure and supports over 70 different languages.
Clipchamp also integrates with several Windows apps and connects to OneDrive for easy file transport. Needless to say, Clipchamp is packed to the brim with features and has a lot going for it.
The company behind Clipchamp was acquired by Microsoft in September 2021, and it looks like the app will be the replacement for the iconic Windows Movie Maker program from years past.
What does Microsoft intend to do with Clipchamp?
For almost 20 years, Windows Movie Maker was the premiere video editing tool for Windows computers up until 2017 when Microsoft officially discontinued it. It was a pretty simple and easy-to-use software that any amateur filmmaker could pick up.
But like a lot of native apps on Windows, it is criticized for oversimplification and lack of any meaningful features. It was just too bare-bones and eventually, Microsoft moved on.
Since then, Microsoft has been working on the next generation of its native apps. Typically, the apps that came on Windows computers were criticized and even mocked for how poor they were in comparison to third-party apps.
People in the past made the joke that Internet Explorer was only good for downloading a better web browser. From this, Microsoft listened to what people were saying and made major changes to its native apps.
Native apps like Calendar and Email got a much-needed revamp with new features and redesign aligned with Windows 11. Movie Maker had a spiritual successor in the form of a Video Editor feature in the Photos app.
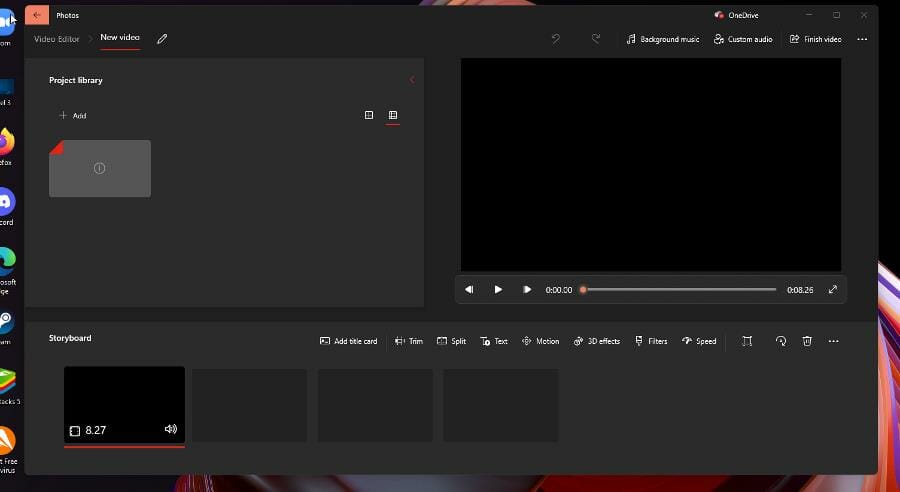
However, the Video Editor is still basic and barebones. It doesn’t have a timeline, but instead a Storyboard, which you can split up and add text. It’s fine, but you wouldn’t consider it to be a great video editor.
And so, this brings everything back to Clipchamp, a web-based video editor that Microsoft is turning into a proper app on Windows 11. Here is how you can download and use Clipchamp.
What are some noteworthy features for Clipchamp?
What’s unique about Clipchamp is that it uses a PC’s GPU to process video. It does this to free up your CPU of processing power, an important resource for programs to use.
➡ Low impact on your CPU
A computer’s CPU only can support a certain amount of tasks and apps. When resources get strained, that causes performance issues and your computer starts to slow down immensely.
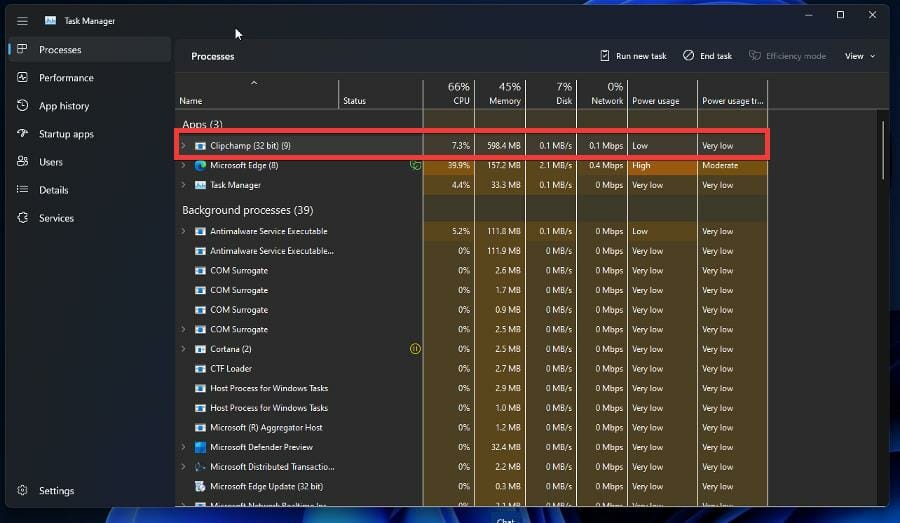
As you can see in the image of the Task Manager, Clipchamp is taking up very little of the CPU, but a large portion of the RAM which is directly from the GPU usage.
If your Windows 11 computer has a good enough GPU, the Clipchamp will save you a lot of CPU resources. But if your GPU isn’t up to snuff, then rendering videos will take a long time to complete.
That said, moving resource management to the GPU is a great solution to resource hogs like Google Chrome. While you render your video, you can surf the internet or whatever else is on your itinerary.
➡ Large stock content library
The stock library available is pretty extensive. The company did not cheap out in this regard. You have a wide selection of choices from base backgrounds to neon lights for stock video.

There are tons of free stock images from various LGBT pride flags and outer space, although more specific stocks images are locked behind a paywall. You’ll know which ones you’ll have to buy if they have an orange diamond in the corner.
Music options run the gamut from lo-fi chill music to hip hop to acoustic guitars. Sound effects stuff like fake police radio transmissions to creepy ghost/zombie sounds for Halloween videos.
If you select the Graphics tab, you will see the entire GIPHY library at your disposal, meaning you add your favorite internet onto your video for no extra charge.
The amount of GIFs you have at your disposal is very impressive. , and stickers from GIPHY are part of that package. Speaking of free content, all of the text and transition options are free on Clipchamp.
➡ Paid plans and what they offer
Clipchamp also has several paid plans that you can choose from that add on features and capabilities. The more expensive the plan, the higher the quality videos you can create.
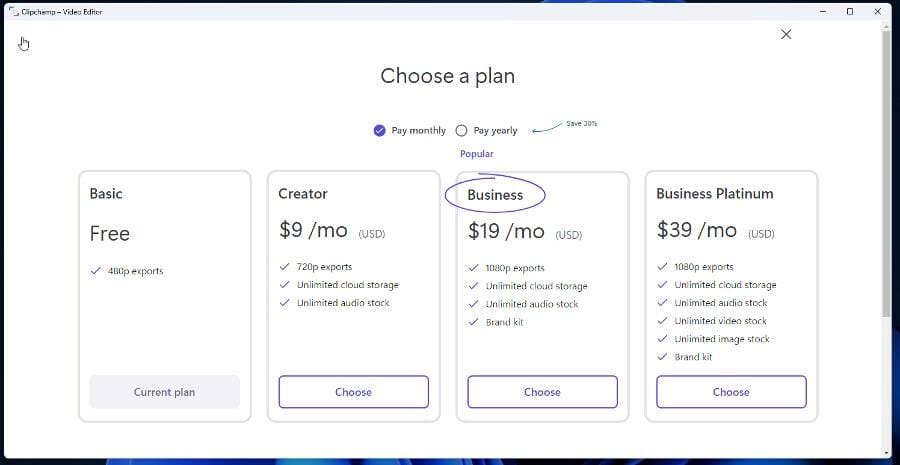
The base plan limits you to videos at 480p, which is a little disappointing to see. This option offers a fairly low-quality resolution and would have liked to see 720p set as the standard. Honestly, 720p doesn’t look that good anymore.
Video resolution has made leaps and bounds in the last several years that devices and platforms can now output video at 4K resolution, and in some cases, even more. Having the 1080p option as the maximum is also disappointing to see.
And certain parts of the stock library are locked behind a particular level. The Business Platinum level gives you access to absolutely everything while the creator limits you to music and sound effects.
It would have been better if the paid plans offered more than what they’re giving its customers. Below is a demonstration of how you can create a video with Clipchamp using the Basic plan.
How can I create a video on Clipchamp?
For this example, the instructions will create a video based on what is available on the Basic plan. The process is the same for every plan. But with higher-paid plans, you’ll have more tools at your disposal, and thus the results could be better.
That being said, to be able to set up and use Clipchamp with ease, you will need to follow some steps. Below you can observe the entire process.
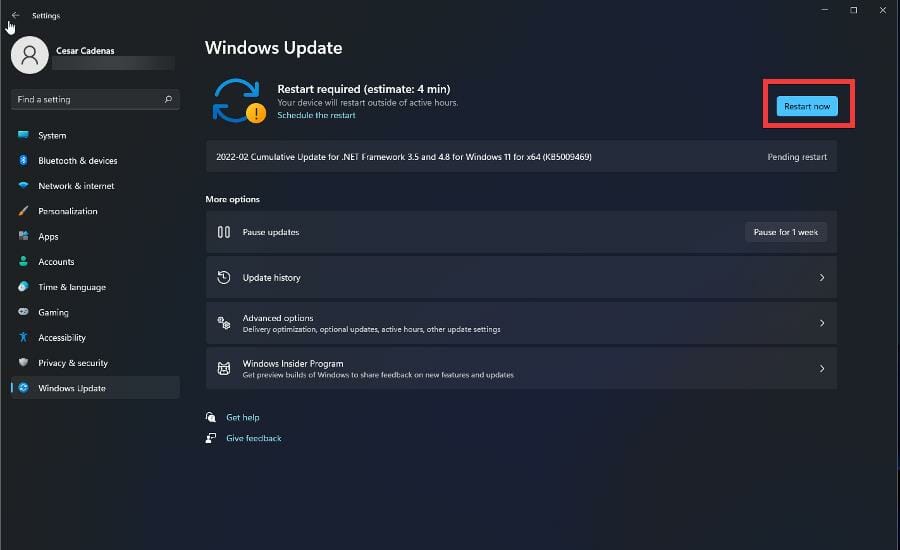
1. Join the Windows Insider Program
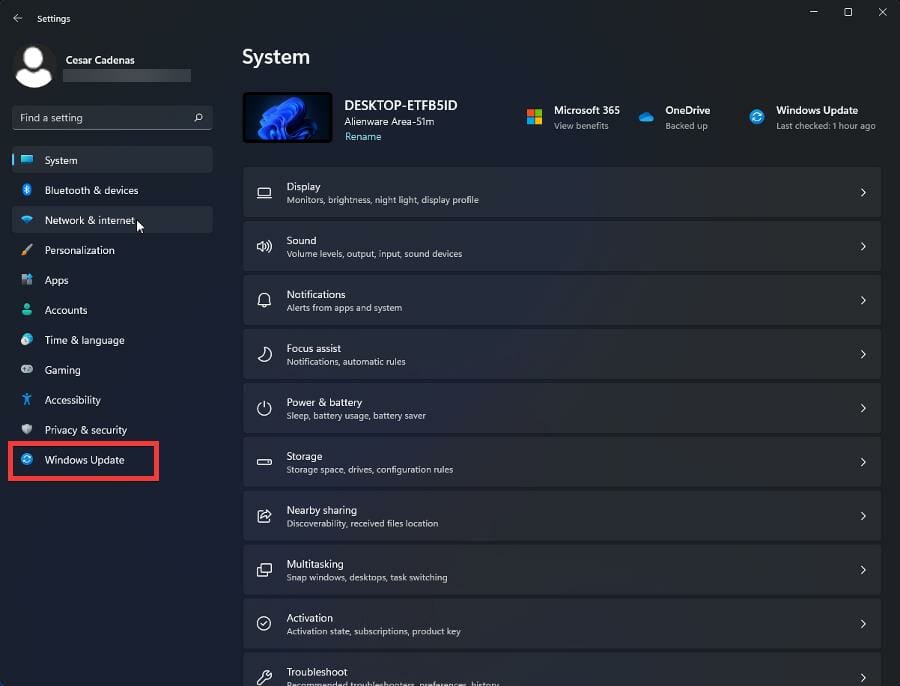
- Open the Settings menu on your Windows 11 computer.
- Click the Windows Update tab on the left hand side.
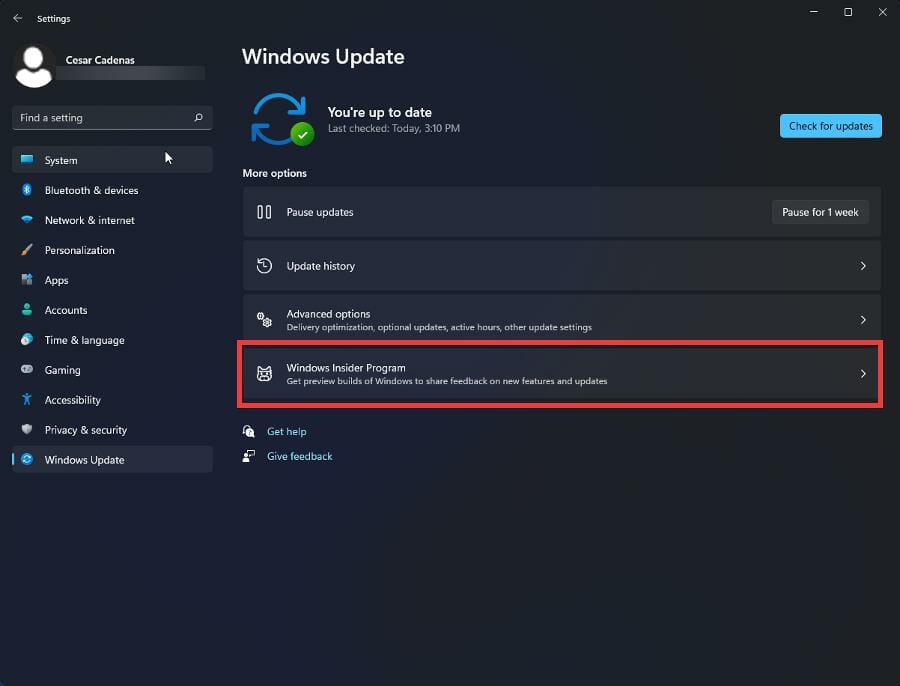
- In this section, click Windows Insider Program.
- Click the Get started button in the upper right corner.

- Click Link an account to connect your account to the Insider Program.
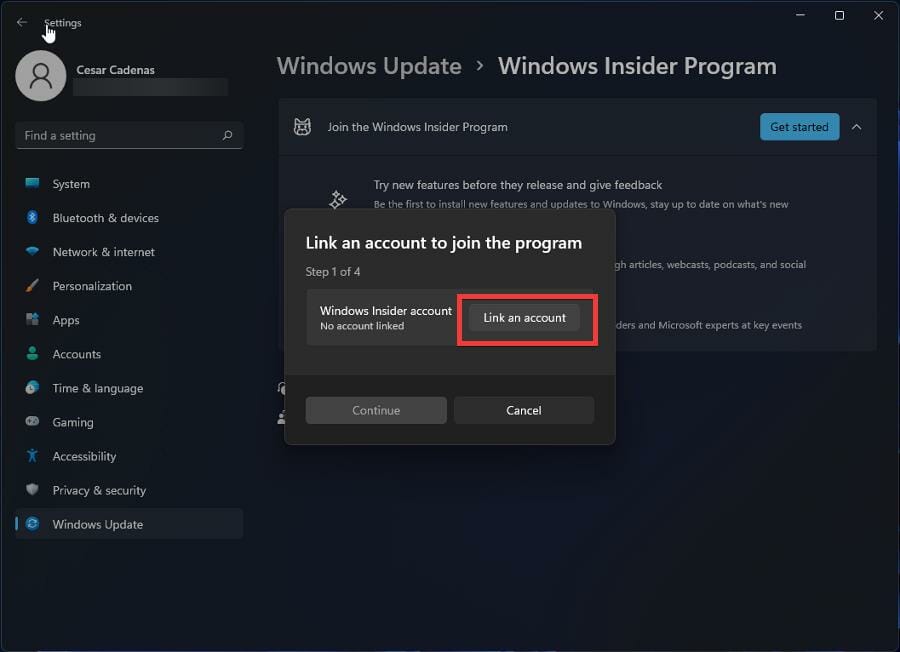
- Select your account and click Continue.

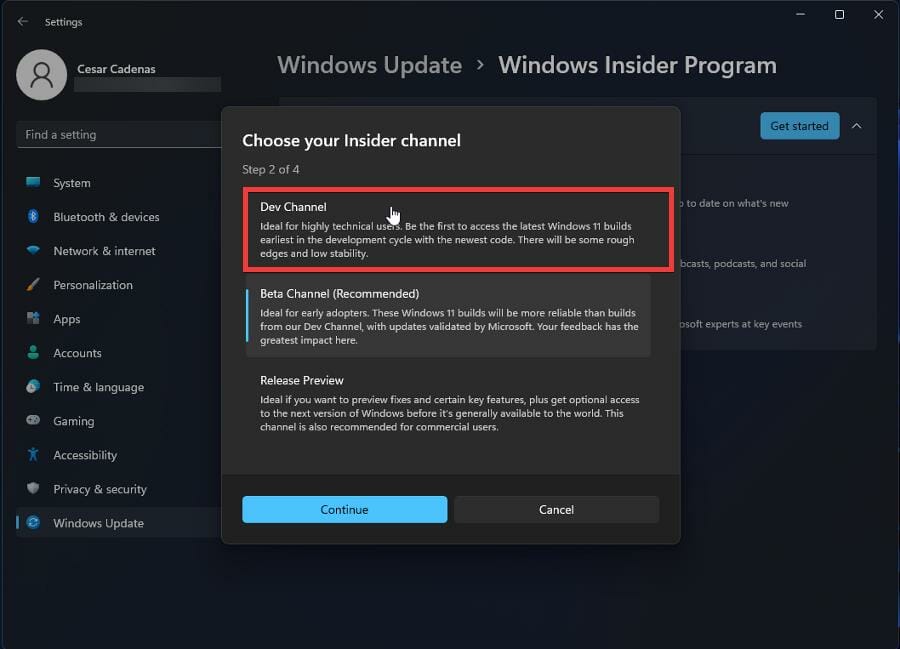
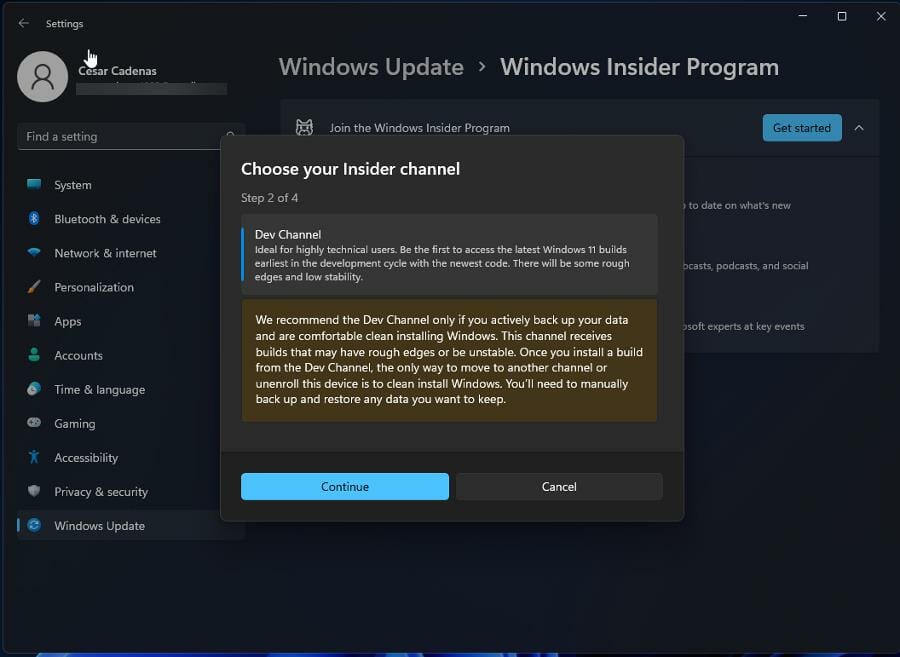
- Select Dev Channel so you can try out the preview build.
- Click the Continue button. You may receive a notice that states it is recommended that you only use the Dev Channel if you back up your data. After backing it up, you’ll need manually restore your data.
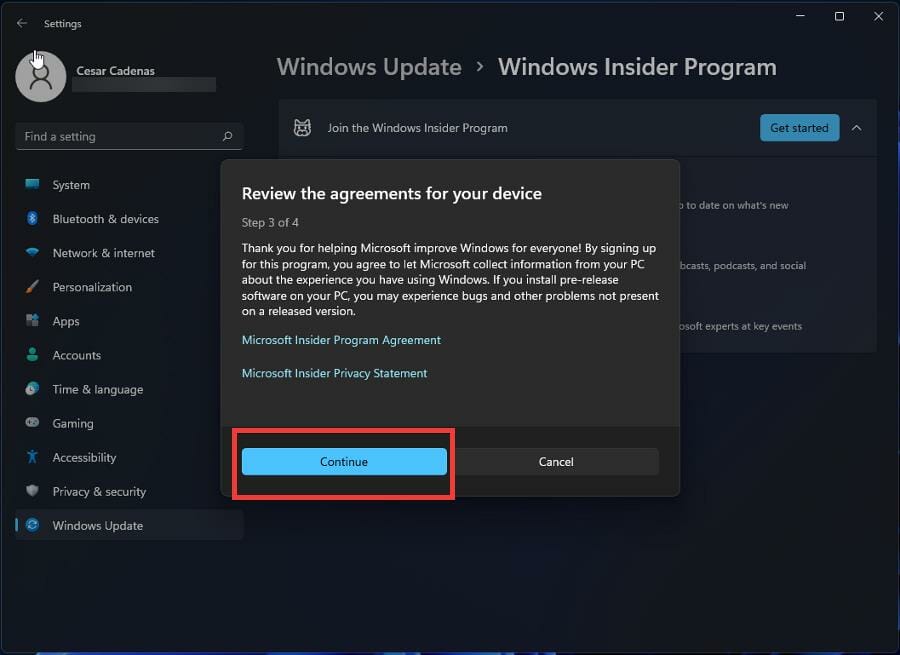
- Click Continue.
- You’ll be given the opportunity to read the Insider Program’s agreement and privacy statement. Click Continue.
- To start the Insider Program, click Restart now.
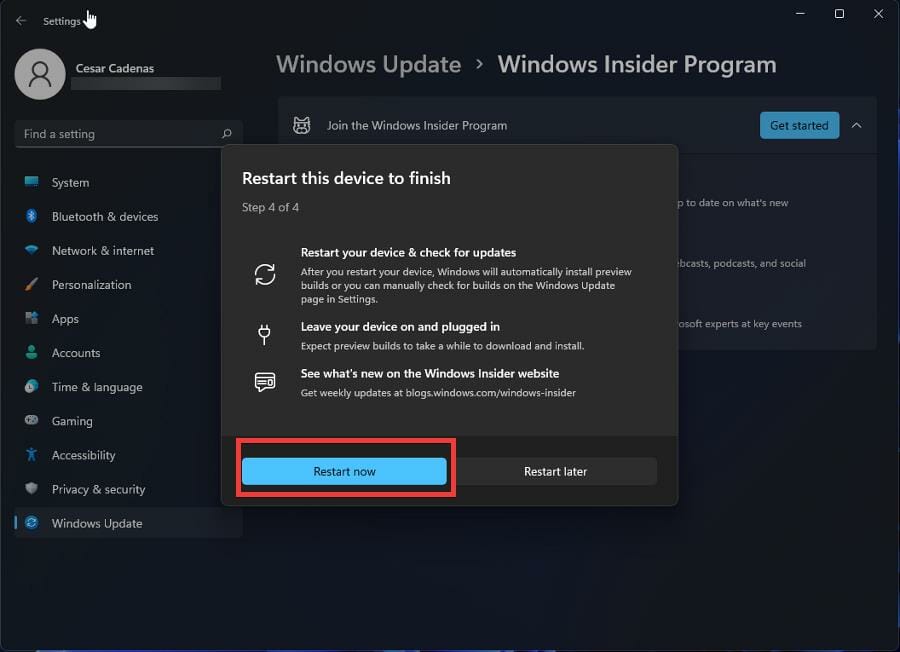
- Give your computer some time to restart and enter the Insider Program.
2. Download the latest Windows Insider preview build
- Go back to the Windows Update section. You will see everything that is going to be added to the Preview Build.
- Click Download now in the top right corner.
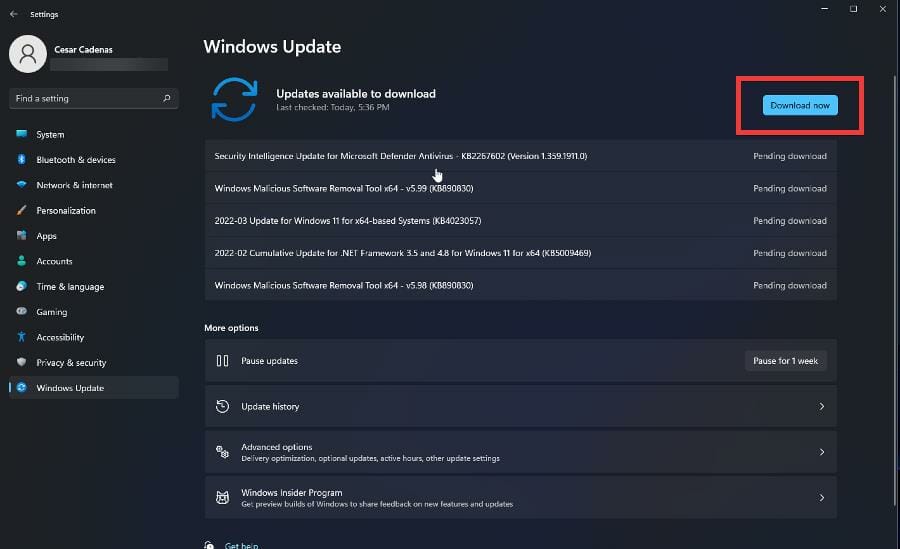
- Give your computer time to download the build.
- After downloading, click Restart now to finalize the installation.
- Like before, give your computer a short amount of time to install the update.
- Restart your computer again to add these updates.
- After restarting, your Windows 11 computer will have the app. Open the search bar and search for Clipchamp.
- Open it to begin configuration.

3. Configure Clipchamp
- Upon launching the app, sign in by creating a new account or use a Gmail account.
- Clipchamp will then ask you about what you intend to use the app for, but you can skip it. For this example, Personal will be chosen.

- Clipchamp will take you through a tutorial showing you the various features of the app.

- From there, you can start making your own videos on Clipchamp.
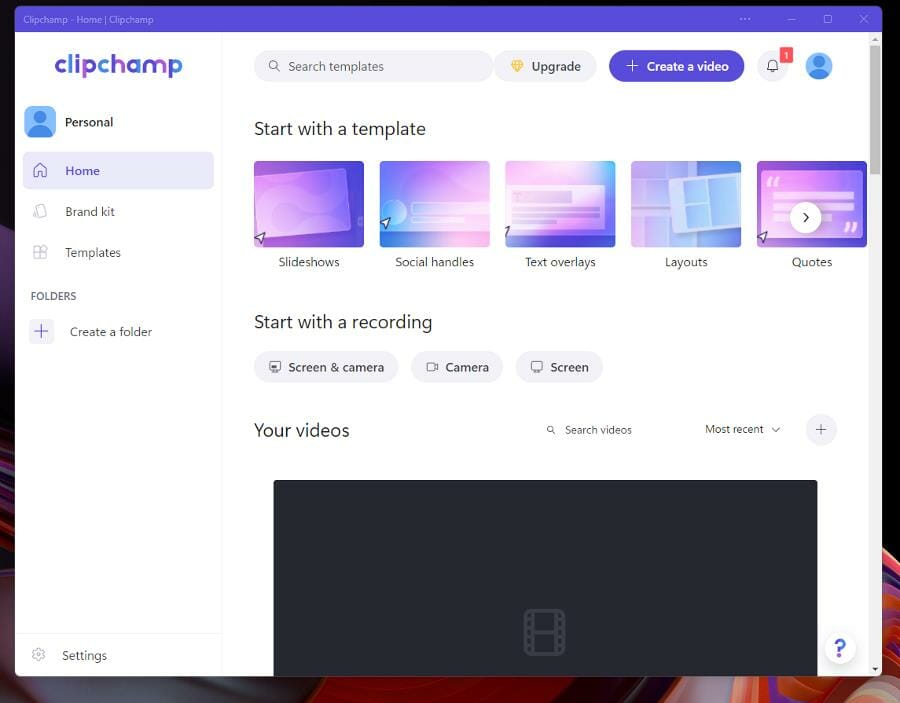
- The Home is where you can start making videos, by starting with a templete or a recording. Or click Create a video in the corner to get started.

- The Brand kit tab is a part of the paid aspect portion of Clipchamp, where you can create your own logo, fonts, and color for your business.

- The Templates tab show a bigger selection of the templates that you can choose from when starting a video.

- If you click on the Settings in the bottom left corner, you’ll be taken to the Settings menu where you can directly connect your app to your Google, Facebook, and Dropbox accounts to save and share your videos.

4. Record video
- Open the Clipchamp app on your Windows 11 computer.
- You can start by clicking the Create a video button in the top right corner or select a template.
- This guide will select a gaming template to start off with.

- Here you will see a variety of templates you can choose from for your YouTube channel or Twitch livestream.
- The guide will select Reaction YouTube gaming video.

- Select the Use this template button.

- A sample video will render.
- Click on the Plus sign in the upper left hand corner.

- A new window will appear where you can drag and drop files or upload them from a Google Drive, Zoom, OneDrive, Dropbox account.

- In this example, the video will be gaming reaction video and will need a recording.
- You can record your screen by selecting Record your camera or screen.

- A recording button will appear from the bottom. If it doesn’t appear, select Screen recording.

- Click the Record button and make sure your mic is on so audio can be recorded as well.
- If you have multiple monitors, Clipchamp will ask you what you want to share.
- Select an option, then click Share system audio to get the audio file.

- Click Share.
- Clipchamp will start recording your screen. Proceed to record your gaming reaction video as you planned.
- Once you’re done, press the Stop sharing button that appeared when you first started to record.

- The recording will play back in a preview window. You can either retake the video or select Save and edit.

- The recording will be saved to your computer and be automatically uploaded to Clipchamp.
- To record yourself, select Camera recording.

- A preview of yourself from your computer’s webcam will appear showing you the webcam being used and which microphone your using.

- You change the mic and camera being used by clicking on their respective popup menus and selecting something else.
- Once you’re done setting up, click the red Record button. Be aware that you’re limited to 30 minutes max.
- After you’re done recording yourself, click the Stop button to end and save the video.

- The recording will play back as a preview. You can either select to retake the recording or Save and edit.

- The file will be saved to your computer and uploaded to Clipchamp automatically.
5. Edit the video
- In the timeline, you can get rid of something by clicking it to highlighting it and select the trash can icon.

- If you want to cut up your recording, go to where you want the recording to start and double click that point to place the playhead there.

- Click the Split button which is the scissors icon to cut the video at that point.

- Highlight the part you want to get rid of and click the trash icon to delete it.
- Drag the newly edited video portion to where you would like it to be on the timeline, like the beginning of the reaction.

- You can add an outro by clicking Templates on the left and choosing an option. Keeping in the tune with the video, the guide will select Gaming.

- Clipchamp has a dedicated gaming outro card that you can add. Hovering over it will reveal a green Plus sign that lets you add the template to the timeline.
- It’s recommended that you add the outro card at the beginning or after the video has been created, but during editing as Clipchamp will create a new video and you’ll have to start from scratch.

- Clicking Music & SFX tab lets you add music to your video.

- Hover over it and you will see the same green Plus sign from before to add to timeline.
- You can edit the music track like videos. You can speed up or slow down audio, clip it, or trash it.

- Once you’re done with editing, click the Export button and a drop down menu will appear with options on which resolution you would like. The Basic plan only allows you to export in 480p.

- A preview of the video will. You can create a video link where you can share your video or save to Google Drive/whatever cloud service you have.

- You can also directly upload to YouTube.
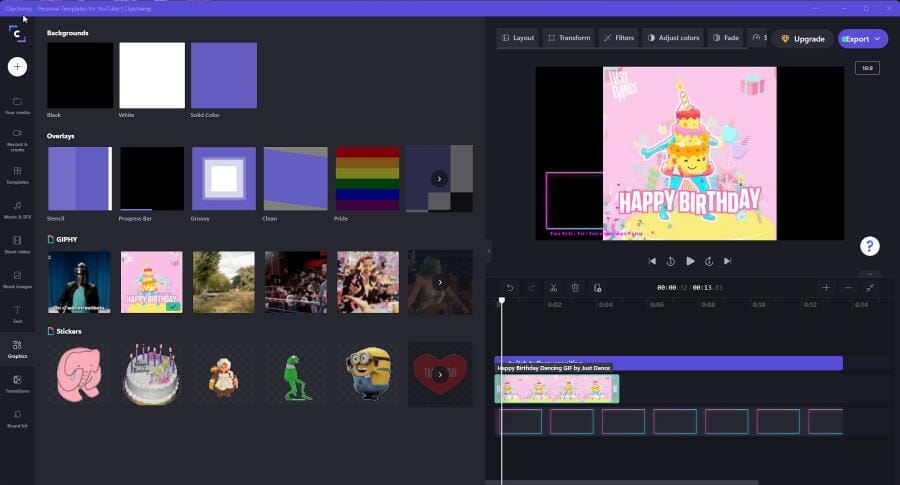
6. Add stock video, music, and graphics
- If you add certain flourishes, click on their respective tab.
- Clicking on Stock video opens all the stocks video available.

- Hover over the video you want to add and click the green Plus sign to add to your video.

- If you want to stretch out or shorten the length the clip, highlight it and click the Speed icon.

- Clicking Slow stretches out the length and clicking Fast shortens it.

- To add GIFs, click on Graphics on the left.

- Select the right facing arrow under GIPHY.

- In the search bar, look for whatever GIF you want to add. GIPHY has a pretty extensive service.

- Over the GIF you want to add and click the green Plus sign to throw it onto the timeline.
- You can place the GIF in the corner by clicking Layout then select Picture in picture.

- You adjust the GIF’s place by making a selection in the Position arrangement and the size by dragging the slider.

- Clicking Color allows you to adjust the Exposure, Saturation, Temperature, and Contrast of the highlighted section.

- Clicking Filters lets you add a filter.

This is was a brief rundown of what Clipchamp is capable of. The purpose was to show how easy and simple it is to record videos on Clipchamp and how easy it is to edit them.
Editing can be a complex procedure that takes a long time, but this app cuts the process down. The amount of time saved using this app cannot be overstated.
Is Clipchamp a good video editing app?
Clipchamp is a pretty good video editor, although there are some weak points in the software. First, it’s incredibly easy to use that even someone who’s never edited a video before can use.
It is so beginner-friendly that anyone looking to venture out into the world of video editing should try out Clipchamp first. The app gives you so many tools to start with. You can create pretty decent videos with it.
Not shown in the step-by-step guide were hints and the tutorial that Clipchamp runs you through to teach you what you have at your disposal. The user interface is clean and marked. Nothing is hidden.
Everything is just a few clicks away. Templates support various types of videos like YouTube, Instagram, Facebook ads, TikTok, holidays, sales videos, and more.
The support for GIPHY is amazing with an almost limitless amount of GIFs at your hands. The stock library alone feels like more should be behind a paywall, but a large portion is free.
It is such a great beginner’s tool, but don’t get it confused with better apps. Clipchamp pales in comparison to software like Vegas Pro or Adobe Premiere which are industry-level video editors.
Third-party apps like that are much more powerful in terms of features, capabilities, and tools. Those set the standard, but Clipchamp is meant for people who are starting, not professionals.
That said, it’s disappointing to see no 4K or even Quad HD resolution as a part of Clipchamp and this is something that pertains to the web browser version as well.

The web browser version and app are identical in every way and are only available on Chrome and Edge. Because of this, Clipchamp on web browser uses CPU resources instead of the GPU which can lead to performance issues.
Just a side note, but important to point out. Also, not supporting 4K resolution is a weird decision since so many websites like YouTube and Twitch allow people to upload videos and stream at that high quality.
People who want to upload to those sites probably won’t be using Clipchamp since it restricts people to such a low resolution. Regardless of what it can’t do, Clipchamp is still a great app.
What else can I look forward to in the latest Insider Preview build?
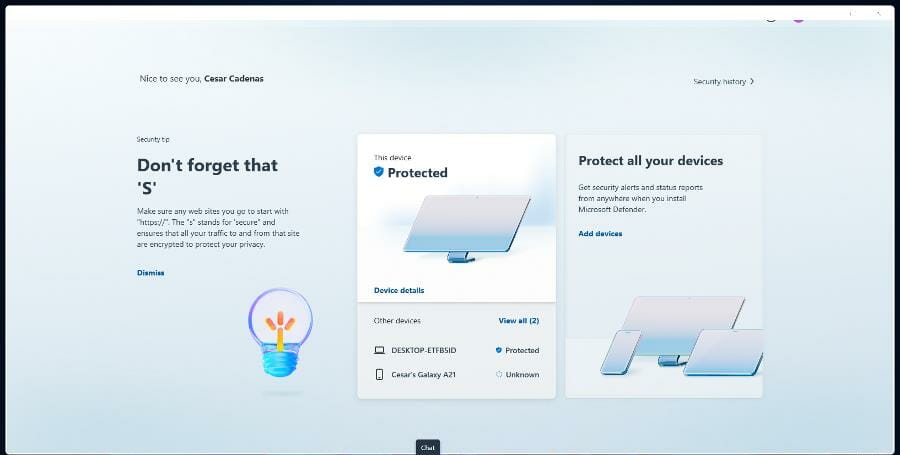
One of the big new additions is a Microsoft Defender app. It’s only available as a preview for users in the United States, but it’s a security app that brings a Windows 11 security standard to mobile devices and a hub for all your machines.
There’s also Microsoft Family which is a parental control app that establishes barriers of what children can and can’t access. It’ll make sure that children can only access family-friendly websites and keep them safe.
And if you ever run into any issues concerning this latest update, it’s recommended that you uninstall it. You can also try disabling your antivirus software which has been known to clash with Windows in the past.
- Pros
- Low impact on CPU
- User-friendly interface
- Large stock of library content
- No learning curve
- Cons
- The base plan limits you to videos at 480p
- Maximum quality rate is 1080p
Final Verdict: 4/5
While the low resolution for videos made from Clipchamp is disappointing, the app is pretty good. You have to look at what the purpose of the app is and who is it for? Not for the filmmaker or the tech-savvy person.
Clipchamp is meant for the common layperson who doesn’t want the most high-quality videos or amazing editing tricks. It’s also meant for small businesses who want a simple video editor with some neat tools.
It has succeeded in being Movie Maker 2.0, in that it’s a video editing app that is easy to use, fun, and teaches you how to make videos along the way.
That said, it’s disappointing to see to see the video resolution cap off at 1080p when so many video streaming sites that can do 4K videos. And this isn’t something that Clipchamp is incapable of.
It’s baffling to see this feature not transfer over to the Windows 11 app version, especially when it focuses so heavily on gaming.
Clipchamp has a lot of tools and templates with a focus on YouTube gaming videos and Twitch streams. This is a community that demands high-quality videos and gaming.
Low-resolution videos that won’t allow a game’s quality to shine through are a confusing move on the behalf of Microsoft. Hopefully, Clipchamp adds Full HD and 4K support soon.
Feel free to leave a comment below if you have any questions on other Windows 11 apps. Also, leave comments about reviews that you’d like to see or information on other Windows 11 features.
Read our disclosure page to find out how can you help Windows Report sustain the editorial team. Read more


Improve this guide


User forum
0 messages